How to Draw a Light Bulb
Any object can be drawn in many different ways, and in this lesson I’ll show you how to draw a light bulb using two simple methods.

How to Draw a Light Bulb: Introduction
In this lesson, you will practice drawing simple geometric shapes and smooth curved lines. Thanks to this training, every novice artist will improve their artistic abilities and gradually move on to drawing more complex objects.
Before you begin the lesson on how to draw light bulbs, let’s take a little look at the structure of the light bulb. An ordinary light bulb has a base and a glass bulb.
You need to start sketching a light bulb with a glass bulb. This will be the basis of the future drawing. In order to draw an even circle, you can use any available tools or do it yourself.
Then, with the help of my simple instructions, you will easily illustrate all the elements of the light bulb. Try to maintain proportions and draw lines carefully at each stage of drawing.
Light Bulb Drawing Tutorial
Materials
- Pencil
- Paper
- Ruler (optional)
- Eraser
- Coloring supplies
Time needed: 20 minutes
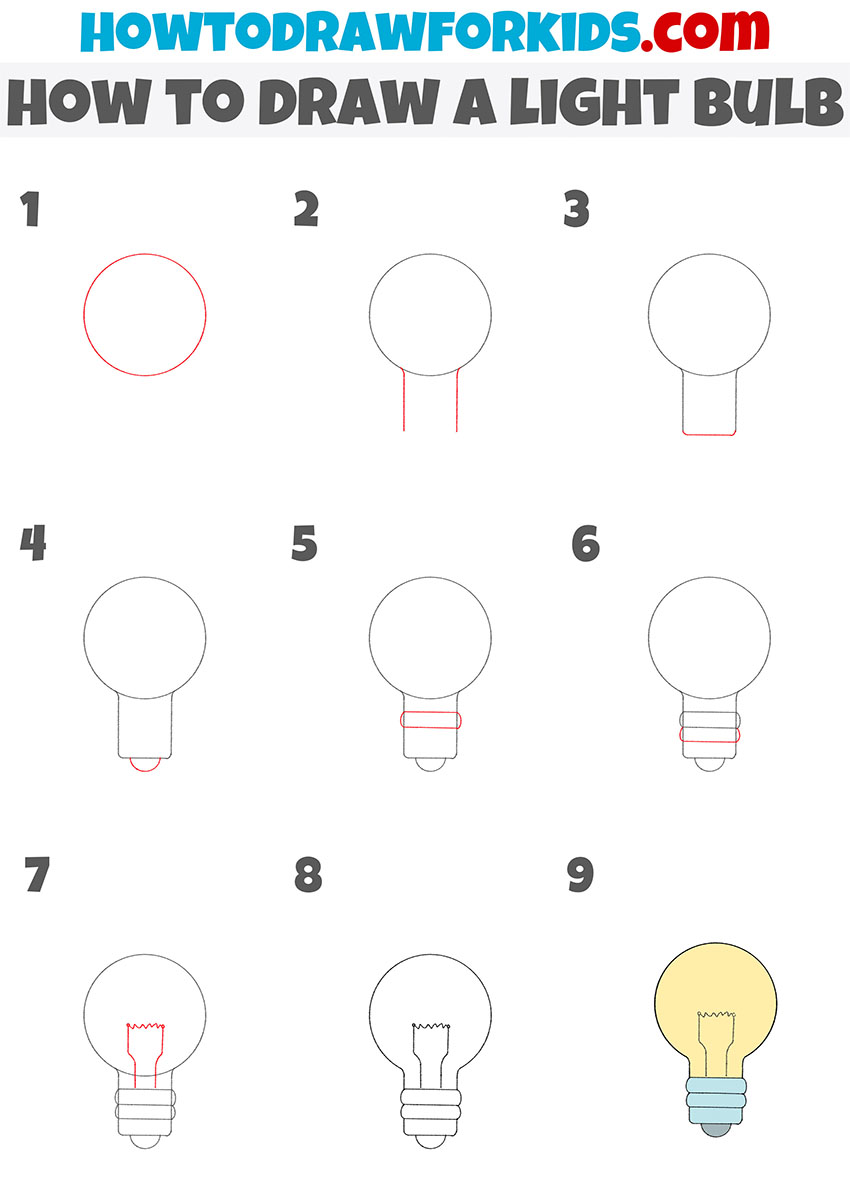
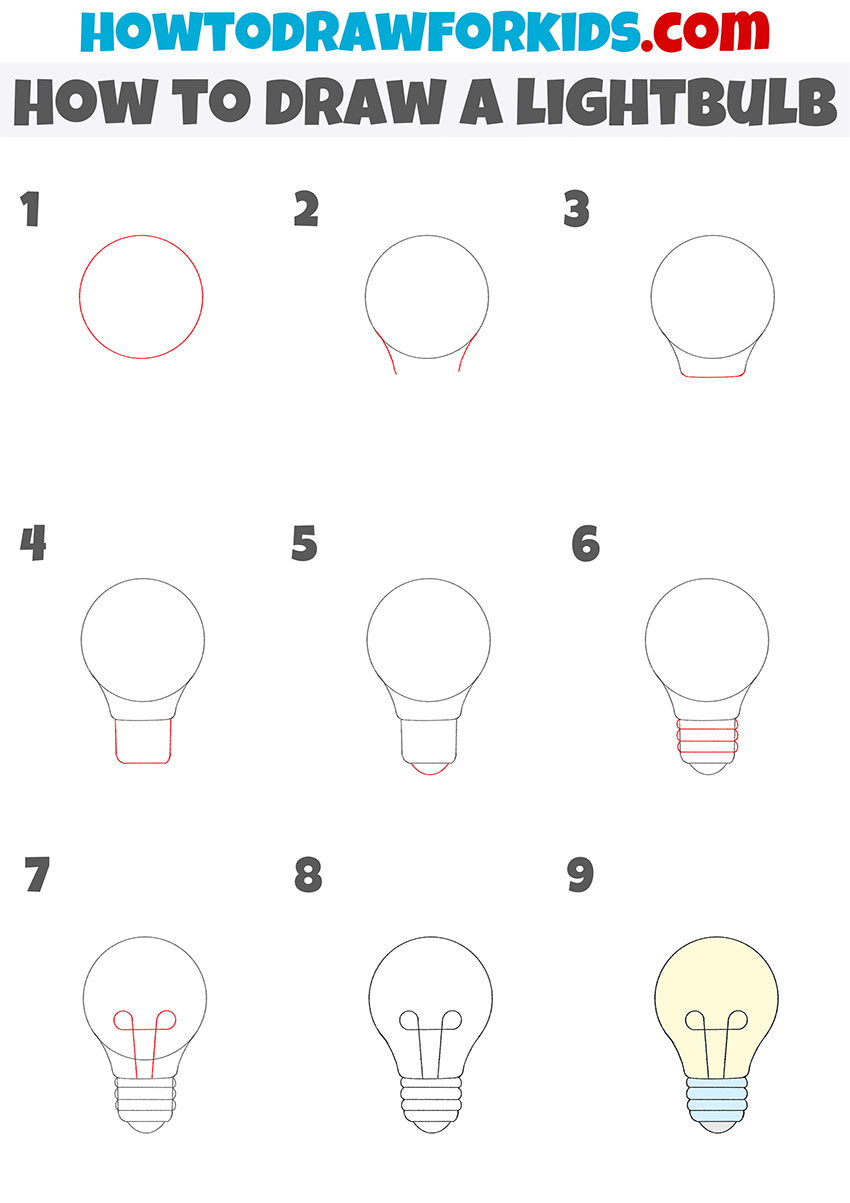
How to draw a light bulb step by step
- Sketch the rounded bulb shape.
Establish the main shape of the bulb first, since everything else will be built around it. To illustrate this part, draw a circle. Using light pressure allows you to adjust the outline if needed. It can help to rotate the page slightly while sketching.

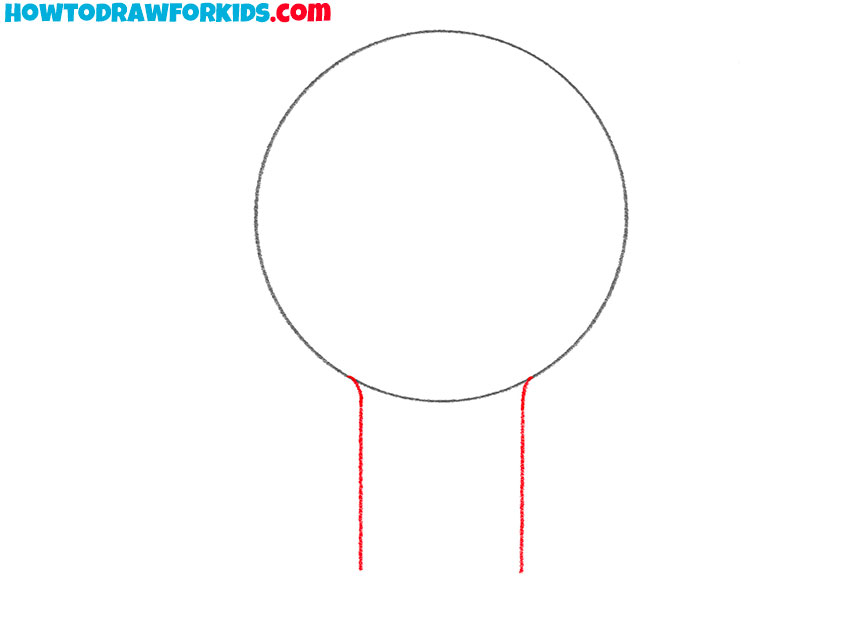
- Sketch the side edges of the base.
Lightly sketch two straight vertical lines starting from the lower edges of the bulb. They should be spaced closely and kept parallel to each other. These guidelines will form the side edges of the base once you connect them.
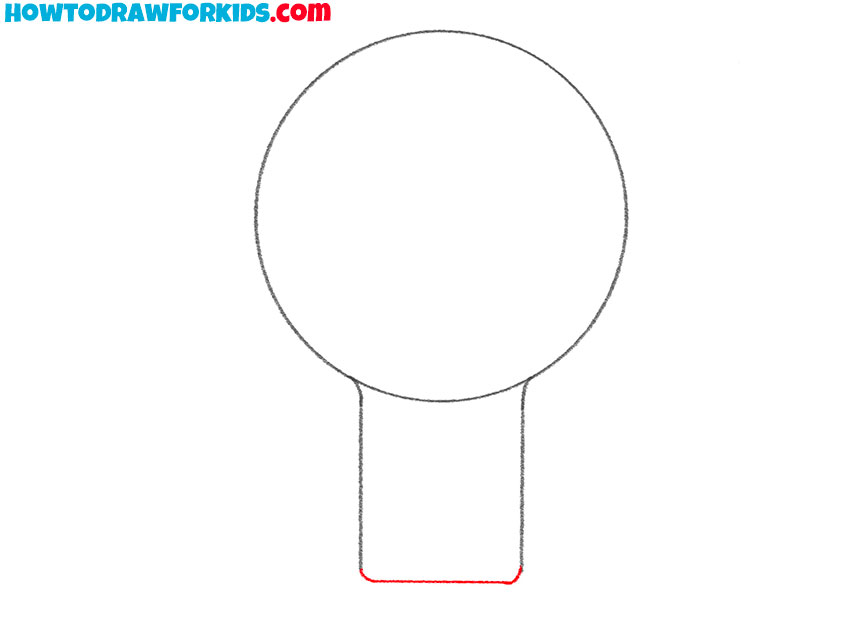
- Draw the bottom of the light bulb base.
With the side edges set, you can now use them to create the base of the bulb. Connect the bottom ends of the two lines with a horizontal line, forming a simple rectangular shape.
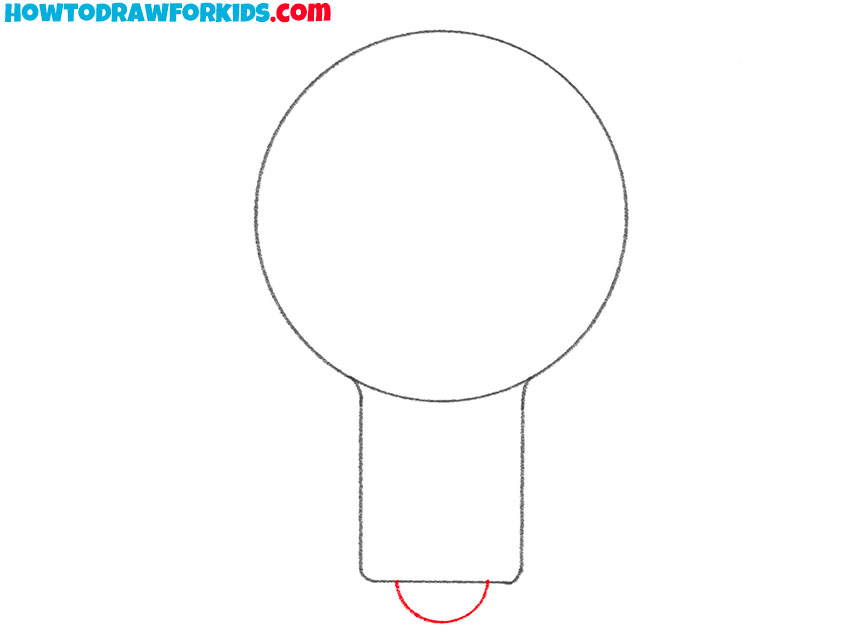
- Add the small bottom cap.
To make the base look complete, add the small rounded cap beneath it. This part represents the very end of the screw fitting. Sketch a short, curved shape centered directly under the base.
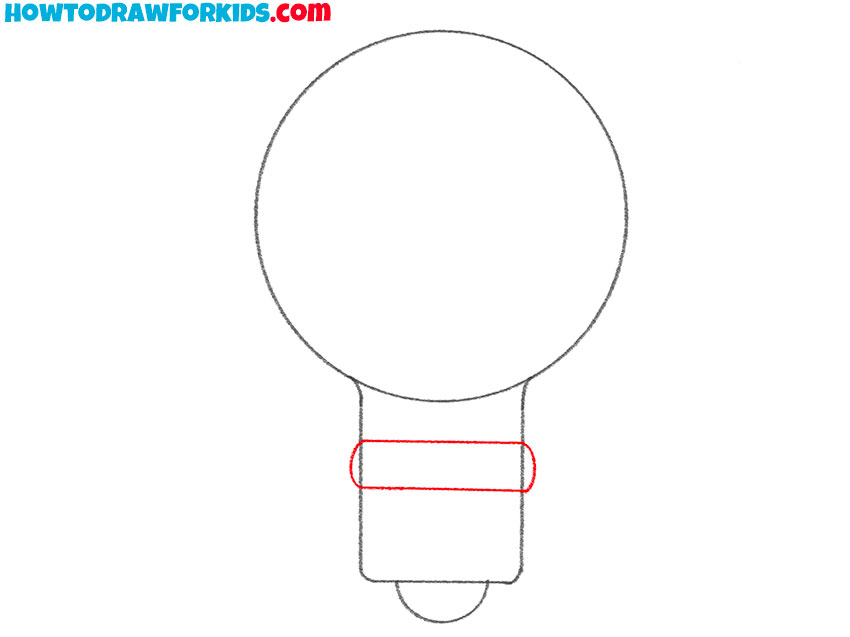
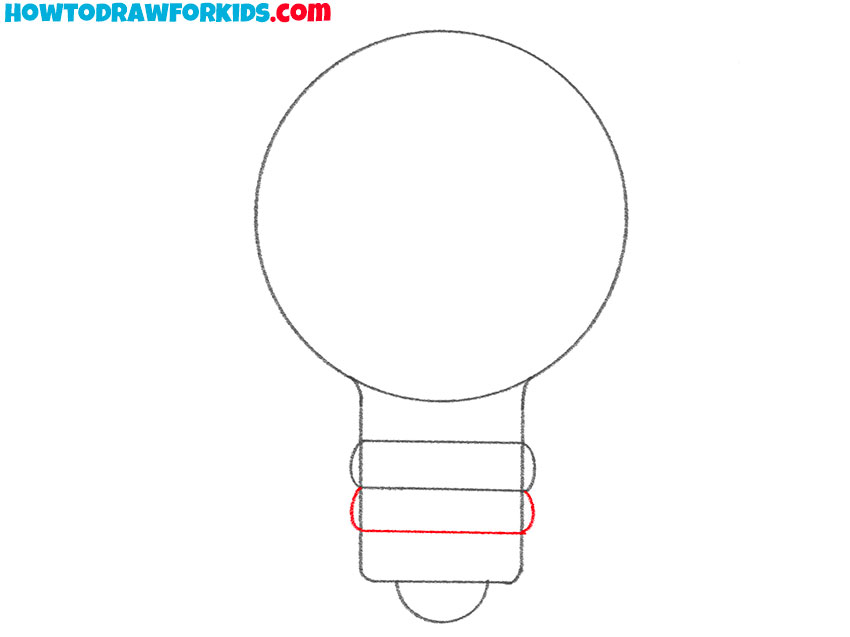
- Draw the first light bulb thread ring.
A traditional light bulb base has several metal ridges, and the first one begins just above the center of the rectangular base. Lightly sketch a horizontal band wrapping around the base. Try to keep the thickness even across the entire band.
- Add the second thread ring.
Below the first band, draw another curved band of similar thickness. Keep the spacing uniform so the ridges look consistent. The two bands together create the iconic screw section that allows the bulb to twist into its socket.
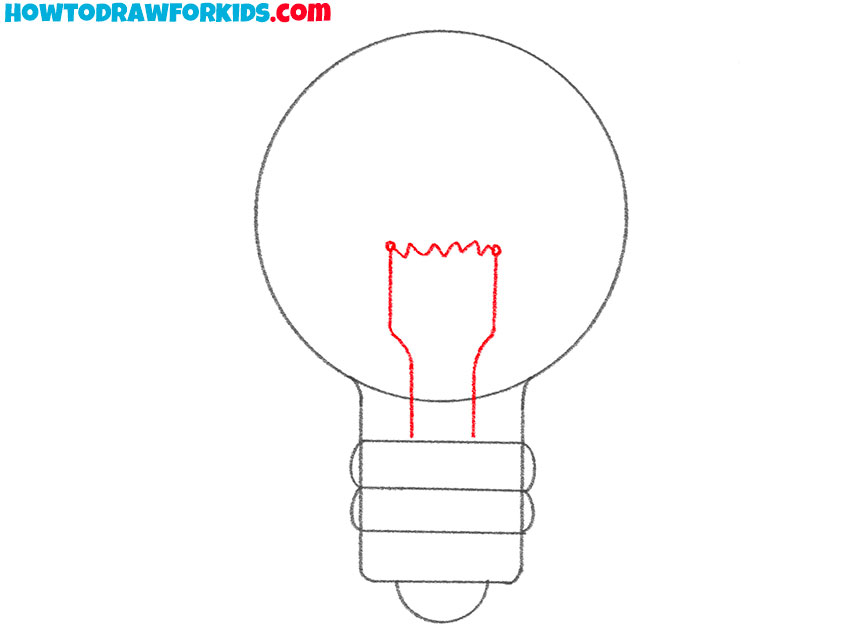
- Draw the filament inside.
Next, focus on the center of the bulb, where the filament sits. Sketch two vertical lines extending upward from the base. Then, draw the top edge as a jagged and irregular line to represent the thin glowing filament inside.
- Clean the outline of the bulb and base.
At this step, refine your lines and remove any unnecessary marks. Erase the guidelines from the very first steps and any overlapping construction lines inside the bulb and base. At the same time, go over the final outlines of the circle and base to make them clean and confident.

- Color the bulb and base.
To complete the light bulb drawing, add simple colors. A soft yellow works well for the glass portion, giving the bulb a warm glow. For the base, choose silvery, gray, or blue-gray shades to represent the metal screw fitting. You can also add a very subtle highlight around the glass.

Additional Content
At the end of the lesson you will find a link where you can download a short version of the lesson as a PDF file. The file contains all the materials necessary to complete the lesson at any convenient time.
How to Draw a Light Bulb: Advanced Method
If you don’t succeed the first time, practice again. To do this, I have prepared for you another method of drawing a light bulb.
Here you will draw a metal spiral of a different shape. This lesson differs only in small details. But it will be great practice for strengthening your artistic skills.
Improve Your Artistic Skills
If you want to strengthen your skills, then practice further and draw a few more light bulbs using the drawing principles that you learned from this instruction.
For example, change the size and color of the flask. You can also change the shape of the glass flask, for example, make the flask more elongated or pointed.
To make the light bulb look more realistic, add highlights to the surface of the bulb. Show your imagination and try different options.
Also, you can draw Christmas lights using this guide. Just illustrate a few similar bulbs hanging on a wire.
Conclusion
Now you have learned how to draw a light bulb on paper using simple art supplies. You can learn about all new lessons from my social networks. Be sure to follow me.