How to Draw a Lily
The lily is one of the most beautiful flowers along with the rose, and this tutorial will show you how to draw a lily in two easy techniques.

How to Draw a Lily: Introduction
In this tutorial, I will show you how to draw a lily. This bulbous plant is one of the most beautiful in the world. There are many types of lilies and each of them is beautiful in its own way.
I think you will enjoy this tutorial and after this lesson, you will have the most pleasant impressions.
The lily has several narrow petals that are turned in different directions and long narrow leaves. There are many long stamens in the center of the flower. You can see all this in the picture.
The color of lily petals can be different – white, yellow, orange, red, purple, burgundy. Petals can be monochromatic, or they can consist of many shades that smoothly merge into each other.
You can color your drawing in the same color as in the example, or you can show your imagination and use any other color. You can also add small spots on the petals. Thus, the flower will look more realistic.
Lily Drawing Tutorial
Materials
- Pencil
- Paper
- Eraser
- Coloring supplies
Time needed: 20 minutes
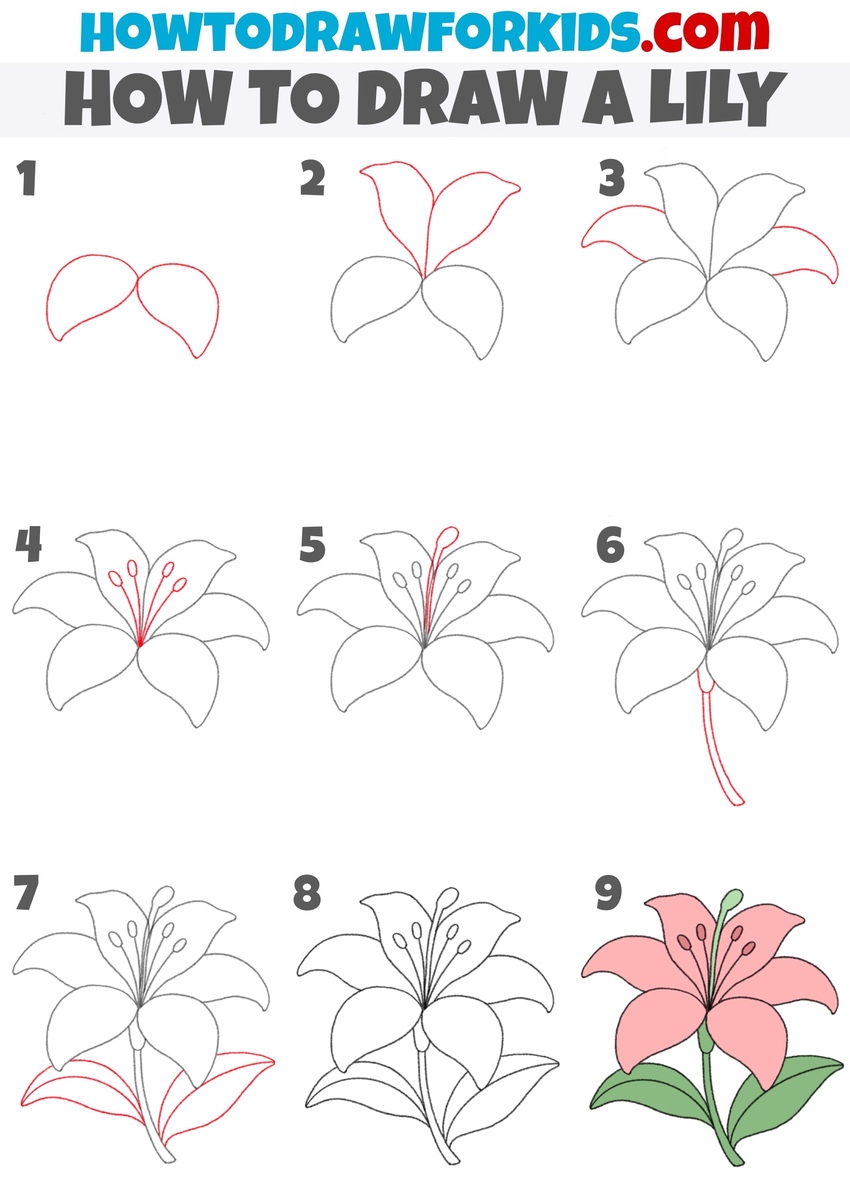
How to Draw a Lily
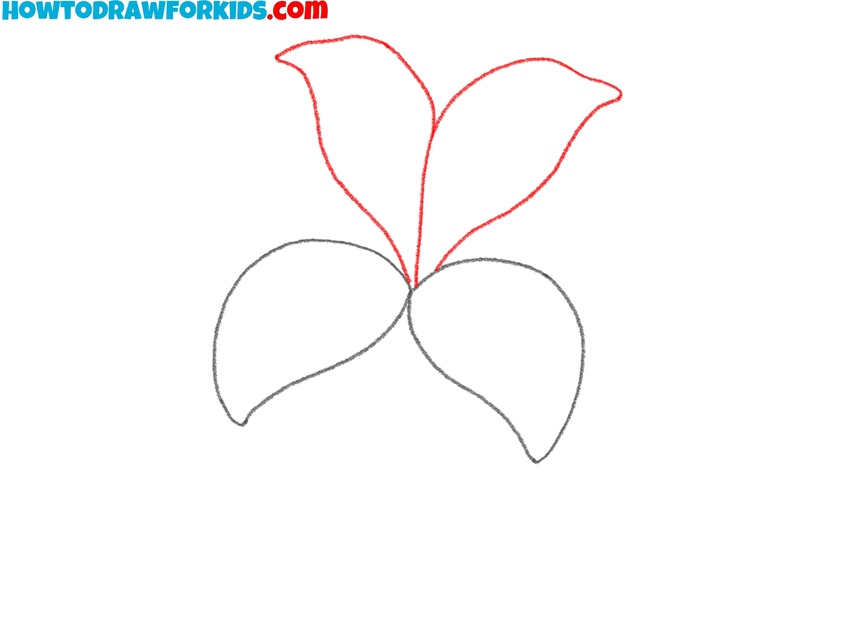
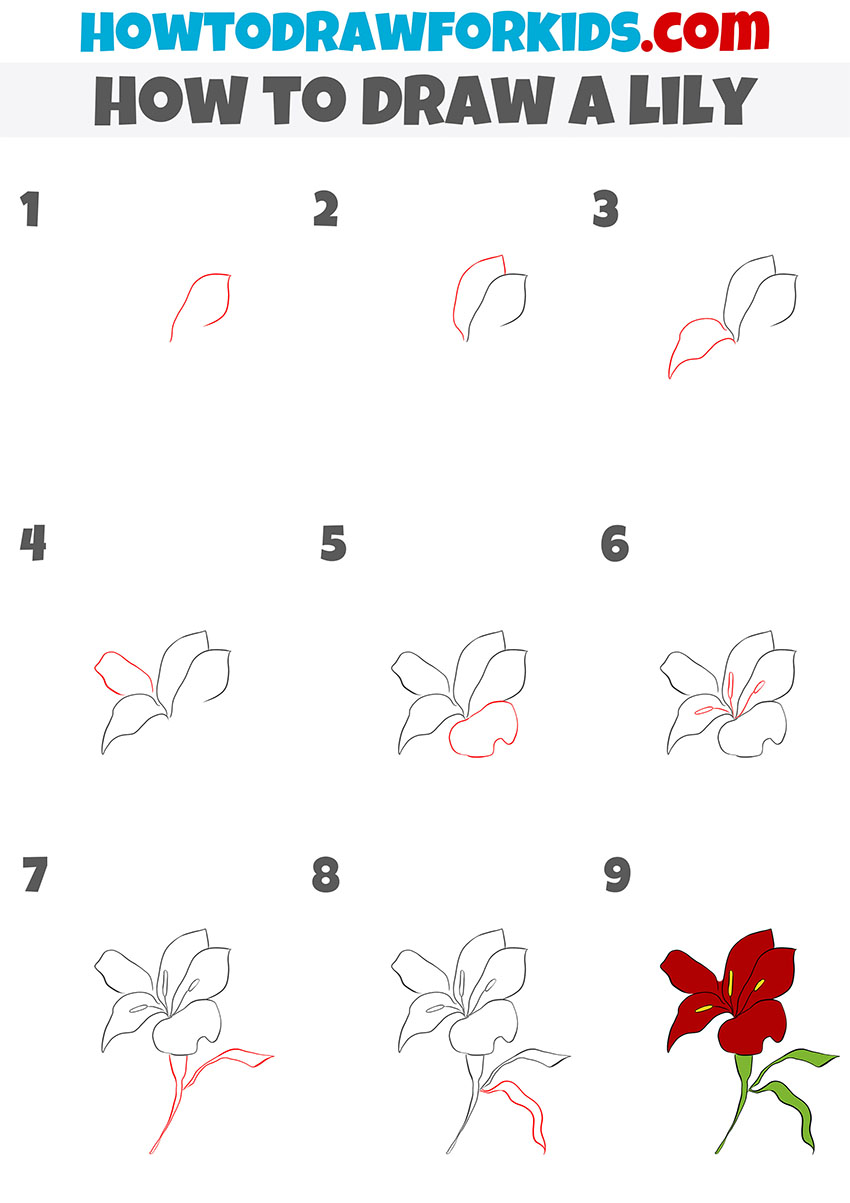
- Sketch the lower petals.
Since every lily very noticeable petals, the best way to start is by sketching two large petals at the base. These should look like teardrop shapes with their tips pointing down. Keep them fairly wide, since lilies have broad petals compared to other flowers. Don’t worry if the curves aren’t perfectly symmetrical.

- Add another pair of petals.
Sketch two additional petals above the first ones. These petals should fill in the upper part of the flower. Keep their size consistent with the first two. It’s ok to allow small differences so the drawing feels natural and authentic.
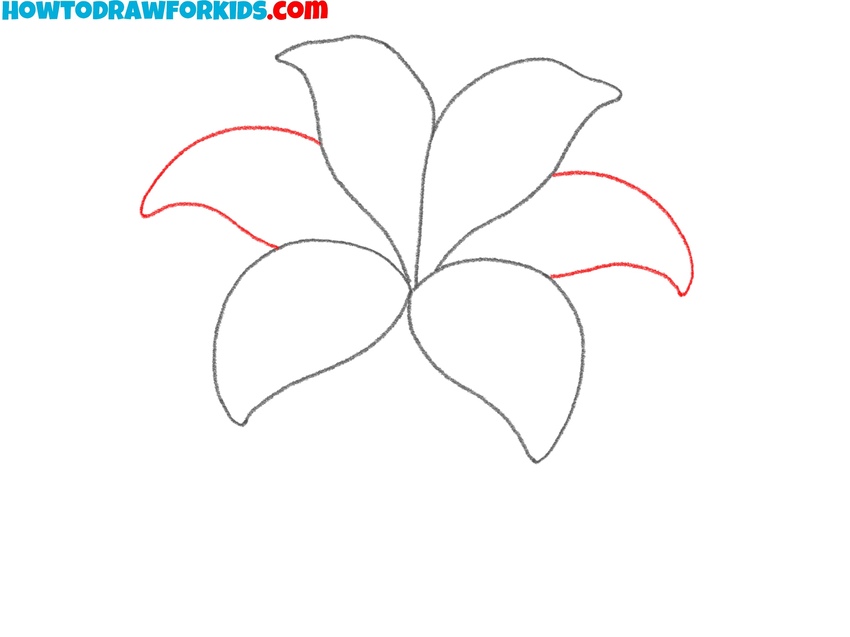
- Place the final petal shapes.
At this point, the flower needs to feel full, so draw two more petals on the sides of the flower to finish the six-petal structure typical of a lily. Sketch them with broad and curved. If one side looks heavier than the other, adjust the angle of the new petals so the flower feels symmetrical.
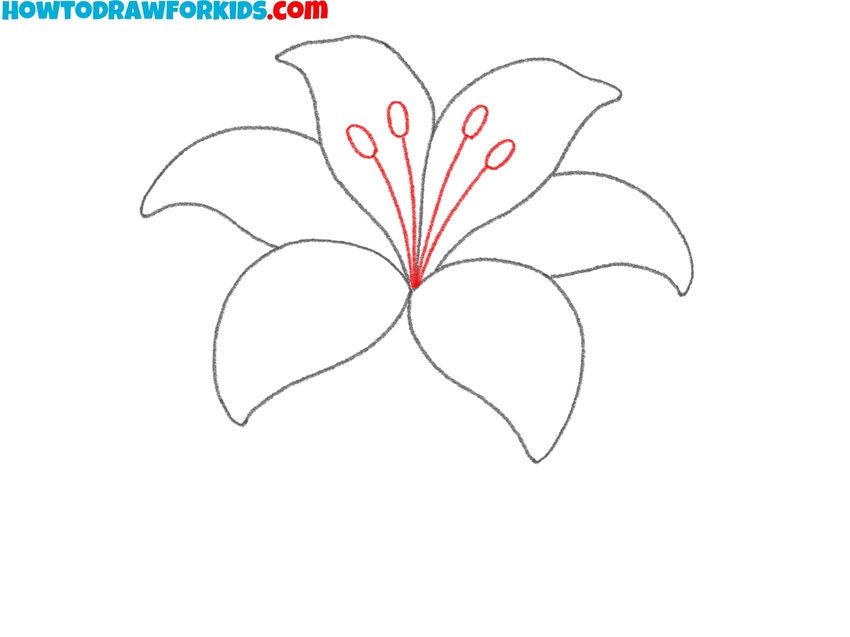
- Illustrate the stamens with tips.
To make the flower identifiable as a lily, it’s important to add stamens in the center. Sketch three or four thin, curved lines extending upward from the base of the petals. At the tips of these lines, draw small oval shapes to represent the anthers. These parts give the lily its distinct look.
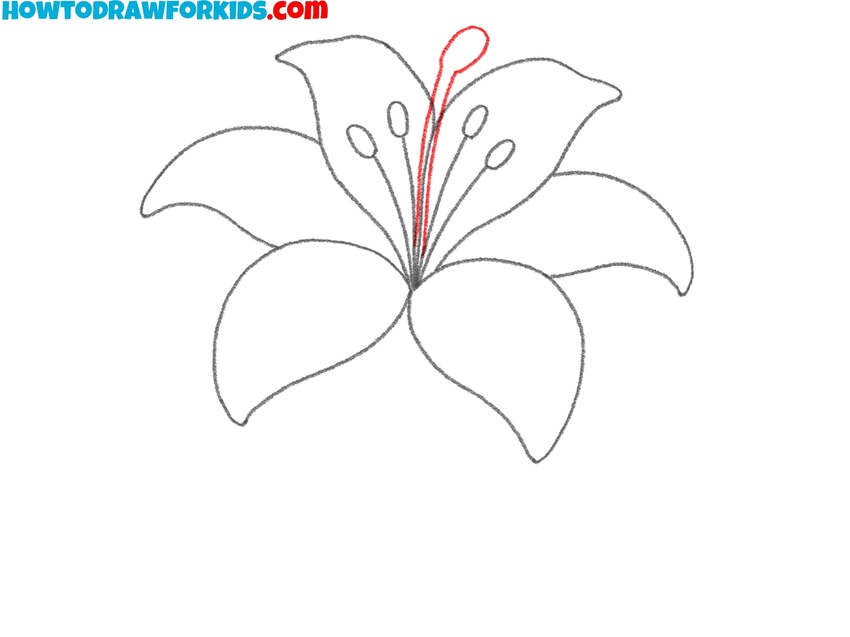
- Add the pistil in the center.
Every lily also has a pistil, the long central structure that rises higher than the stamens. Draw a slightly thicker curved line in the center of the flower, extending upward past the stamens. At the top, sketch a small rounded shape to represent the stigma.
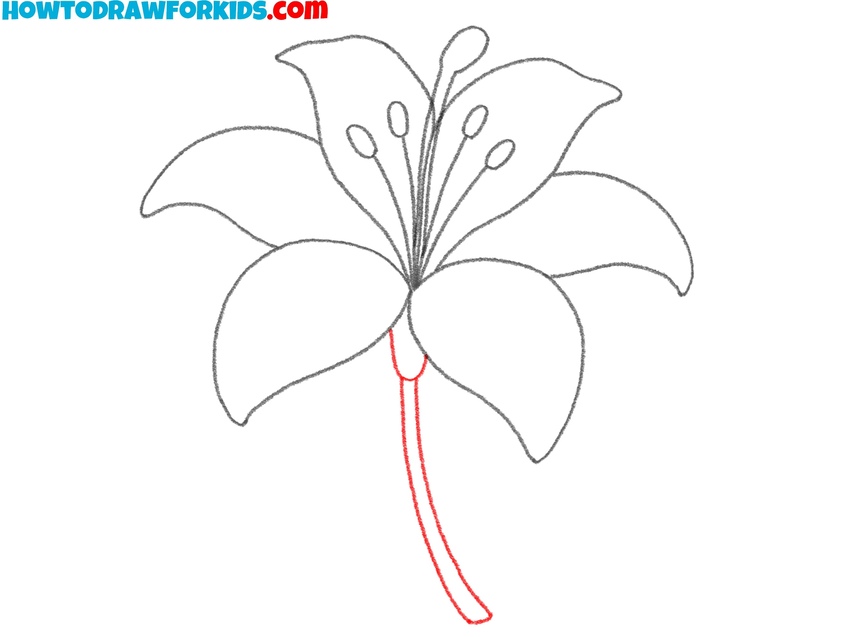
- Draw the lily flower stem.
The bloom now needs support, so add a simple shape for the top of the stem, then draw the long stem moving down from the center of the petals. A barely noticeable curve in the stem will make it look more natural than drawing it completely straight.
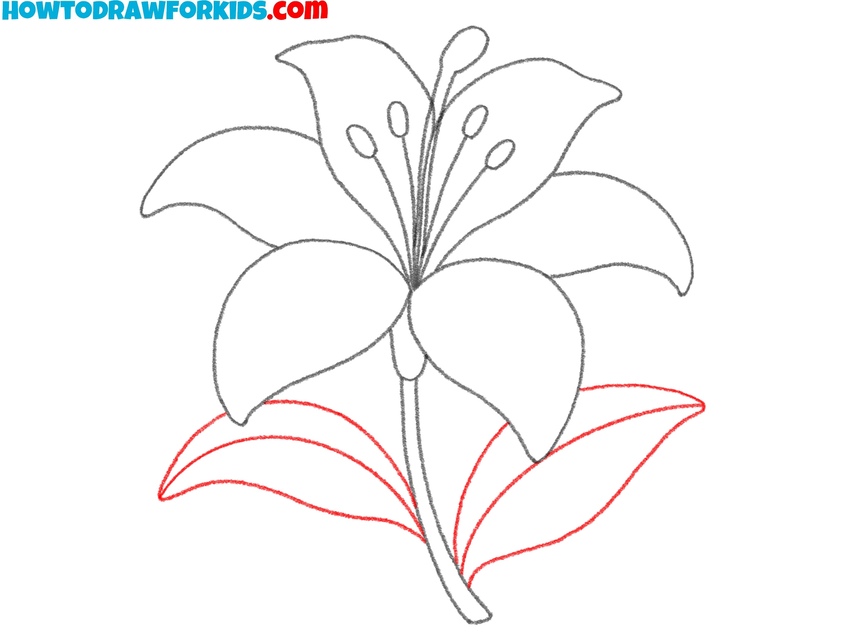
- Sketch the leaf shapes.
Lilies are also recognized by their long, pointed leaves, so sketch a few extending from the stem. Draw them as elongated oval shapes with pointed tips. Position one on each side of the stem. Keep their width smaller than the petals. A useful tip is to let the leaves arch slightly downward to convey the natural weight.
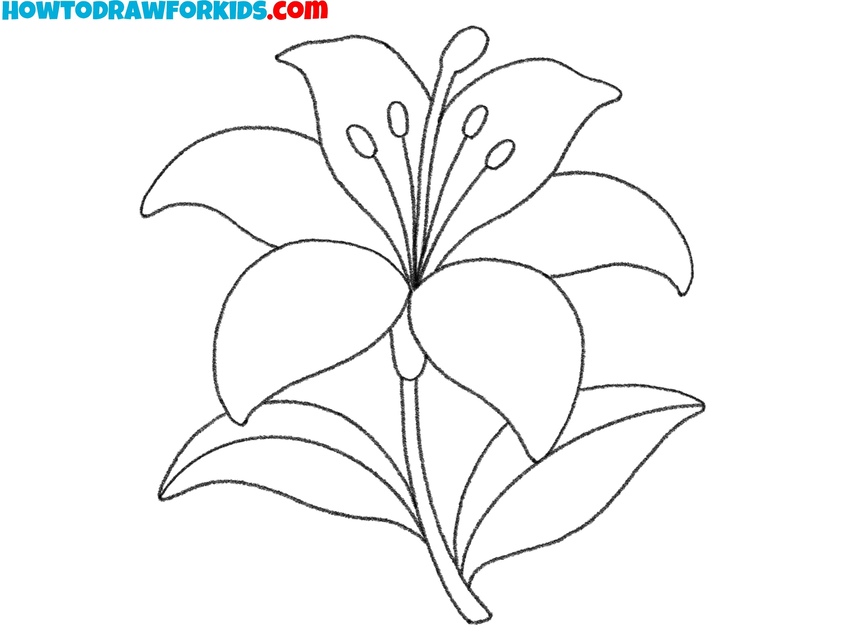
- Erase extra sketch marks.
Now that the main shapes of your lily are in place, it’s time to go back and refine the drawing. Darken the outlines and erase any unnecessary guide lines that are no longer needed. Also don’t forget to check proportions. Small corrections now will make coloring easier later.
- Paint the lily in natural tones.
Color completes the drawing and highlights the flower’s beauty, so paint the petals with a soft pink, peach, or orange, depending on the type of lily you want to show. Color the stem and leaves green. For the stamens, use a brown or orange tone, while the pistil can be shaded with green or yellow.

How to Draw a Lily: Additional Methods
If you’d like to continue practicing, there are also a couple of additional tutorials on how to draw a lily in different styles. These options are useful if you want to try drawing the same subject with different levels of complexity, or simply explore another approach to the same flower.
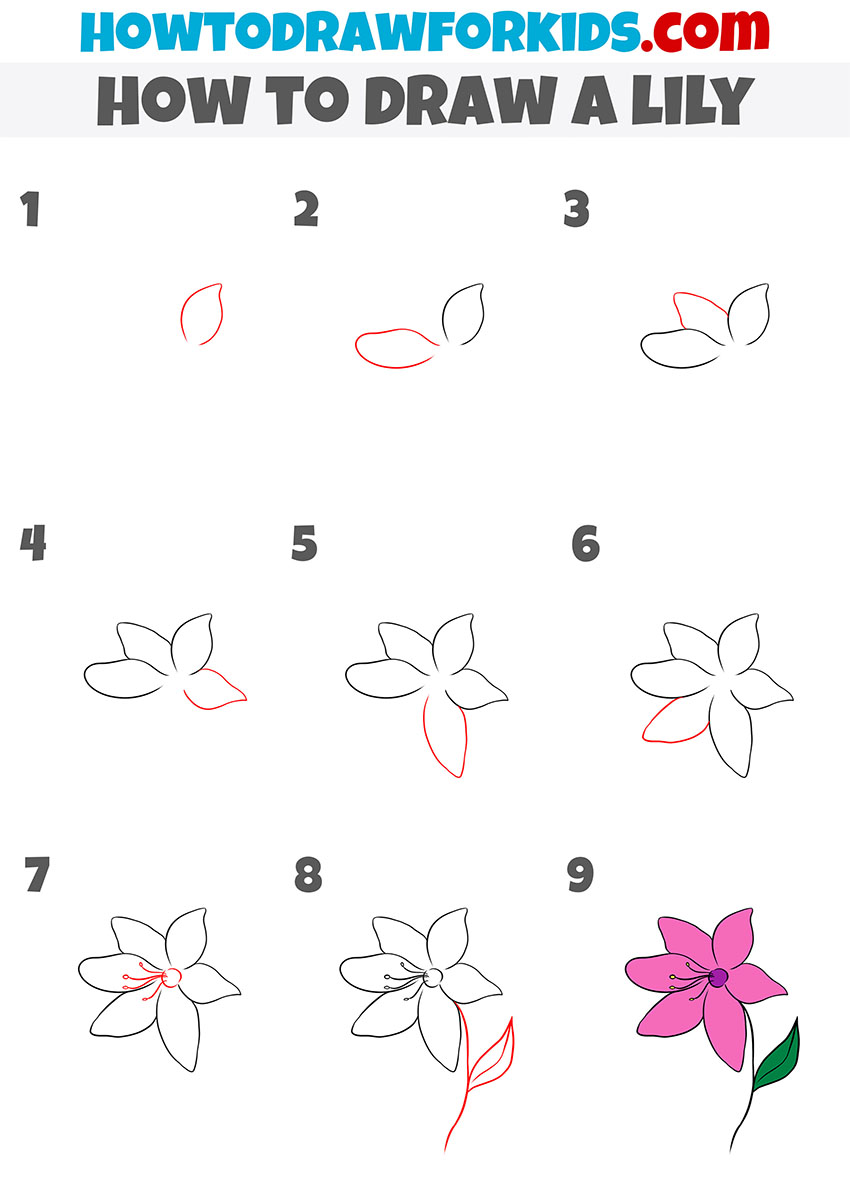
Easy Lily Drawing Tutorial
Just as in the main lily tutorial, this version builds the flower gradually petal by petal, but the structure here is slightly simplified. The process is carried out in small steps so the flower develops evenly.
Sketch one petal, then add another beside it. Continue the cluster with additional petals, spreading them out in different directions. Add another petal to the side, then sketch the lower petal at the base to complete the structure.
Draw stamens in the middle with thin lines and small tips to mark the inner detail. Next, outline the stem as two parallel lines and add a couple of long, pointed leaves. In the last step, apply color to the petals, leaves, and stem.
Alternative Technique
In this instruction, you will draw a beautiful lilac lily. This flower is often planted in the garden and in the house. It is believed that the lily brings harmony and material well-being so let’s try to sketch this beautiful flower.
Lay down the first petal, then add a second next to it, adjusting their curves so they meet at the center. Add a third above, then expand the arrangement with additional petals until the bloom feels complete. Make sure the petals are similar in size but allow for small variations.
Add the stamens inside with thin, curved lines, placing rounded ends at the tips to show the anthers. Extend a narrow stem beneath the flower. Sketch a simple leaf at one side, using a pointed oval with a central vein. To finish, apply color across the petals and leaves.
Conclusion
You can practice and draw several lilies of different colors. Try different options, compare it with each other.
If you want to continue with similar lessons, check the flower drawing tutorial to review general methods for sketching blossoms, or the rose drawing tutorial to practice another type of flower with a recognizable but. Share your finished drawings, leave your feedback, and visit again for more tutorials.