How to Draw a Mailbox
Some simple objects have their own nuances and subtleties, which we will look at in this step-by-step tutorial on how to draw a mailbox.
In this tutorial, you will learn how to draw a mailbox. This is a box that is designed to deliver correspondence. The design of the box may vary.
The mailbox can be located inside the apartment building on the wall, or it can be located on the street. Such a street box has support and a small metal box for collecting letters.
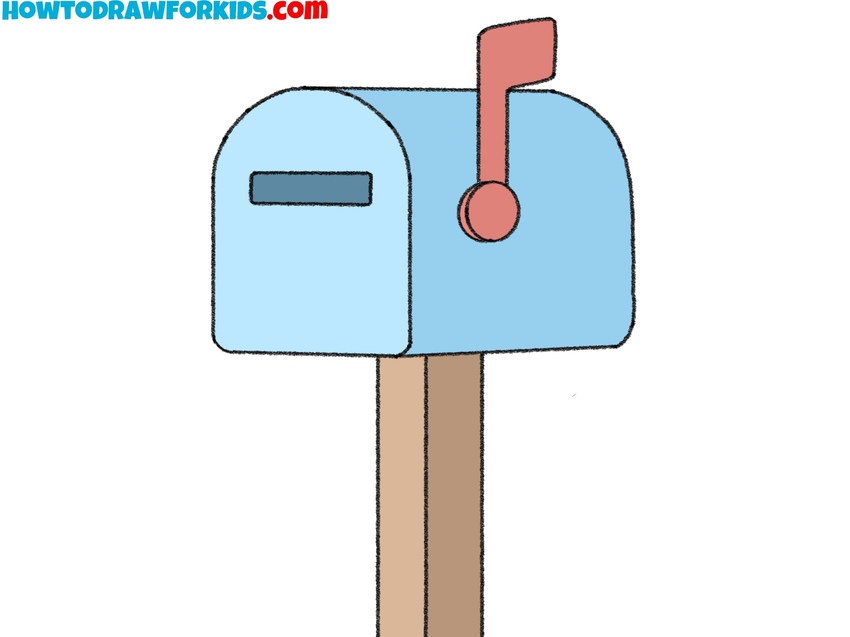
In the picture, you see a standard street box. The box is placed horizontally on a metal pole. The cover is semicircular, the door is located on the side. On the surface of the box, there is a flag that signals the presence of mail. This is the most common model.
You can easily draw such a box if you consistently follow all the drawing steps and use small tips. So, prepare all the art supplies and you can start the lesson.
Materials
- Pencil
- Paper
- Eraser
- Coloring supplies
Time needed: 20 minutes
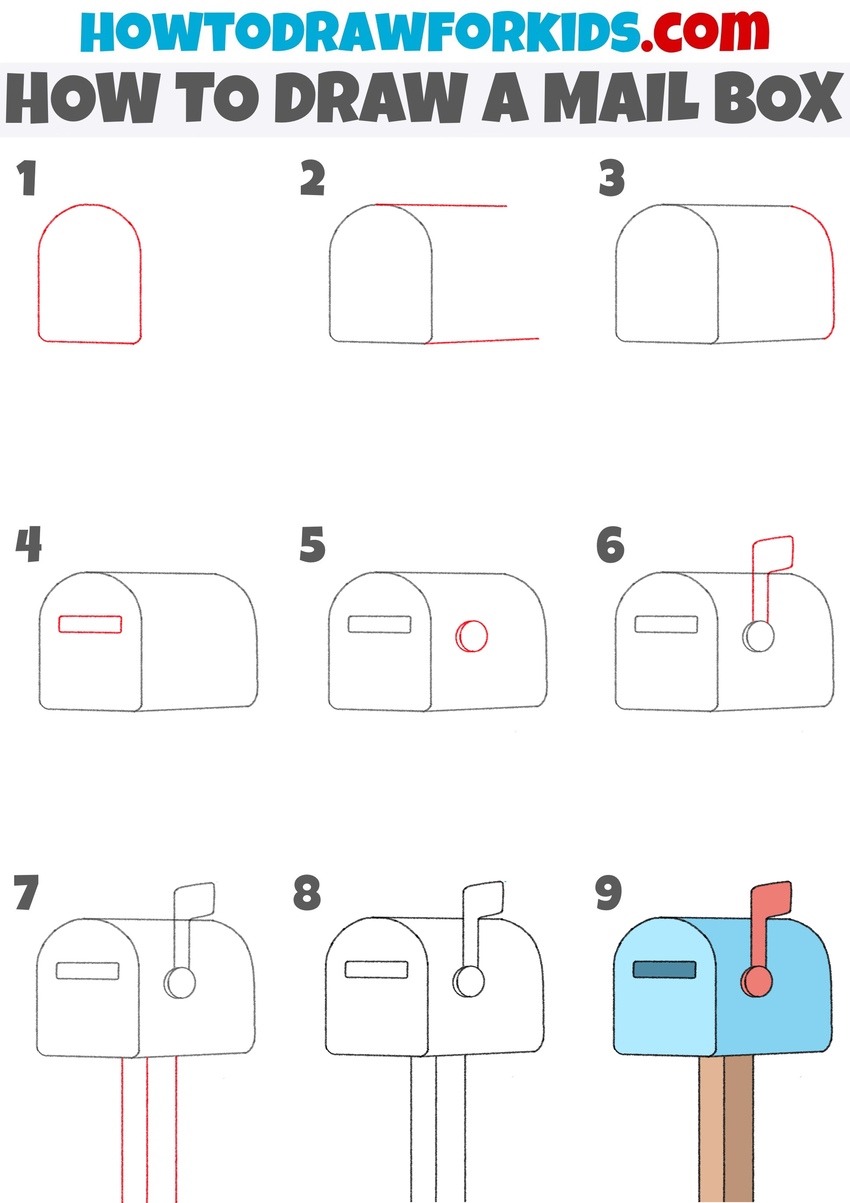
How to draw a mailbox
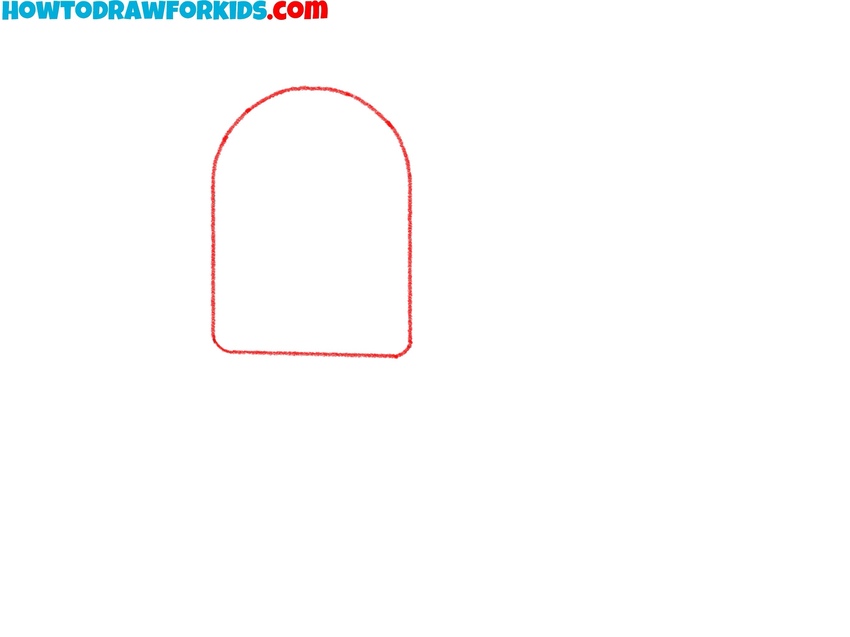
- Sketch the basic front shape of the post box.
Start your mailbox drawing by creating the front outline, which will define its overall form. Draw a tall rectangle with a rounded top, similar to an upside-down “U.” This shape represents the front face of the mailbox. Keep the vertical sides straight and the curve at the top smooth and symmetrical.
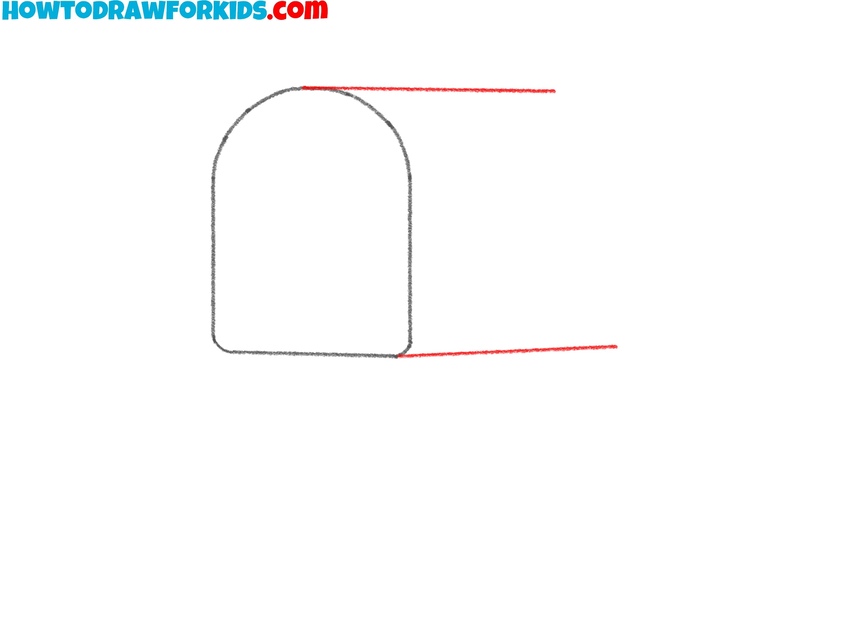
- Mark the top and bottom edges.
To give your mailbox drawing its recognizable shape, extend two parallel lines from the top and bottom of the front shape toward the right side. These lines form the sides of the mailbox, showing how it stretches backward. Try to keep both lines equal in length so the mailbox looks consistent in perspective.
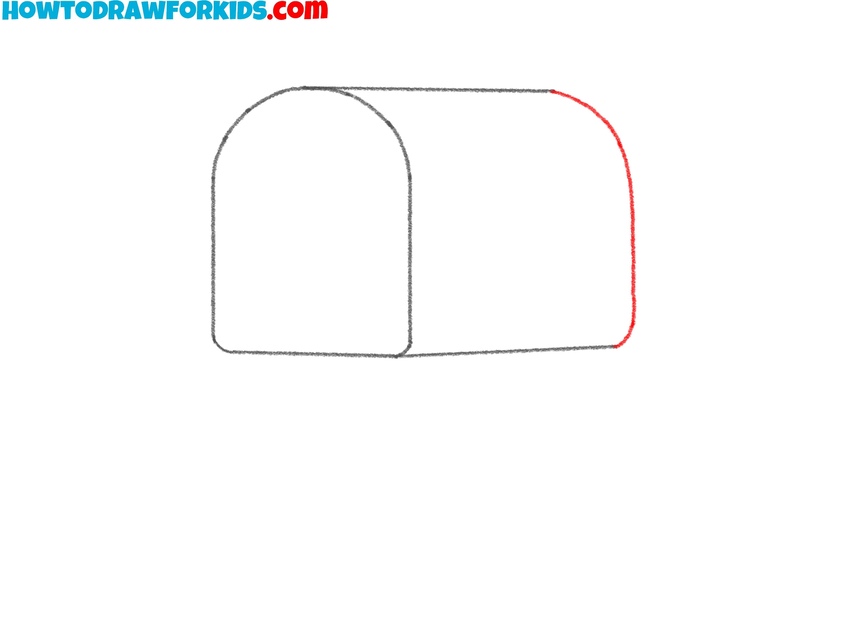
- Connect the lines to form the back of the box.
Now connect the open ends of the two lines you drew in the previous step. Use a smooth curve that matches the side edge of the front face. This simple line will create the back wall of the mailbox. At this stage, your sketch should look like a rectangular box with rounded tops. Check proportions before moving on.
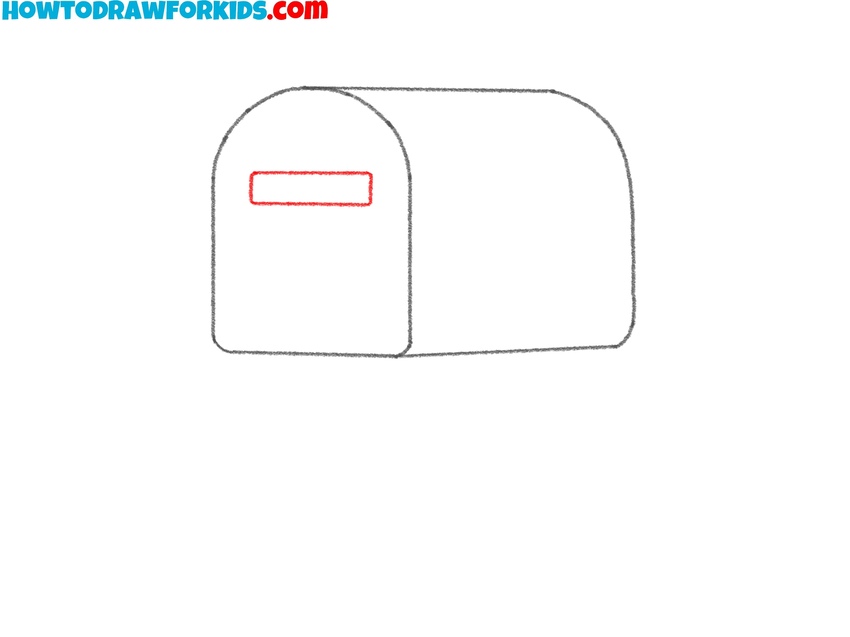
- Sketch the mail slot on the front of the box.
To make the mailbox drawing look functional, draw a small rectangular slot on the front face. Place it closer to the upper part, just below the curved top. The slot should be long and thin, representing the opening where mail is inserted. It should be centered horizontally.
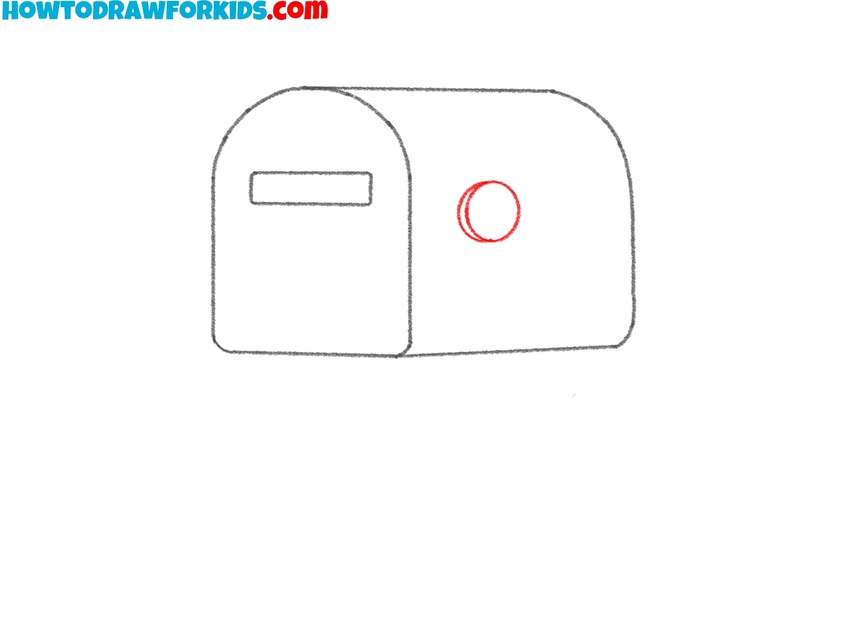
- Add the round flag hinge on the side.
Continue by illustrating the small circular hinge that marks where the flag will be located. On the right side of the mailbox, sketch a circle slightly above the midpoint. To make the circle look more dimensional, add the side edge of the part using a small semicircle.
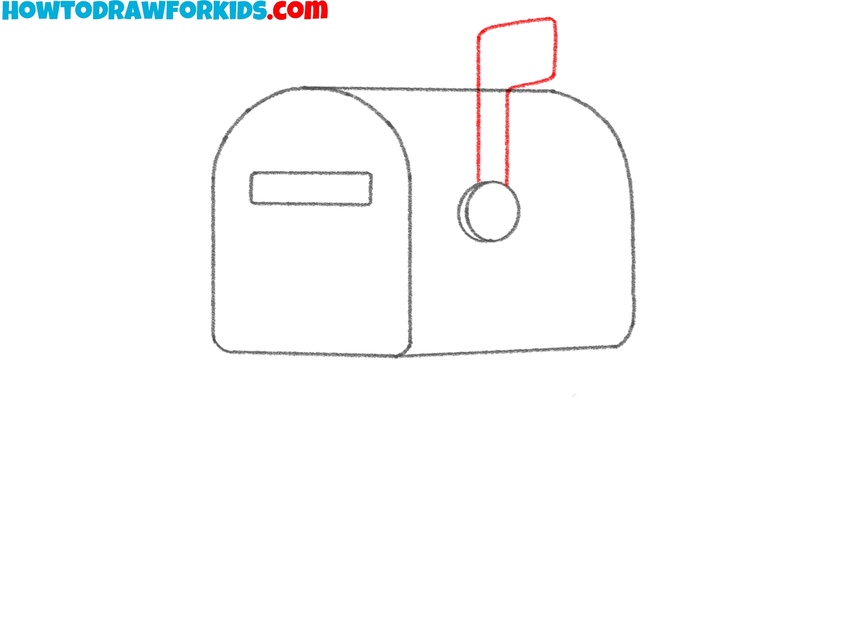
- Draw the small flag on top of the mailbox.
Every traditional mailbox has a flag that signals when mail is inside. From the hinge circle, draw a thin vertical rectangle extending upward. At the top, attach a small horizontal rectangle to represent the flag. The flag should angle. Check that the lines stay straight.
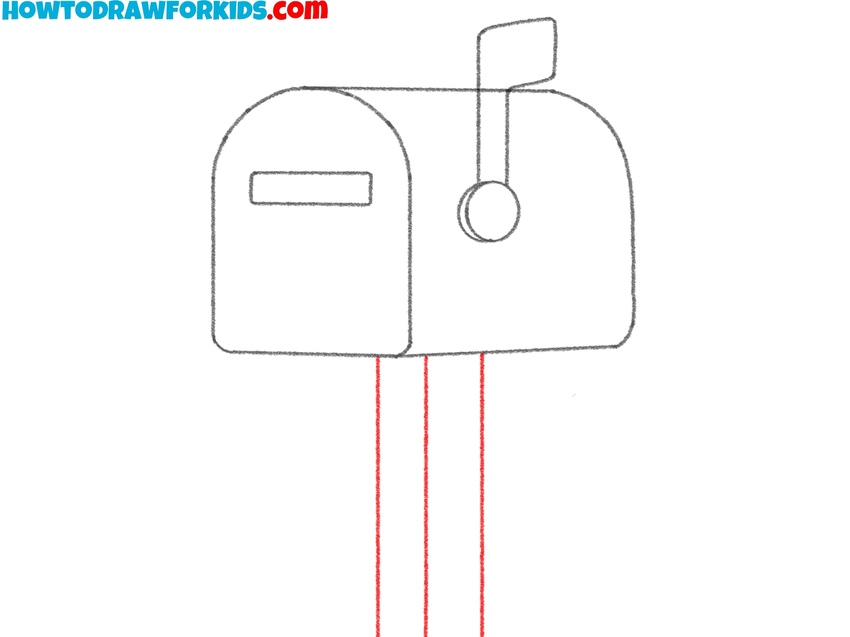
- Draw the wooden post under the mailbox.
Mailboxes are usually mounted on a wooden post, so draw long parallel vertical lines extending downward from the bottom of the mailbox. These lines should be straight. Keep the spacing between the lines consistent and the edges parallel. You can also draw wood texture on the post, to make it look realistic.
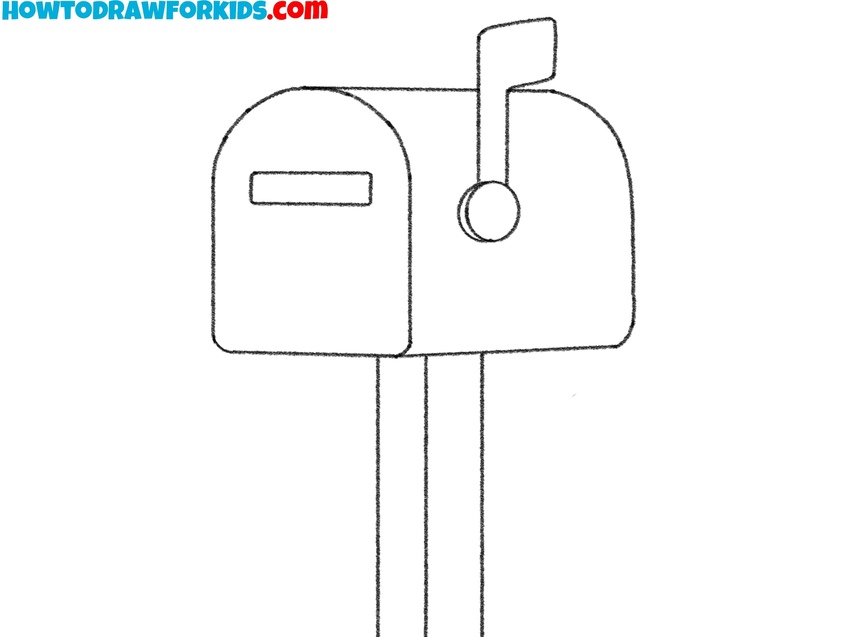
- Polish the contours and remove sketch marks.
It’s time to clean up your sketch. Erase all unnecessary construction marks, remove the early guidelines, overlapping edges, and extra curves from the head and body of the box. Double-check that all corners connect properly and the mailbox remains symmetrical. You can additionally thicken the outer contour.
- Fill the mailbox and post with clean colors.
Finish your mailbox drawing by applying simple colors. A light blue shade can be used for the box body, while the flag can be a bright red. The wooden post looks natural in brown tones. You can add a slightly darker tone on one side to make the box look more dimensional. When completed, you’ll have a simple yet realistic mailbox illustration that looks ready to collect letters and postcards.

Easy Mailbox Drawing Tutorial
To sketch the mailbox correctly, it’s important to establish its main shape first to define proportions. Draw a slightly curved rectangular contour to represent the front and sides of the mailbox, keeping the top edge rounded to show the metal cover.
Sketch the small lip and drop-shaped handle near the bottom of the mailbox door to give it structure. Under the box, add three parallel vertical lines for the wooden post. You can make them uneven or straight.
Show the ground line at the base and draw grass. Draw the triangular mailbox flag fixed to the side. Add small marks on the surface to indicate wood grain on the post and metal seams on the mailbox.
To make your mailbox sketch look more interesting, you can draw an envelope near the base of the post or at the top of the box.
Review the drawing for symmetry before outlining the final lines and coloring the mailbox gray and the post brown.


I love this my drawing is so cute!:)
Thanks! Really nice to hear you like the tutorial.
Let’s be friends I love drawing!:)
Love for drawing is wonderful, I also love to draw, like all the readers of the site.