How to Draw a Mech
Want to sketch your own battle robot? This tutorial on how to draw a mech will help you build a strong and powerful design from scratch.

How to Draw a Mech: Introduction
Mechs like this are often seen in military sci-fi, where they serve as armored infantry or mobile weapon platforms. The design here follows a “walking tank” approach with a thick torso, angular limbs, and functional joints. In this tutorial on how to draw a mech, the figure is built from a combination of hard angles and simple symmetry.
While drawing, it’s important to keep the mech drawing looking functional. Most real and fictional mechs have a large, armored torso that acts as both a power unit and cockpit. In this version, the wide torso should stay symmetrical and authentic. Each part needs to look like it was engineered to fit and function. The torso acts as the central anchor, and the limbs must connect logically.
Mechs often have visible joints, bolts, or armor plates. Keep those elements minimal in this version, but still use clean divisions between parts to illustrate articulation. The legs and arms should look like they could bend or rotate at key points. Don’t round out the shapes too much – mechs are made to look engineered, not organic.
You can change the design by modifying the arms into claws or cannons, or by adjusting the head to look more like a pilot hatch or camera sensor. This version is great as a base for experimenting with different sci-fi styles.
Mech Drawing Tutorial
Materials
- Pencil
- Paper
- Eraser
- Coloring supplies
Time needed: 45 minutes
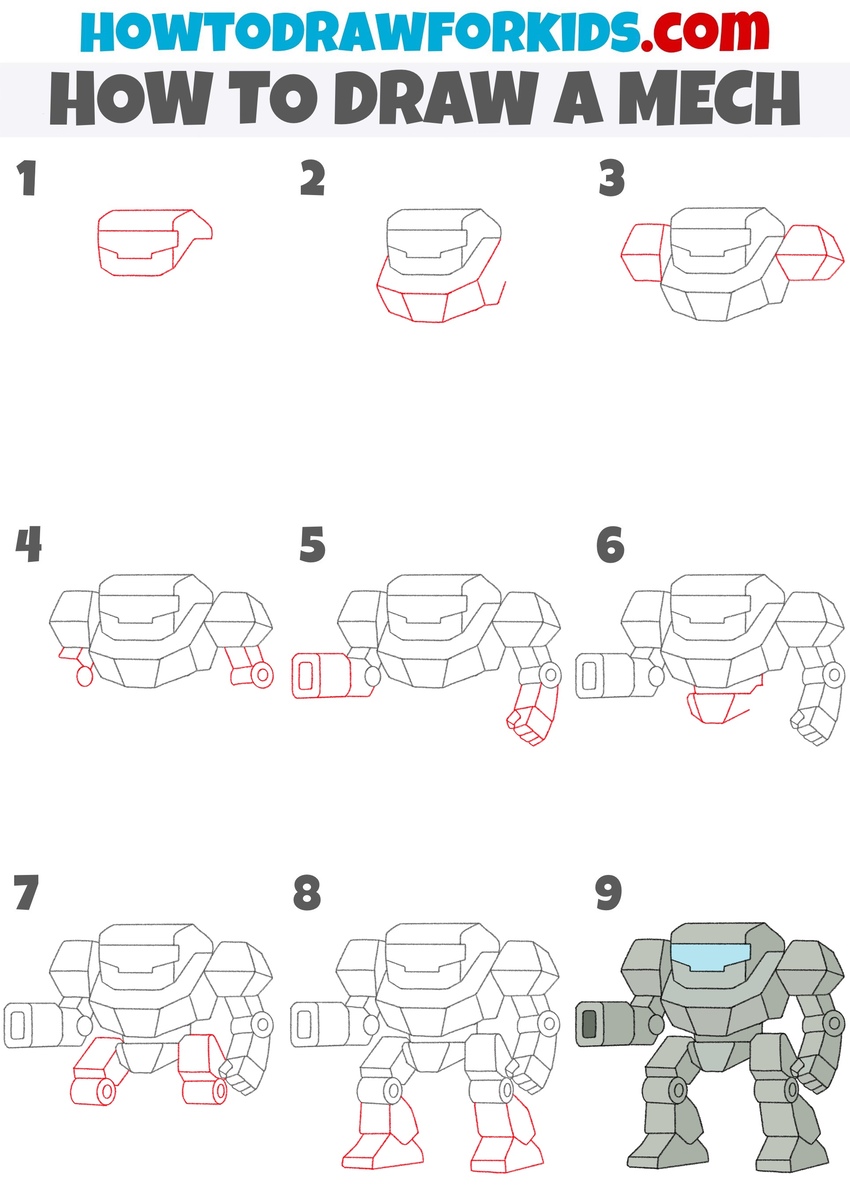
How to Draw a Mech
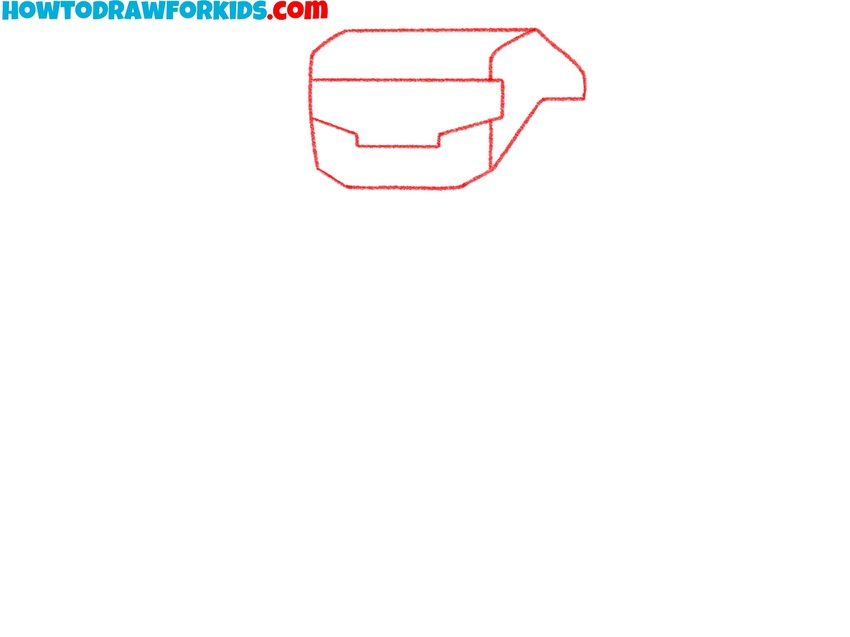
- Sketch the cockpit area.
First, sketch a large rectangular or trapezoidal shape for the head section of the mech. Inside that, draw a smaller rectangle or square for the window of the cockpit area, depending on your mech’s style. Keep the lines straight and edges smooth and curved.
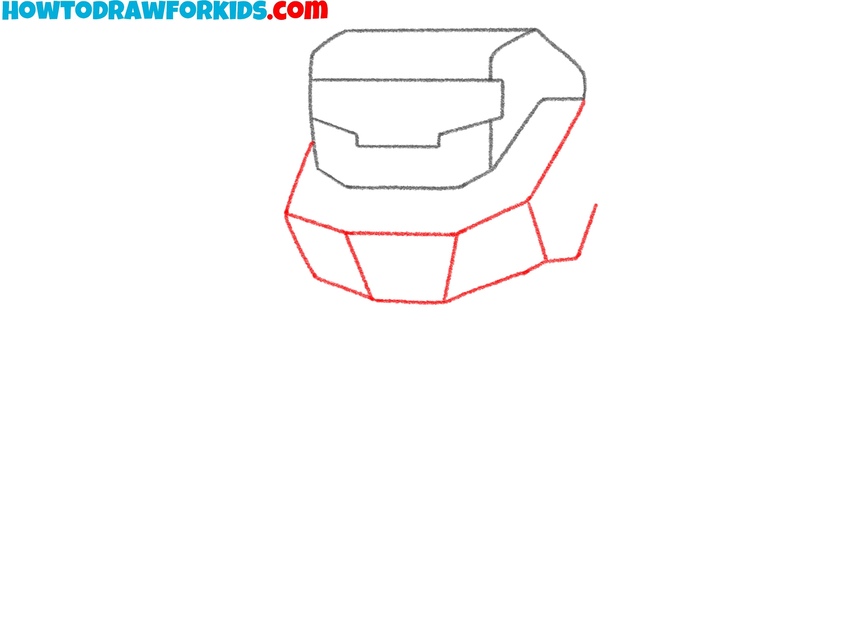
- Draw the mech’s upper body.
Next, draw the top torso of the mech. To do this, underneath the head section, sketch a smaller angular shape – this represents the mech’s top part of the body. The shape can be boxy or slightly curved, depending on whether you want a heavy industrial look or a more agile one.
- Sketch the large shoulder blocks.
Add a large shoulder shape on each side of the upper chest block. These can be simple ovals, circles, or blocky polygon shapes – choose a style that matches the overall look of your mech. Place each shoulder close to the top corners of the chest, overlapping the torso.
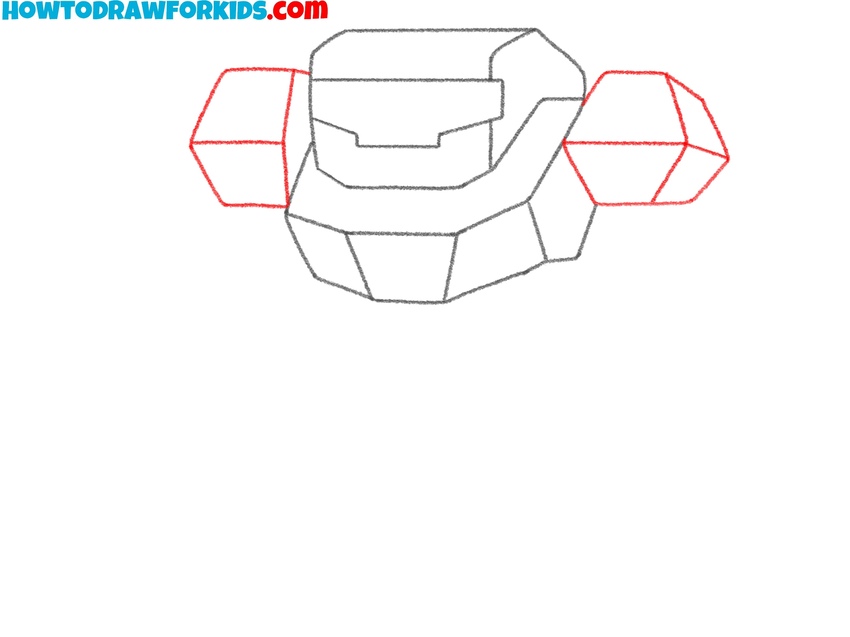
- Draw the mech’s top sections of the arms.
Next, draw a mech’s upper arms extending downward from the shoulders. For each arm, sketch a thick, rectangular or cylindrical shape that connects cleanly to the bottom edge of each shoulder. The upper arms should be shorter than the torso height. Keep both arms equal in length.

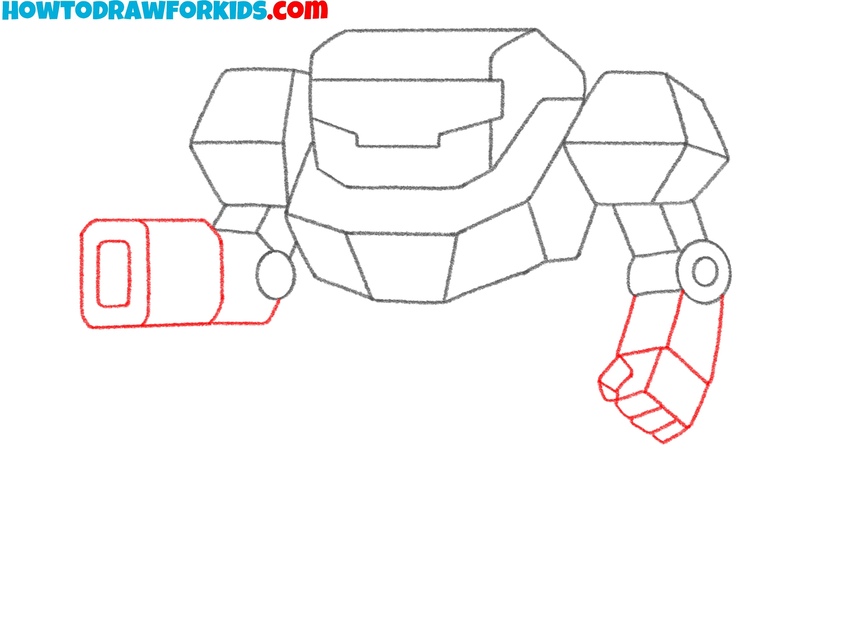
- Finalize the mech’s arms.
Begin by drawing the left lower arm: sketch a rectangular and angular segment extending downward from the left upper arm. At the end of this segment, add a simple mechanical hand – use blocky fingers or a mitten-like shape. Next, move to the right arm. Instead of a hand, draw a mounted gun or cannon.
- Sketch the pelvis structure.
Underneath the chest section, sketch a wide, block-like pelvis shape. This can be a rectangular box or a slightly trapezoidal form, depending on your mech’s style. You can add small connector shapes or lines on either side where the upper legs will attach in the next step.

- Add the upper leg shapes.
To draw the mech’s upper legs, sketch large, angled shapes – either blocky trapezoids or cylinders – to form the thighs. Connect these shapes smoothly to the pelvis. After that, draw the knees beneath with circles or cylinders. You can add subtle panel lines or joint connectors at the top of each leg.

- Draw the mech’s lower legs.
Now, draw the mech’s lower legs to complete the bottom part. For the start, continue the lines of the upper legs and draw the shin areas of the mech. Use angular, clear lines for this. Then continue these lines and draw the feet, giving them the same angular look.

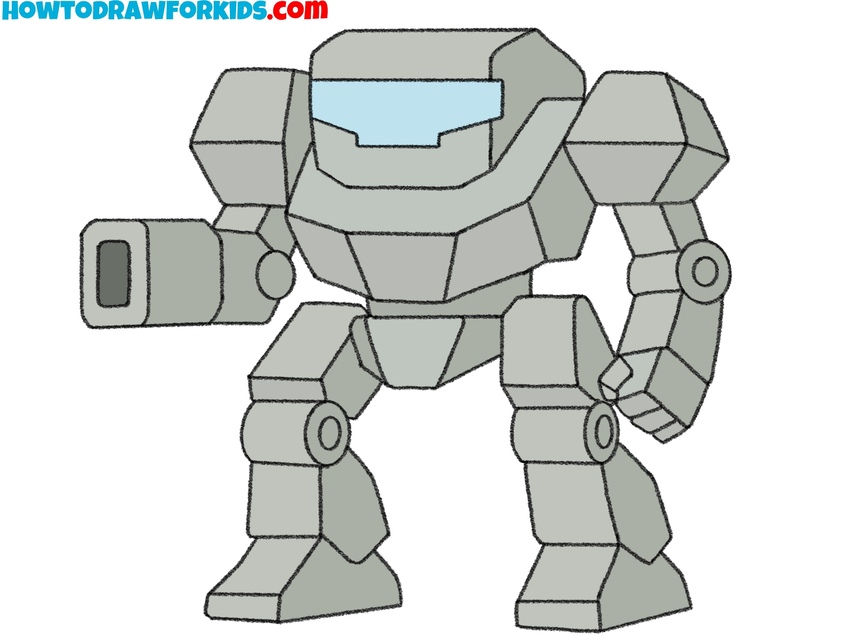
- Color your mech drawing.
Finally, color the mech, using grays or bold color schemes depending on the type of mech you want. You can use darker shades for the darker areas, and lighter or brighter tones for the lighter areas. Use blue, orange, red, or any other bright color for the cockpit window.
Conclusion
This tutorial on how to draw a mech demonstrated a really simple way to practice building mechanical forms using clear geometric shapes and straight lines. It helps develop an understanding of how to balance proportions in a full figure and how to create believable joints, armor, and weapon elements.
Drawing a mech also gives you the opportunity to explore design choices – whether your mech looks agile, heavily armored, or specialized for a particular function. It’s a very adaptable subject that can be expanded with more details or stylized depending on your preference.
If you’d like to continue with similar themes, try the robot drawing tutorial next. Or if you want another type of activity, you can visit my collection of Transformers coloring pages, featuring the most iconic characters from this universe.
To find more lessons like this, check the Pinterest page or subscribe to the YouTube channel for step-by-step video guides.