How to Draw a Mushroom
For those who enjoy drawing elements of nature, I’ve created this lesson to show you how to draw a mushroom using a few simple methods.
In this really easy tutorial, I would like to demonstrate you how to draw a simple mushroom. I’m sure this lesson can be handled by any child or beginner artist who doesn’t have much drawing experience.
To give you the broadest possible understanding of the topic, I have compiled on this page three methods for drawing mushrooms, differing in difficulty, appearance, and approach to the steps. To sketch mushrooms with these instructions, you will only need to be able to sketch curved lines and ovals.
There are edible and inedible mushrooms. Edible mushrooms include many fungal species that are either harvested wild or cultivated. You can also see inedible mushrooms growing in forests, thickets, and other wildlife.
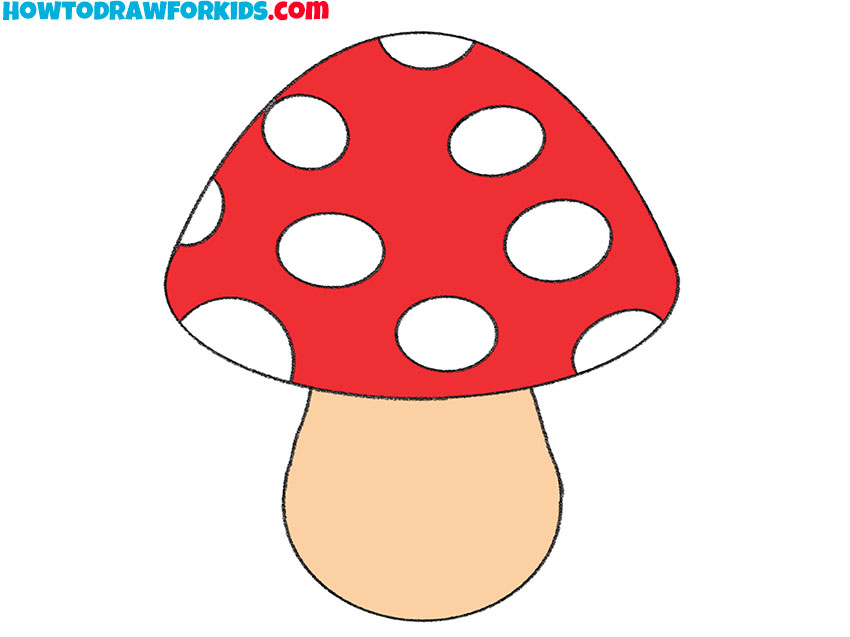
In this tutorial, you will draw an inedible mushroom called a fly agaric. Its distinguishing feature is the red color of the cap of the mushroom and the white dots on it.
Remember that this kind of mushroom should never be eaten. So, now you should prepare your art materials to start drawing.
Materials
- Pencil
- Paper
- Eraser
- Coloring supplies
Time needed: 20 minutes
How to draw a mushroom step by step
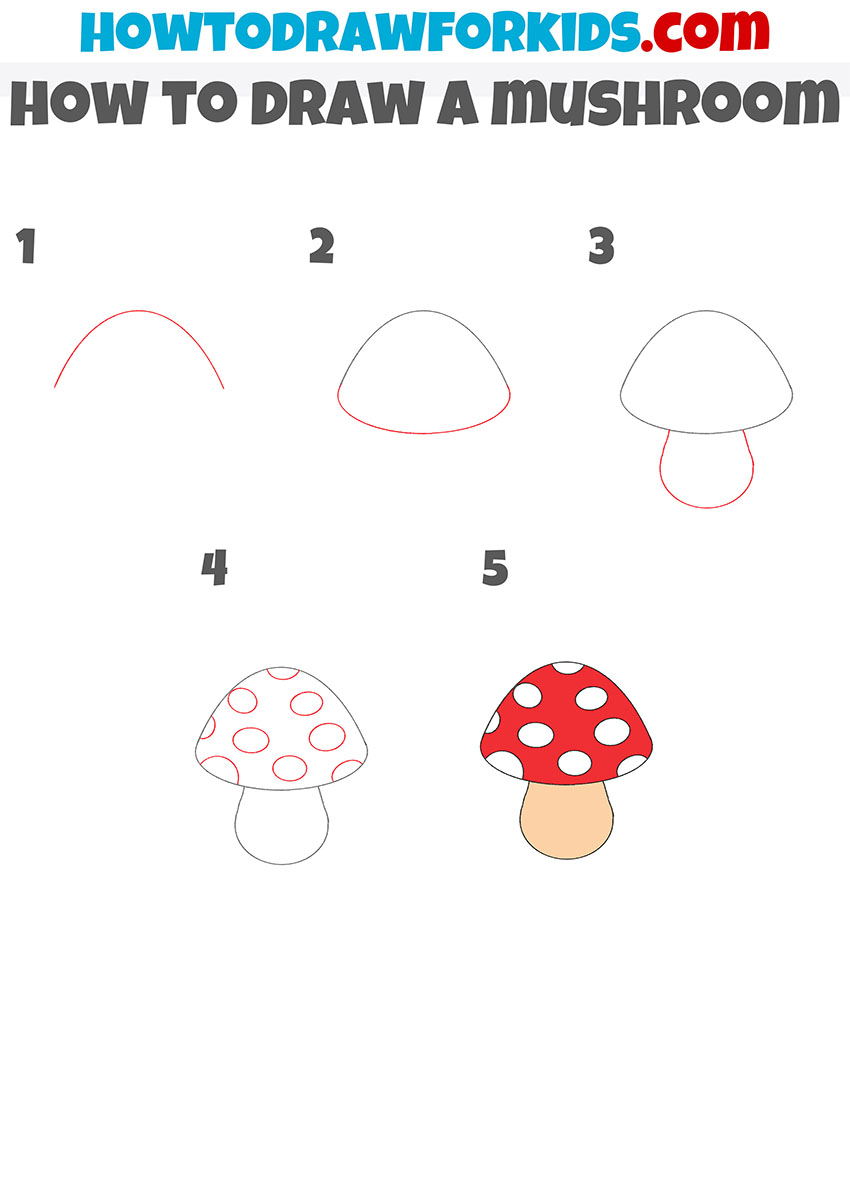
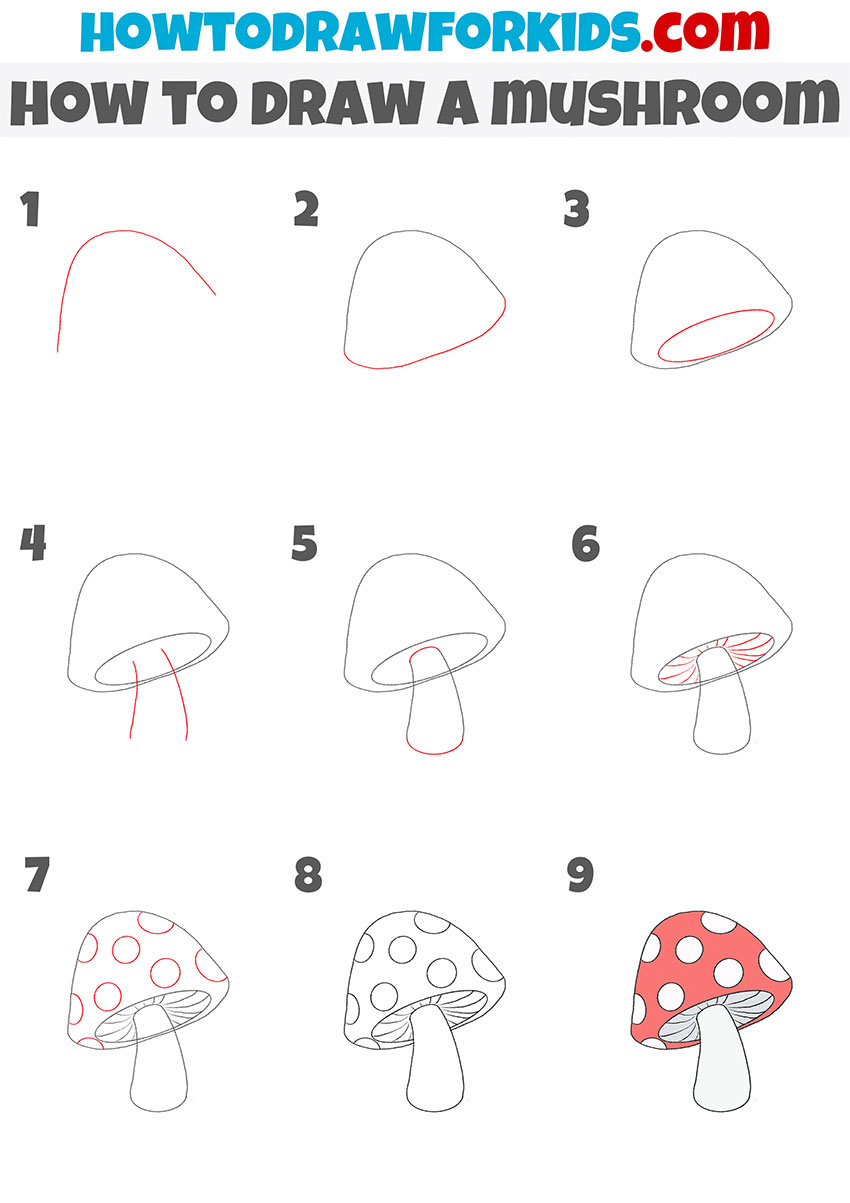
- Sketch the top curve of the cap.
Start with the top line to establish the mushroom’s overall height and width before any details are added. Sketch a smooth, rounded arc that bends gently downward on both sides. Try to keep the curve symmetrical, but don’t worry if it’s not perfect, because mushrooms naturally have slight irregularities.

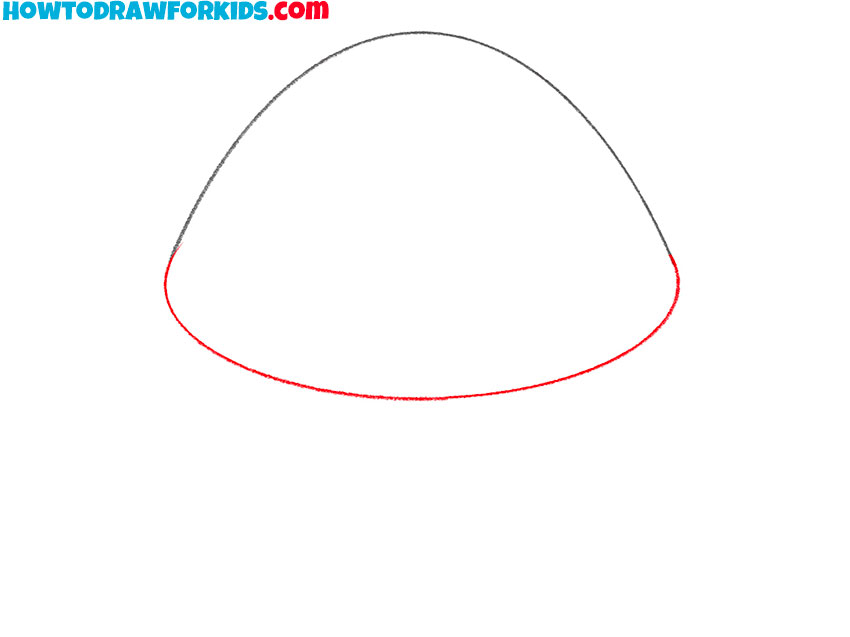
- Complete the outline of the cap.
Before adding the stem, complete the overall outline of the mushroom cap, since it is the largest and most recognizable part of the drawing. Illustrate the bottom curve to connect both sides from the previous step, forming a full dome-like shape.
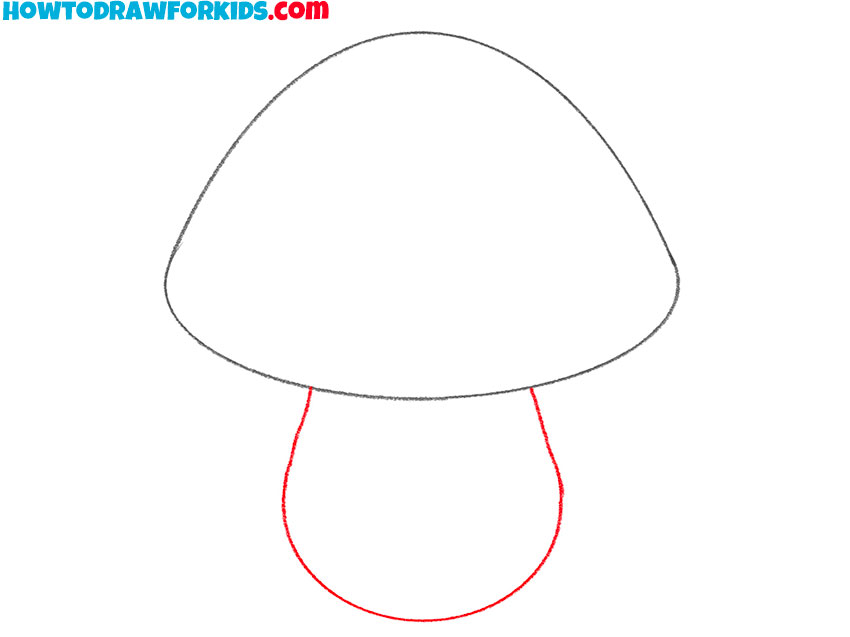
- Sketch the mushroom stem.
Now, sketch a simple rounded shape beneath the cap. To draw the stem symmetrically, use two lightly curved vertical lines then round out the bottom with a soft wide curve. The stem should be narrower at the top and wider at the bottom.
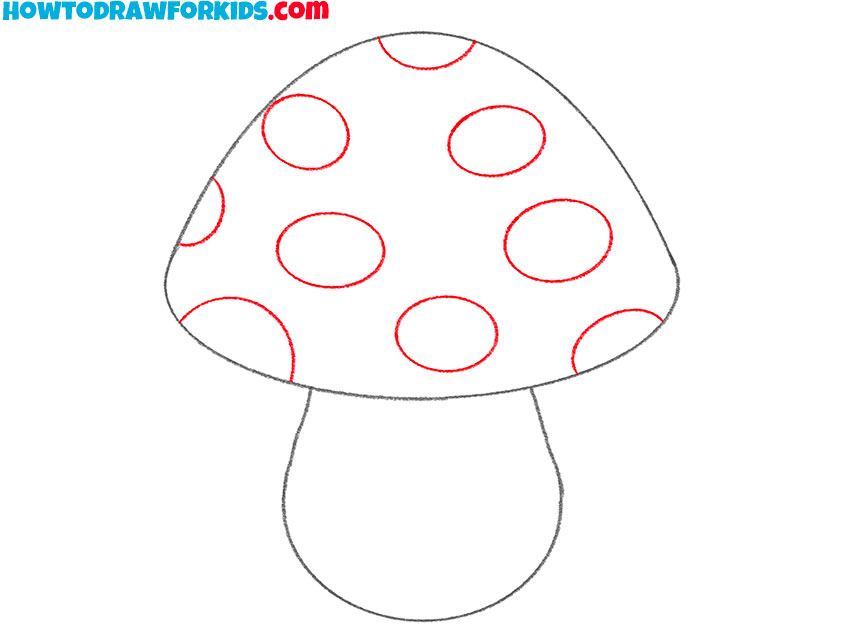
- Add spots on the cap.
The spots give this mushroom its classic toadstool look. Scatter the circles across the surface of the cap, varying their sizes to keep the pattern interesting. Draw each spot as a simple rounded shape and avoid lining them up in perfect rows.
- Finish the mushroom with bright coloring.
Paint the cap with a bold red while keeping the spots white. Next, shade the stem with a warm beige or light tan. But this is not the only option for coloring the mushroom drawing, so you can paint it in any other color. You can slightly darken the lower area of the stem to give it a bit more dimension.

Additional Materials
Traditionally, at the end of the lesson, I suggest you download the PDF file that I prepared especially for your convenience. It contains a short version of this tutorial and useful additions that will help you when doing this drawing.
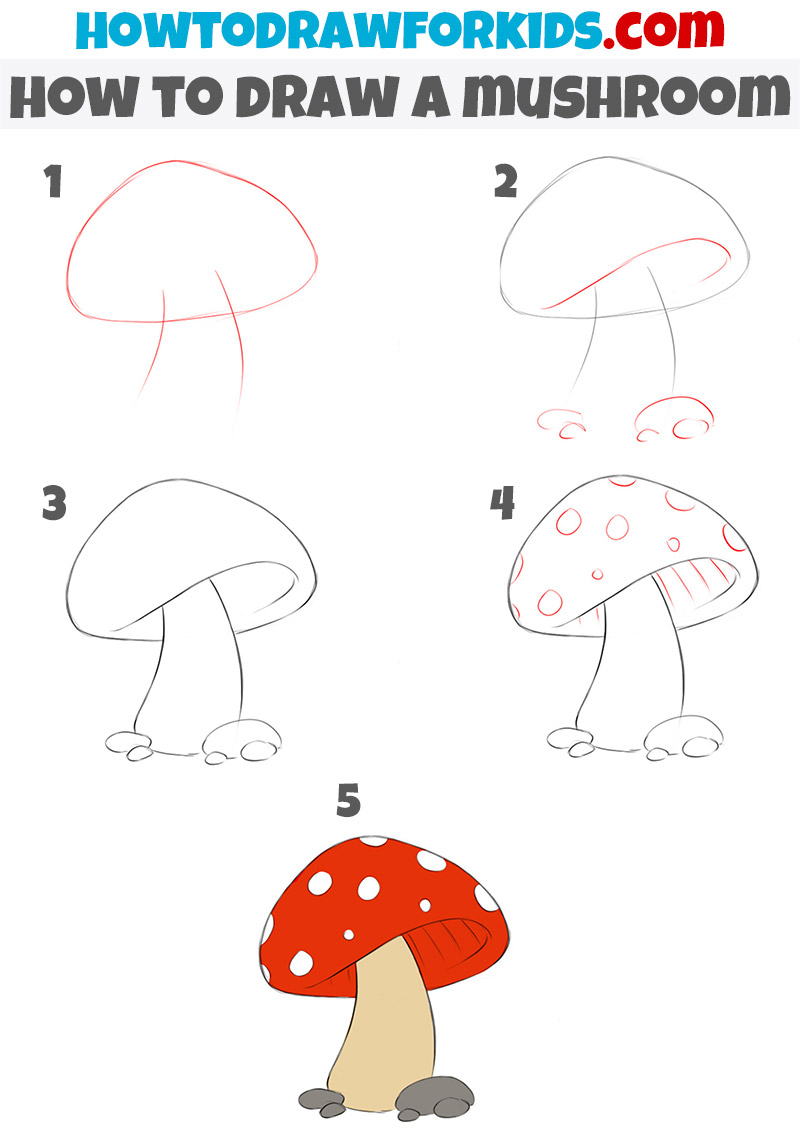
How to Draw a Mushroom: Advanced Method
If you master this lesson, you will acquire useful skills that will be useful to you in the future. As a result, you can easily create a beautiful picture with mushrooms and other natural objects. If all the art supplies are already at the ready, then you can start the lesson.
Alternative Mushroom Drawing Method
The mushroom that you see in this picture is a toxic thing. It can not be eaten. You can only draw it without harm to health. By the way, you can draw other mushrooms using this sketching and painting guide.
You can make your mushroom drawing more interesting and complex by drawing trees in the background or adding grass and other details around it.
Conclusion
At this point, this step-by-step mushroom drawing lesson has come to an end. I hope you got a great drawing and had a great time doing it! If you liked this guide, you can leave a comment about it and share it with your friends.