How to Draw a Pegasus
Drawing fairy-tale and unusual characters is enjoyable for both kids and adults, so let’s begin this lesson and learn how to draw a Pegasus.

How to Draw a Pegasus: Introduction
In this tutorial, you will learn how to draw a Pegasus. This is a beautiful-winged horse that we know from ancient Greek mythology. This mythical creature is a symbol of inspiration.
I am sure you will enjoy this tutorial and have a great time. You can easily draw a Pegasus because the lesson is adapted for beginner artists. All the lines are very simple, and you will quickly repeat all the drawing steps.
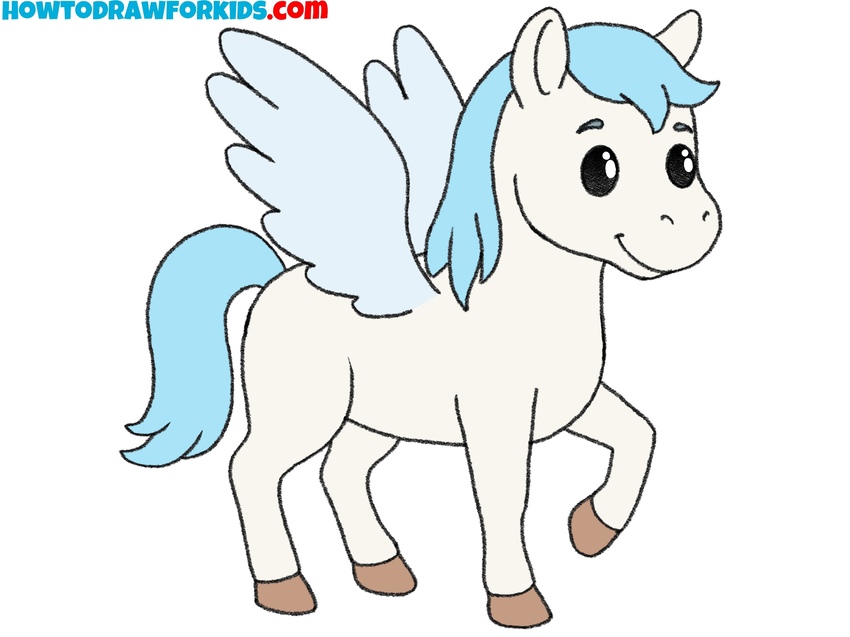
In the picture, Pegasus is made in a cartoon style and looks very cute. It is a small horse that has short legs, a lush mane, a beautiful tail, and graceful wings on the back. Pegasus is usually white, but you will portray this creature in a more attractive way. To do this, you will use beautiful delicate shades for coloring the mane and tail.
Pegasus Drawing Tutorial
Materials
- Pencil
- Paper
- Eraser
- Coloring supplies
Time needed: 25 minutes
How to Draw a Pegasus
- Outline the Pegasus body base.
To begin this drawing, it helps to set the basic structure with two large shapes, one for the body and one for the head. The body should be drawn as an oval or bean shape. Above and to the right of this shape, sketch the head as a rounded oval, with a slight curve on the lower part for the snout.

- Add the nostrils, eyes, and smile.
Inside the head oval, sketch two small circles for the eyes, positioned roughly halfway down the head. Add small ovals or dots for the nostrils near the tip of the snout, and then draw a curved line for the smiling mouth of the Pegasus just below it.

- Draw the Pegasus ears and mane.
Once the face is prepared, it is helpful to add the mane and ears since these are signature details of a Pegasus. Sketch two small pointed ears at the top of the head. Then illustrate the mane flowing down from between the ears and along the neck.

- Illustrate the neck and tail.
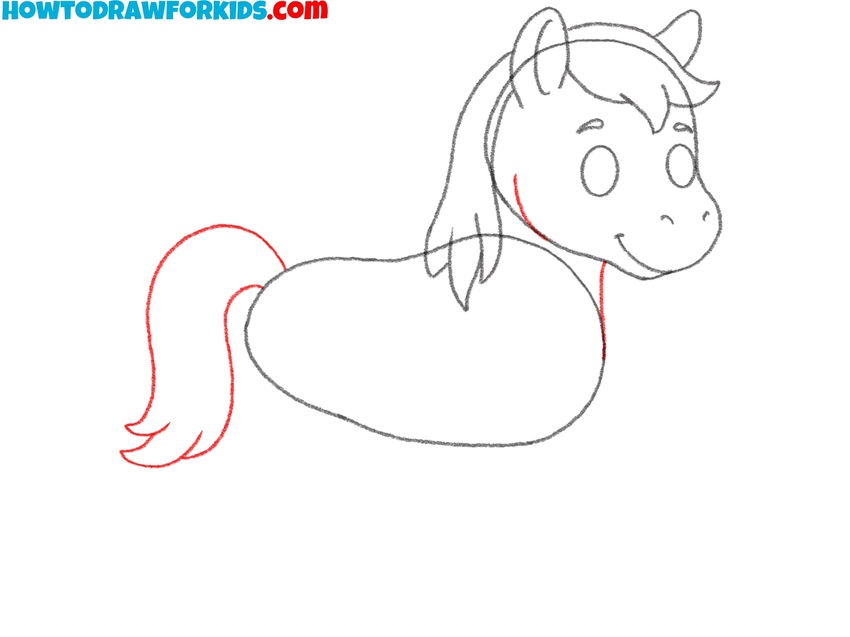
Now, you will need to add a tail at the back of the body. Draw the Pegasus’s tail with long, flowing lines similar to the mane. It should extend from the rear of the body. Since Pegasus tails are often drawn thick and full, you can sketch several strands to show volume. Then, connect the head and torso sketching the neck.
- Sketch one wing on the back.
The defining feature of a Pegasus is, of course, its wings. To draw a wing, begin with a curved line to form the top edge of the wing. Then, add several feather-like shapes along the lower edge. Repeat the same with the second wing.

- Sketch two front legs and hooves.
At this stage, add the first two legs to the Pegasus, sketching them extending from the front of the body. Use long and curved lines to show them in motion, with one leg bent forward as if the Pegasus is stepping. Add a small rectangle shape at the end of each leg to represent the hooves.

- Add the Pegasus hind legs and hooves.
To complete the body of the Pegasus, draw the hind legs at the back of the body. These should appear slightly thicker than the front legs. The back legs should be noticeably thicket at the top and narrow to the bottom. Again, add small rectangular shapes for the hooves at the bottom.

- Review and refine proportions.
Before finishing, it is important to go over the drawing and refine the entire outline. Smooth out any uneven shapes in your Pegasus drawing. Erase extra construction lines carefully, leaving only the clean final shapes. Redraw certain parts with slightly firmer lines.

- Add gentle color to the mythical creature.
Traditionally, Pegasus is drawn with a white or ivory body, so use a light shade for the main figure. Color the mane and tail in a brighter hue, such as blue or pink. The wings can be kept light with soft blue or gray tones. Shade the hooves in a darker color, like brown. The eyes should be filled with black with white highlight.

Bonus Tutorials
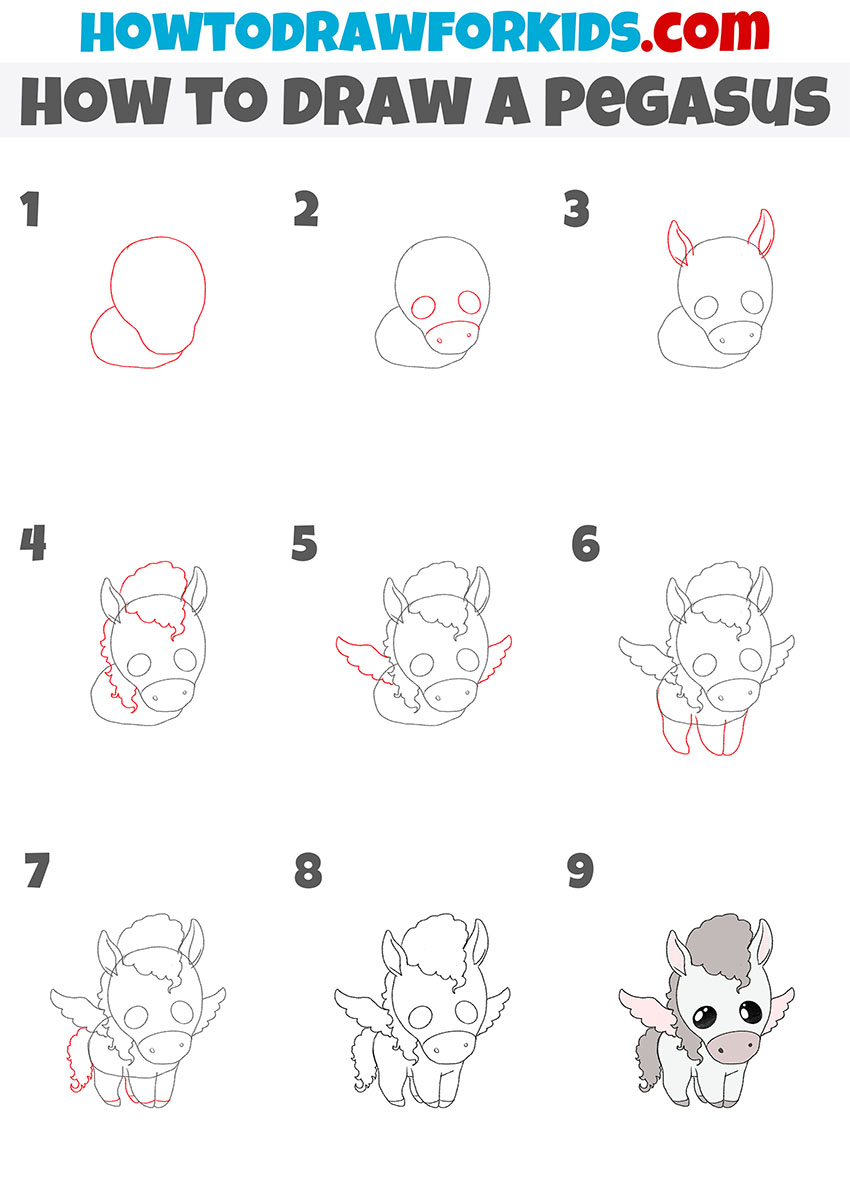
Along with the main tutorial, I’ve also prepared a couple of additional methods. These give you alternative ways to draw a Pegasus. One in a very simplified cute style, and another in an easy flying pose with flowing mane and wings. Both variations build on the same idea but let you practice different shapes and proportions.
Easy Pegasus Drawing Tutorial
To create an easy Pegasus drawing, outline the head with a small circular shape and add the muzzle by attaching another curve. Place the ears above the head, and then draw the mane flowing backward with long curved lines.
Sketch the body by connecting a rounded form to the head, making sure it is smaller in proportion to keep the Pegasus truly simplified. Add the legs underneath with short rounded shapes, and bend them. Draw the wings, keeping the top line curved and the feathers simplified.
Include the tail flowing in the same direction as the mane. Once the outline is complete, refine the shapes so the Pegasus looks smooth and symmetrical. Finish by coloring the mane and tail with bright tones and the wings with lighter shades.

Cute Pegasus Drawing Tutorial
To draw a cute Pegasus, the first step is to outline the head and add the muzzle area, making them larger compared to the body. Place two circles for the eyes, leaving enough space between them, and add two nostrils on the muzzle.
Draw the ears on top of the head. Sketch the mane with a wavy line, then extend the neck and body beneath the head. Add short legs with rounded hooves to maintain the simplified style.
Draw wings at the sides of the body. Add the tail with small curves to match the mane’s texture. Check proportions, erase any extra lines and color the Pegasus with light shades to give it a cute appearance.
Conclusion
To continue, see the horse drawing tutorial to work on the basic form without wings, or the unicorn drawing tutorial to try another mythical variation.
You can also look at the dragon drawing tutorial to practice a different fantasy creature.
Don’t forget to share your drawings, leave a comment, and check back for more step-by-step lessons.


