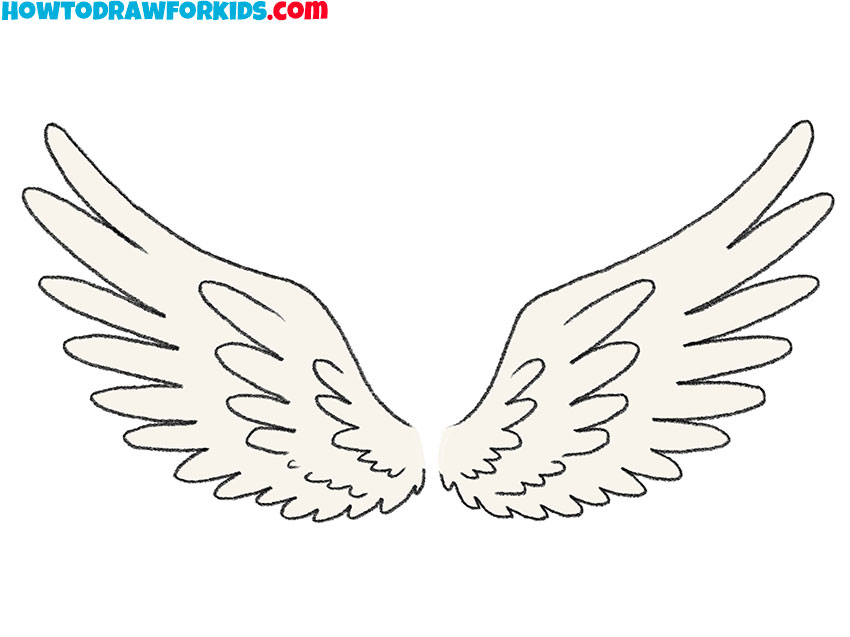
How to Draw Wings
The art of sketching wings brings a sense of lightness and beauty to any piece, and with this lesson, I’ll guide you through the process of how to draw wings with ease. These wings are crafted to symbolize both strength and delicacy, with an emphasis on the individual feathers that build up the overall form.
How to Draw Wings: Basic Information
The grace of wings has always captivated artists, and learning how to draw wings that appear as though they could take flight at any moment is what I aim to teach you in this lesson. The wings depicted here are designed with the novice in mind, starting with simple shapes and building up to the detailed feathers.
In drawing these wings, we focus on the curvature and flow of each feather, ensuring they have the softness and structure seen in nature. You’ll learn to shape the individual feathers with precision, giving your wings a realistic and dynamic quality. This lesson simplifies complex forms into manageable steps, so you can achieve impressive results with ease.
As we progress and draw wings, you’ll notice the importance of symmetry and pattern in creating a balanced and aesthetically pleasing pair of wings. I’m excited to share this method with you, enabling your art to soar to new heights. So, let’s spread our creative wings together and begin this drawing journey.
Wings Drawing Tutorial
Materials
- Pencil
- Paper
- Eraser
- Coloring supplies
Time needed: 30 minutes
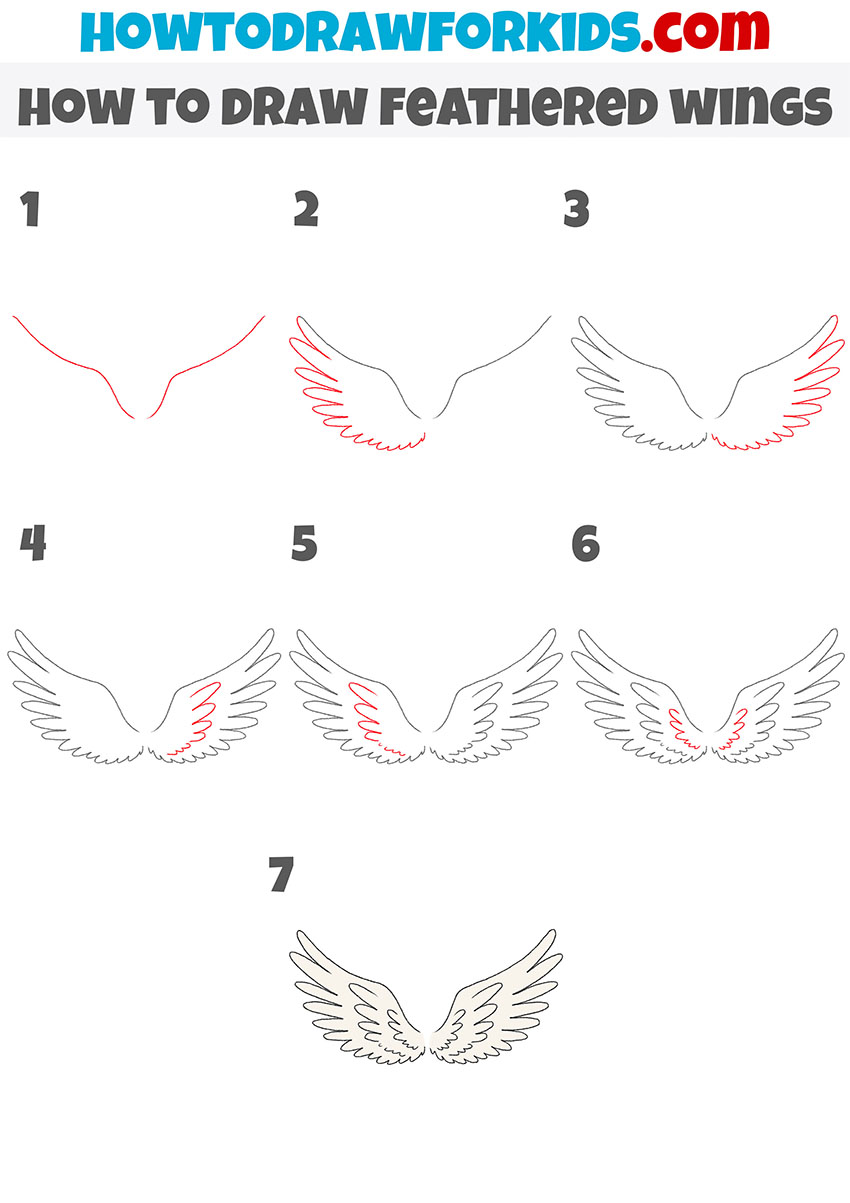
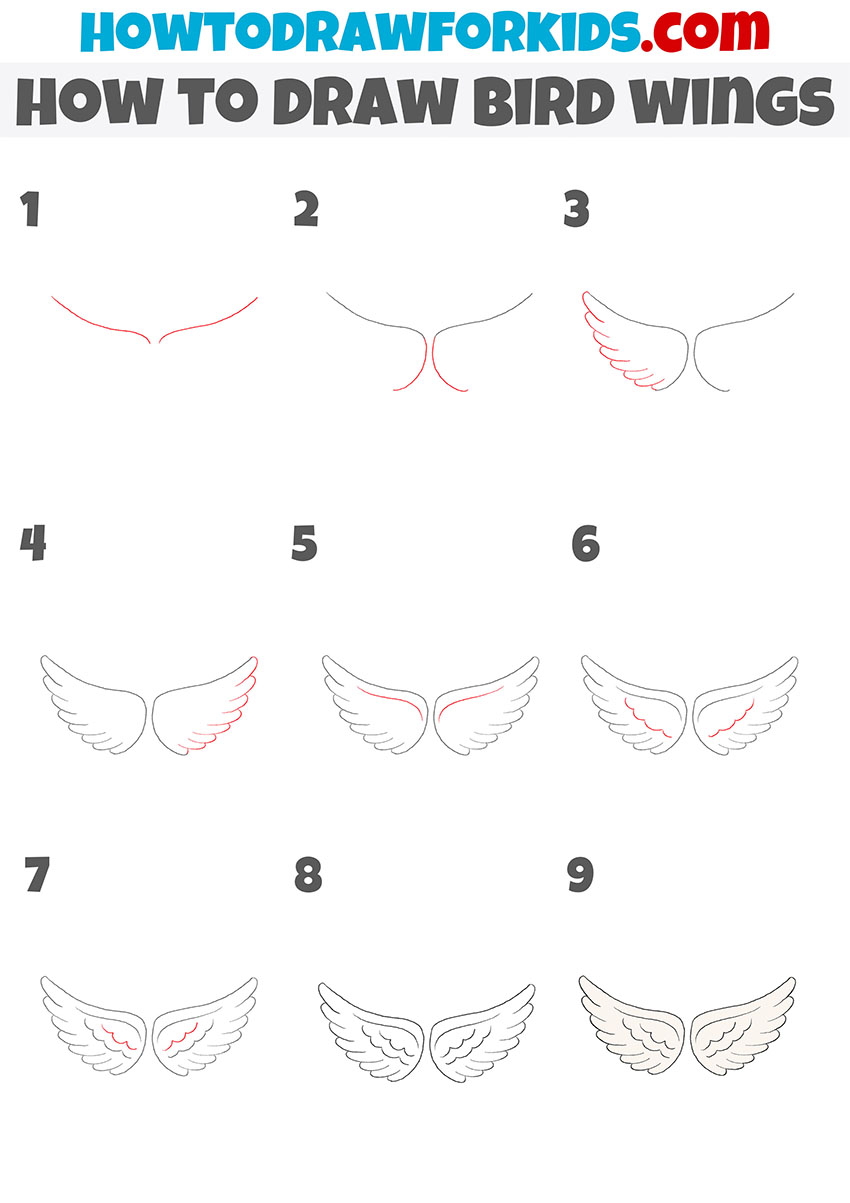
How to Draw Wings
- Draw the top outlines of the wings.
To complete this step, you need to draw two symmetrical curved lines as shown in the picture.

- Depict the bottom of the wing on the left side.
Continue drawing the line on the left, adding many arcs and curved lines of varying lengths.
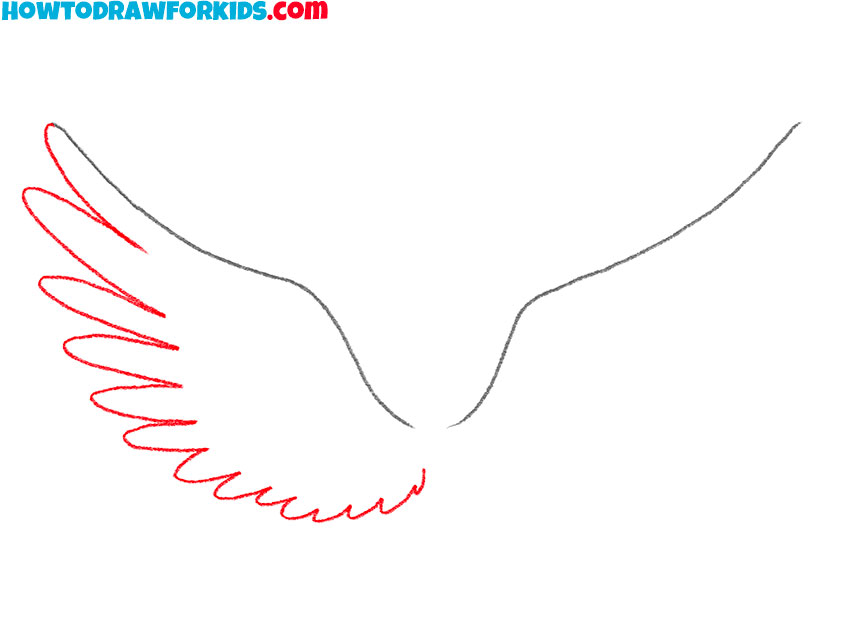
- Add the outline of the wing on the right side.
Now you should continue the drawn curved line on the right by adding arcs and curved lines.
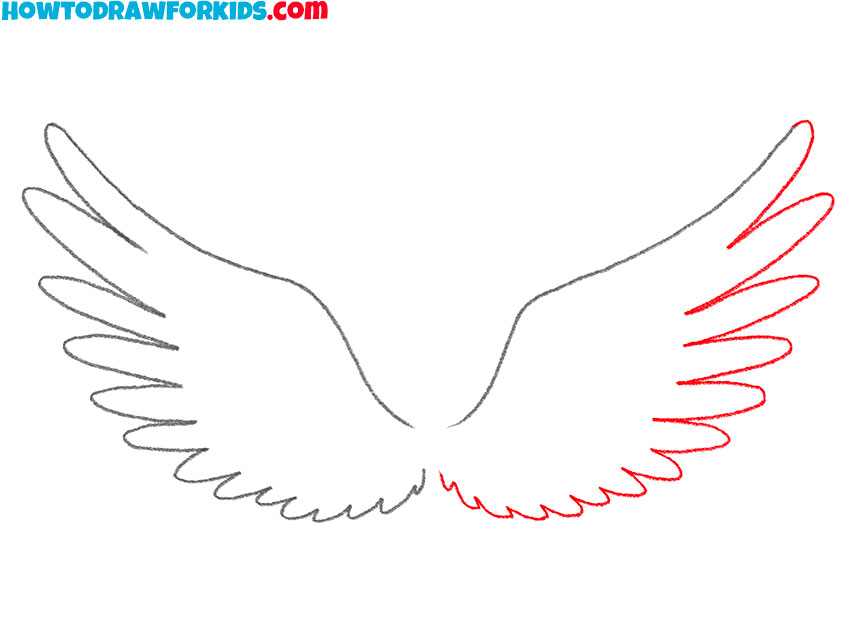
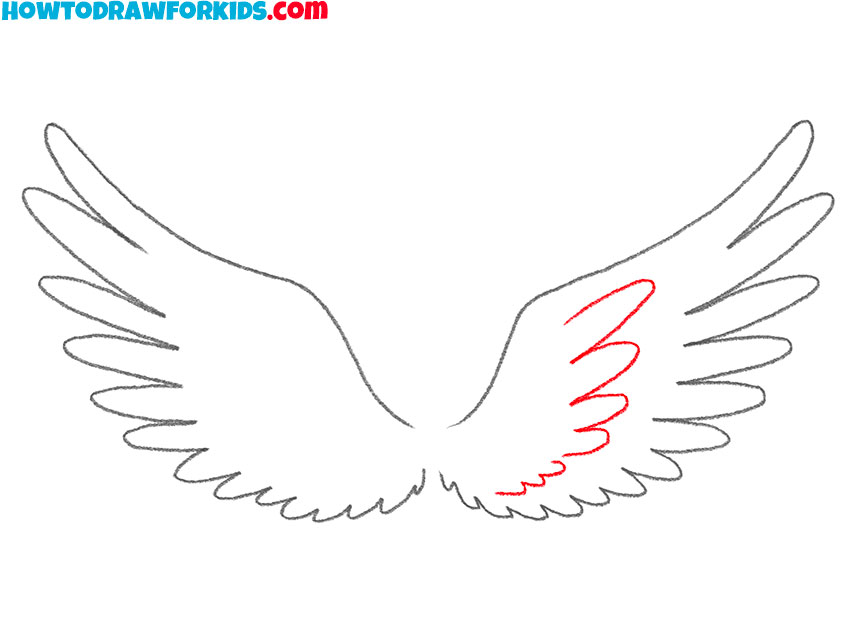
- Start drawing the inside of the wing on the right.
Inside the previously drawn outline of the wing, add some arcs and curved lines.
- Start drawing the inside of the left wing.
Now you need to add some arcs and curved lines of different lengths to the left side.

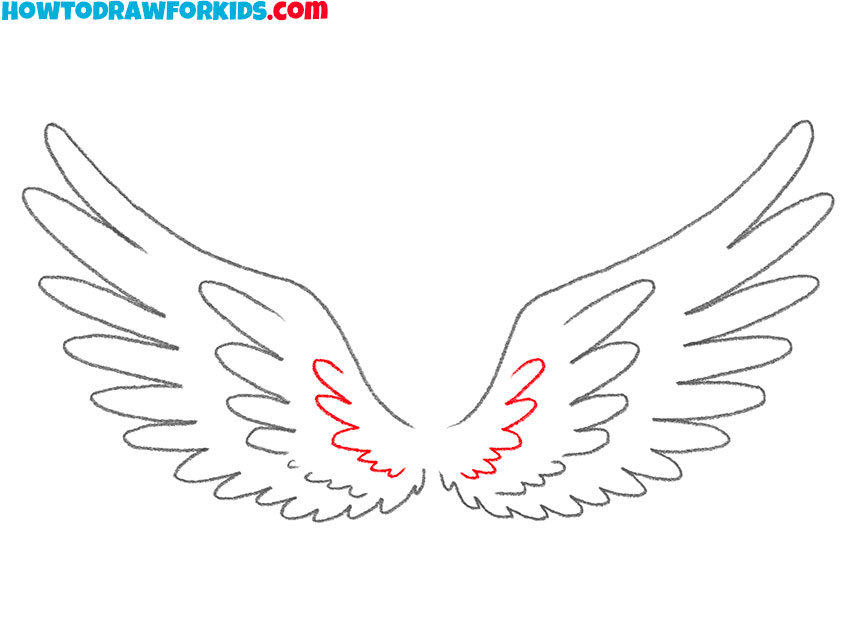
- Finish drawing the feathered wings.
Inside both wings, add arcs and curved lines of varying lengths, as shown.
- Color the drawing.
To color the wings with feathers, use a light gray color.
Additional Content
To enhance your learning experience, I’ve also prepared a free PDF file that encapsulates this tutorial on how to draw wings. This concise guide is the perfect takeaway from our lesson, allowing you to revisit the key steps anytime, with the convenience of offline access.
Recognizing the importance of practice in the art of drawing, this downloadable PDF serves as your personal sketchbook guide. It distills the essence of our lesson into an easily digestible format, ideal for quick referencing and refreshing your memory on the fundamentals of wing drawing whenever inspiration strikes.
I am pleased to offer this resource at no cost, ensuring that everyone has the opportunity to learn and improve their drawing skills. It’s a token of my commitment to your artistic development, and I hope it encourages you to continue practicing and perfecting the art of drawing wings, wherever you may be.
Alternative Drawing Techniques
In this tutorial, I want to show you one of the easiest ways to quickly draw wings .In our alternative drawing techniques, the primary focus will be on experimenting with the form and structure of feathers, allowing for a diverse range of artistic interpretations.
As you practice these varied methods, you’ll observe how subtle changes in feather form can dramatically affect the overall impression of the wings. Each stroke is an opportunity to express movement and character, making your artwork come alive. Through these exercises, your ability to capture the diversity of wings will flourish.
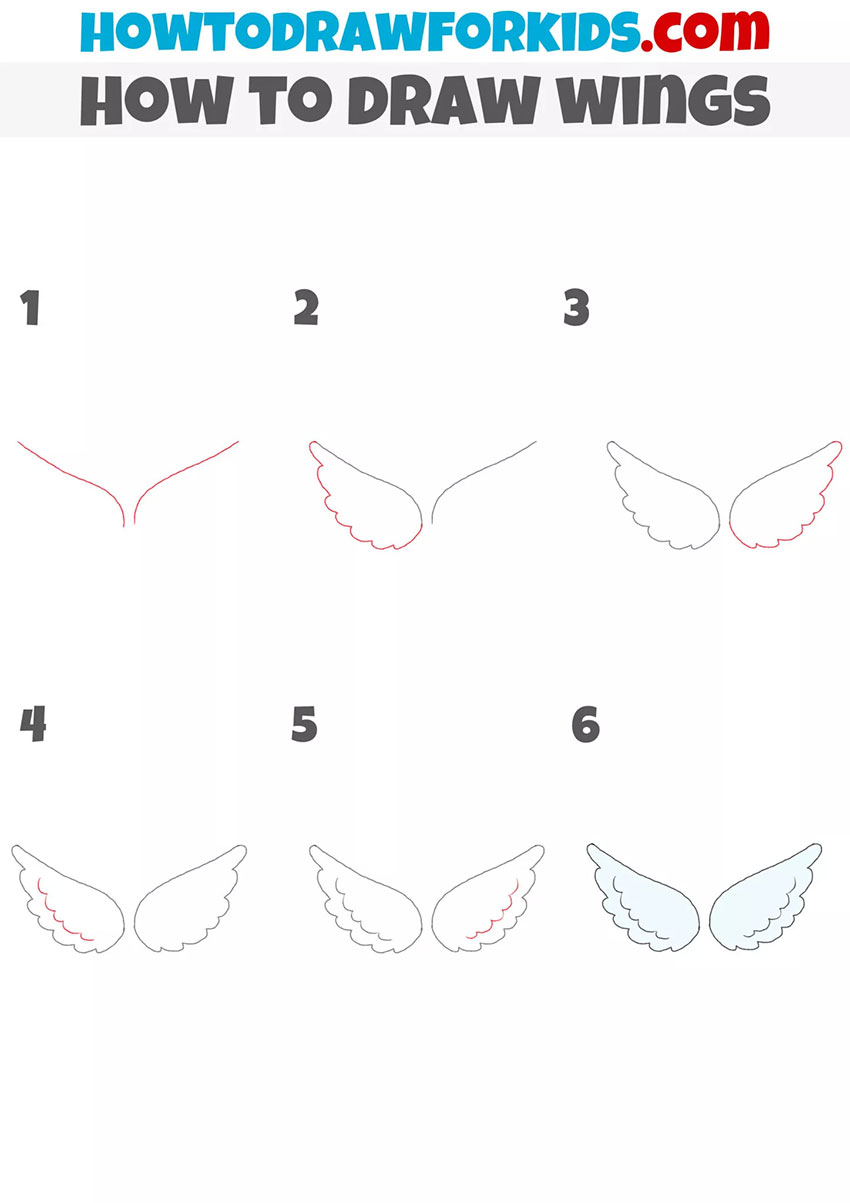
Wings Drawing Tutorial: More Practice
This drawing method unfolds in a series of steps that build upon each other, starting with the basic curvature that forms the wing’s base. In the first step, we sketch the subtle arc that serves as the foundation for the wings, ensuring that the initial lines suggest both movement and grace.
As we progress, the focus shifts to adding individual feathers, each one cascading from the primary curve with attention to detail and flow. The feathers are layered in a way that mimics the natural arrangement on a wing, starting from the larger primary feathers to the smaller, more delicate secondary feathers.
In the final stages of the method, the wings take on a full form with the addition of finer feather details. The careful spacing and sizing of the feathers create a lifelike pair of wings ready to flap and soar. This method is designed to be simple yet effective, allowing artists to capture the essence of bird wings with ease.
How to Draw Wings: Changing the Shape of Feathers
Continuing to experiment with the shapes of wing feathers, this method simplifies the complexity into a more approachable form. We start with a gentle arc, ensuring that each feather naturally extends from this curve. It’s about capturing the essence of flight in each line, allowing the wings to unfold with grace on the page.
With each feather, the focus is on how its shape contributes to the overall silhouette of the wing. Shorter feathers near the top graduate to longer ones at the bottom, creating a rhythm in the wing structure. This gradual change mimics the way feathers layer in nature, providing a realistic portrayal with a straightforward approach.
The final touches involve refining the feathers, adding texture and detail that bring the wings to life. With each feather, we infuse the wings with realism, capturing the essence of flight. This method, while simple, allows for a rich portrayal of wings, providing a solid foundation for more complex and detailed wing drawings in the future.

Wings Drawing Lesson for Kindergarten
Embracing the wonders of simplicity, this method of drawing wings is intentionally designed with the youngest of artists in mind. The process begins with a gentle arc, the foundation for our wings, requiring minimal detail and allowing for the natural, free expression that comes so easily to children.
Next, we add just a hint of feathering, drawing soft scallops to suggest the edges of feathers without overwhelming with detail. It’s a dance between suggesting form and leaving space for imagination, perfect for little hands still mastering the coordination of drawing.
In the concluding steps, the wings gain a touch of completion as we add just a few more curves to indicate individual feathers. With each addition the wings begin to take shape, ready to flutter off the page. It’s a testament to how a few simple lines can capture the essence of something as intricate as wings.
Conclusion
With our wings now fully drawn, I encourage you to continue your artistic exploration with the diverse tutorials available on my website. Whether you’re intrigued by the sturdy charm of a cowboy boot or the soft allure of a blooming cherry branch, there’s a lesson waiting for you.
To ensure you’re always in the loop with the latest creative lessons, be sure to follow me on social media. And if there’s something specific you’d like to draw next, let me know in the comments section below. Your suggestions are the seeds from which our next artistic explorations will grow.