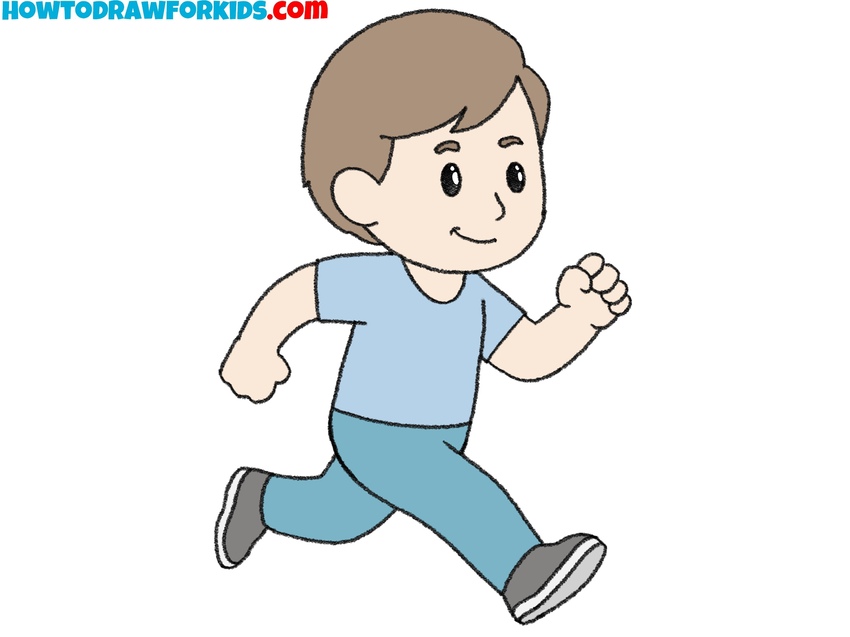
How to Draw a Person From the Back
This lesson will teach you how to draw a person from the back and once again help you improve your skills in drawing the human figure.

How to Draw a Person: Introduction
This lesson serves as a supplement to the main person drawing tutorial, focusing specifically on the process of drawing a figure from the back in as much detail as possible. While the core tutorial covers the basic structure and proportions of the human body, this additional lesson allows us to shift attention to a different viewpoint without overwhelming the original guide.
As with many other supplementary lessons that build on foundational topics, I chose to keep this tutorial on how to draw a person from the back as a separate tutorial. This approach makes it possible to carefully learn the main aspects, without overloading the main tutorial or burdening the student with too much information all at once.
In this tutorial, we’ll go into full detail on how to create a full-body back view of a person. You’ll also learn the key differences between drawing a person from the back versus from the front, as explained in the main tutorial.
Person from the Back Drawing Tutorial
Materials
- Pencil
- Paper
- Eraser
- Coloring supplies
Time needed: 40 minutes
How to Draw a Person from the Back
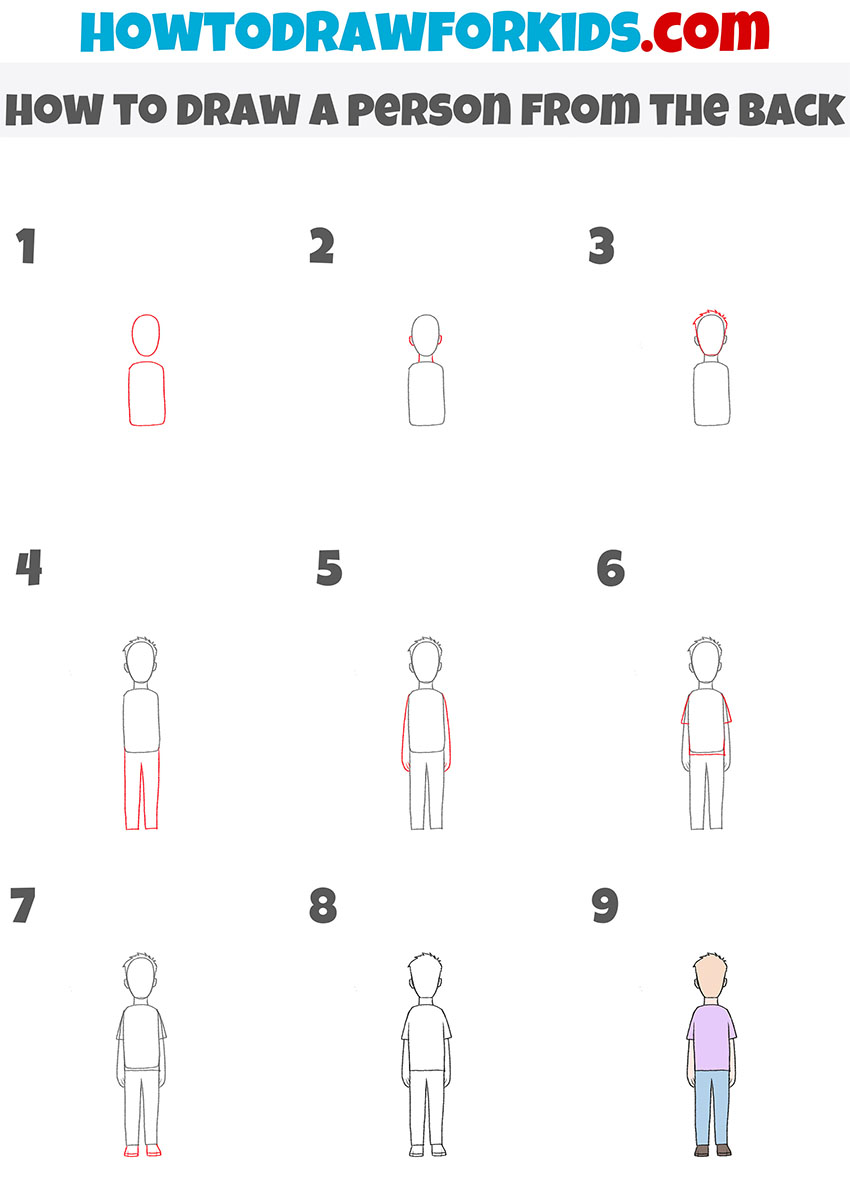
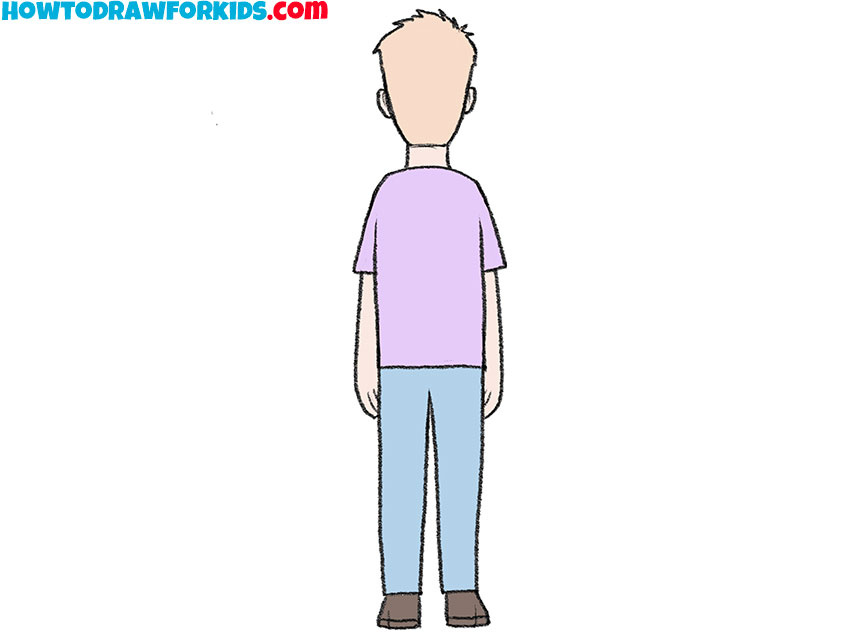
- Draw the head and torso from behind.
First, sketch an oval for the back of the head. Below the head, draw a slightly wider rectangular shape with rounded corners to represent the torso. This step in the tutorial on how to draw a person from the back is not much different from drawing a person from the front. The main differences will come later.
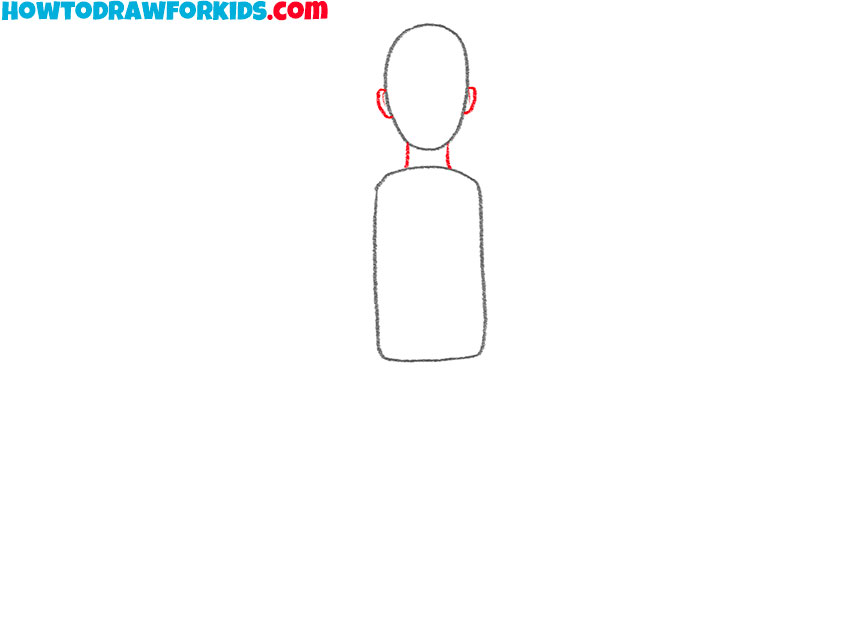
- Add the ears and neck.
Next, draw the ears on both sides of the head as small half circles. Then connect the head to the torso with two short vertical lines for the neck. Compared to the front-facing version, the ears appear much simpler. Be sure to center the neck the shoulders.
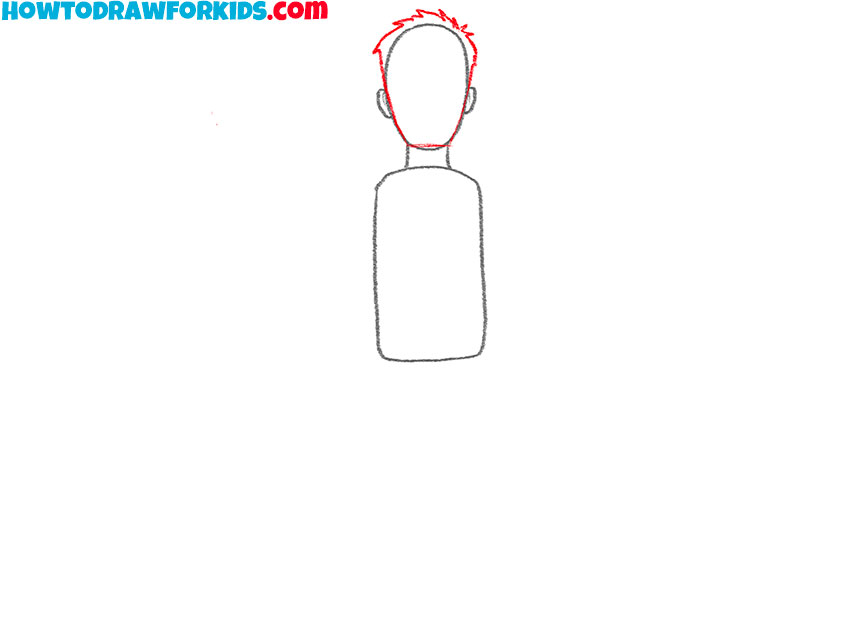
- Draw the hairstyle from behind.
Use short jagged or curved strokes to shape the back of the hairstyle. In the front-view tutorial, the hair wraps around the face, but here it only outlines the top and back of the head. You won’t see bangs or facial hair from this angle. Keep the shape symmetrical to make the figure look realistic from behind.
- Sketch the back view of the legs.
Begin the lower half of the body by drawing two vertical shapes for the legs, starting from the bottom of the torso. Unlike in the basic person drawing tutorial, you don’t need to include side pockets or a front zipper. However, you can add back pockets to give the drawing a more realistic appearance.

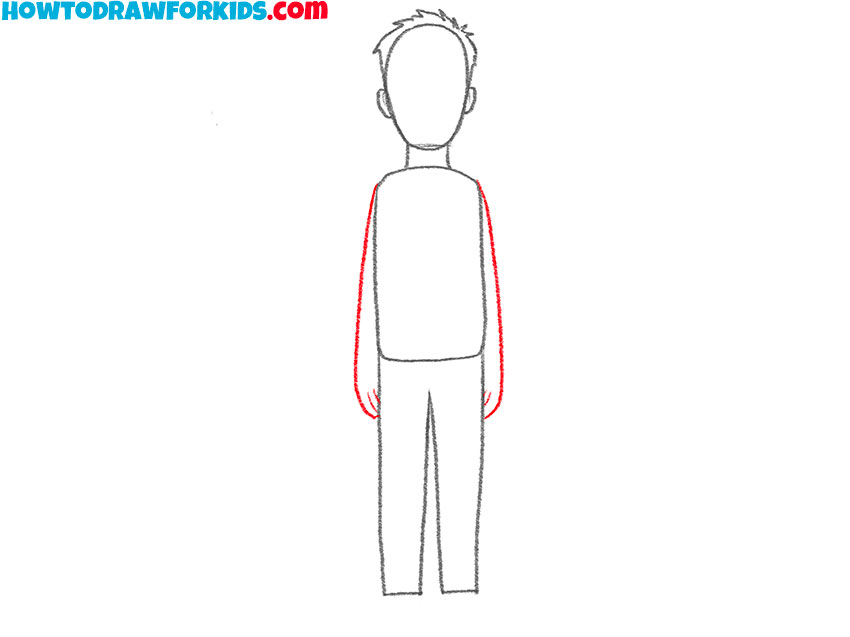
- Sketch the arms along the sides.
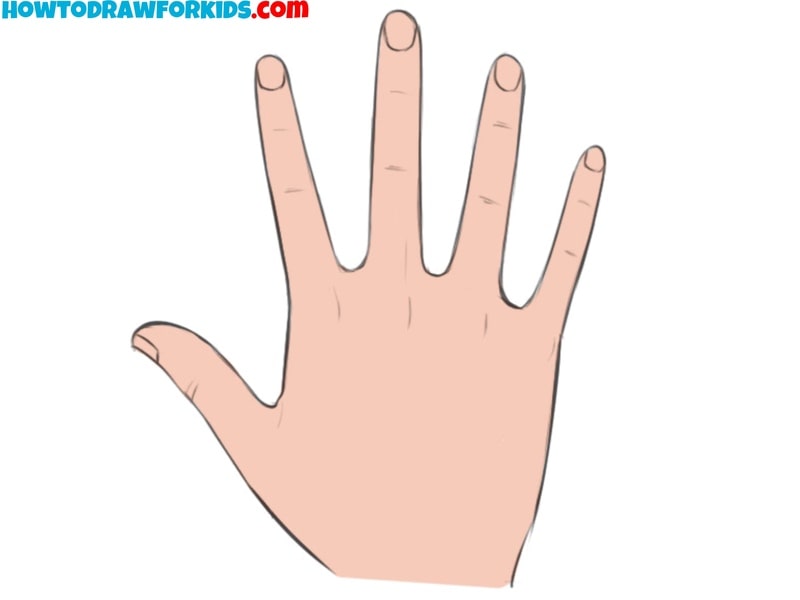
Draw both arms extending downward along the sides of the body. Since the character is standing straight, the arms should appear as two simple, slightly curved lines. Unlike the front view, where the thumbs may be clearly visible, here you only need to draw the outlines of the arms, with just the little fingers defined.
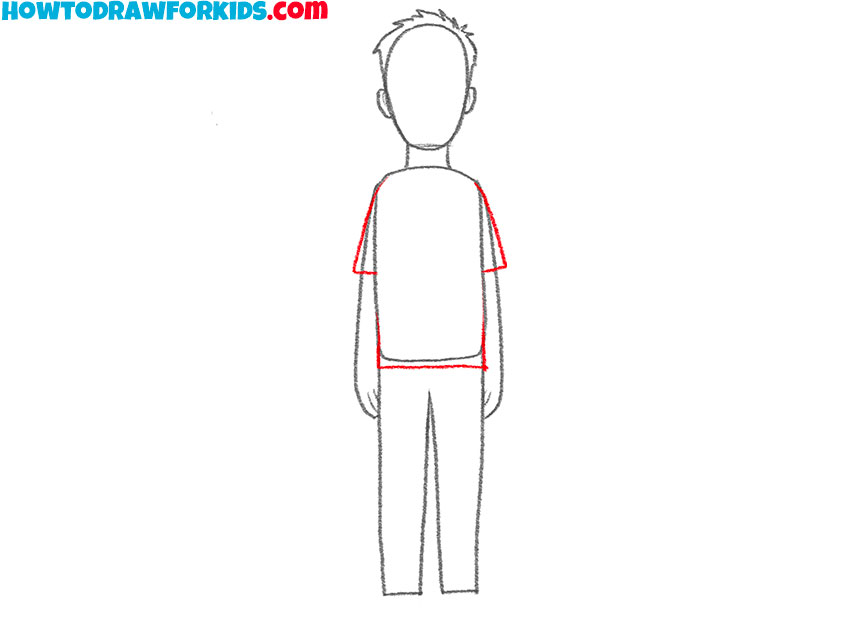
- Sketch the shirt.
To show the shirt sleeves, add short diagonal shapes from the shoulders. These sleeves help define the clothing without adding unnecessary details. From the back, you don’t see shirt buttons, collars, or chest features like you would in the front-view person tutorial.
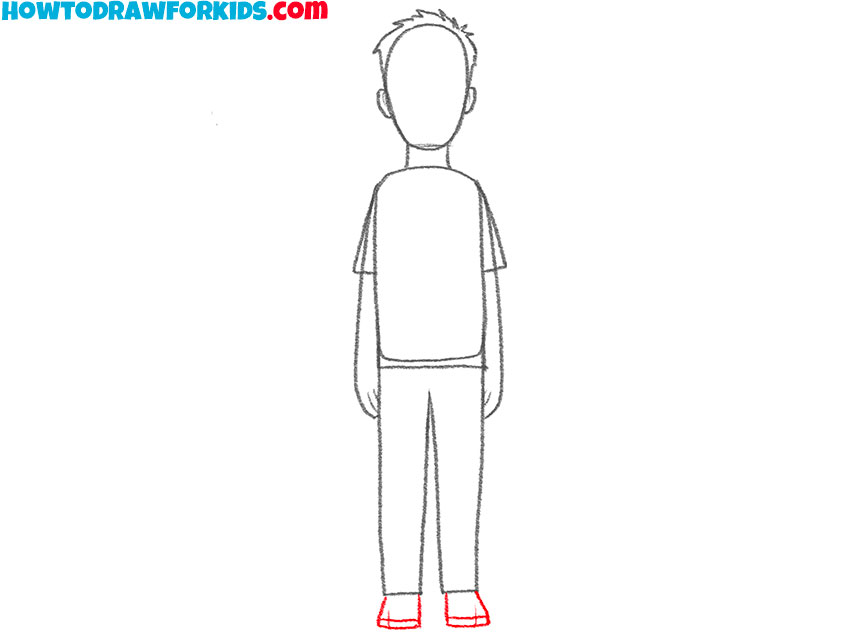
- Add the back parts of the shoes.
Draw small horizontal shapes at the base of each pant leg to represent simple shoes. Keep the shoe shapes flat and simple to match the perspective of the back view. Make sure both shoes are the same size. You can also add short lines at the bottom of each shoe to illustrate the soles.
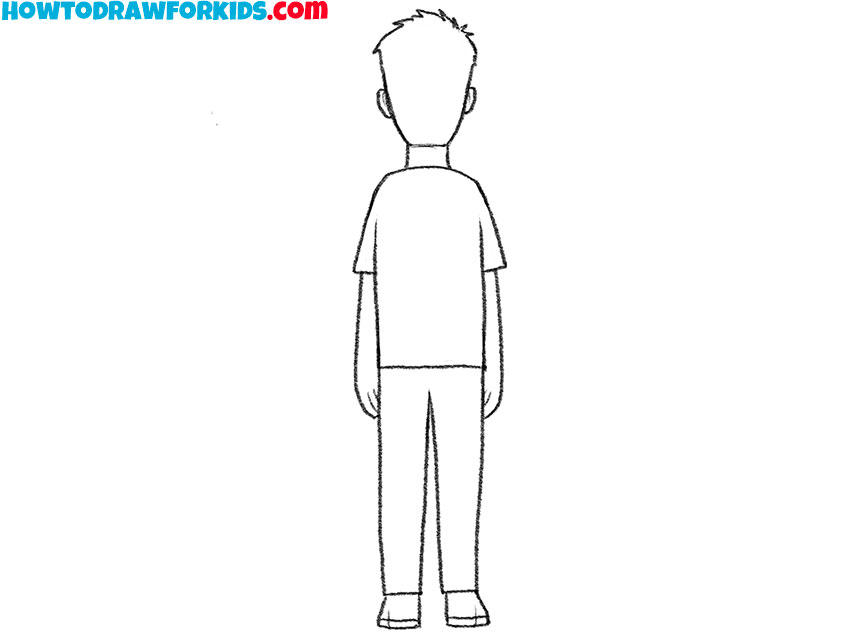
- Clean up the full back silhouette.
Carefully trace all parts of the figure using a darker pencil or pen. Erase any unnecessary sketch lines or overlapping parts that are no longer needed. This step helps unify the person drawing and gives it a finished appearance before the last step – coloring.
- Color the person from behind.
Use any skin tone for the neck and ears, and choose a hair color that matches your style. For the shirt, choose a bright or neutral color like purple, blue, or green, and match the pants with a simple tone such as blue or gray. Because this is a back view, you don’t need to worry about facial tones or front clothing details.
Additional Content
Download the PDF file I’ve prepared especially for your convenience. Inside, you’ll find a brief set of instructions and additional practice materials.
Conclusion
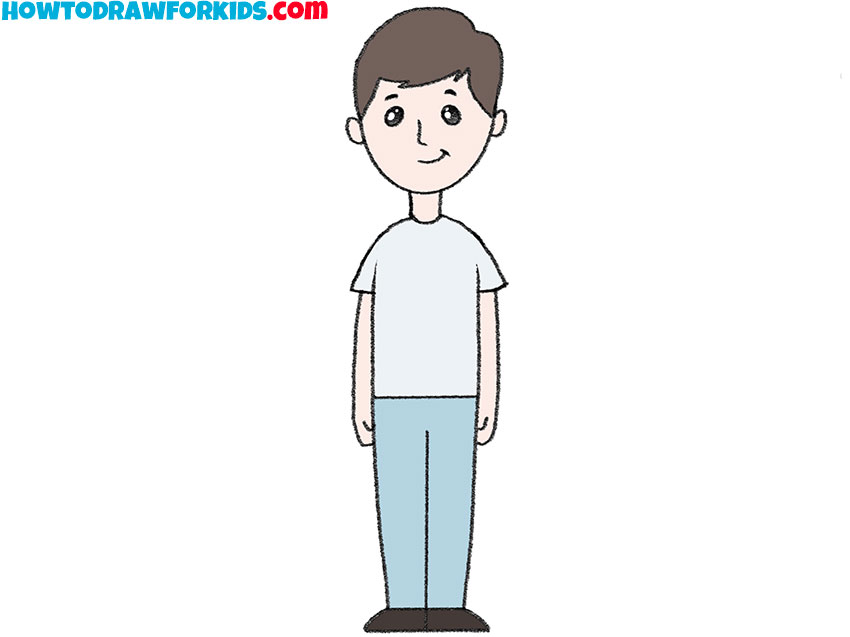
Today, we learned two different ways to draw a person from the back, expanding our understanding of how to draw the human figure from various angles and building on the basic knowledge of how to draw a person from the front. This helps develop a more complete view of human proportions and poses.
Be sure to let me know how helpful and interesting this tutorial on drawing a person from the back was for you. Also, let me know if you’ve already studied the main person drawing lesson. If not, I highly recommend doing so, as this back-view tutorial is intended as a supplement. It builds on the foundation of the main lesson and offers a different perspective in a detailed and careful format.
I also strongly encourage you to check out my other tutorials in the “People” section, where you’ll find a wide variety of drawing lessons. There, you can explore how to draw people in different professions, poses, and styles, all designed to help you grow your drawing skills step by step.

A sincere thanks! 💛