How to Draw a Rose Bouquet
The rose is one of the most beautiful flowers on our planet, and this lesson I will show you how to draw a rose bouquet step by step.

How to Draw a Rose Bouquet: Introduction
Roses come in many different varieties, with a vast number of species, shapes, and overall variations you might encounter. The diversity increases even further when these roses are arranged into completely different bouquets, each with its own unique composition and style.
In this lesson, I will show you how to draw a rose bouquet in a way that makes it instantly recognizable. To achieve this, I use two different methods, each with its own characteristics, level of difficulty, and final appearance.
As you learn how to draw a rose bouquet, you can add your own unique details, adjust the placement of the blooms, increase or decrease the number of flowers, or modify the shape and color of the necessary elements. Alternatively, you can follow the lesson exactly as I demonstrate to create a bouquet of roses just as shown.
If you have already completed the lesson on how to draw a rose, you may find this tutorial even easier, as it builds upon those foundational techniques.
Rose Bouquet Drawing Tutorial
Materials
- Pencil
- Paper
- Eraser
- Coloring supplies
Time needed: 40 minutes
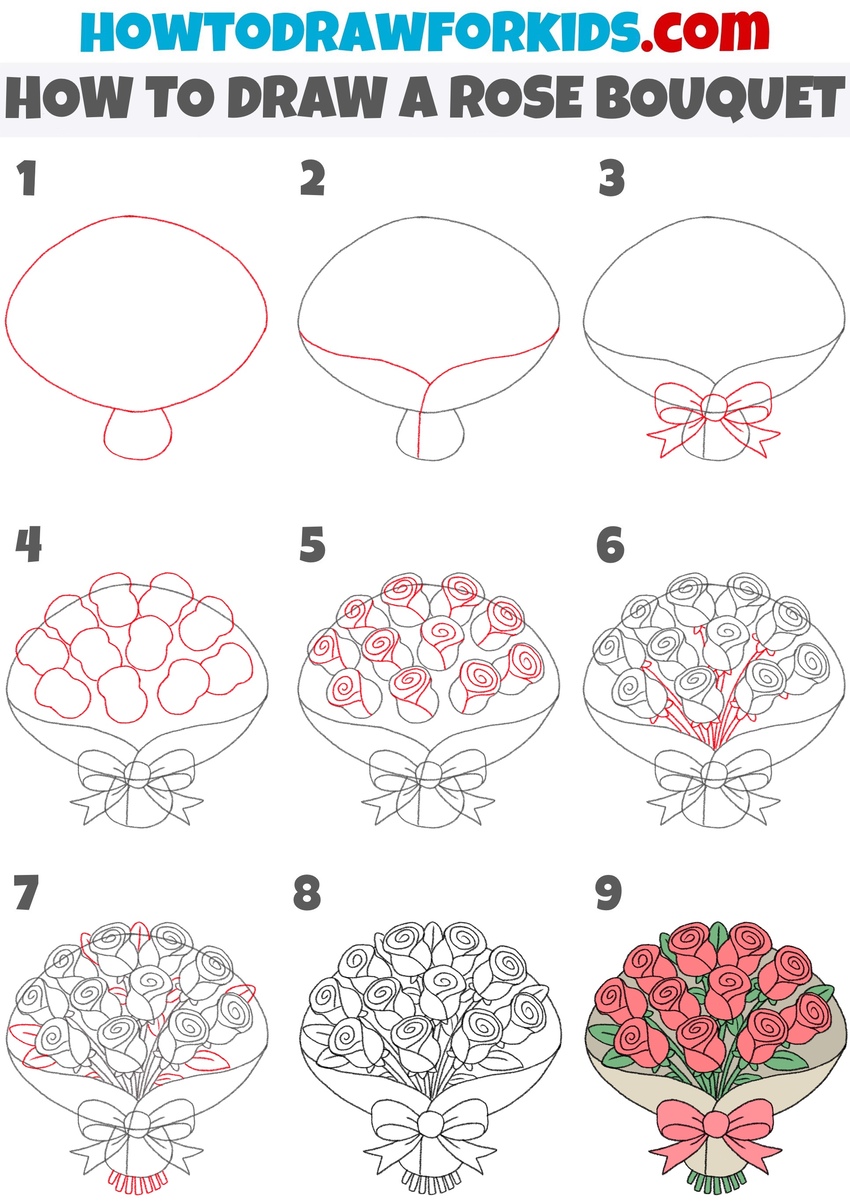
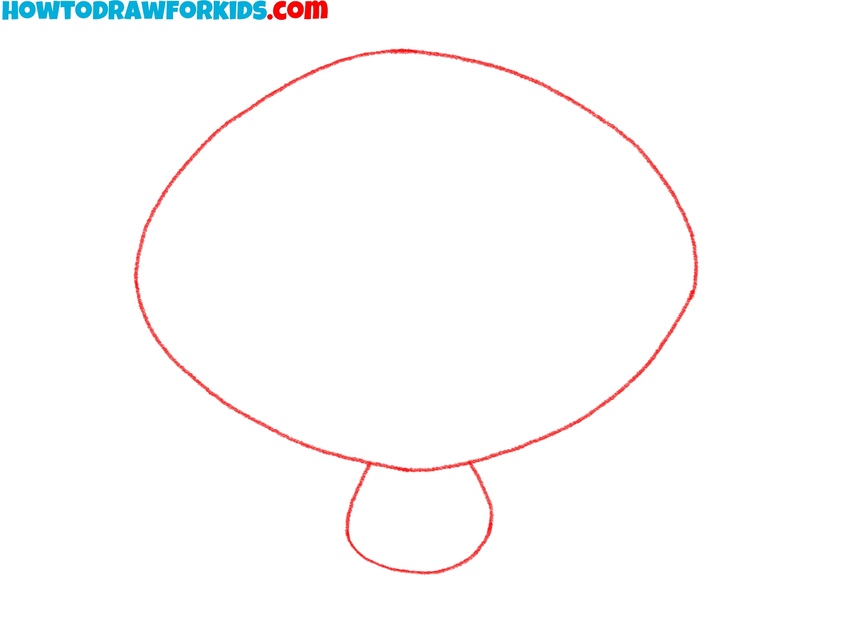
How to Draw a Rose Bouquet
- Draw the outline of the wrapping.
Draw a large, rounded shape for the wrap of the flowers, keeping the edges slightly uneven to create a natural look. Below this, add a small oval-like shape for the handle, which will represent the base of the bouquet where the stems are gathered.
- Detail the rose bouquet’s wrapping.
Now, add some definition to the bouquet’s wrapping. Draw a curved line across the middle of the large shape to indicate the top edge of the wrapping. Be sure to keep these lines smooth, but don’t try to make them perfectly symmetrical.

- Draw a bow around the bouquet.
To make the bouquet look more polished and decorative, draw a large bow tied around the handle. Start by sketching the central knot of the bow, which should be an oval or rounded shape. Then, add two symmetrical loops on either side of the knot. Extend two ribbon ends downward from the knot.

- Sketch the general placement of the roses.
Now, begin filling in the upper part of the bouquet with basic shapes for the roses. Instead of drawing detailed flowers immediately, sketch multiple rounded blobs to represent the general placement of the roses. These should be loosely packed together, with slight variations in size and shape.

- Add details to the roses.
Now that the placement of the roses is defined, refine each one by adding spiral-shaped centers to represent the petals. Start in the middle of each flower and draw a small spiraling curve. The spirals should be simple but varied, giving the flowers a realistic look.

- Draw the stems and sepals.
To make the bouquet look more realistic, add the stems connecting the roses to the handle. Draw thin, slightly curved lines extending from the base of each rose toward the center of the bouquet. These lines should meet at the handle, creating the illusion that the flowers are bound together.

- Add leafs and ends of the stems.
Detail the bouquet by adding extra leafs and small details around the roses. You can also add a few small sepals or petals sticking out from the sides to make the bouquet appear even more realistic. Then, draw the bottom ends of the stems below the angle of the rose bouquet.

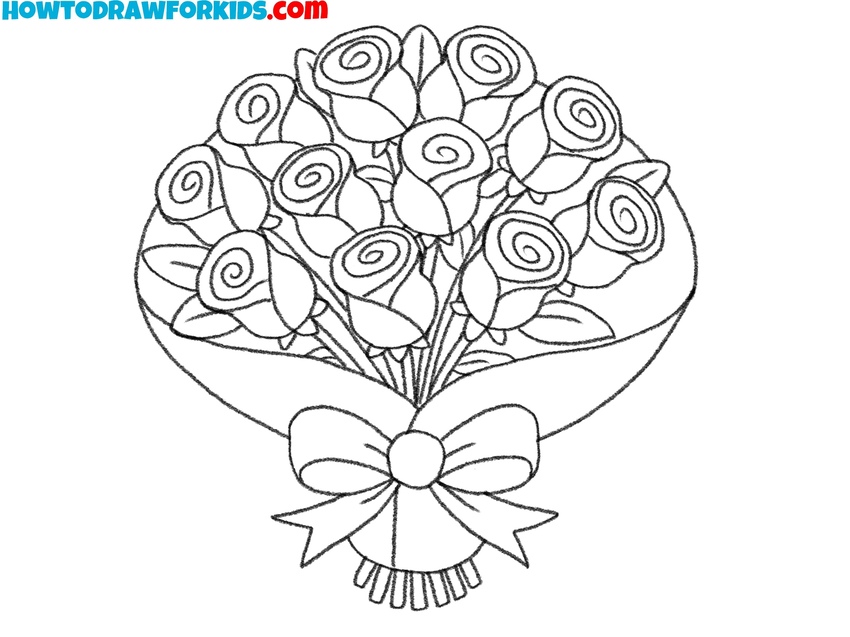
- Add some finishing touches.
Darken the main outlines of your rose bouquet drawing to make it more polished. Ensure all elements, including the flowers, stems, wrapping, and bow, are clearly outlined. If needed, adjust any proportions or shapes to make the rose bouquet drawing look finished.
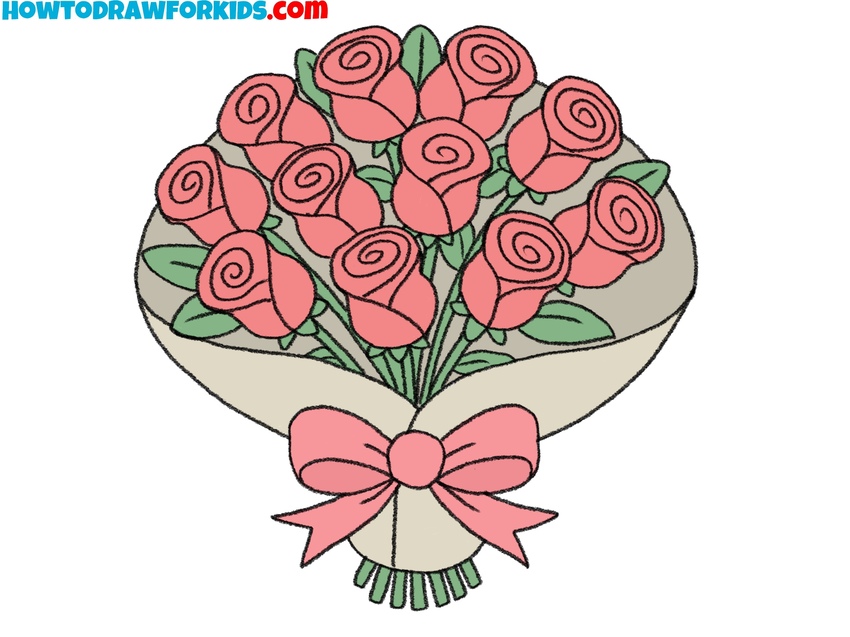
- Add color to the rose bouquet.
Use a rich red or pink for the roses. Shade the leaves and stems with different shades of green, keeping them slightly darker near the base. Color the bouquet wrapping in a light beige or brown tone to resemble paper, and shade the bow with a complementary pink or red hue.
Simple Rose Bouquet Drawing Tutorial
This method shows more simplified and stylized approach to drawing a rose bouquet. Compared to the first tutorial, this version features fewer intricate details, a more compact bouquet shape, and a straightforward arrangement of roses. The roses are drawn using minimal lines, and the bouquet’s wrapping is simplified.
To learn how to draw a simple rose bouquet, sketch a cloud-like shape to form the base of the bouquet where the roses will be placed. Extend two curved lines downward from the sides to create the bouquet wrapping, slightly flaring at the bottom. Add pointed leaves sticking out from the sides of the bouquet to give it a more natural look. Begin drawing roses by sketching simple spiral shapes with a few surrounding petal curves. Continue adding more roses in different sizes.
Draw additional leaves to fill in gaps and adjust the composition. Refine the bouquet wrapping by adding subtle folds and a ribbon tied around the lower part. Outline the drawing with smooth, clean lines and erase unnecessary guidelines. Finally, add color to complete the rose bouquet, using shades of red and pink for the roses, green for the leaves, and a light beige for the wrapping. You can leave it it as in my example, or add some additional elements, for example, draw a vase and place the bouquet inside it.

Conclusion
Today, we learned in detail how to draw a rose bouquet in the simplest way using two completely different and exciting lessons. I’m very curious to know how you did with this task, so be sure to let me know in the comments on this article.
I’m also interested in seeing how your rose drawing turned out, so don’t hesitate to share your artwork with me. You can do this by, for example, posting your drawing on my Pinterest account. In the comments under the pin, you’ll also see how other artists completed the task.
Of course, don’t forget to follow me on Pinterest. There, you’ll find a huge variety of images, illustrations, collages, and other types of content that I regularly publish.
Additionally, following me on Pinterest allows you to stay up to date with all the latest updates from my website. If you want to keep track of my video content, which I also post regularly, make sure to check for updates there as well.