How to Draw a Sea Otter
This animal is easy to recognize by its appearance and typical resting pose, which we will study in this guide on how to draw an sea otter.
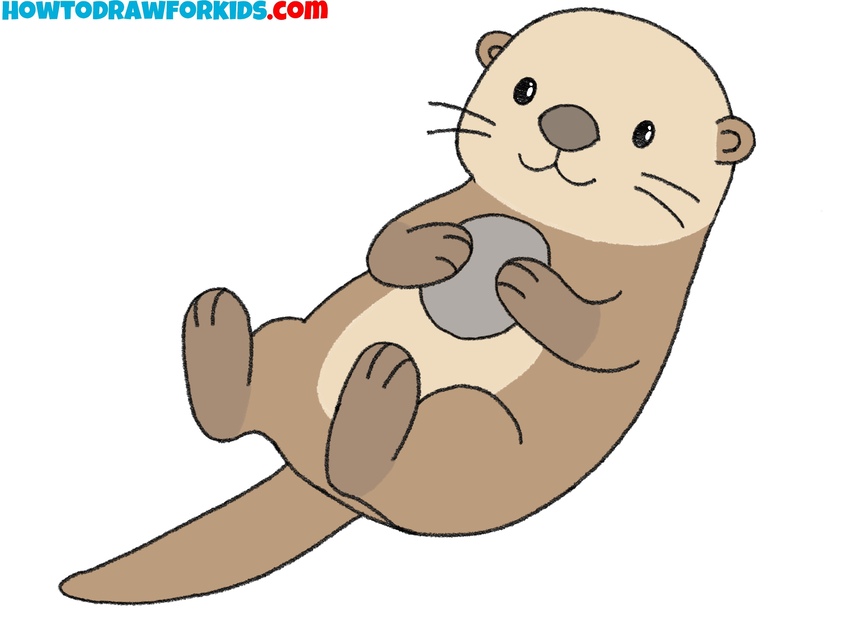

In this lesson, you will learn how to draw a sea otter. It is a predatory marine mammal. The otter spends time both on land and in water. This animal looks very funny.
The otter has a cute face, the head is lighter, and the rest of the body is dark. The paws are short, on the hind legs there are webs between the fingers, so the paws are very similar to flippers. The fur is very thick, which allows the otter to stay in cold weather conditions for a long time.
Otters are friendly animals, and can safely let other animals and people near them. The number of sea otters is small, so hunting for these animals is prohibited.
Now you have learned a few facts about these amazing animals, and I hope you will be interested in drawing a sea otter yourself. It is very easy to do this.
The lesson is designed in such a way that any child or the aspiring artist will quickly repeat all the drawing steps. Each step uses simple lines and no complex elements.
Materials
- Pencil
- Paper
- Eraser
- Coloring supplies
Time needed: 25 minutes
How to Draw a Sea Otter
- Sketch the simple oval head.
To begin, draw the sea otter’s head with a very simple oval shape. Keep it slightly wider than a perfect circle and define the cheek with a small bump. Otters have very smooth shapes, so don’t use straight lines.

- Add the eyes, nose, and mouth.
With the head shape ready, start giving the otter some details by adding facial features. First, draw two small eyes. Below them, sketch a rounded nose in the center with a couple of short lines to form the mouth. Then place a few whiskers on both sides.

- Draw the otter’s front limbs.
To build the body, begin with the front paws. Sketch two small, curved shapes beneath the head, almost like elongated ovals bent to the center. These will later look like the otter is holding something. You can make the paws closer together or spread them apart.

- Sketch the large rounded body.
Now continue the body and sketch a large oval shape. This oval represents the otter’s torso as it floats. Keep the curve smooth and very simple.The body should expand towards the bottom.

- Draw the otter’s back legs.
Next, sketch the otter’s hind legs extending from the lower part of the torso. Draw two short, rounded shapes with small curves at the ends for the feet. The legs should bend slightly upward, showing the otter floating with its limbs relaxed.

- Sketch the simple tail shape.
Sea otters have long, flat tails that help them swim, so now extend a tapered shape from the lower back of the body. Draw it as a long oval that narrows toward the tip. You can curve the tail slightly to one side, giving the impression of motion in water.

- Define the ears and toes.
Now return to the head and paws to add detail. Sketch small rounded ears on either side of the head. Then refine the front and rear paws by adding small lines to define fingers and toes, and place a simple shape in the otter’s grasp, such as a pebble or shell.

- Remove construction shapes.
At this stage, clean up your drawing by erasing any construction lines. Remove the extra oval outlines around the body, as well as overlapping lines near the head and paws. Smooth out the curves of the body so the outline feels polished and clear. Be careful not to erase important details like the face or whiskers.

- Add natural brown and cream colors.
To finish, add color, painting the body in browns, with a lighter cream for the face and chest. The nose can be dark brown or black, and the stone in its paws gray.

Bonus: Easy Sea Otter Drawing Tutorial
To draw this version of a sea otter, sketch an oval shape for the head and connect it with a curved line that outlines the body. Add two small rounded ears at the top and draw the belly section with a separating line across the middle.
Next, sketch the front paws resting on the body, and then draw the hind flippers with their simple rounded shapes. Place a shell or circular object on the belly. Extend the back with a long, slightly tapered tail.
Add facial details with two round eyes, a small triangular nose, and a short line for the mouth. Once the outline is complete, go over the lines neatly and finish by coloring the head in lighter tones and the limbs and tail in darker shades of brown.


