How to Draw a Semi-Truck
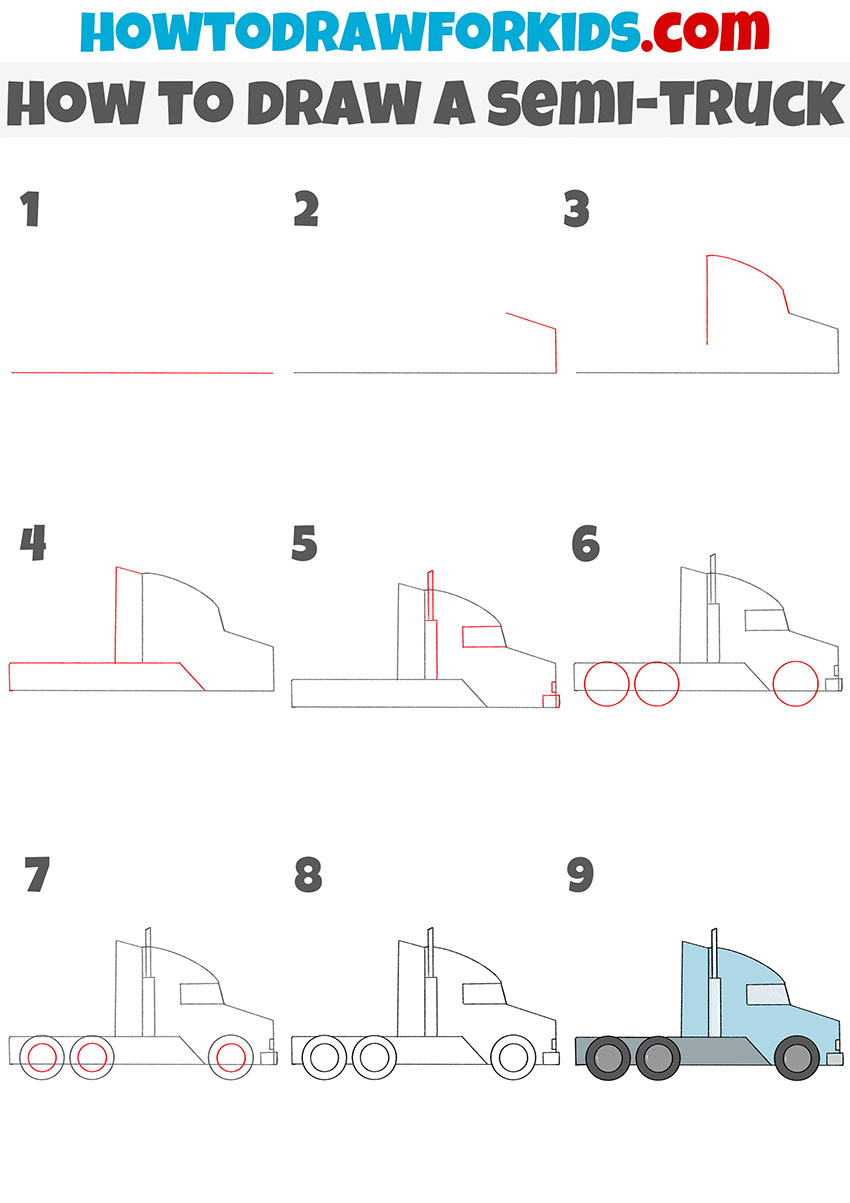
In this tutorial, you will learn how to draw a semi-truck for kids. I promise, in just nine easy steps you will get a great result.
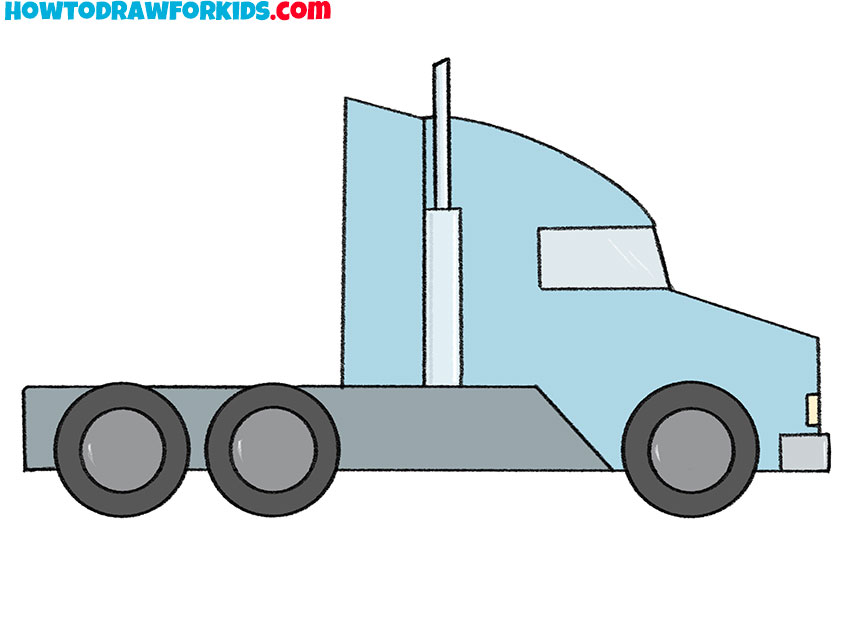
In this lesson, I will show you how to draw a semi-truck. This lesson will be useful for you because here you will train your ability to make even, straight lines.
This step-by-step tutorial shows in detail how to draw a semi-truck. This is a vehicle that is designed to transport various goods on any road.
In the picture, you see the driver’s cab, wide chassis, and powerful wheels. You can attach a cargo part to this car and carry out the transportation of goods over any distance.
Try to make even, straight lines yourself, without using improvised tools. If you complete this task correctly, then in the future you will be able to easily draw more complex objects.
Materials
- Pencil
- Paper
- Eraser
- Coloring supplies
Time needed: 30 minutes
How to Draw a Semi-Truck
- Draw the bottom of the semi-truck body.
This is a simple step in which you must draw a straight horizontal line.

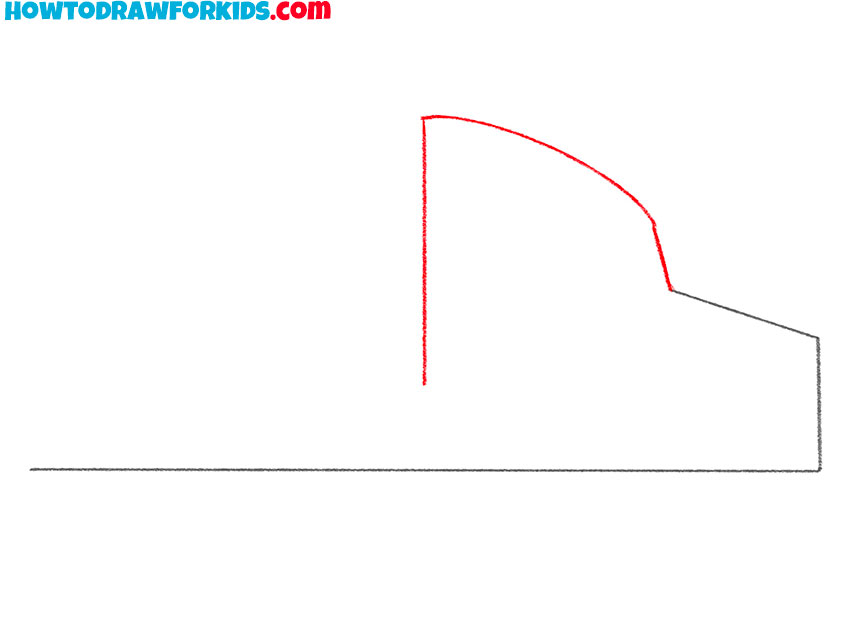
- Depict the front of the semi-truck.
On one side, draw up two straight lines at an angle.

- Sketch out the driver’s cab.
Continue the line and draw the outline of the cabin.
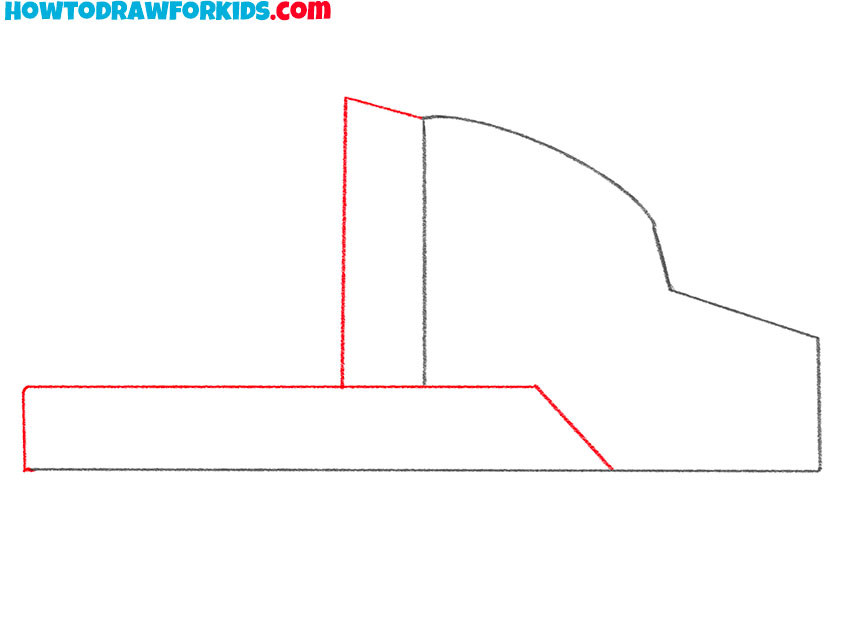
- Add details.
Draw some straight lines to depict the height of the chassis and the rear of the cab.
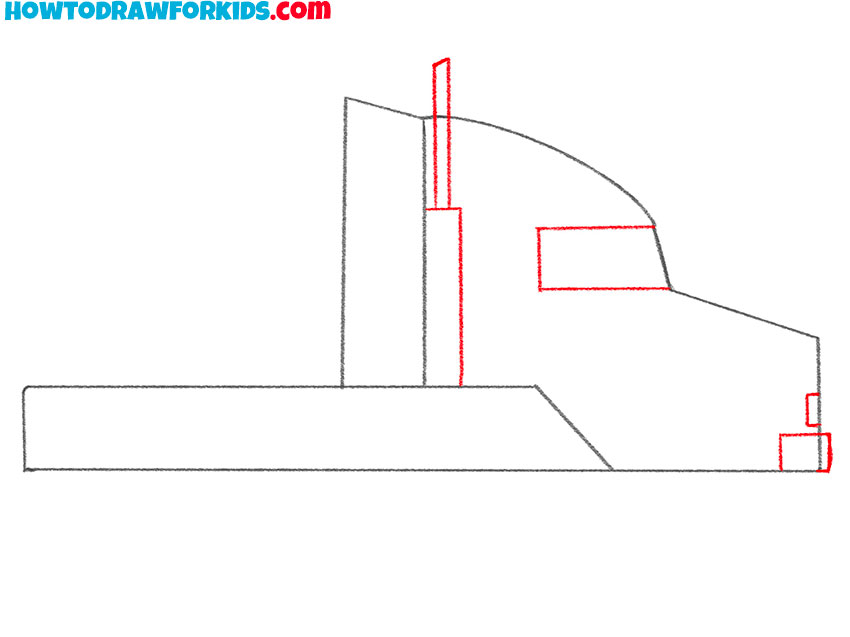
- Add more details.
Use smooth, straight lines to depict the window, headlights, and the tall pipe behind the cab.
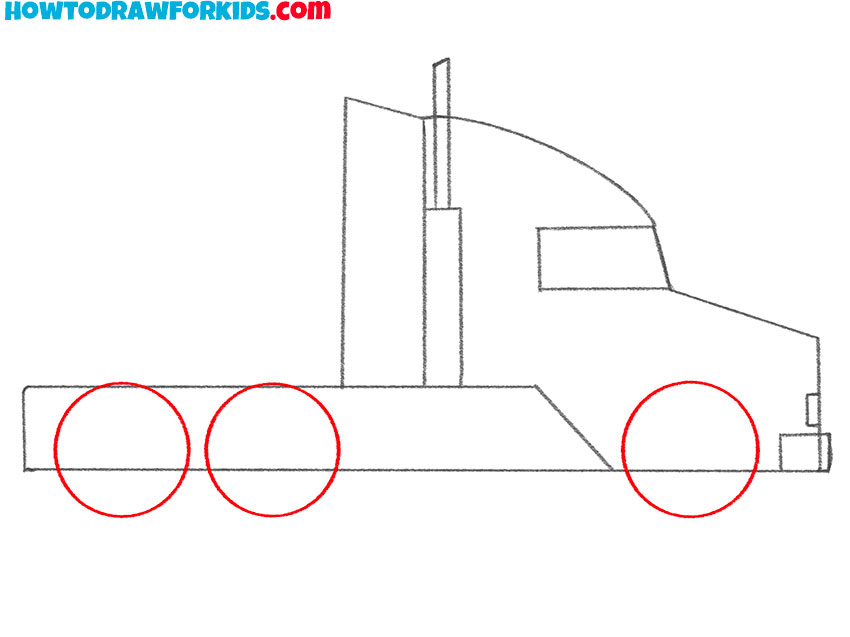
- Sketch out three wheels.
Draw three circles of the same size.
- Add the inside of the wheels.
Depict small circles inside each wheel.
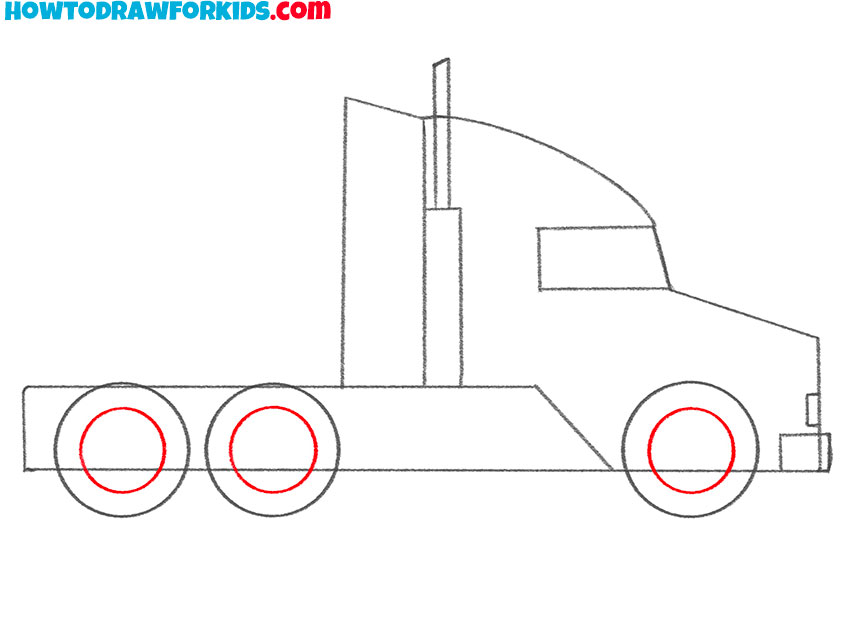
- Correct inaccuracies.
Use the eraser to remove all unnecessary lines.
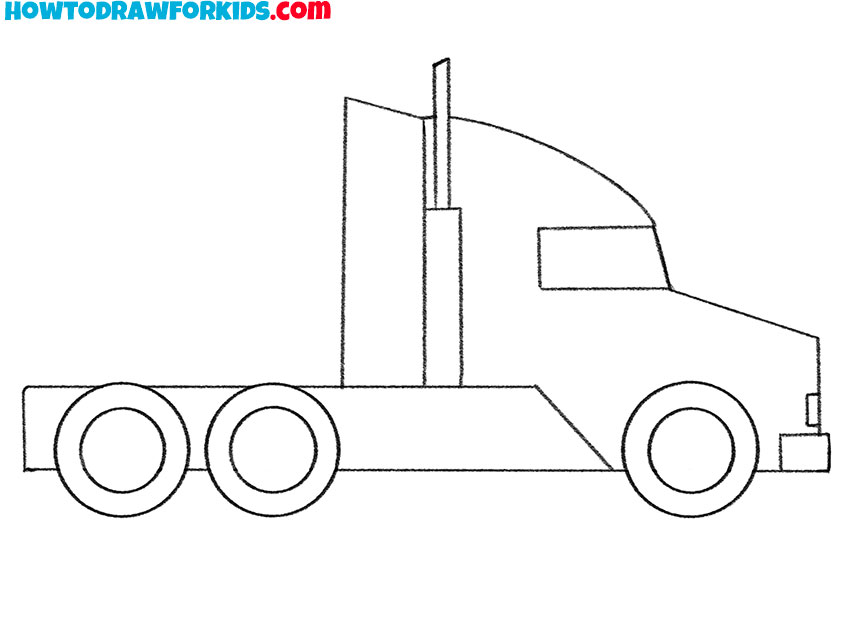
- Color the semi-truck.
You will need shades of blue and gray.

You can now download the short version of the lesson as a free PDF file.

