How to Draw a Penguin
Learn how to draw a penguin with my collection of six different, easy, and cute step-by-step tutorials for kids and beginners.
Prepare to Draw a Penguin
Drawing a penguin, like drawing a bird of another type, is fairly simple because its main features consist of basic shapes.
Still, several details should be considered to give the bird a recognizable appearance. For example, avoid sharp, straight contours when drawing the penguin. Use smooth lines instead.
It is also important to maintain symmetry so the two sides of the face and body look natural. Place the wings and feet at similar heights.
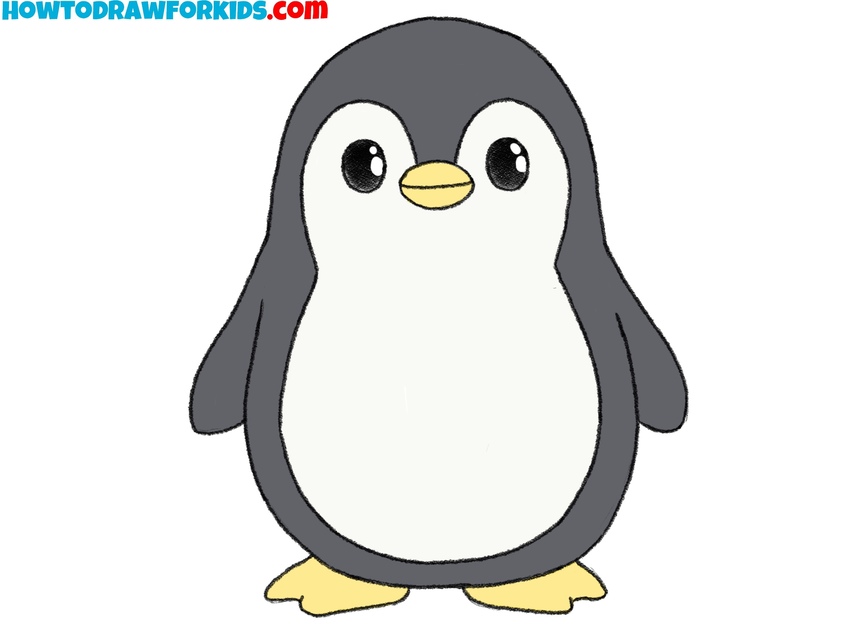
Consider the color palette as well. A penguin is mainly black and white, which gives the bird its familiar tuxedo-like appearance.
Color the beak and feet yellow or orange. This tutorial uses a simple palette, but you can add light shadows to give the penguin drawing more volume.
Step-by-Step Penguin Drawing Tutorial
Materials
- Pencil
- Paper
- Eraser
- Coloring supplies
Time needed: 35 minutes
How to draw a penguin step by step
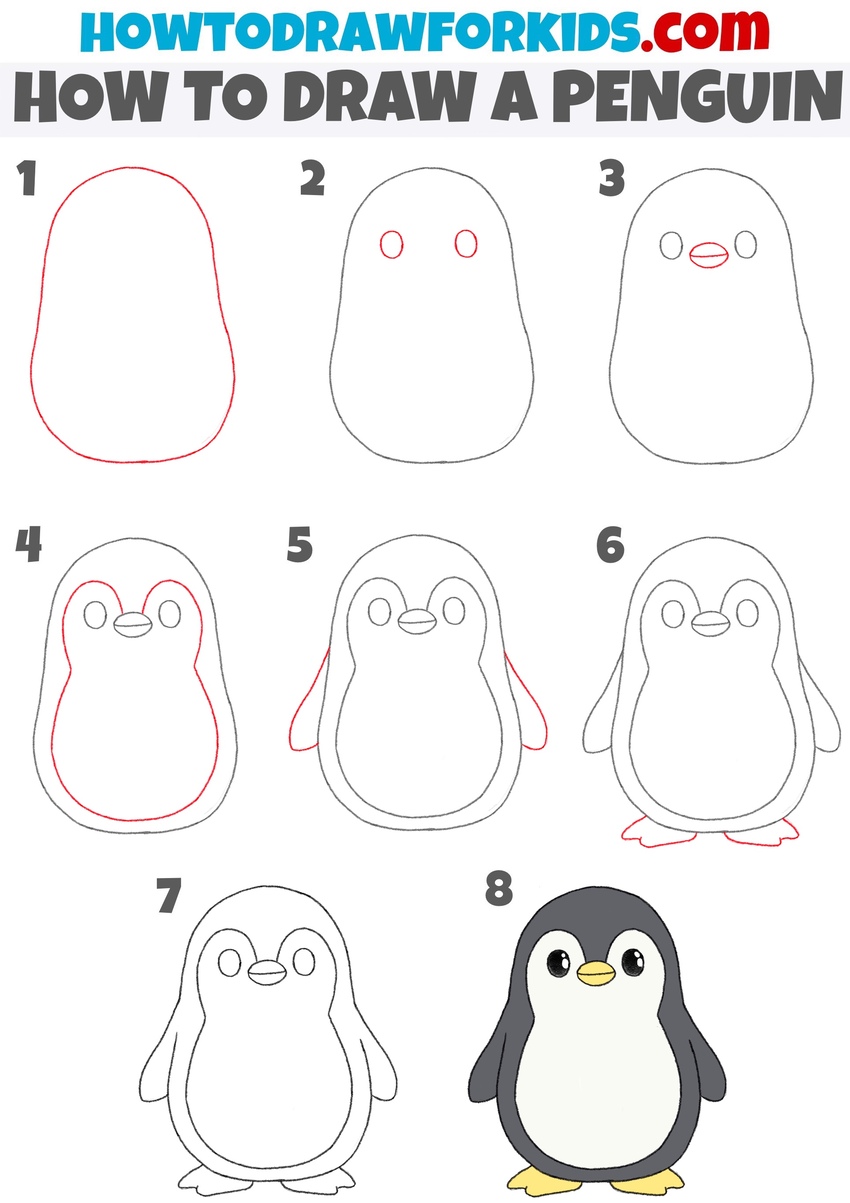
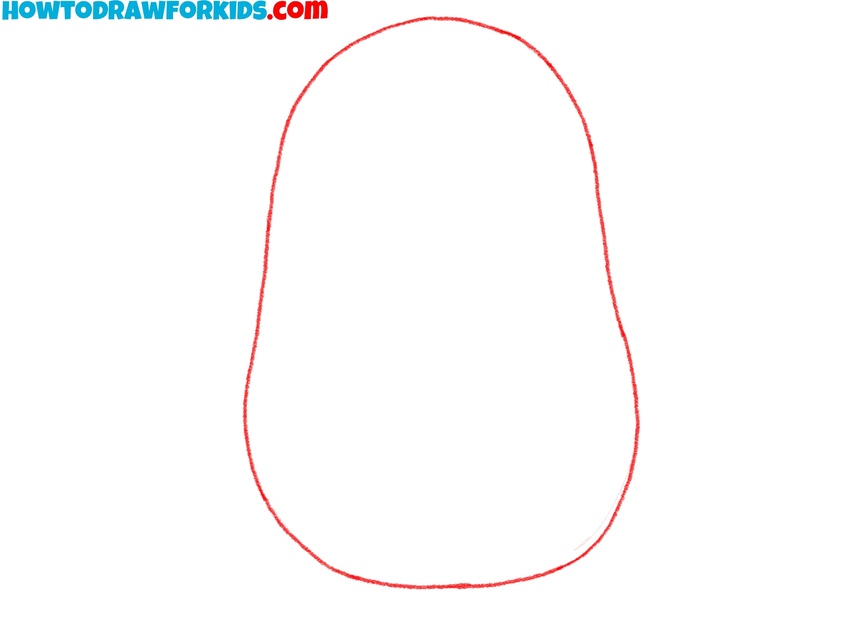
- Sketch the basic outline of the penguin.
Begin with a simple oval-like shape that is slightly wider at the bottom. This will form the outline of the penguin’s body. Keep the pencil lines light so you can adjust them later.
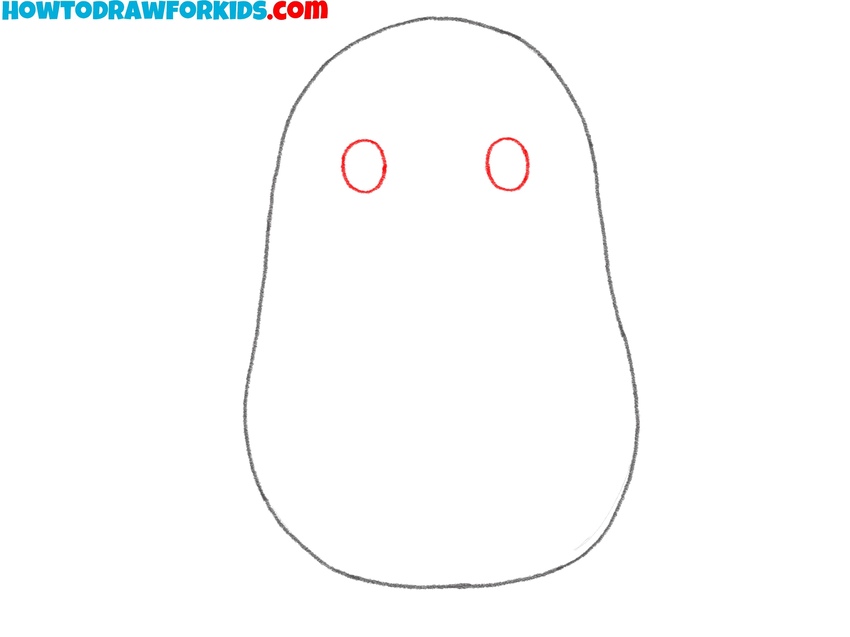
- Sketch the penguin’s eyes.
Next, draw two small vertical ovals near the upper part of the body for the penguin’s eyes. Place them close together and at the same height, leaving space below for the beak.
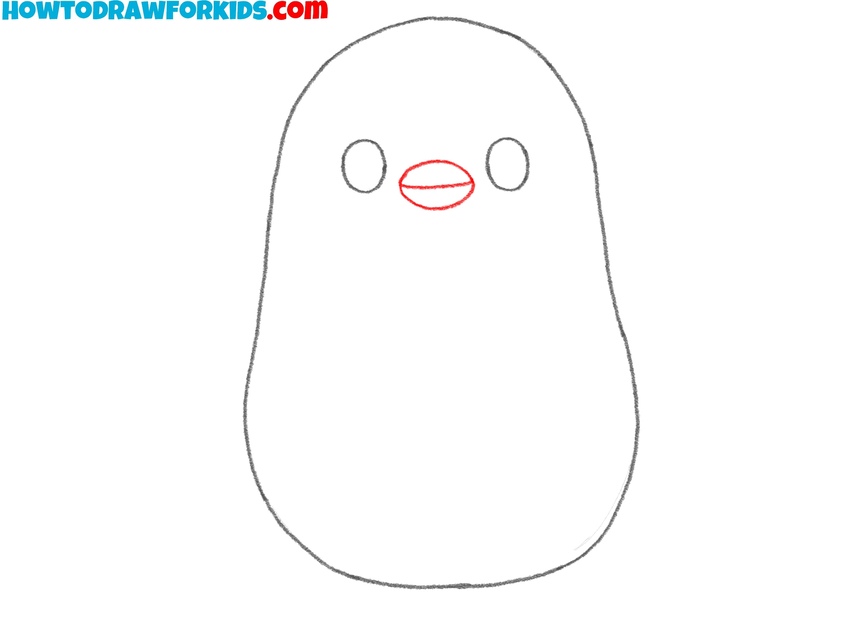
- Add the penguin’s beak.
Draw a small horizontal oval below the eyes for the penguin’s beak. Center it on the face, then add a curved line across the middle to separate the upper and lower parts.
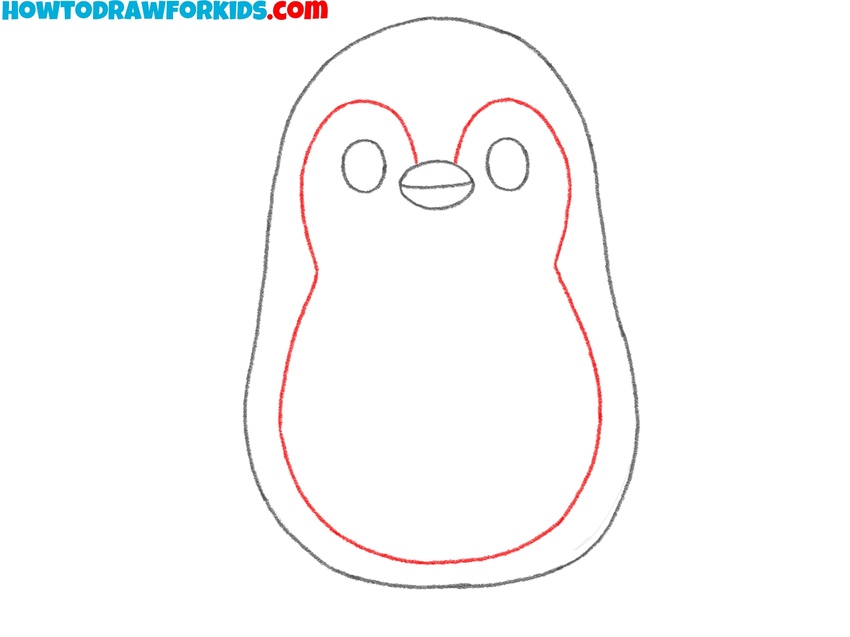
- Outline the penguin’s white face and belly.
Draw a line inside the penguin’s body to mark the white area. Start above the beak, curve the line around the eyes, continue down the sides, and connect the ends near the bottom.
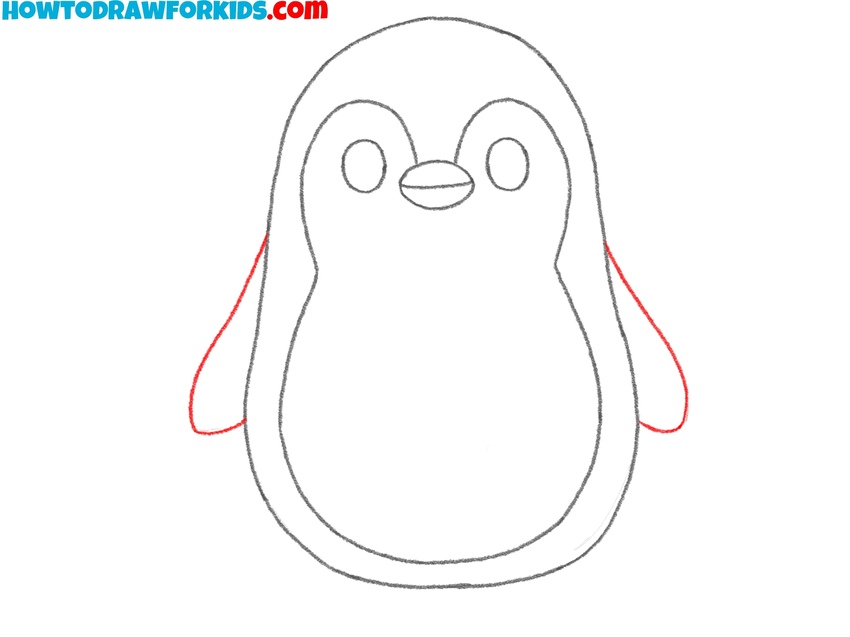
- Sketch the penguin’s wings.
Draw a small wing on each side of the penguin’s body. Curve each flipper-like shape slightly downward and place the wings at about the same height.
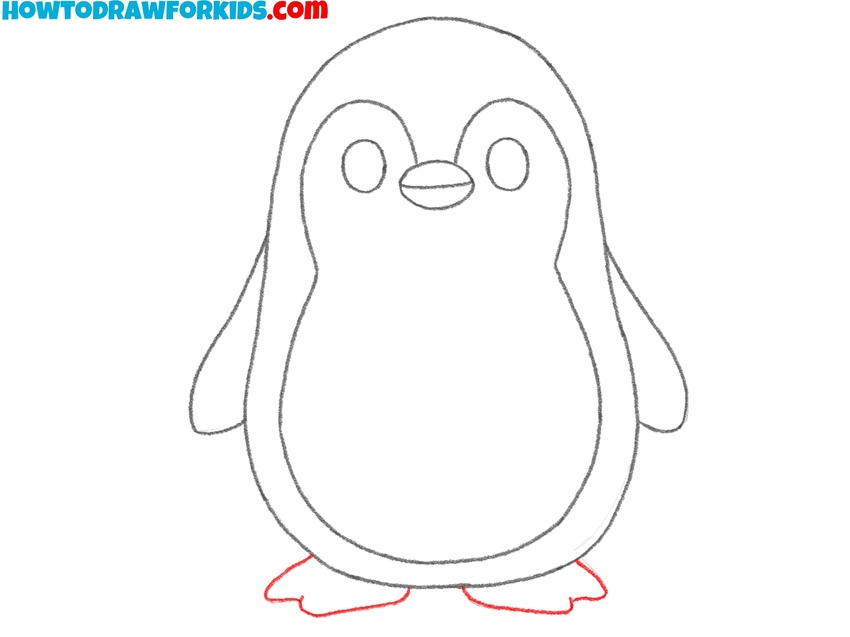
- Draw the penguin’s feet.
Below the penguin’s body, draw two small feet with pointed ends. Place them on opposite sides of the center and keep the shapes similar in size.
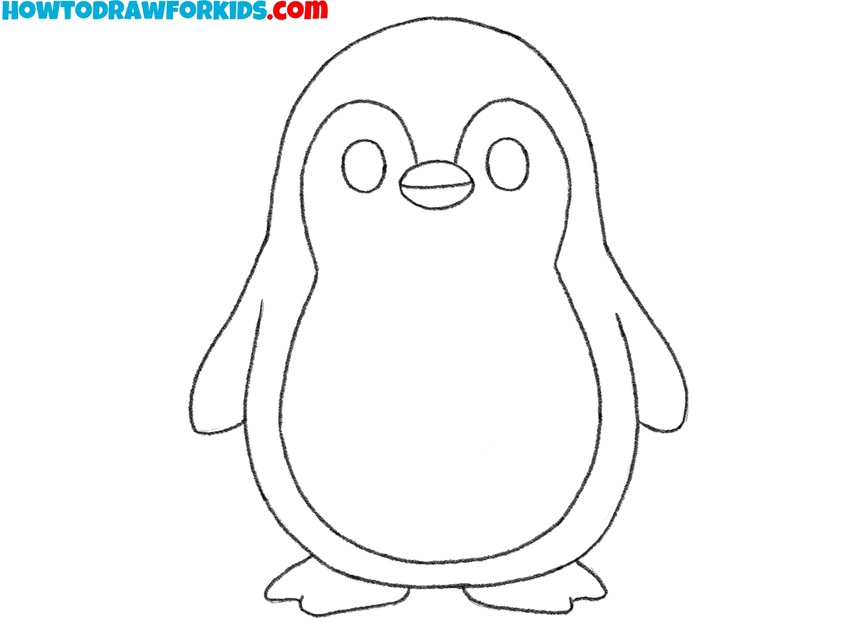
- Erase the guidelines and refine the penguin drawing.
Erase any unnecessary guidelines and smooth the remaining lines. Refine the body outline and clean up the shapes of the belly, wings, beak, and feet before coloring.
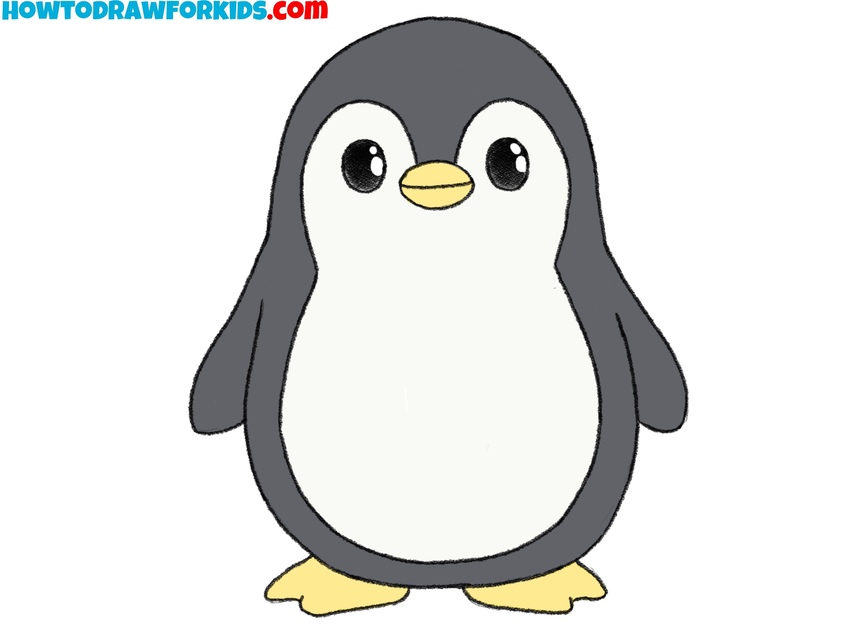
- Color the penguin drawing.
Color the outer part of the penguin black, leaving the face and belly white. Add yellow or orange to the beak and feet, then leave small white highlights inside the eyes.
More Ways to Draw a Penguin
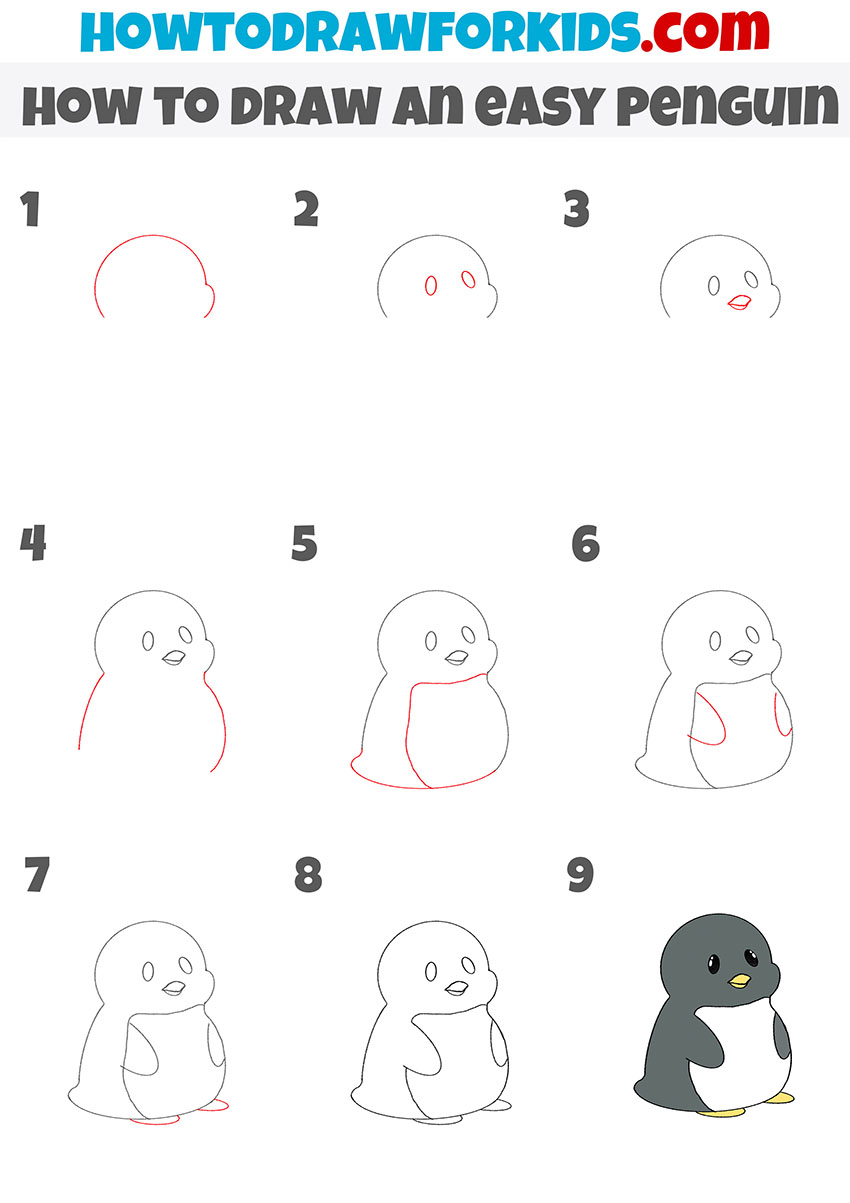
Easy Penguin Tutorial
This first additional tutorial shows a slightly simpler way to draw a penguin. The details are simplified to make the process easier for children and keep the bird recognizable.
Start by sketching the top of the head. Add two small ovals for the eyes and draw a short beak below them. Extend curved lines downward to form the sides of the body, then add the inner belly outline.
Draw a curved wing on each side and place two flat oval feet below the body. Refine the lines, then color the outer area black, leave the belly white, and make the beak and feet yellow.
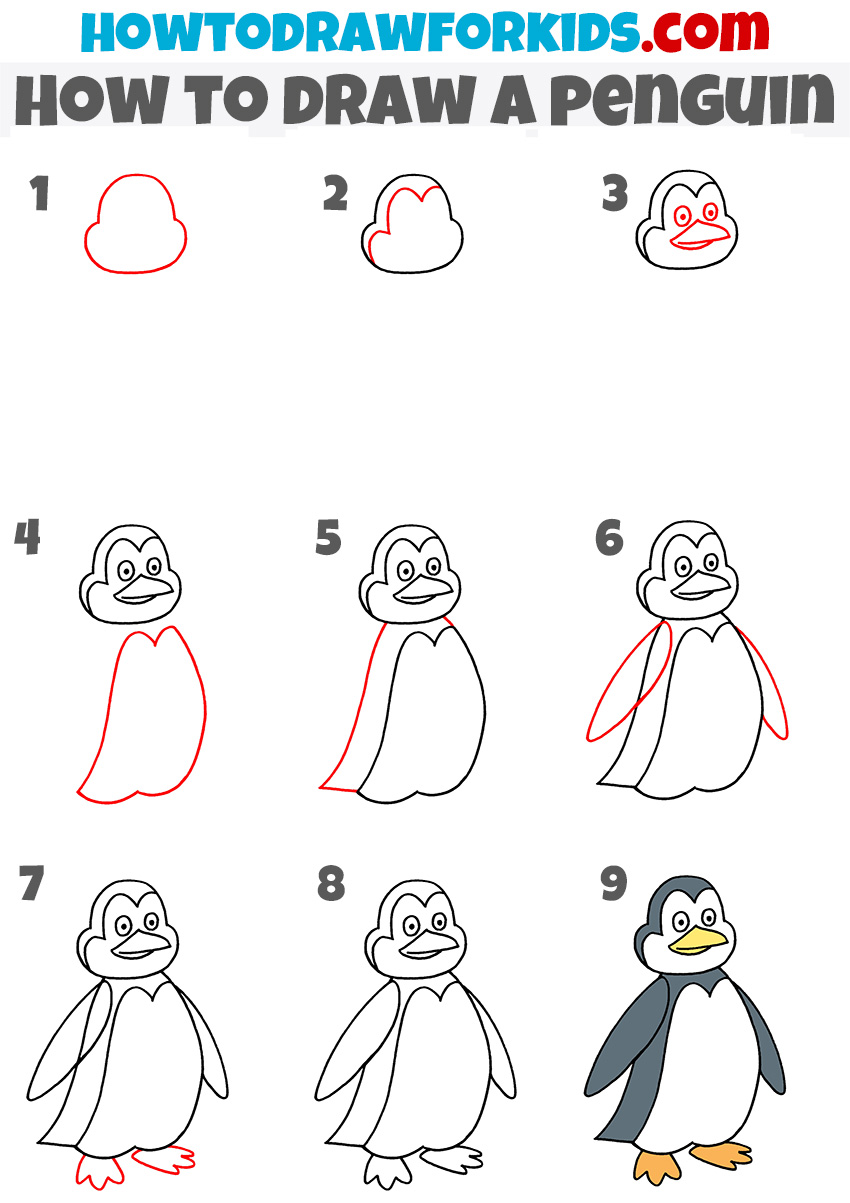
Alternative Penguin Drawing Technique
This next method gives the penguin a taller shape. Start by sketching the head with a curved top and rounded sides. Add a smaller inner outline for the light face area.
Draw two small circles for the eyes and add a beak with a line across its center. Extend the body downward, shape the lower edge around the legs, and draw an elongated wing on each side.
Add two webbed feet with pointed toes. Erase the extra lines, then color the outer body black, leave the belly white, and use yellow for the beak and feet.
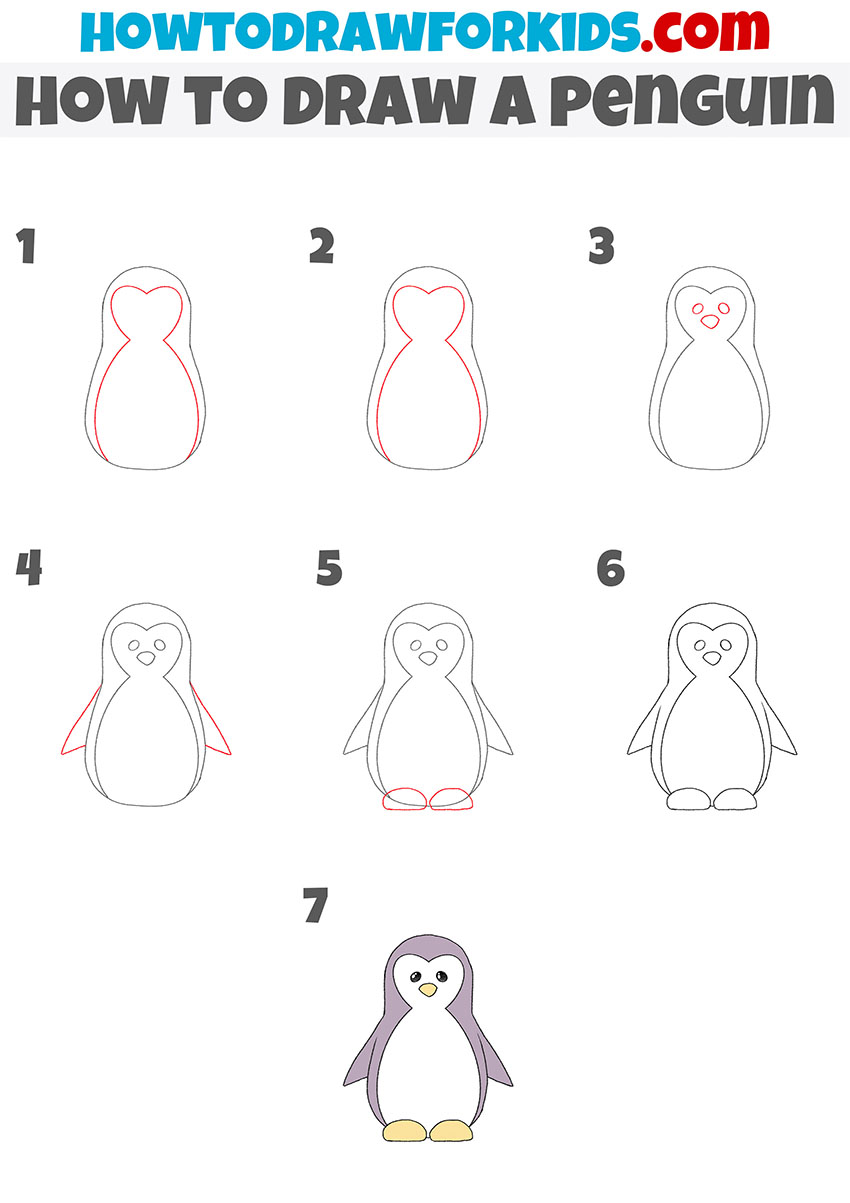
Simple Penguin Tutorial
This version shows the penguin in a simple cartoon style. Its body has one large rounded outline, while the wings and feet use only a few short lines.
Start by sketching a large smooth shape for the penguin’s body. Inside it, draw a curved outline for the face and chest. Add two small circles for the eyes and a small oval below them for the beak.
Draw the wings with angled lines that taper near the ends, then add two small oval feet. Refine the outline and color the outer body dark, leaving the chest white and making the beak and feet yellow or orange.
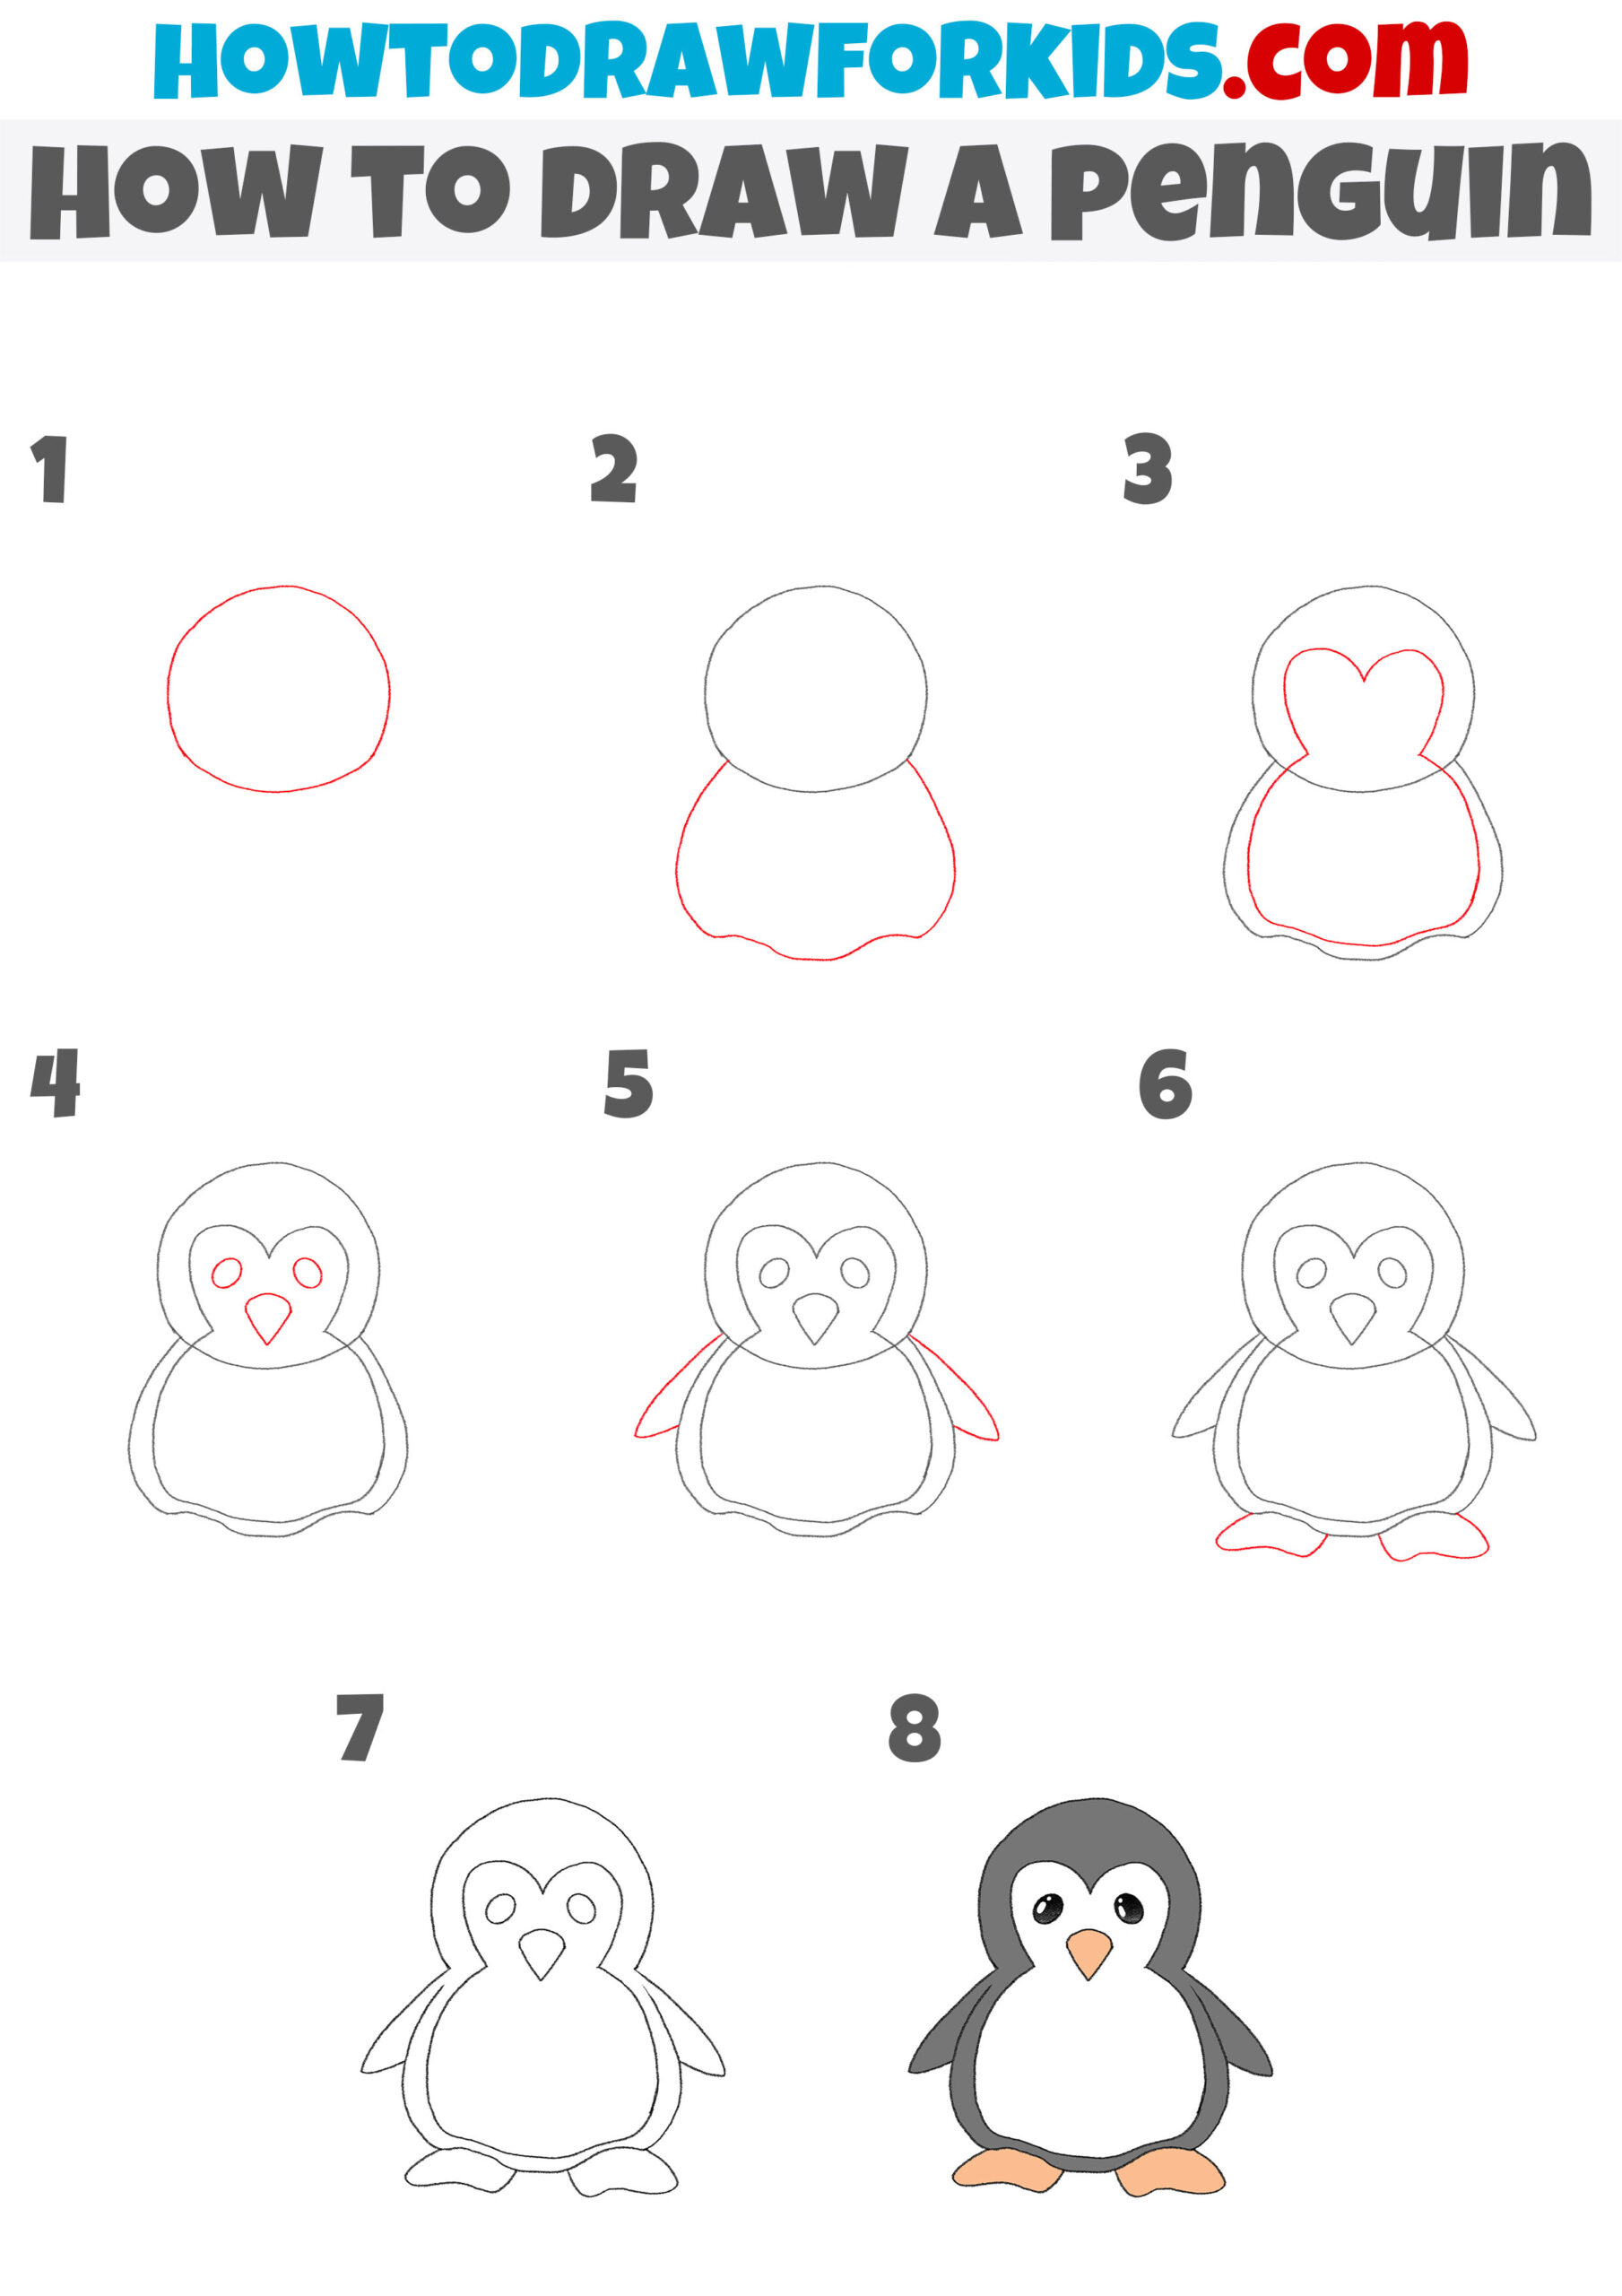
Small Penguin Drawing Tutorial
This method separates the head and body more clearly. Begin by drawing a circle for the head, then add a wider rounded shape underneath with a slightly scalloped lower edge.
Inside the head, draw a heart-shaped outline that connects to the body and marks the light face area. Add two small circular eyes and an upside-down triangle for the beak.
Draw short curved wings at the sides and add two small feet below the body. Refine the lines, then color the outer areas dark while leaving the face and chest white. Make the beak and feet orange.
Penguin Tutorial for Preschoolers
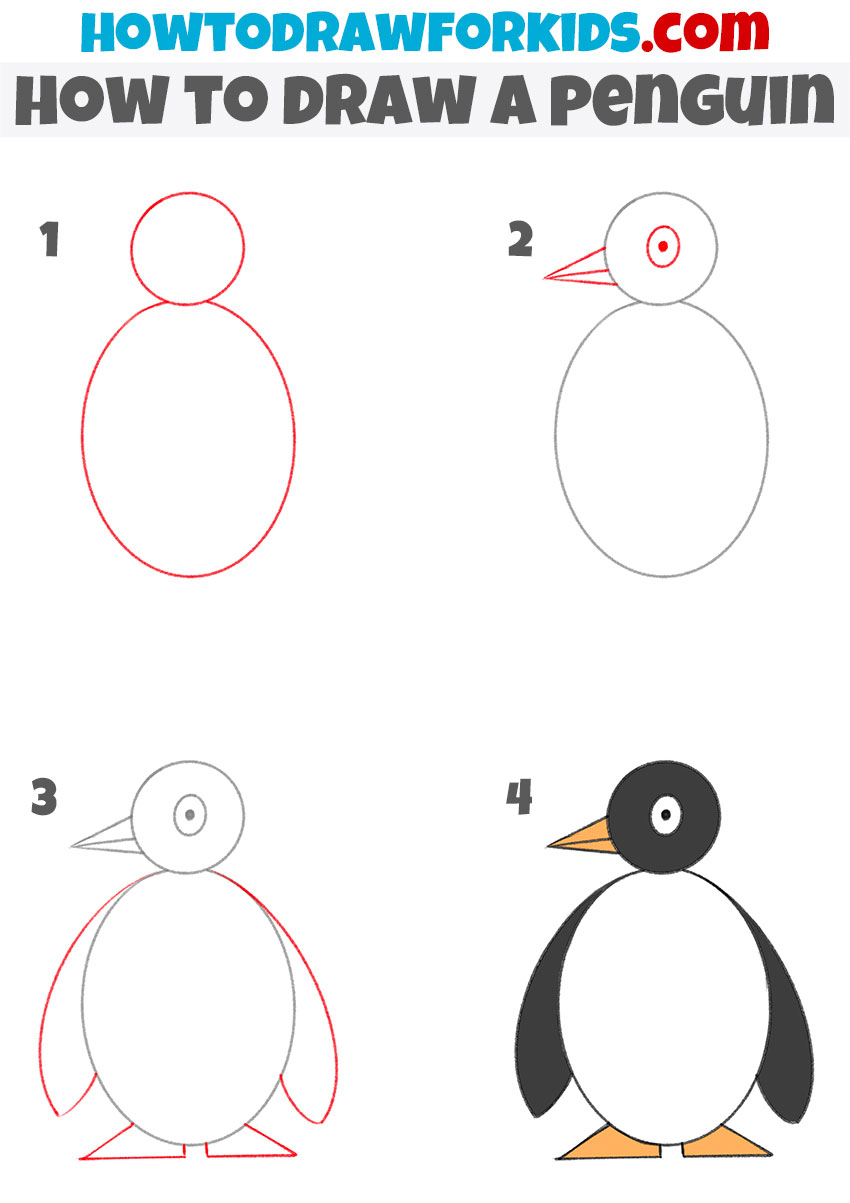
This final method uses very simple shapes and shows the penguin in profile. It is suitable for preschoolers who are comfortable drawing circles, ovals, and triangles.
Sketch a large oval for the body and a smaller circle on top for the head. Draw one small circular eye inside the head, then add a triangular beak at the front.
Draw the wings with curved lines along the sides of the body and add two flat triangular feet below. Refine the outlines, color the head and wings black, leave the belly white, and make the beak and feet orange.
Conclusion
Now you know six easy ways to draw a penguin. Each method uses a slightly different shape, so you can choose the version you like or try drawing several penguins on one page.
To continue drawing animals, you can practice drawing a dog or try drawing a cat next.
Follow me on Pinterest for new tutorials and visit my YouTube channel for video versions of these drawing guides.
You can also share this tutorial with friends who enjoy drawing animals.