How to Draw a Sled
In this lesson, I’ll show you how to draw a sled using simple straight and curved lines that are easy to follow, even for kids and beginners.

How to Draw a Sled: Introduction
Sleds are one of the simplest and most beloved winter activities for children all around the world, or at least everywhere winter and snow exist. There’s something timeless and fun about sliding down a snowy hill, and sleds have become a classic symbol of the winter season.
In this tutorial, I’ll be using two incredibly simple methods to show you how to draw a sled. Even though the sled is already a basic object, these drawing techniques will make it feel even more accessible – even for someone just starting out. With the help of my step-by-step instructions, even experienced artists will find this an easy and quick subject to sketch.
Of course, like any object, sleds can vary depending on the region they’re from or the preferences of the person who designed them. As you follow the steps of the tutorial on how to draw a sled below, feel free to modify certain elements of the design to suit your own style or vision.
For example, you could replace the slatted wooden seat with one solid board, or change the shape of the runners to something different. You can even add extra details like a rope for pulling the sled or other decorative touches to make your version more unique.
Sled Drawing Tutorial
Materials
- Pencil
- Paper
- Eraser
- Coloring supplies
Time needed: 35 minutes
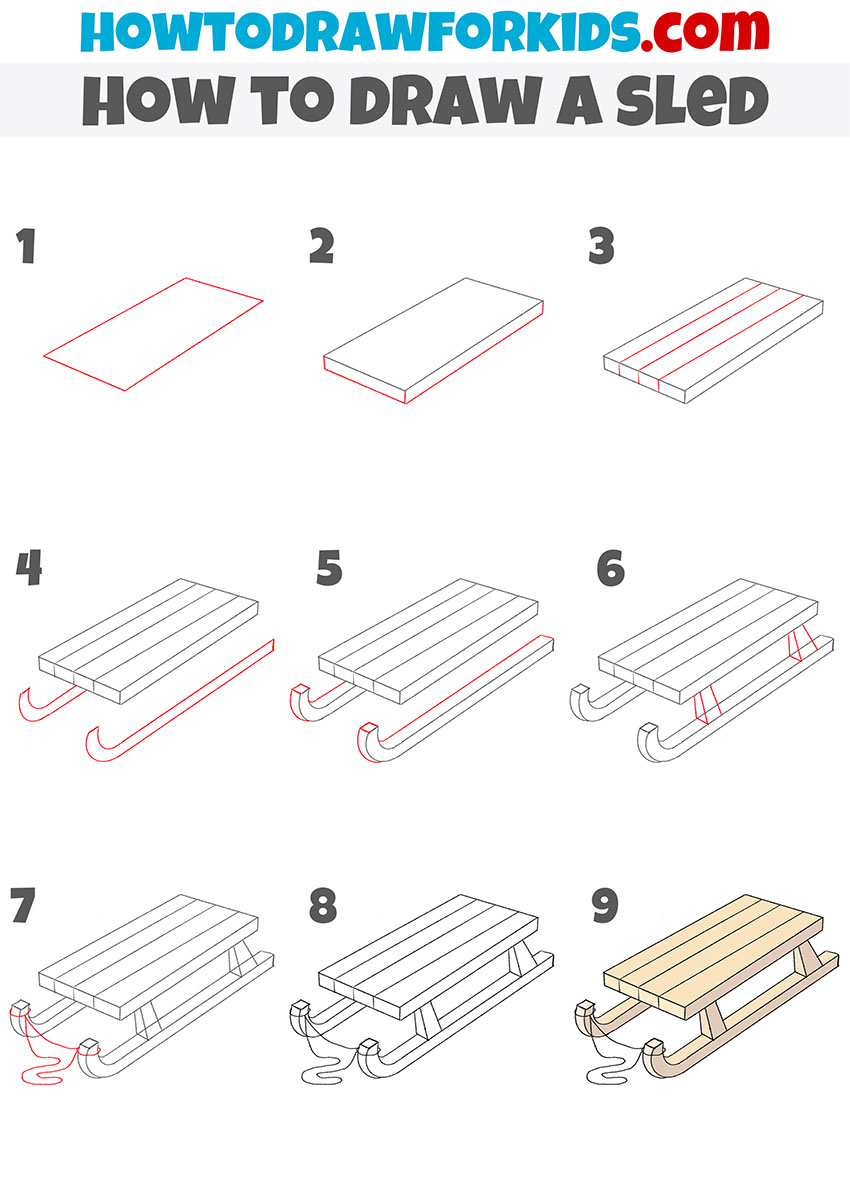
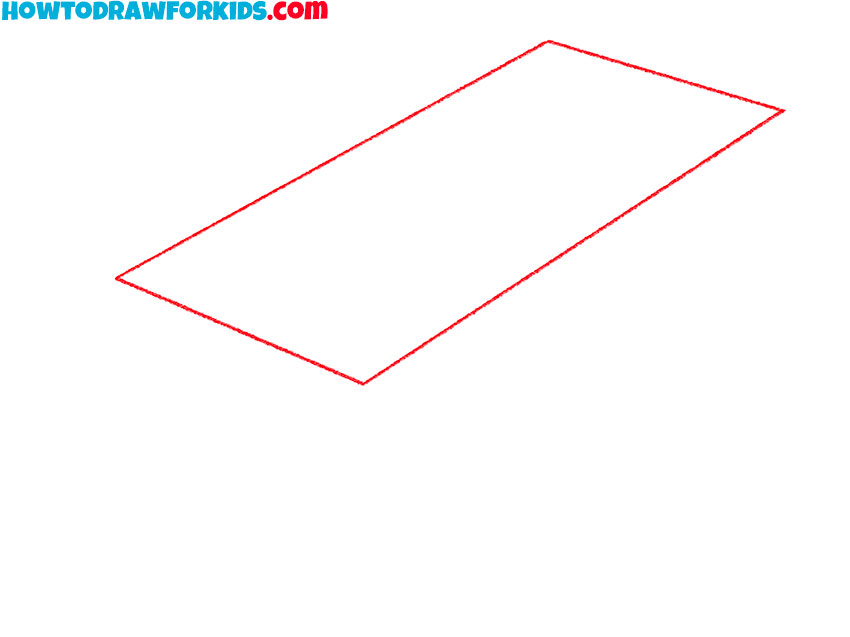
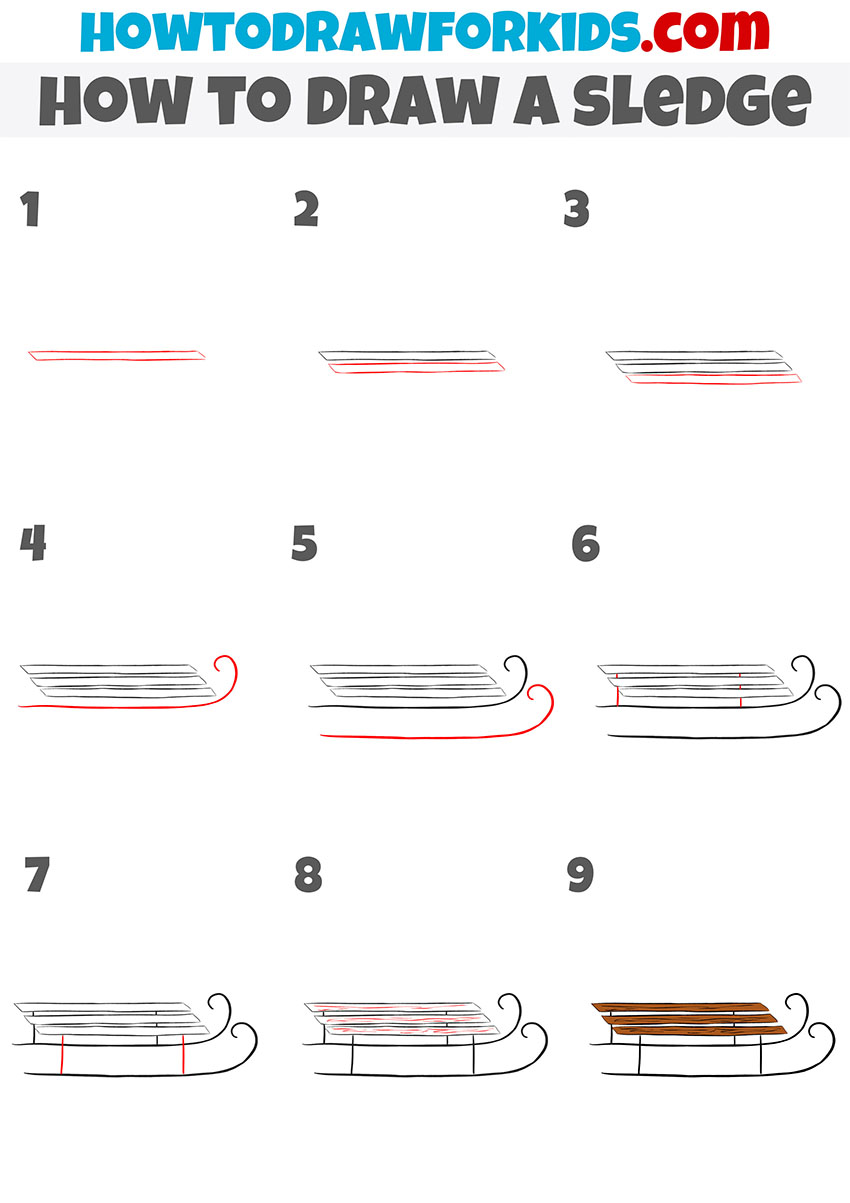
How to Draw a Sled
- Draw the top surface of the sled.
Start by drawing a simple parallelogram shape for the top surface of the sled. It should look like a flat, slanted rectangle to create the illusion of perspective. This base shape sets the orientation of the entire sled and helps guide the placement of all other elements in later steps.
- Add thickness to the seat.
Now, give the top part of the sled some dimension by drawing the thickness of the seat. First, from the angles of the seat, draw three vertical lines. Then connect these lines with a two long lines to create a 3D edge along the front of the sled. This simple addition turns the flat surface into a solid, wooden board.

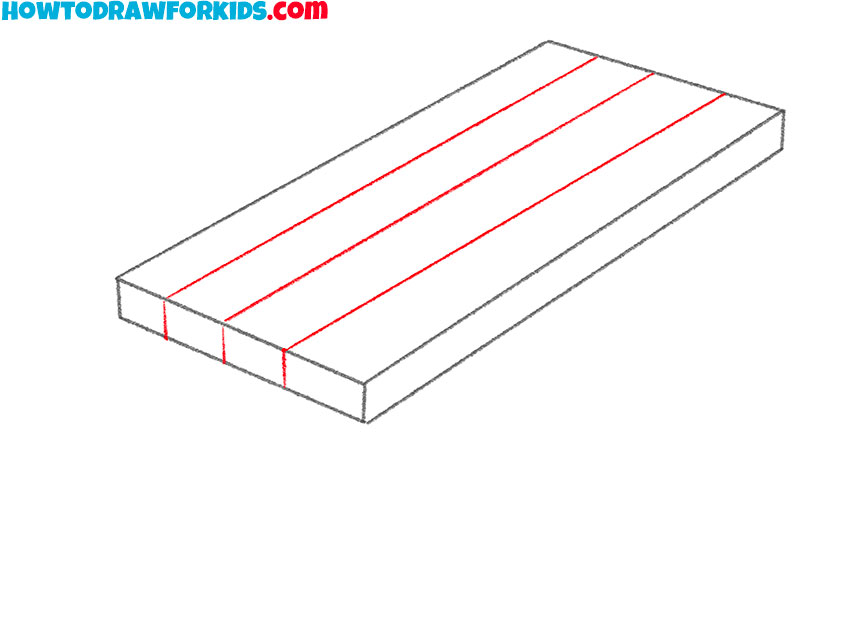
- Divide the seat into planks.
To make your sled drawing look even more realistic, add three straight lines, following the perspective of the original shape. These lines will separate the seat into four planks. Be sure to match the angle of the base shape so the planks look like they’re lying flat in perspective.
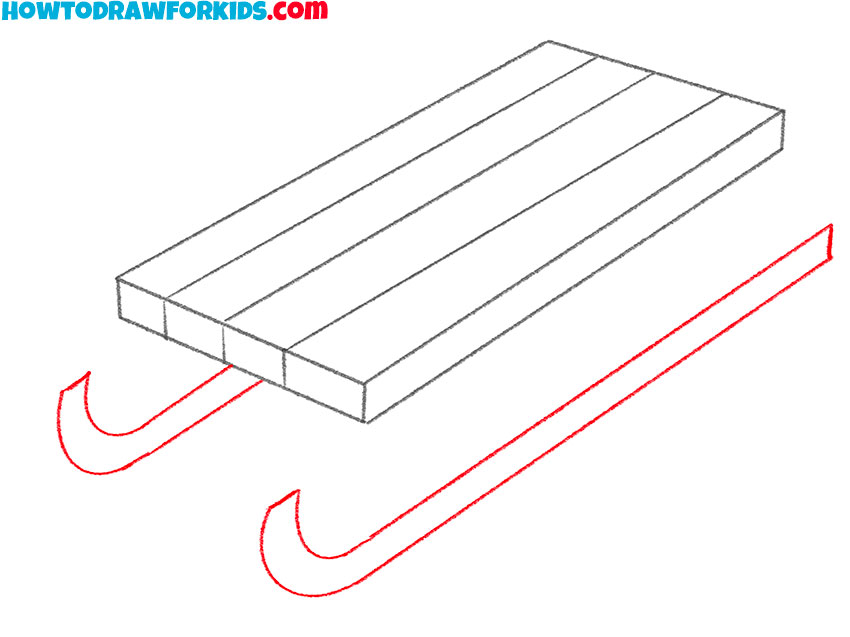
- Start drawing the sled runners.
Now draw the side edges of the sled’s runners, the parts that touch the ground and help it glide over snow. Draw two identical hook-like shapes at the front. Then, extend each shape backward with long, straight lines running underneath the sled. Keep the curves smooth and the lines parallel.
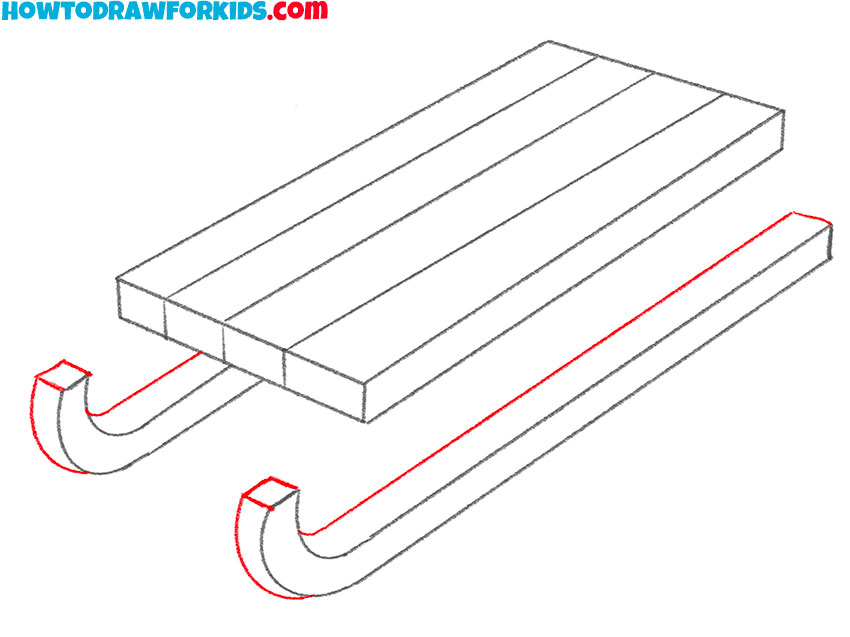
- Complete the runner outlines.
Now that you’ve drawn the front curves and outlines of the runners, it’s time to complete their shapes by adding thickness. Starting from the front curve, follow the lines you made in the last step and draw matching lines. Keep the thickness even along the entire length of each runner.
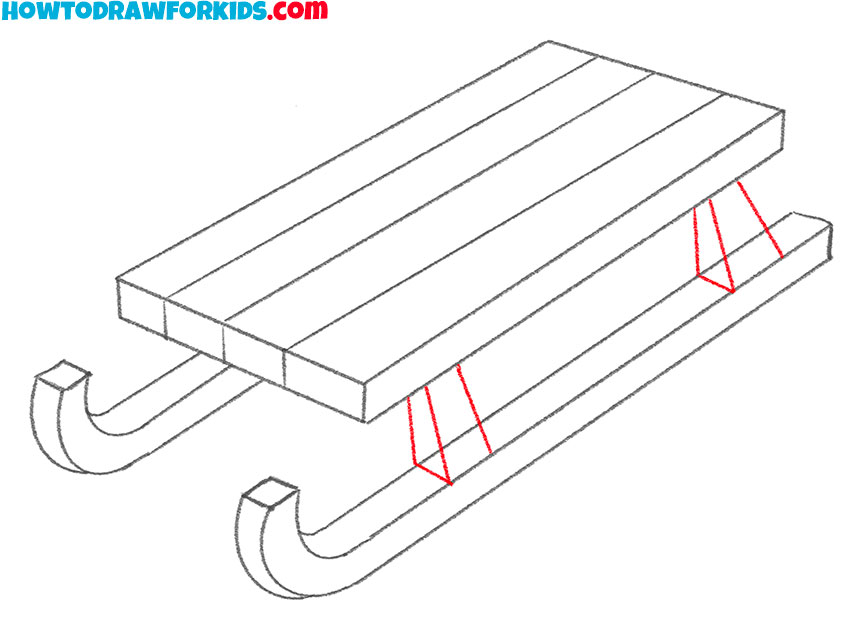
- Add vertical supports.
In this step, draw the supports that connect the sled’s seat to the runners. From the bottom edges of the seat planks, draw slightly angled vertical lines, reaching down to meet the runners. Drawing these supports, make sure that they follow the perspective of the sled.
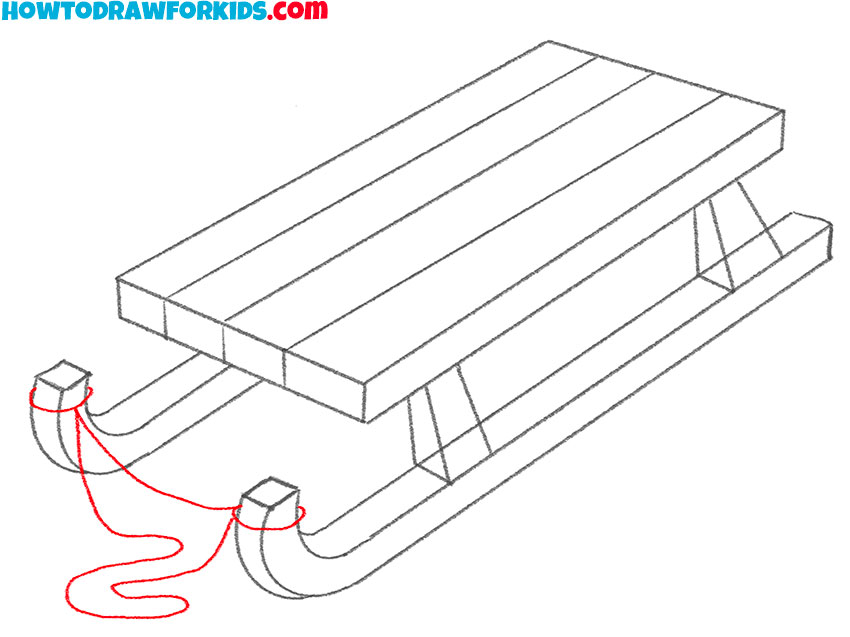
- Draw the sled rope.
Let’s add one more realistic detail: the rope. Draw a short loop of rope attached to the front of the sled – this is what you’d use to pull it. You can add a knot to make the rope look natural. You can also add some additional details to make your sled drawing more realistic.
- Erase the guidelines.
Now, carefully trace over your drawing of sled with a darker pencil or pen. Make your outlines smooth and clear, cleaning up any rough or sketchy lines as you go. Erase any extra construction lines you don’t need anymore. You’ve now finished the entire sled drawing and are ready for the final step: coloring.
- Color the sled drawing.
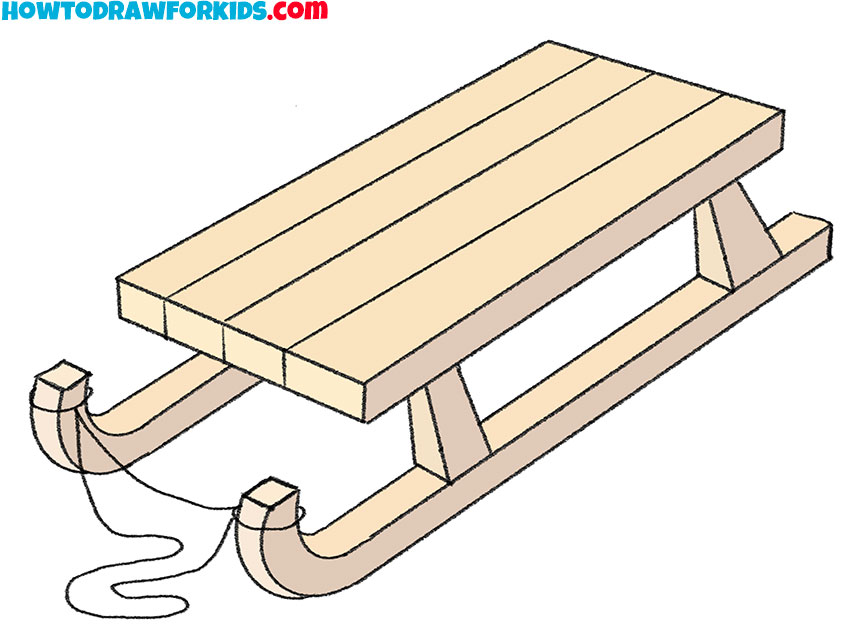
To color your sled drawing, use light brown or beige tones for the wooden planks of the seat to represent natural wood. The runners and supports can be a darker brown or even a reddish tone. If you want, you can add slight shading to give your sled drawing more realism.
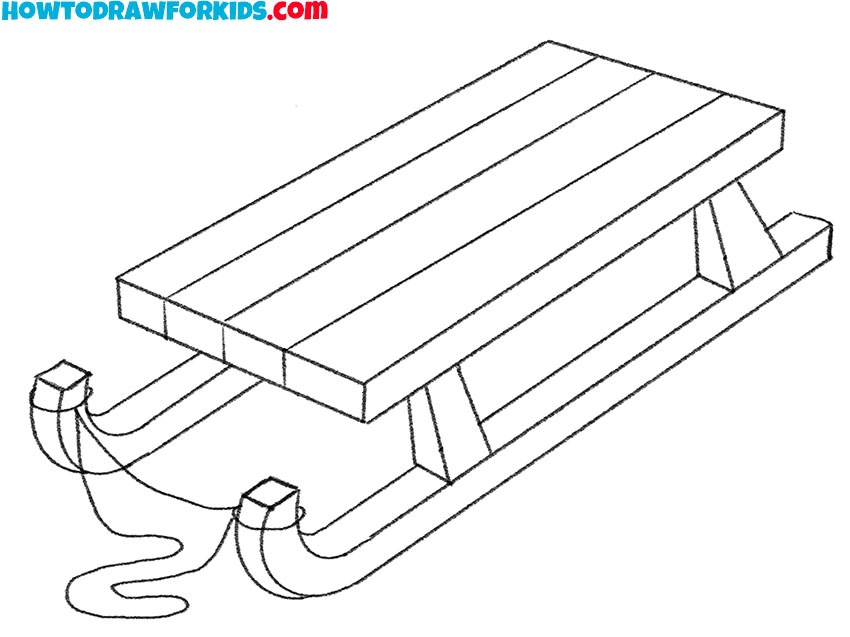
Simple Sledge Drawing Tutorial
This simple sledge drawing tutorial focuses on a more simplified, curved-runner sledge look, which visually differs from the sled in the first tutorial. The most noticeable feature of this method is the elegant scroll-like shape of the runners. The perspective is also different in this method.
To learn how to draw a simple sledge with this method, sketch a long slanted rectangle to create the first plank of seat. Add a second, parallel shape underneath. Then, add a third plank to complete the seat of the sledge. Next, draw the base runner under the seat, curving its front upward into a spiral. Repeat this on the opposite side, keeping both curves consistent. Extend the runners backward in a smooth, straight line. Draw the vertical supports that connect the seat to the runners. Add som texture and additional details. Finally, trace the full outline and color the wooden parts in shades of brown.
This was an interesting and fun lesson on how to draw a sled step by step. I hope you found it easy to follow and successfully completed the drawing. If something didn’t turn out right the first time, don’t worry – just try going through the steps again. I also recommend downloading the PDF version of this tutorial, which provides a shorter, more convenient format. That way, you’ll have the lesson available anytime and can return to it whenever you need.
Conclusion
Today, we drew one of the most classic winter items in this lesson on how to draw a sled, using two very simple methods. Let me know which method you liked best and whether you added any extra details while drawing.
Also, don’t forget to check out other categories on the site to level up your drawing skills – you can, for example, learn how to draw a car or try drawing a person sitting on a sled. And of course, make sure to follow me on social media and share this drawing lesson to help inspire other beginner artists and encourage them to get creative.