How to Draw a Spray
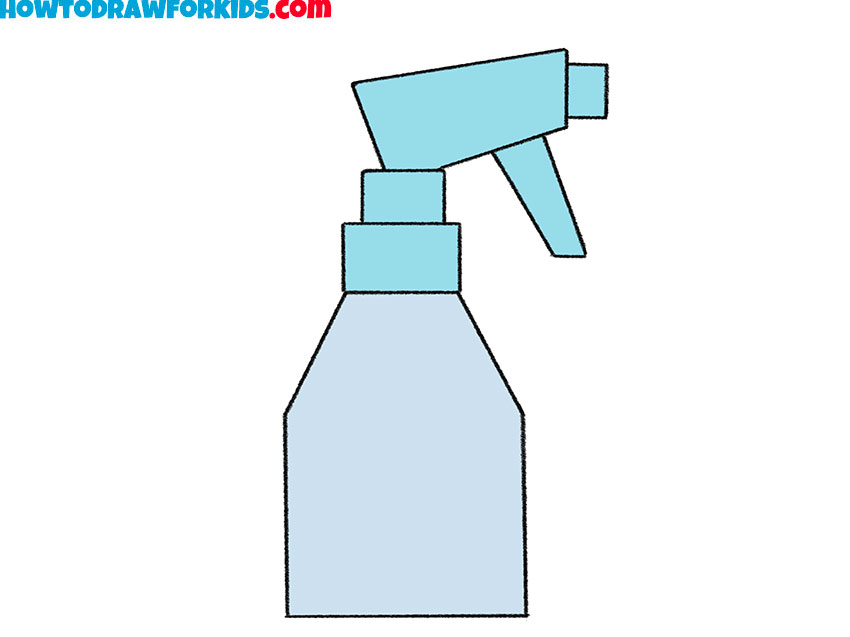
Let’s study this lesson on how to draw a spray and outline a typical trigger bottle used for cleaning or plant care.
How to Draw Spray: Introduction
So in this lesson, I would like to tell you how to draw a spray. The drawing object in this lesson is a household item that each of you probably knows about. This lesson consists of nine very simple steps that any child or beginner can do.
The spray is a liquid that is forced out of a special container under pressure so that it becomes a mass of small liquid drops like a cloud.
So to begin the following steps you first need to prepare your drawing materials.
Spray Drawing Tutorial
Materials
- Pencil
- Paper
- Eraser
- Coloring supplies
Time needed: 20 minutes
How to Draw a Spray
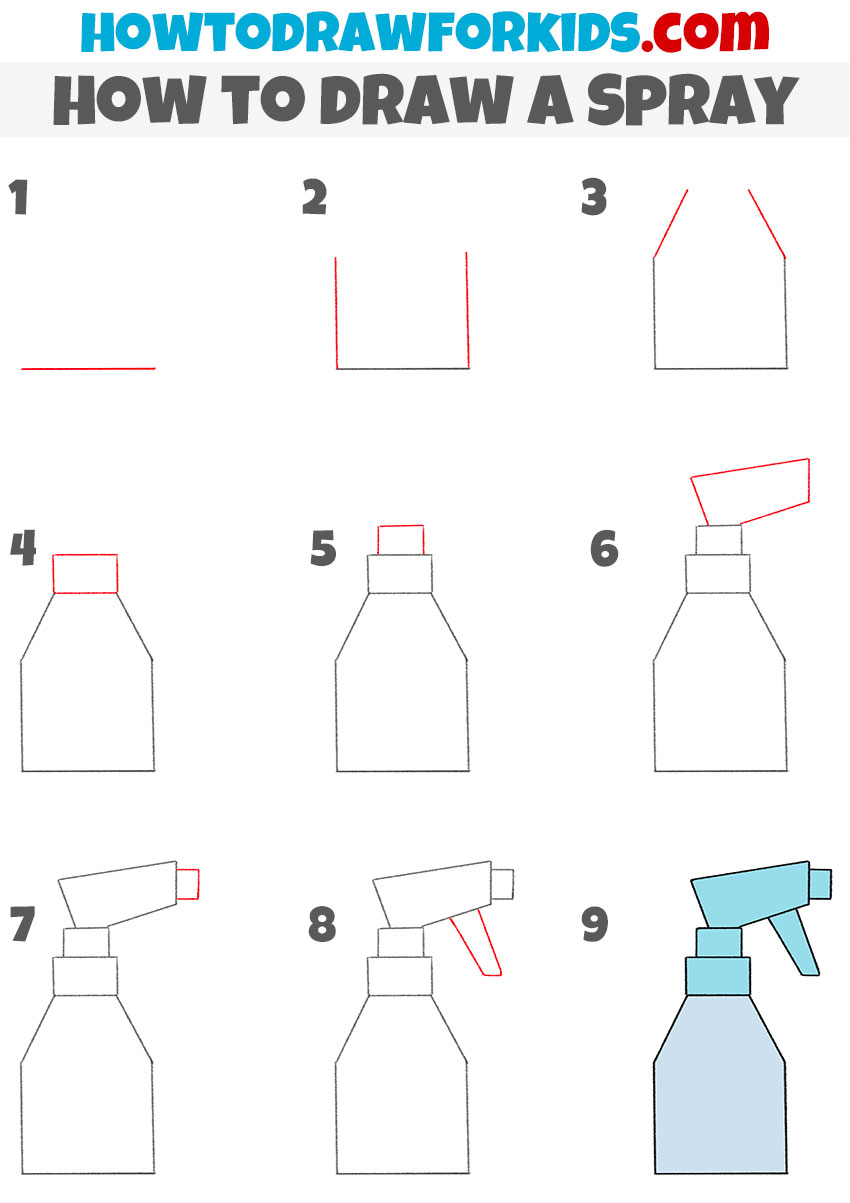
- Sketch the bottom edge of the bottle.
Start your spray bottle drawing by making a straight horizontal line at the bottom of your canvas. This will be the bottom edge of the bottle, and it’s important to keep it level so the bottle stands upright in the final drawing. This step is like laying a foundation for a building, and if it’s tilted, everything above it will feel off.

- Draw the spray bottle sides.
From each end of your base line, draw two straight vertical lines going upward. I often suggest that students check the spacing by lightly holding their pencil horizontally at the top to ensure the lines are parallel. Keep the height consistent on both sides so the bottle doesn’t look lopsided.

- Draw the spray bottle shoulders.
From the tops of the vertical lines, draw two angled lines pointing inward. This creates the “shoulders” of the bottle – the part that transitions to the neck. If the angle is too steep, the bottle will look too narrow; too shallow and it may seem bulky. Keep the angles even and symmetrical on both sides.

- Sketch the neck rectangle.
At the top of the angled shoulders, sketch a small rectangle for the bottle neck. In your spray bottle drawing, this part will connect the body to the spray mechanism. This part should be perfectly centered so the nozzle will sit properly in later steps. The rectangle should be narrower than the shoulders.

- Sketch the small connector.
Above the neck, draw a smaller rectangle that will hold the sprayer in place. This connector is slightly taller than it is wide and should sit perfectly aligned with the neck. Keep in mind that this section is like the “collar” that secures the sprayer head. Check the symmetry and proportions before moving to the next step.

- Draw the spray bottle head.
From the top connector, sketch the sprayer head at an angle. It should have a trapezoid-like shape, narrower toward the front where the nozzle will be. Drawing simple parts like this, think about the ergonomics – the sprayer head is usually tilted slightly forward for comfortable use.

- Illustrate the nozzle shape.
At the front of the sprayer head, draw a small rectangular shape for the nozzle. This is where the spray would come out. Adding it now helps finish the silhouette of the sprayer and makes it clear what the object is, even without color.

- Sketch the spray bottle trigger.
From the underside of the sprayer head, sketch the trigger handle. This should slope downward and slightly forward. Keep its shape simple, a straight top edge and a slightly curved lower edge usually work well. You can also add some logos to the bottle or illustrate water inside the spray.

- Color your spray bottle drawing.
You can choose any colors you like – bright for a cleaning spray, soft tones for a plant mister, or transparent blues for a more realistic look. I often suggest shading the bottle slightly darker along one side to give it dimension.

Additional Content
This spray drawing lesson is now complete. You can share your thoughts on the tutorial in the comments and let me know if you were able to follow all the steps. If the lesson was useful, consider sharing it with others. You can also download the PDF version for offline use and subscribe to our social media pages to see more drawing guides.