How to Draw a Stethoscope
This tutorial teaches how to draw a stethoscope using two methods and introduces the key components of this medical instrument.

How to Draw a Stethoscope: Introduction
A stethoscope, like many objects we sketch, is a simple yet detail-oriented subject. While it might appear too simple, this tutorial will guide you through the nuances of drawing a stethoscope to ensure your final result looks polished and realistic. By the way, we studied a similar detailed approach to a simple subject in the heart drawing tutorial.
The stethoscope is composed of symmetrical lines and geometric shapes, making precision a key focus throughout the drawing process. From the ear tubes to the chest piece, each element needs to be carefully constructed to maintain the proper proportions and alignment.
Pay special attention to the headpiece, which consists of two symmetrical, reflecting geometric shapes. These parts must be drawn with perfect symmetry to achieve an accurate depiction of the stethoscope. Additionally, the tubing that connects the headpiece to the chest piece should be smooth and even, with both edges of the tube maintaining equal distance and curvature.
Finally, once you’ve completed the main steps, you’ll find an additional stethoscope drawing tutorial at the end of this page. This alternate tutorial provides a slightly different style and approach, allowing you to further develop and practice your drawing techniques. By completing both lessons, you’ll strengthen your ability to draw symmetrical and clean objects while boosting your overall skill set.
Stethoscope Drawing Tutorial
Materials:
- Pencil
- Paper
- Eraser
- Coloring supplies
Time needed: 30 minutes
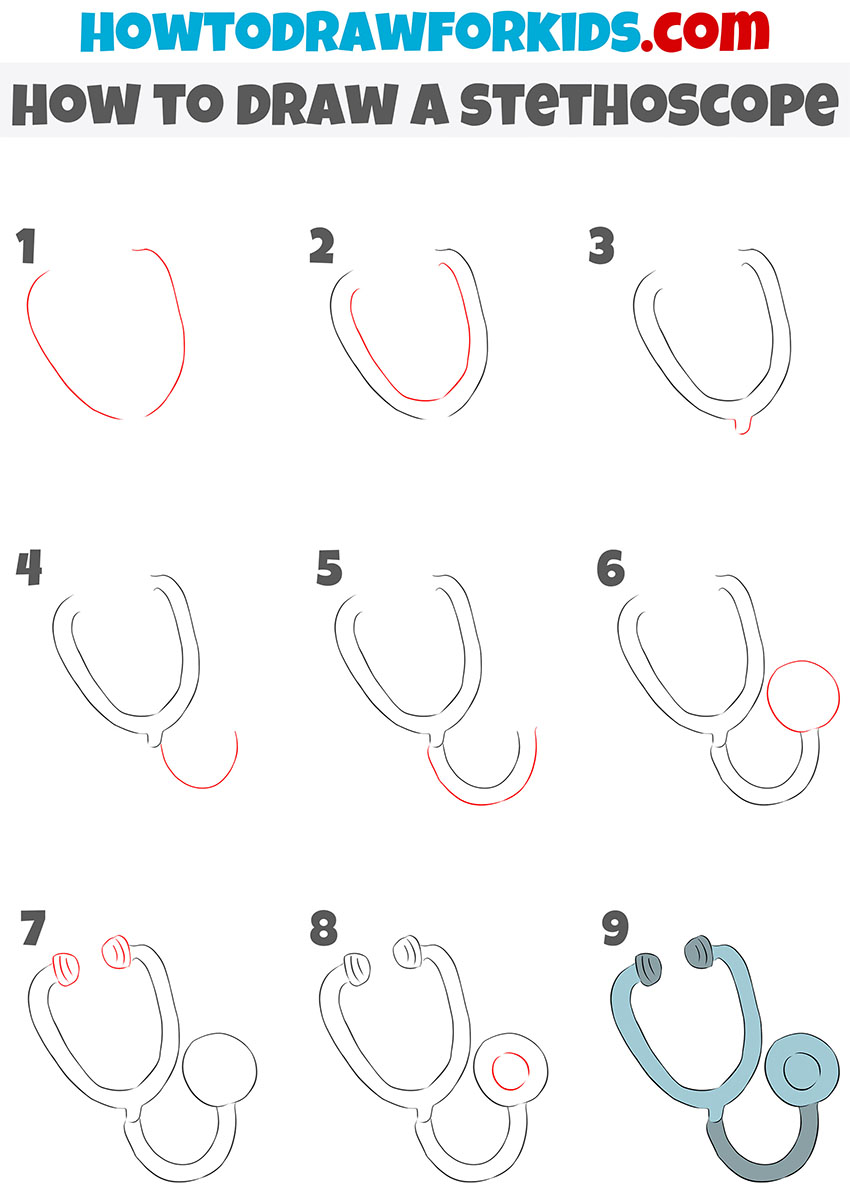
How to Draw a Stethoscope
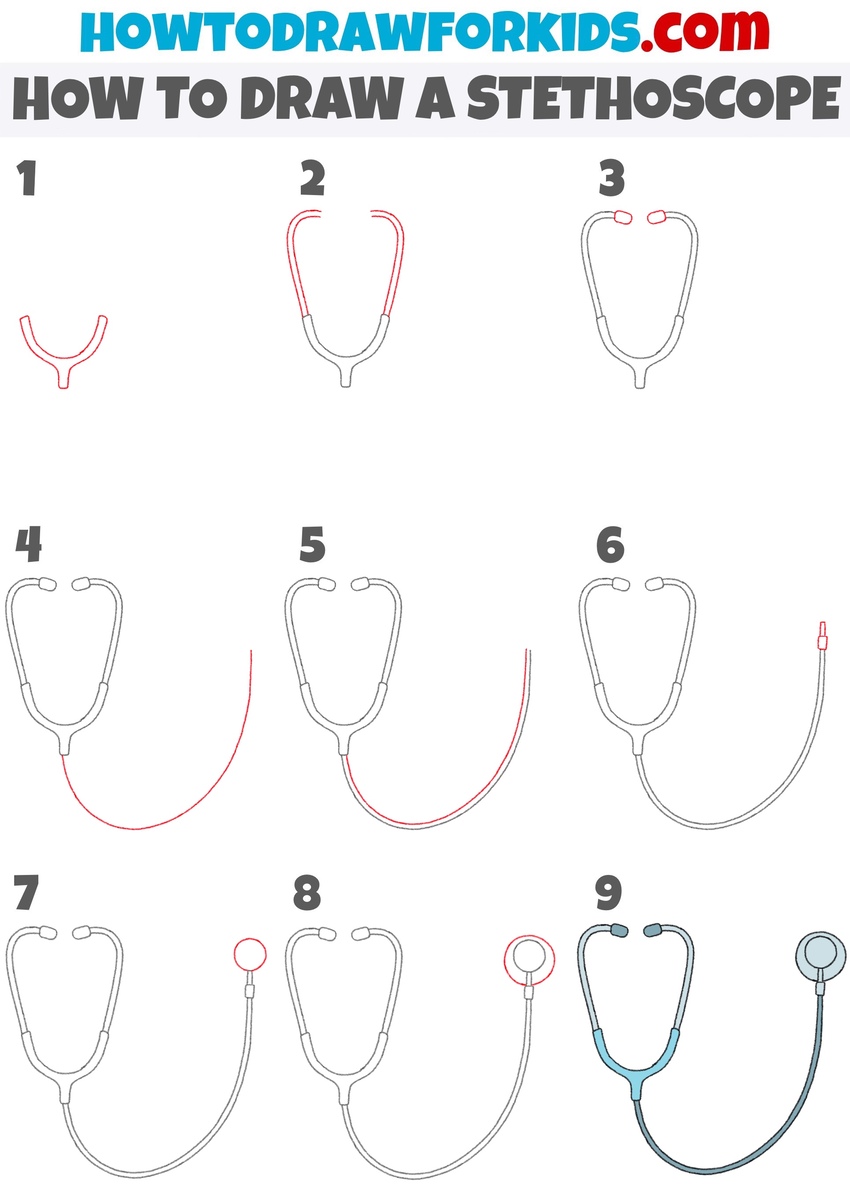
- Draw the binaural of the stethoscope.
Begin by sketching the binaural part or base of the stethoscope. This part connects the ear tubes to the rest of the device. Draw a simple “U” shape with slightly curved ends pointing outward. Ensure the curves are smooth and symmetrical, as this shape will determine the overall look of your stethoscope drawing.
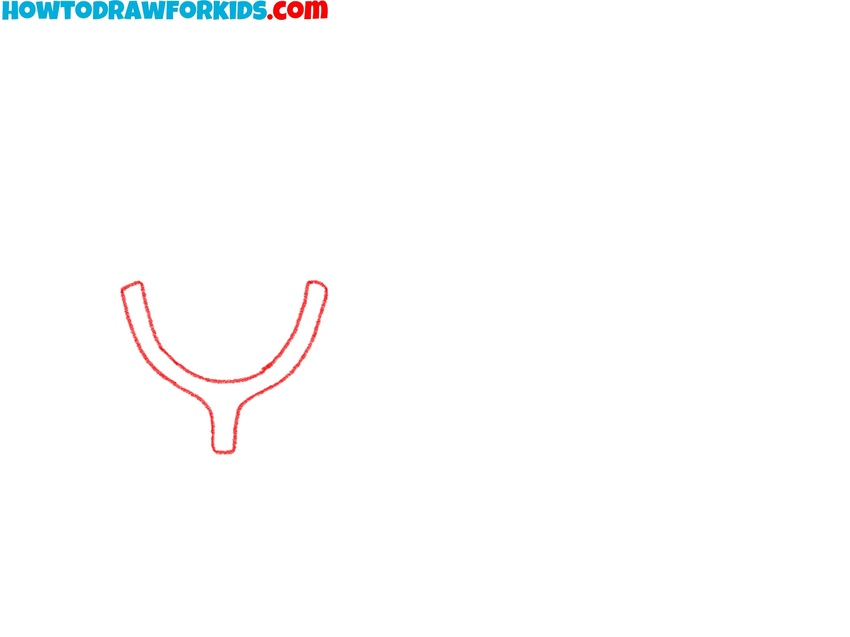
- Sketch the ear tubes.
Extend two parallel lines upward from each end of the yoke to form the ear tubes. These tubes will lead to the ear tips, so make sure they curve slightly to give a natural shape. Symmetry is crucial in this step – both sides should mirror each other.

- Add the ear tips.
At the ends of the ear tubes, add small rounded shapes to represent the ear tips of the stethoscope. These tips are where the stethoscope connects with the user’s ears. Make sure they are rounded and natural. The ear tips should be identical in size and shape.
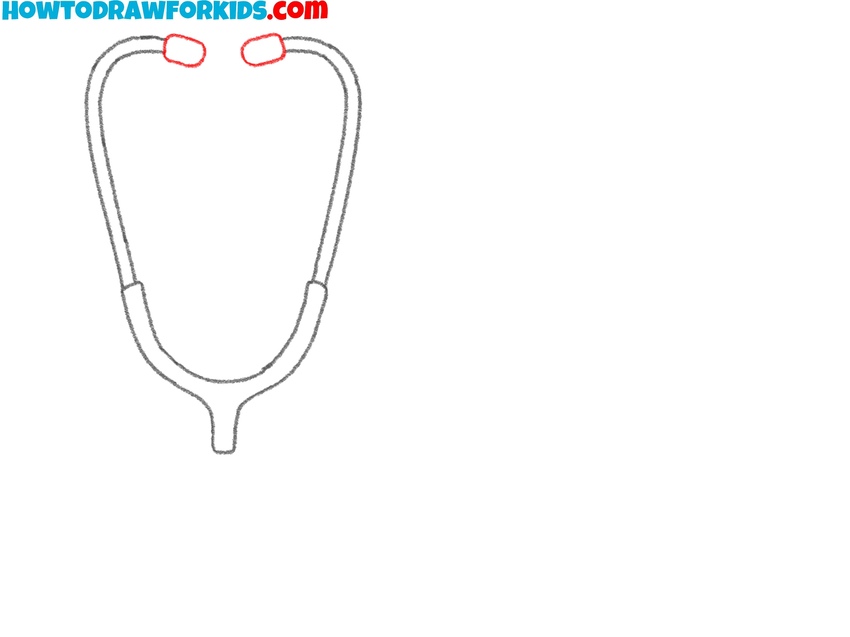
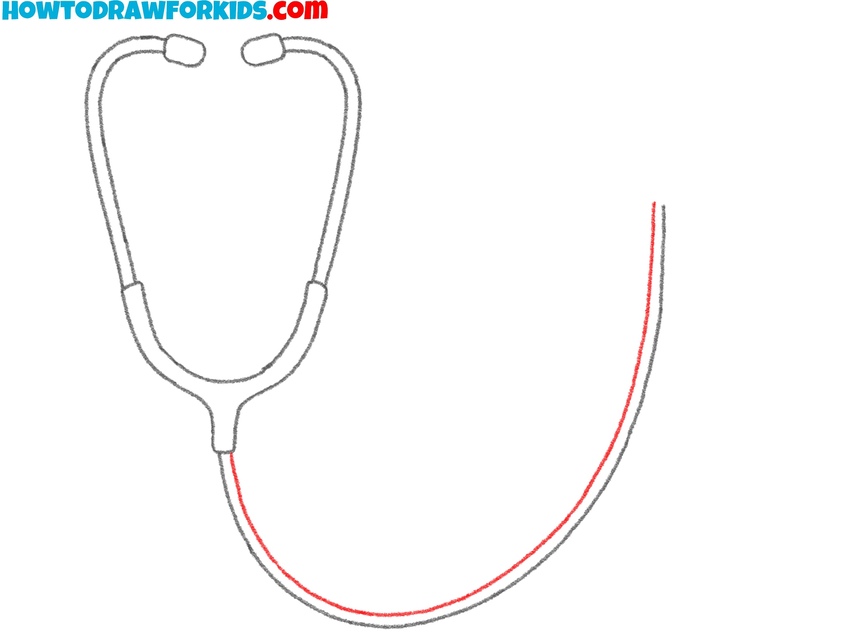
- Start to sketch the tubing.
Draw a single curved line extending downward from the yoke. This line forms the top edge of the flexible tubing of the stethoscope. Make sure the curve is smooth and natural, as this tubing connects the chest piece to the ear tubes.
- Complete the tubing of the stethoscope.
Add a second curved line parallel to the first one, forming the full tubing. This creates a flexible and natural look for the stethoscope. The two lines should remain evenly spaced, giving the tubing a consistent width. If you want, you can give this part a slightly different curve.
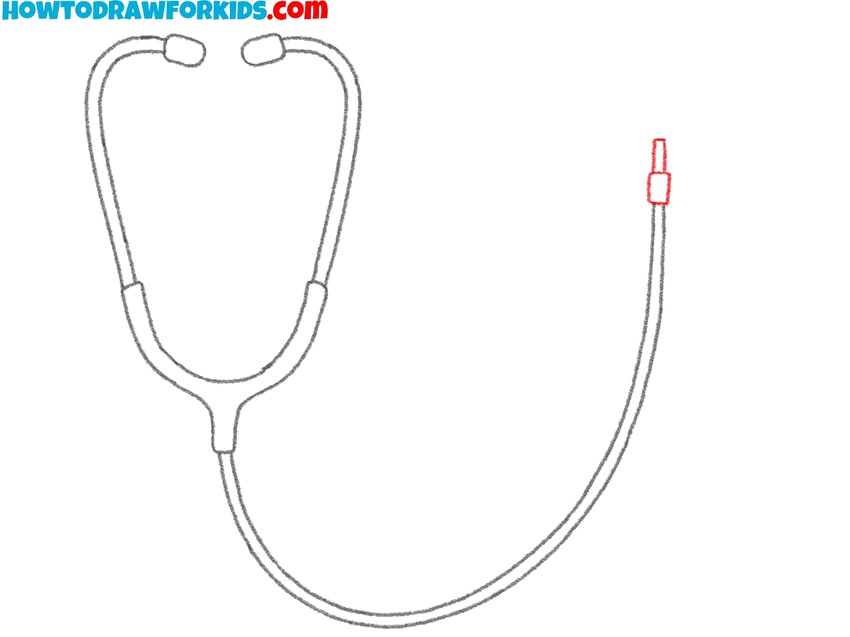
- Draw the stethoscope connector.
At the end of the tubing, draw a small rectangular connector. This piece links the tubing to the circular chest piece. The connector should be small but clearly visible, providing a clean transition between the tubing and the stethoscope’s main diagnostic component.
- Add the chest piece base.
Begin the chest piece by drawing a small circle just above the connector. This base supports the larger diaphragm portion of the stethoscope. The circle should be proportional to the rest of the device, with clean and, smooth, and even lines.

- Complete the chest piece.
Encircle the base with a larger circle to form the chest piece’s diaphragm. This is the part of the stethoscope that makes contact with the patient’s body. Position this part slightly off-center to create a more realistic appearance. This step finalizes the chest piece of your stethoscope drawing.

- Finalize and color the stethoscope.
Review your stethoscope drawing and make any necessary adjustments. Erase any extra guidelines to clean up the sketch. Add color to your stethoscope to give it a finished look – commonly, the tubing is black, gray, or blue, with metallic shades on the chest piece and ear tubes.

How to Draw a Simple Stethoscope
The second tutorial simplifies the structure of the stethoscope by omitting the longer tubing that connects to the chest piece, focusing more on the main yoke, ear tubes, and chest piece. It also concentrates on the circular components, such as the diaphragm and ear tips, making the design slightly more compact and beginner-friendly.
To draw an easy stethoscope, begin by sketching the ear tubes. Draw two curved lines extending upward to represent the ear tubes. Make sure they are symmetrical and slightly taper at the ends where the ear tips will be placed. Next, draw the short binaural section connecting the ear tubes to the tubing.
After that, sketch the tubing by creating two curved, parallel lines extending from the binaural. These lines should flow naturally and form a connection to the chest piece. Finally, draw the chest piece at the end of the tubing. Start with a large circle to represent the diaphragm, and add an inner circle for detailing. Erase any unnecessary guidelines, refine the lines for smoothness, and add color to complete your stethoscope drawing.
Conclusion
Now that you’ve completed this tutorial on how to draw a stethoscope, I hope you have two excellent drawings of this medical instrument on your paper. Along the way, you’ve not only learned how to draw a stethoscope but also practiced creating smooth and symmetrical objects. Additionally, you became familiar with the key components of a stethoscope, enhancing both your drawing skills and your understanding of its structure.
Feel free to share your experience in the comments section below and let me know how your drawings turned out. You’re also welcome to share your stethoscope drawings on Pinterest or Facebook. I always enjoy seeing your results and hearing about your progress. Engaging with other artists can be a great way to improve and stay motivated.
Finally, don’t forget to follow me on social media to stay updated on new tutorials and other content posted on this site. This will keep you informed of any updates, allow you to share your thoughts and lessons with others, and learn what other artists are creating. Thank you for drawing with me, and I look forward to seeing your work!


This is a great tutorial for kids! I love how easy it is to follow and the results look great.