How to Draw a Rabbit
As a passionate artist, I love sharing my tricks! Join me as we explore four different drawing methods to draw a rabbit, perfect for young learners eager to express their creativity.
Drawing is a hop, skip, and jump away with my easy-to-follow guide on four unique techniques to draw a rabbit, tailored for the imaginative minds of children. I’ve crafted each method to be engaging and rewarding, so you’ll feel like a true artist by the end. Let’s bring these bunnies to life, one adorable sketch at a time!

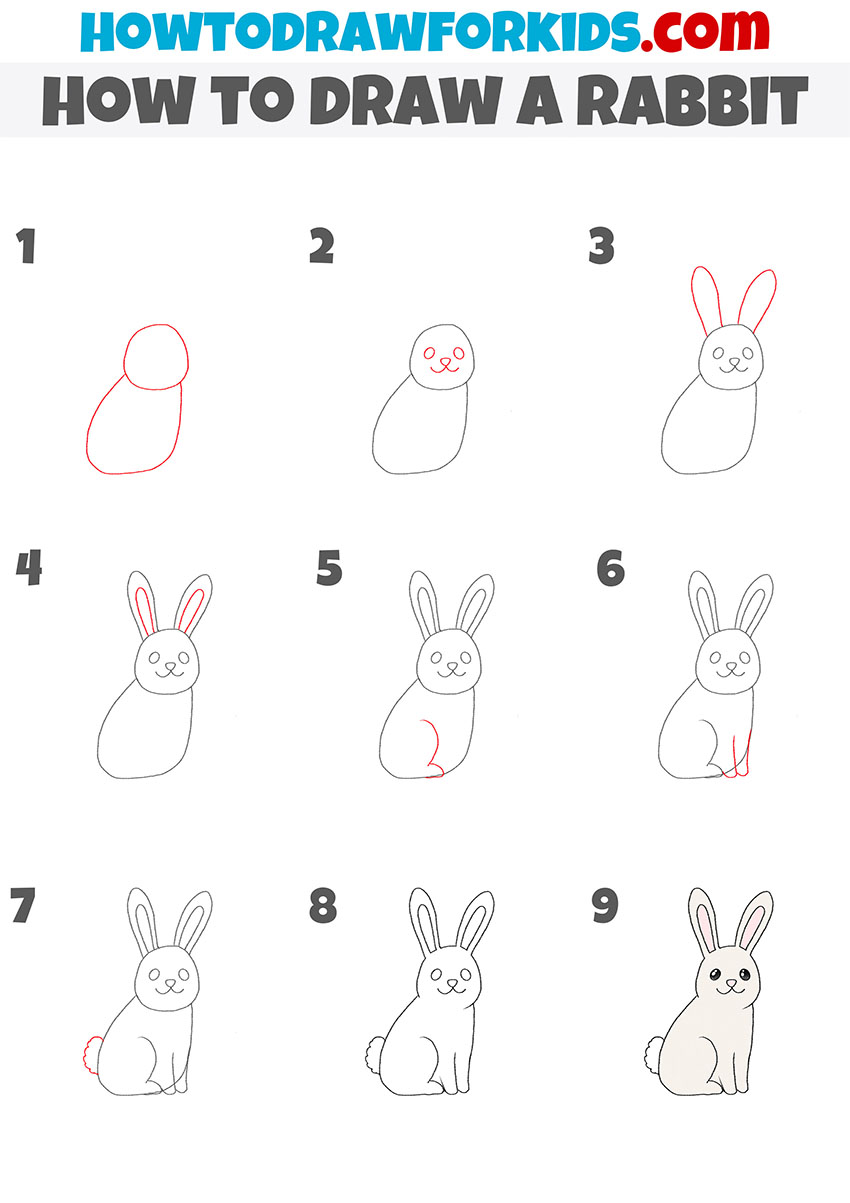
How to Draw a Rabbit: Basic Information
Welcome to a hopping good time, little artists! Today, we’re going to learn how to draw a rabbit using a simple and fun method that I’ve created just for you. This tutorial is designed to make drawing easy, using shapes you already know to build our fluffy friend from the ground up.
In the next part of our lesson, we’ll add character to our rabbit. With a couple of gentle curves for the ears and a pair of bright eyes, your bunny will start to have its own personality. It’s all about taking it one step at a time, ensuring that you can follow along at your own pace.
Finally, once you’ve mastered how to draw a rabbit with this guide, you’ll be ready to depict bunnies everywhere! Whether it’s a cartoon rabbit, a realistic one, or even a bunny from your imagination, the skills you learn here will help you on your artistic journey. So, let’s grab our pencils and hop right into drawing!
Rabbit Drawing Tutorial
Materials
- Pencil
- Paper
- Eraser
- Coloring supplies
Time needed: 25 minutes
How to Draw a Rabbit
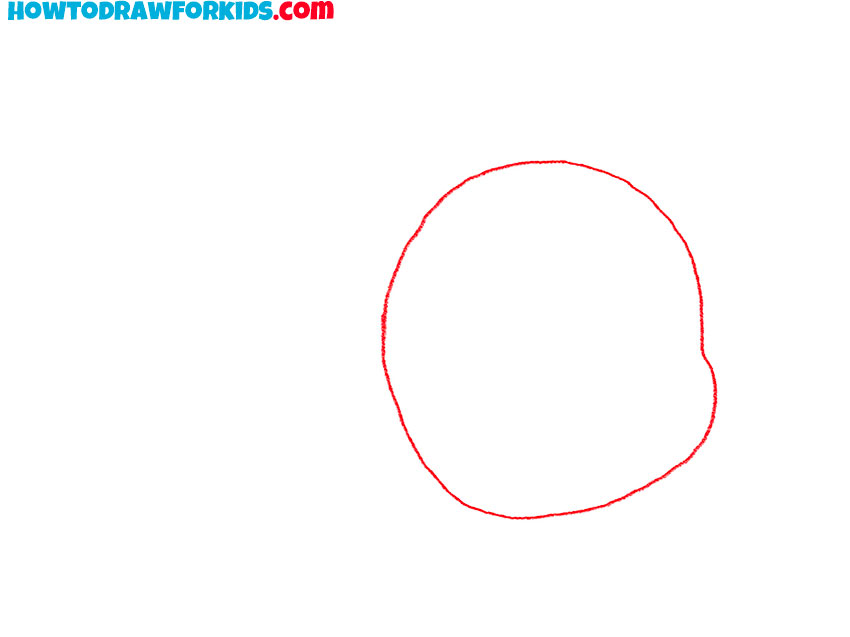
- Draw the outline of the head.
So, let’s draw a simple oval shape, which will form the head of the rabbit. It’s important to keep the lines light so they can be adjusted or erased as necessary in later steps.
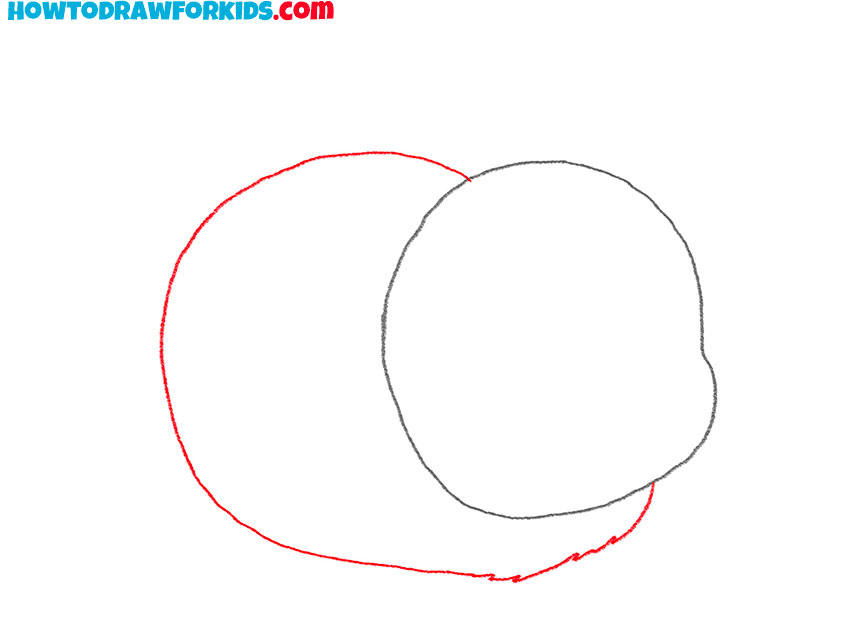
- Sketch out the torso.
Depict another shape that overlaps the first oval on the right side. This additional oval will serve as the body of the rabbit. This figure is located slightly lower compared to the head.
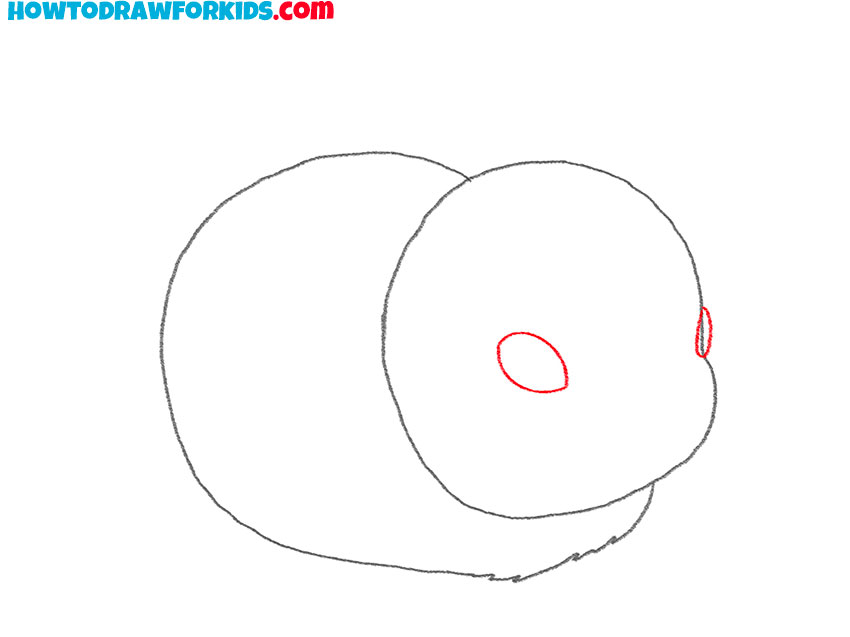
- Depict the eyes.
Begin by drawing a small circle within the head oval to establish the location of the eye, ensuring it’s placed toward the upper right area to give the rabbit an alert appearance.
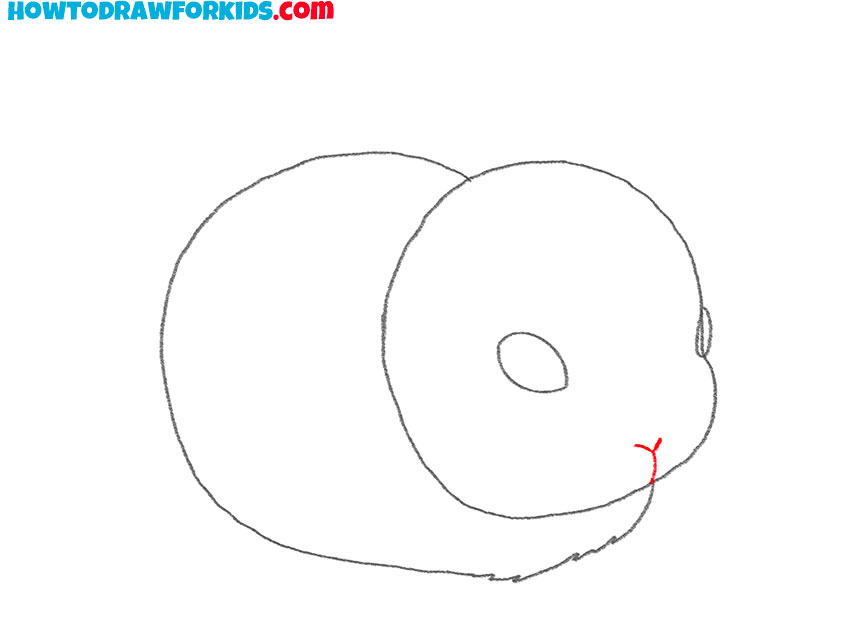
- Add the nose
At the very bottom of the oval of the face, draw a tiny figure that looks like the letter “Y”. The lines should have slight bends to convey a slight turn of the head away from us.
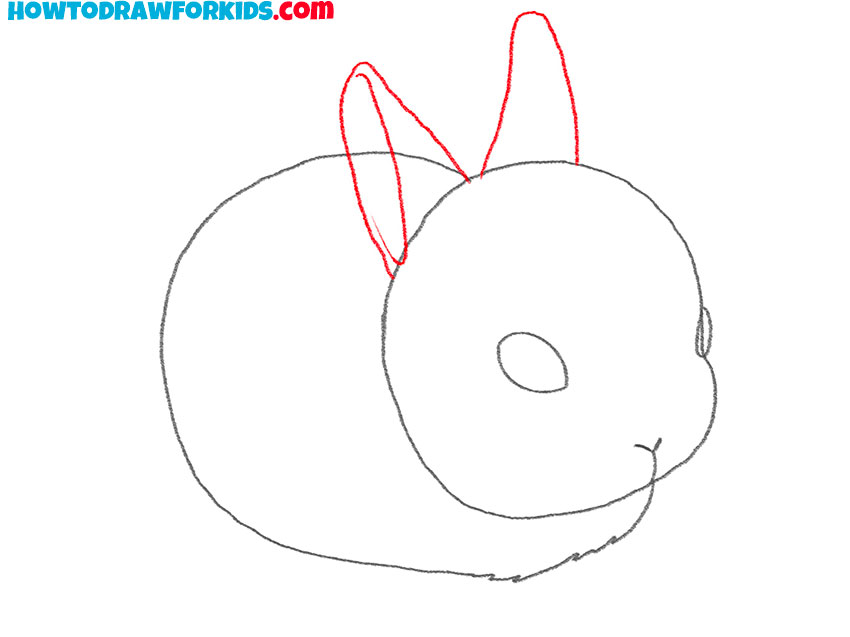
- Draw the ears.
Sketch two long and narrow ovals atop the head, slightly tilted inwards to mimic the natural stance of a rabbit’s alert ears. Don’t forget – the ears are an iconic feature of the rabbit.
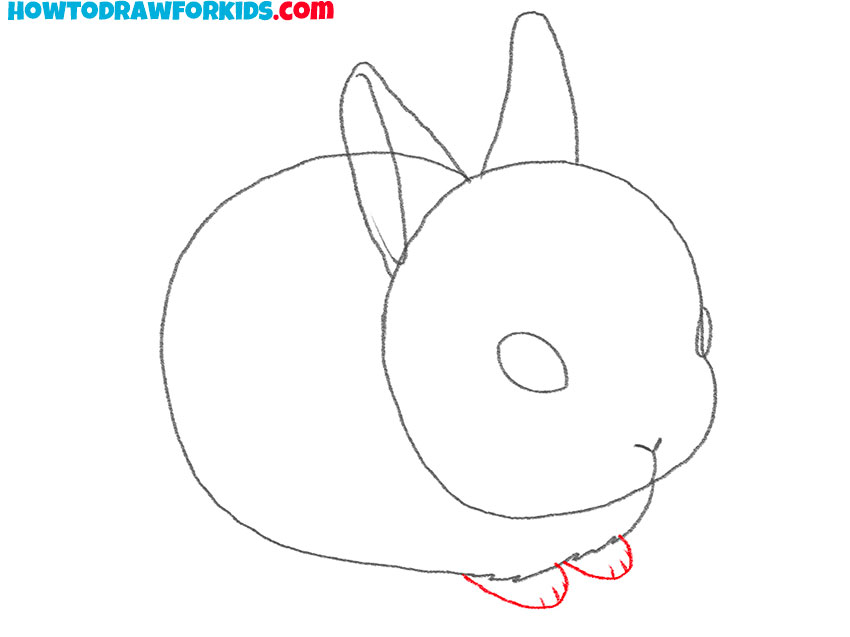
- Depict the front paws.
In this step we can start drawing our bunny’s front paws. These should be drawn as small ovals peeking out from the bottom of the body, giving a sense of the rabbit’s posture.
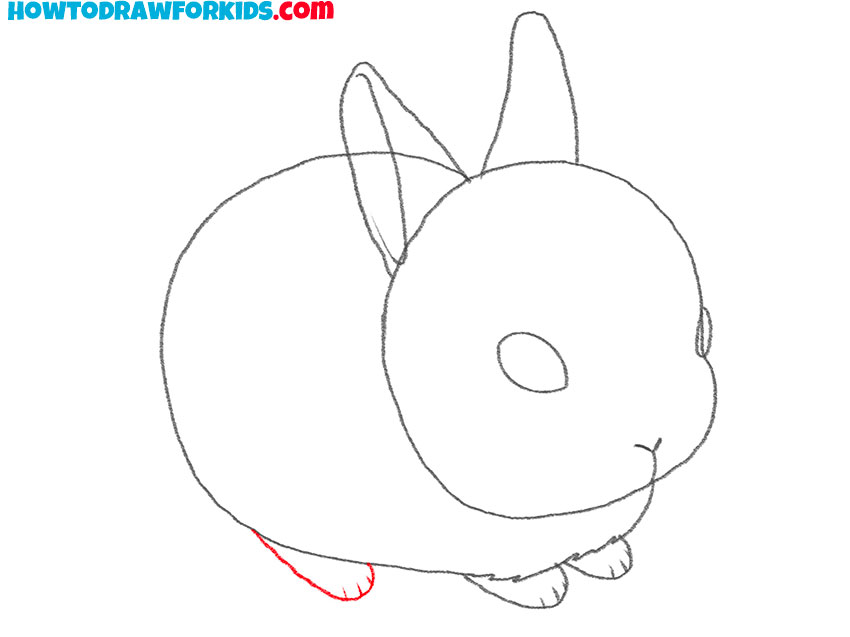
- Add one hind paw.
With a smooth line draw the hind paw and add the fingers.
- Sketch out the tail.
On the back end of the body oval, draw a small, fluffy oval to represent the tail. This should be fluffy and light, providing a nice counterbalance to the rabbit’s ears.
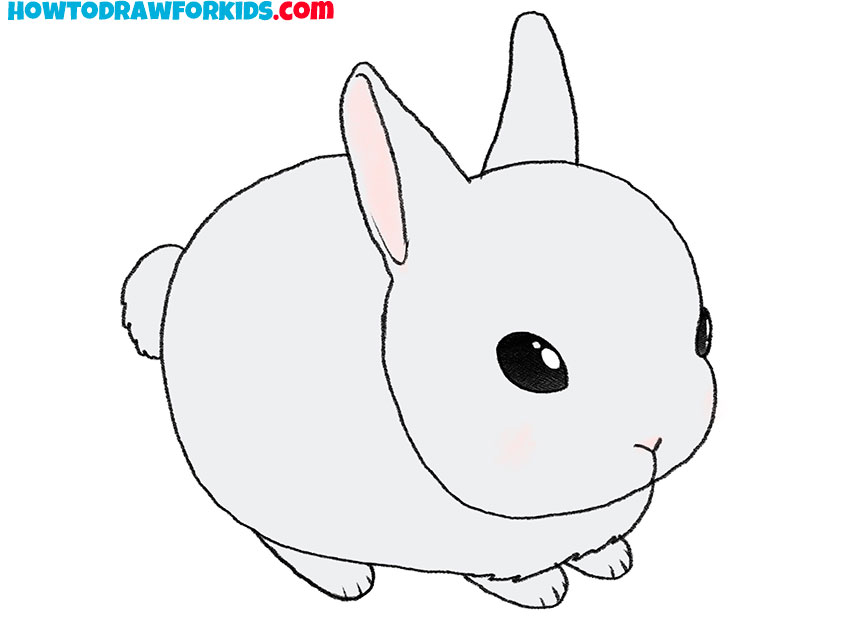
- Color the rabbit.
To create a realistic bunny look, use soft colors for the fur and light pink for the inside of the ear. Don’t forget about the highlights inside the eye contours.
Additional Content
For all my budding artists out there, I’ve made a special downloadable PDF for our rabbit drawing lesson. It’s like a mini-version of our full class, and best of all, it’s free! No need to worry about being online – you can have this guide right by your side, ready to help you draw adorable rabbits whenever the mood strikes.
This PDF is easy to follow and great for keeping your drawing skills sharp, especially when you’re on the go. So what are you waiting for? Grab your PDF and let’s make some art!
Alternative Drawing Techniques
In addition to the step-by-step lesson, I’ve also put together several alternative drawing techniques for rabbits, aimed at enhancing your artistic skills. Each one offers a unique perspective and challenge, perfect for practicing and honing your craft.
These methods vary in style and complexity, giving you the chance to explore different aspects of drawing and creativity. Keep practicing with these varied techniques, and you’ll see your skills hop to new heights!
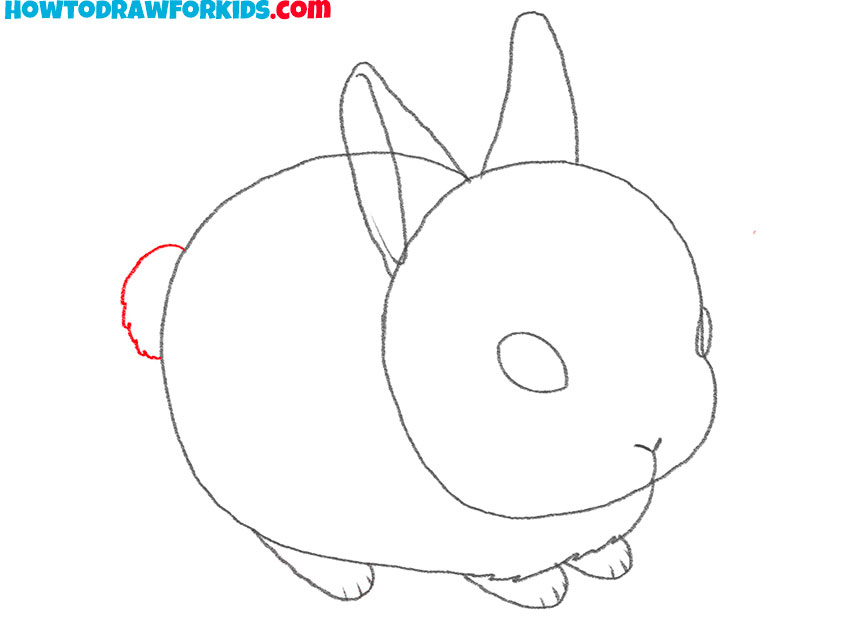
How to Draw a Rabbit in a Sitting Pose
In this first method, we’re focusing on capturing the rabbit’s alert posture. We begin by outlining the head and body, then draw the long, upright ears that are the hallmark of a curious bunny. Step by step, you’ll see how to add the back paws, which are tucked under the body as the rabbit sits up, giving the impression of attentiveness.
This approach is great for learning how to convey character in your drawings through body language, even with the simplest of shapes. It’s a process that’s enjoyable and easy to follow, resulting in a charming rabbit.
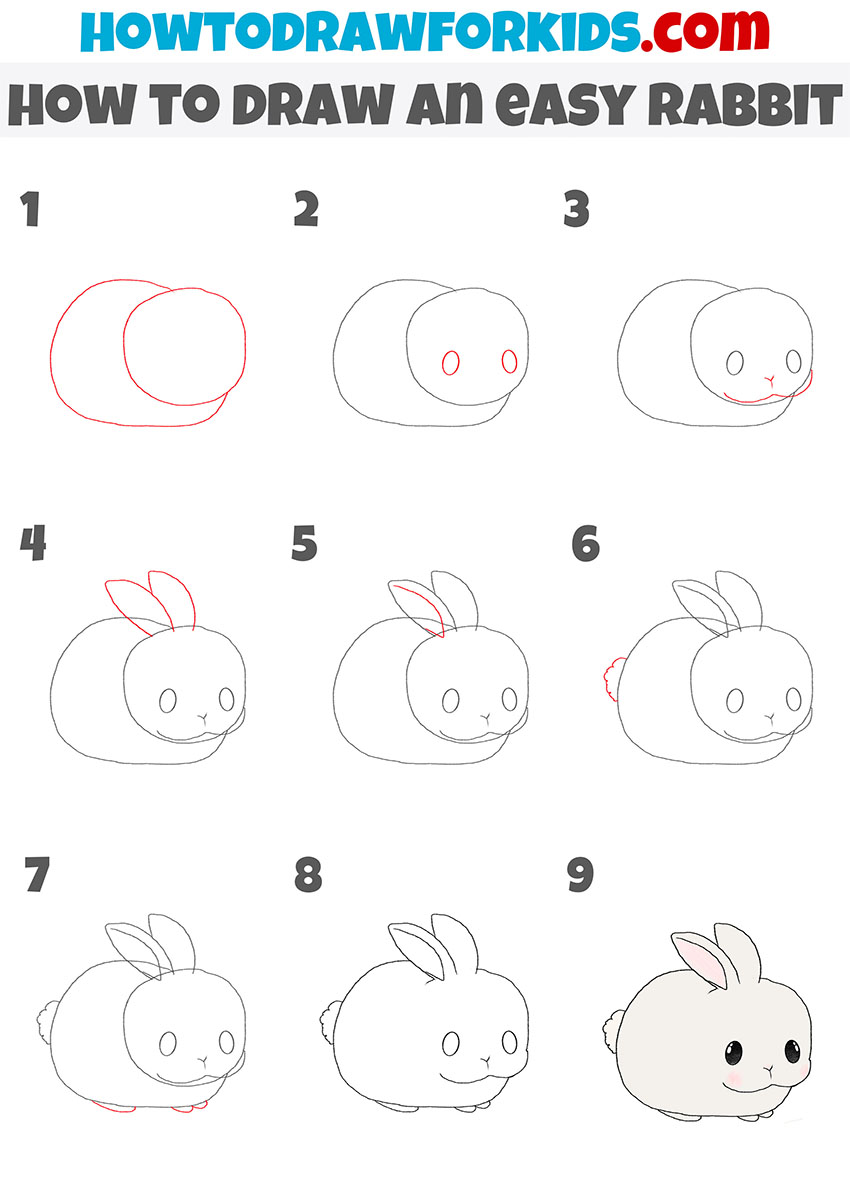
Cute Rabbit Drawing Guide
Now, we’ll be drawing an adorable and charming rabbit that looks so soft, you’ll want to reach out and pet it! Starting with a simple combination of circles to form the body and head, we then add the details that bring our bunny to life.
Small touches like the curve of the ears, the sparkle in the eyes, and a tiny, twitching nose make all the difference. The final touches of fluffy fur texture and round cheeks will give your rabbit a cuddly appearance. This method is perfect for creating a lovable character that could hop right into a storybook.
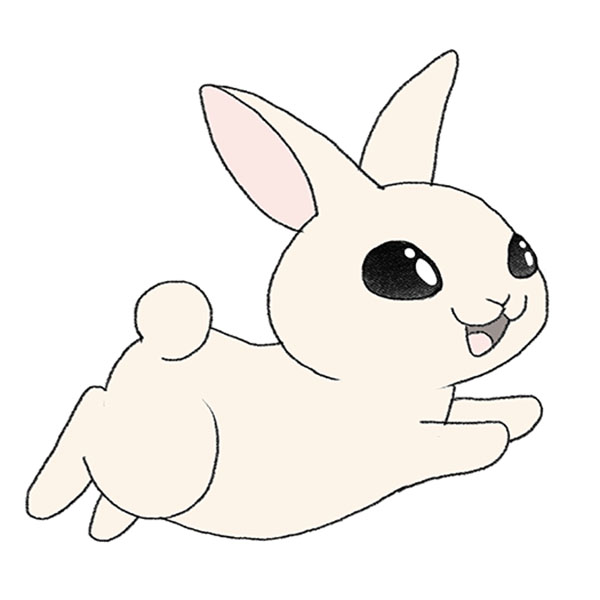
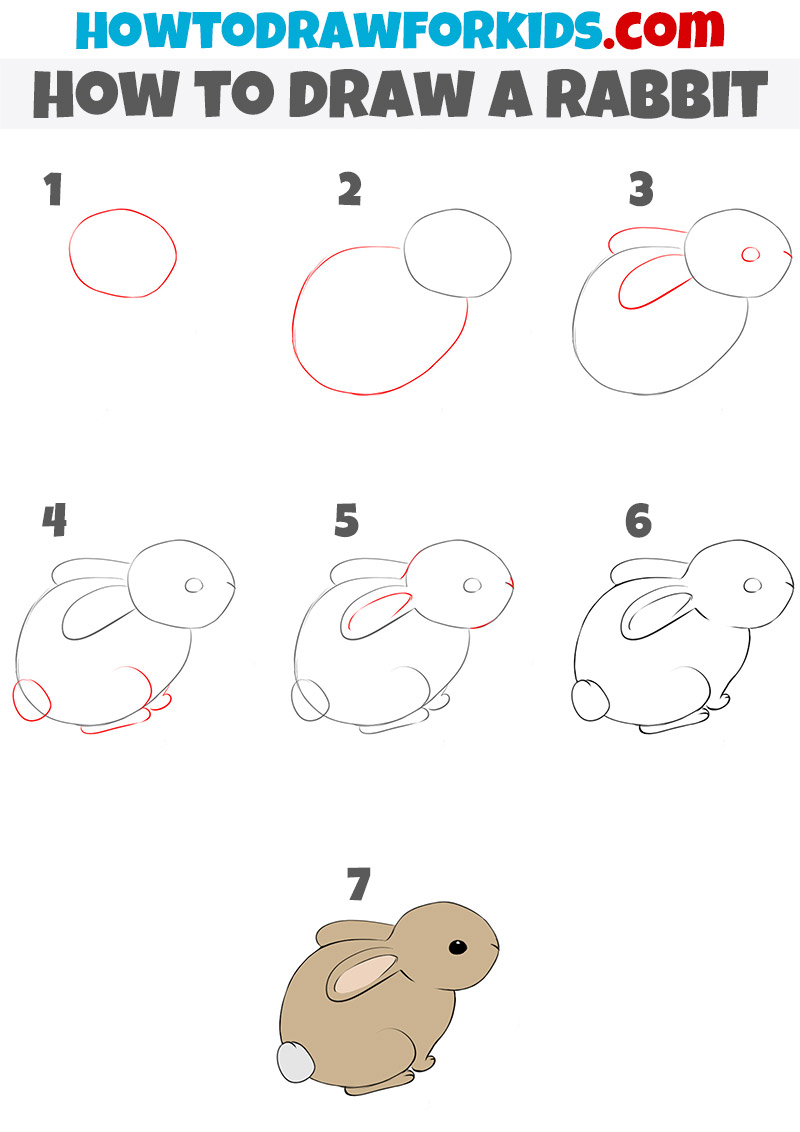
How to Draw a Rabbit Side View
So, in the final method of our rabbit drawing tutorial, we showcase a side view of our furry friend. This perspective gives you a clearer understanding of the rabbit’s anatomy, teaching you the subtle curves of its back, the placement of its ears, and the roundness of its body.
This angle is especially beneficial for learning how to portray movement and direction, giving you the skills to draw rabbits in various poses and from any perspective in the future. Keep practicing, and soon you’ll be able to bring these cute creatures to life in any scenario you can imagine!
Conclusion
You’ve mastered drawing a rabbit, and I’m so proud of your progress! Are you excited to explore more? My website is brimming with drawing tutorials for all levels – like a quacking duck or a beaming sunflower. It’s a place where your creativity can truly flourish.
Stay in the loop with all the latest lessons and artistic tips by following me on social media. By staying connected, you ensure a vibrant palette of possibilities for your art. Let’s continue this creative journey together, one drawing at a time!