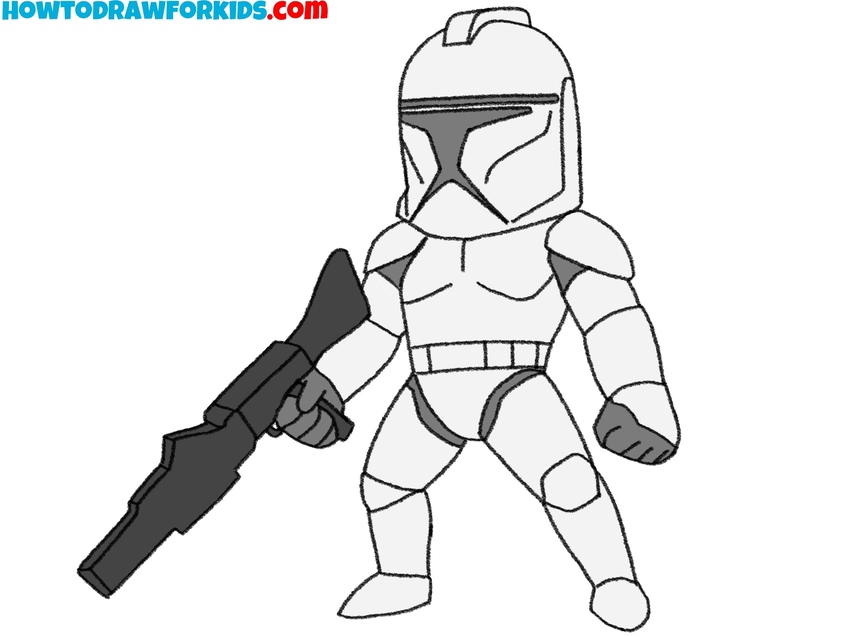
How to Draw a Stormtrooper
Especially for all Star Wars fans, I’ve created this simple tutorial on how to draw a Stormtrooper in two different and really easy ways.

How to Draw a Stormtrooper: Introduction
My website features a large number of drawing tutorials covering a wide range of Star Wars characters. Previously, we’ve already drawn Darth Vader, along with other equally iconic heroes and villains from this universe.
In this tutorial, we’ll use genuinely simple steps to learn how to draw a stormtrooper. This exercise will also strengthen our skills in drawing characters and human figures.
In the movie, stormtroopers wear rather detailed costumes, but we’ll significantly simplify it. This approach will make it easier for you to recreate stormtroopers on paper without unnecessarily complicating the drawing process.
Additionally, we’ll use a simpler style for this lesson on how to draw a stormtrooper. However, you can easily create a more detailed character with realistic proportions by changing some elements of the drawing.
Stormtrooper Drawing Tutorial
Materials
- Pencil
- Paper
- Eraser
- Coloring supplies
Time needed: 40 minutes
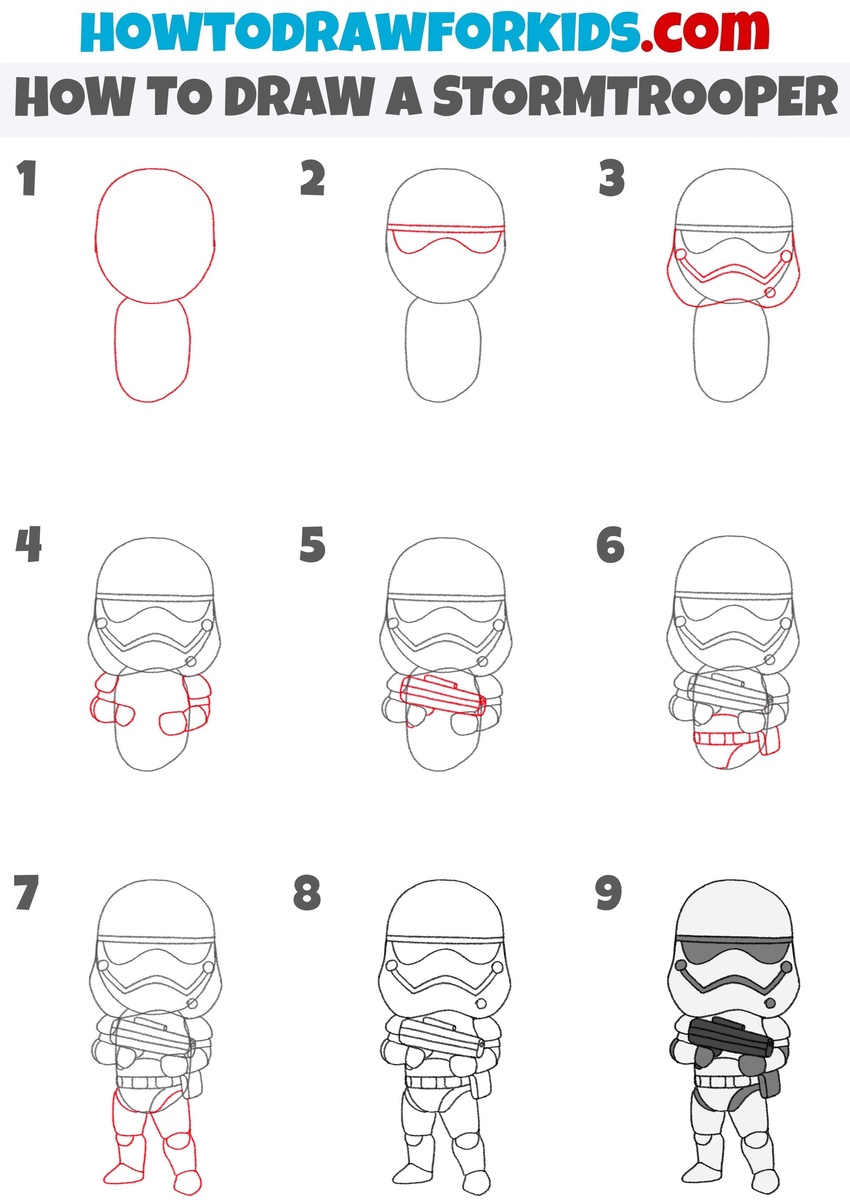
How to Draw a Stormtrooper
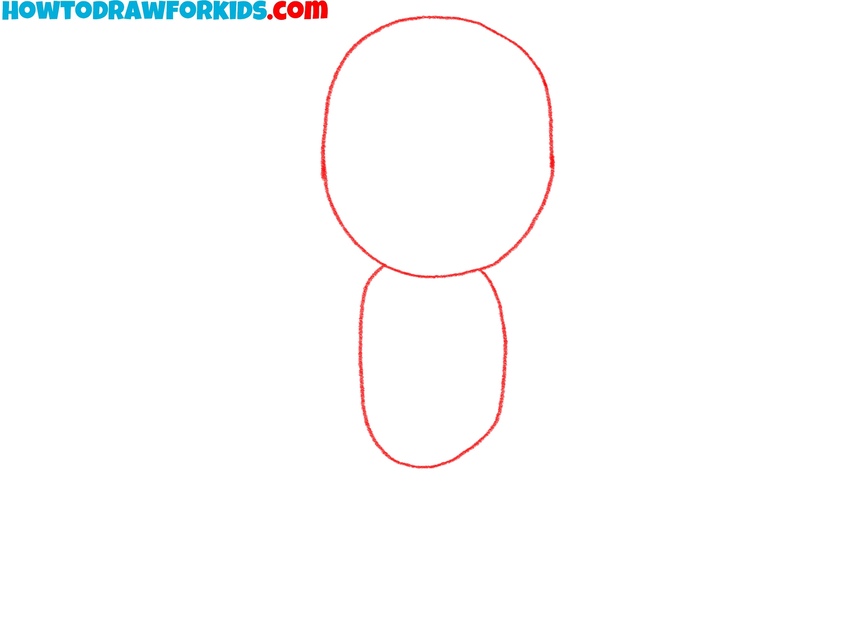
- Sketch the basic head and body shapes.
Outline two simple shapes to serve as guidelines for proportions. Draw an oval-like circle for the head. Below the head, sketch an elongated oval to represent the torso. This shape should be narrower than the head and gently tapered toward the bottom. The simplicity of this step allows you to correct proportions later.
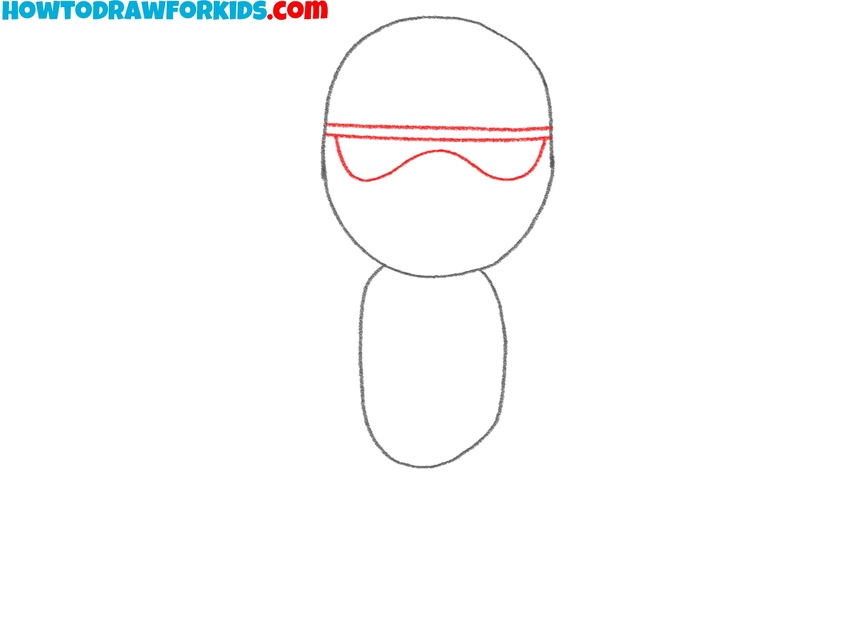
- Draw the eyes of the helmet.
Next, define the stormtrooper’s iconic helmet visor by drawing a horizontal line across the upper portion of the head. Beneath this, sketch the distinct wave-shaped outline of the helmet eyes. Remember, the eyes should take up about a third of the helmet’s overall height. Double-check your drawing for accuracy.
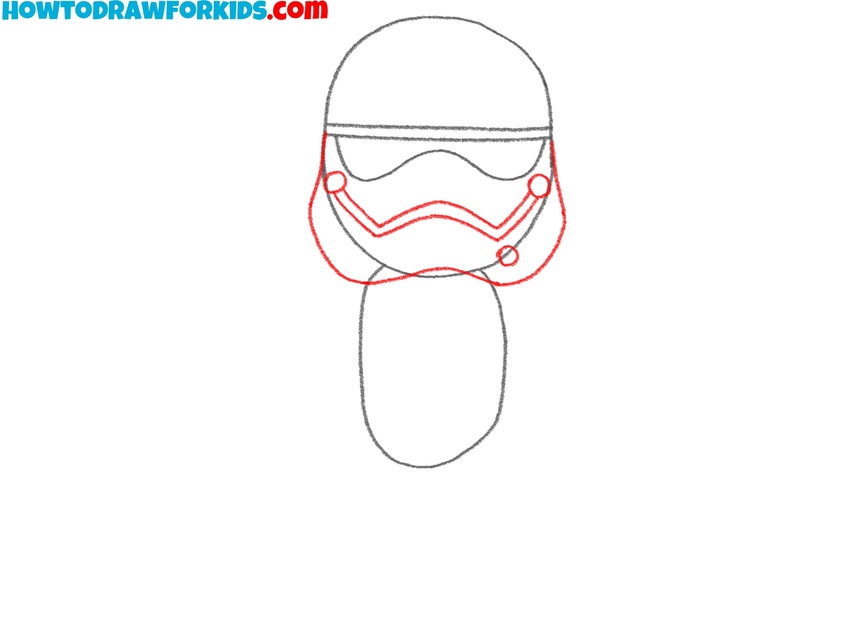
- Detail the helmet of the stormtrooper.
In this step, elaborate on the helmet by adding important design features. First, outline the bottom side parts of the helmet, which frame the chin and widen outward at the base. Incorporate two small circles on each side of the helmet’s front face, symbolizing breathing filters.
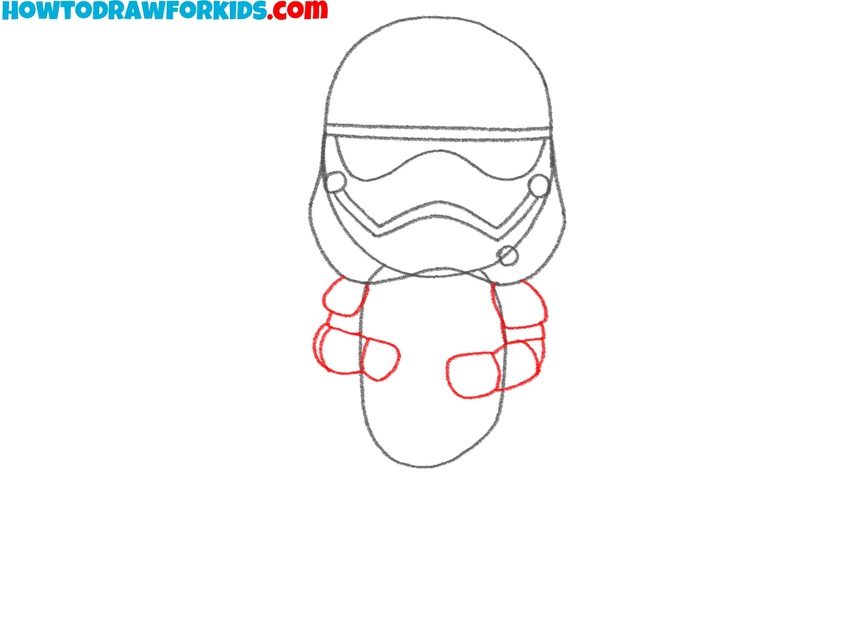
- Add the arms and hands.
Sketch small oval shapes to represent the stormtrooper’s shoulders. Attach short, cylindrical shapes to form the arms. At the end of each arm, sketch simplified rounded rectangles or ovals to represent the hands, currently placeholders for the stormtrooper’s grip.
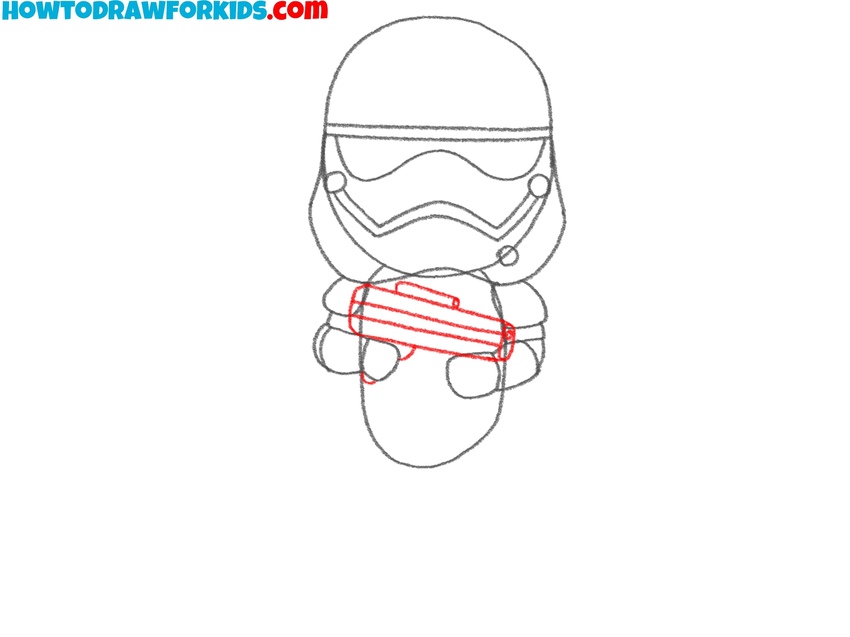
- Draw the stormtrooper’s weapon.
Between the two hands you drew earlier, sketch a simplified version of the weapon, consisting of rectangular and cylindrical shapes. Begin with a long horizontal rectangle that will become the body of the blaster. Add small cylindrical elements underneath to resemble the weapon’s barrel and grip.
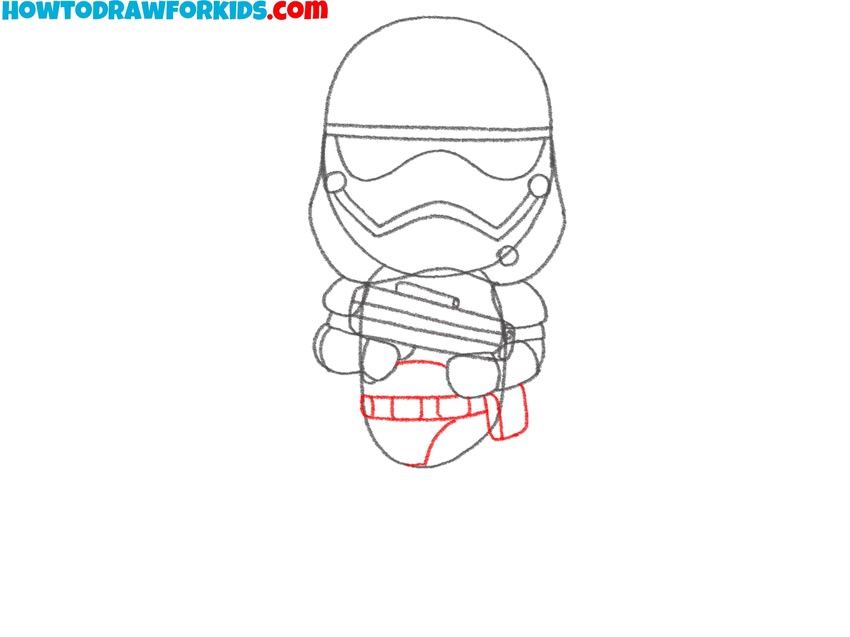
- Define the belt and lower torso.
Sketch a horizontal rectangle around the waist area, clearly defining the belt. Add small square or rectangular shapes along the belt to represent pouches and utility compartments typically carried by stormtroopers. Beneath the belt, outline curved lines that define the stormtrooper’s armor plates on the lower torso.
- Sketch legs and feet.
Sketch two simple shapes to form the legs, tapering slightly as they move downward toward the feet. Near the middle of the legs, sketch irregular ovals or circles for knee pads. Sketch small rectangles or oval shapes at the bottom to represent the boots.

- Refine and finalize the outline.
Now carefully review your entire drawing, finalizing all lines and refining any remaining details. Erase any unnecessary guidelines from earlier steps of your stormtrooper drawing. Smooth any uneven edges, correct minor asymmetries, and ensure the outlines appear clear and finished.
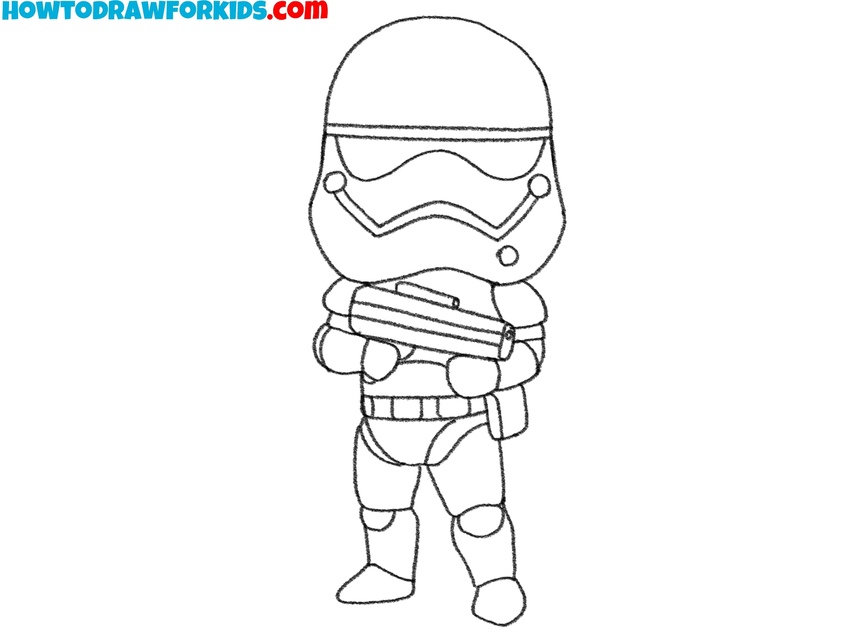
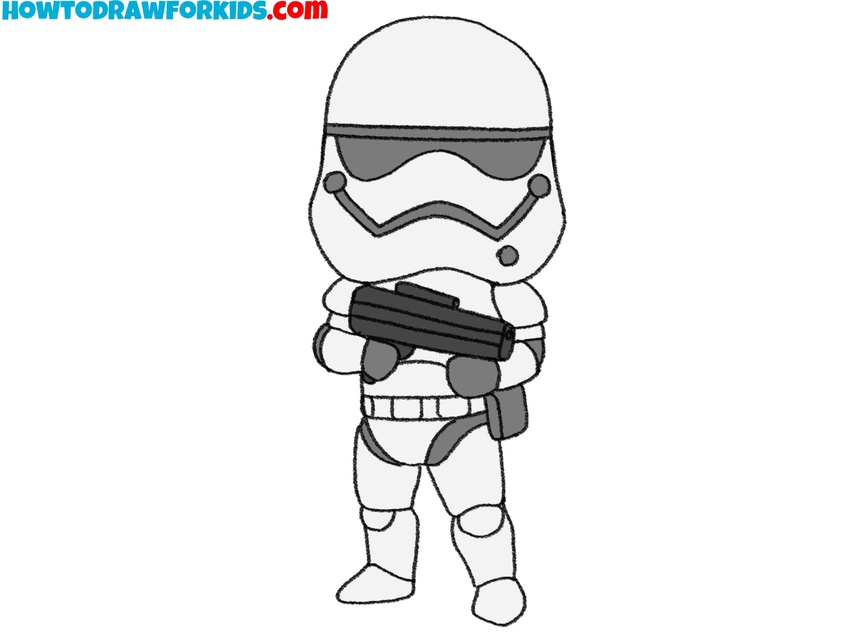
- Color your stormtrooper.
Stormtroopers traditionally feature stark white armor, contrasted sharply with black accents such as the visor, joints, and details of the blaster. Carefully fill in the larger areas of armor with a clean white. Use black to color the eyes, weapon, belt details, and areas between armor plates.
Alternative Stormtrooper Drawing Tutorial
This second stormtrooper drawing tutorial differs from the first one by initially focusing on drawing the helmet outline before adding the body, arms, and weapon details. The steps are reordered to emphasize arms and weapon positioning earlier, while helmet details like the visor and facial elements are added later, unlike in the first tutorial.
Begin this additional tutorial on how to draw a stormtrooper by sketching the basic shape of the helmet. Next, draw the arms and hands positioned to hold the weapon across the torso area. Add the upper torso and belt area using simple geometric shapes. Outline the lower legs and boots, defining armor segments with simple lines at knees and ankles. Then draw the visor of the helmet clearly, creating its distinct shape.
Next, add the front facial details, including breathing filters and helmet contours characteristic of a stormtrooper. Afterward, detail the blaster held by the stormtrooper, clearly marking its main shape and simplified features. Finish the stormtrooper drawing by carefully adding small accent lines on the helmet and armor, clearly outlining armor plates and belt details. Review and erase any unnecessary guidelines, leaving a clean outline ready for coloring. Finally, use black and white colors to finish this addition tutorial on how to draw a stormtrooper.

Conclusion
The basic tutorial on how to draw a stormtrooper is now complete, as is the additional tutorial that demonstrated a completely different way to create this Star Wars fighter. Now it’s the perfect time to try improving your drawing skills even further.
To continue building your drawing skills, explore other sections of my website. For example, you might choose to draw Baby Yoda, or you could draw the Mandalorian and add this character to your current composition.
Also, be sure to follow me on social media platforms like YouTube or Pinterest to stay updated on new tutorials and content.