How to Draw a Watering Can
This tutorial will show you how to draw a watering can, a simple but essential tool used by gardeners everywhere.

How to Draw a Watering Can: Introduction
Any artist should be able to draw simple, everyday objects such as cups, spoons, and similar items. This helps you learn the basics of drawing and later allows you to create more complex and interesting compositions that include these simple objects.
In this lesson, I want to show you how to draw a watering can, an item that is probably familiar to all of us. As I mentioned, ordinary objects can be an excellent addition to more complex compositions. For example, a watering can works perfectly in a still life alongside sunflowers and other plants.
It is also a great subject for practicing symmetry, especially since this main lesson will be followed by a second one showing how to draw the watering can at an angle.
Watering Can Drawing Tutorial
Materials
- Pencil
- Paper
- Eraser
- Coloring supplies
Time needed: 20 minutes
How to Draw a Watering Can
- Draw the watering can base line.
Begin your watering can drawing by making a straight horizontal line. This will be the base of the can and will help keep the proportions correct as you build the rest of the shape. Starting with a stable base line helps you visualize how wide the object will feel. Keep the line straight and even.

- Illustrate the can body edges.
From each end of your base line, draw two slightly angled lines going upward. Not make these lines perfectly vertical, as that would make the can look too boxy. A subtle inward tilt creates a more realistic and pleasing shape. Keep both sides symmetrical so your watering can drawing feels believable.

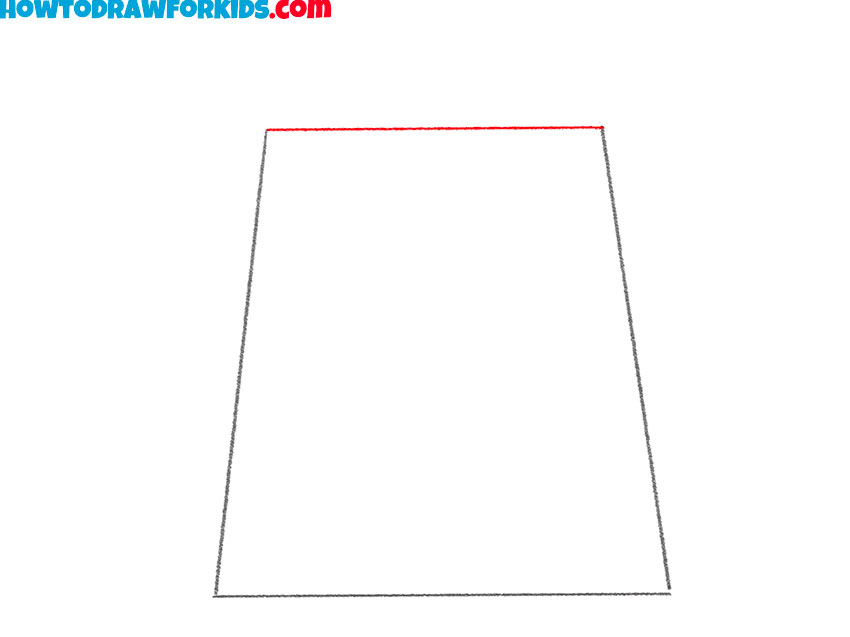
- Sketch the upper rim.
Connect the tops of the angled lines with a straight horizontal line to complete the trapezoid-like body. This line will be the top rim of the can. Check that the top line is parallel to the bottom so the watering can looks stable. If you draw a watering can with an uneven rim, it can make the whole object feel unnatural.
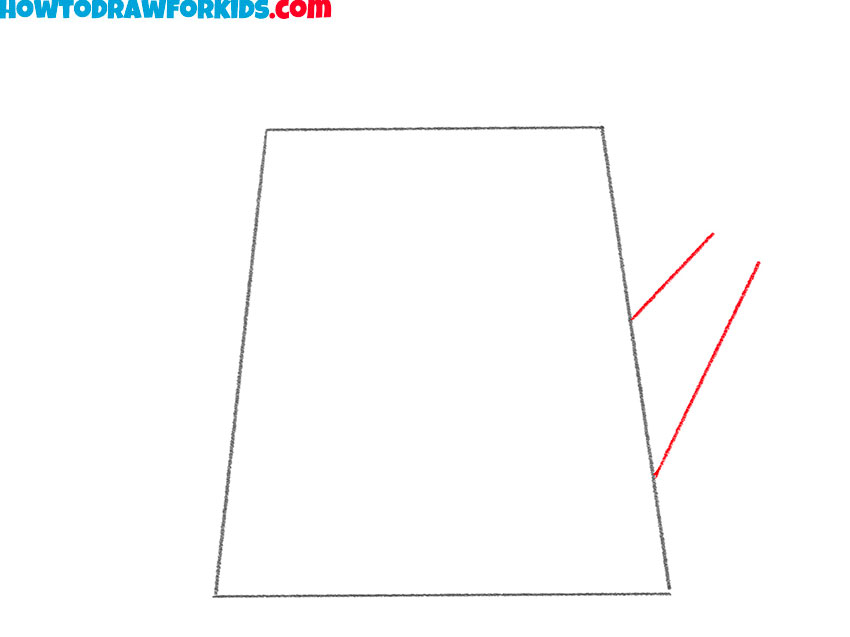
- Sketch the base of the spout.
On one side of the watering can body, sketch two angled lines extending outward for the spout’s base. Picture where water would naturally pour out; this helps with positioning. Make sure the base of the spout is wider than the end.
- Draw the watering can spout tip.
At the end of the spout base, add a small oval or angular shape for the opening where water will pour out. When you illustrate a watering can, making the spout tip slightly wider than the base helps it look more authentic and believable.

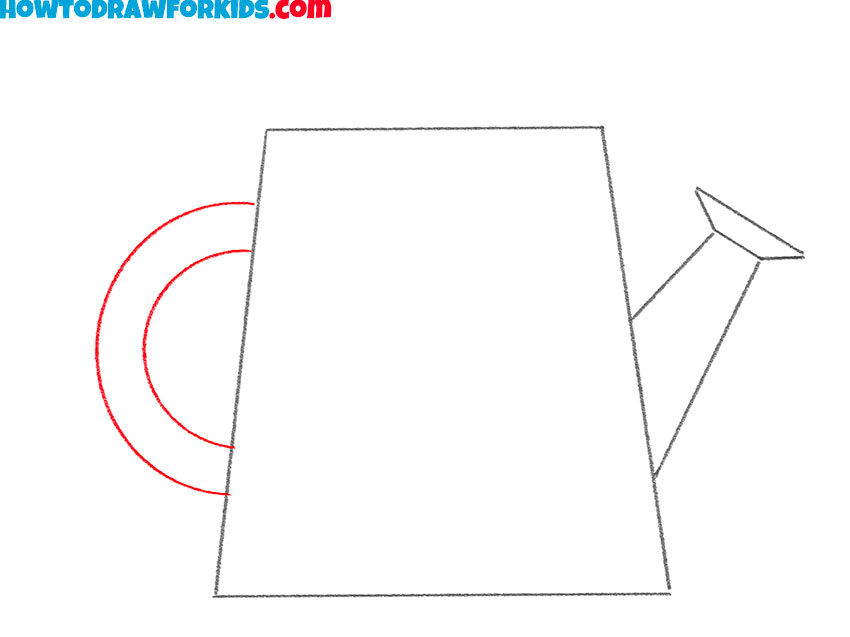
- Sketch the curved side handle.
On the opposite side of the spout, sketch a large curved handle looping from the upper part of the body down to the lower side. A watering can sketch looks more authentic when the handle is big enough to comfortably “hold” if it were real.
- Draw the watering can top handle.
Add a smaller curved handle on top of the can, connecting both sides of the rim. In a real watering can, this is often used for carrying with two hands or for better control when pouring. In your watering can drawing, this small part will add more realism.
- Fill the can with color.
You can use any shade you like – traditional silver, bright green, or pastel blue. When coloring a watering can sketch, I recommend using more common colors for this object, since this will make your artwork look more beloved and authentic.

Additional Content
Good news, my budding artists! I’ve crafted a special treat for you – a free downloadable PDF of my watering can lesson. This handy file is a brief version of our full lesson.It’s perfect for keeping the kids engaged with their art anywhere, at any time.
Just download, print if you’d like, and carry it along on your artistic endeavors. You could be in the comfort of your home or under a tree in the park – this PDF is your personal art teacher, ready whenever inspiration strikes!
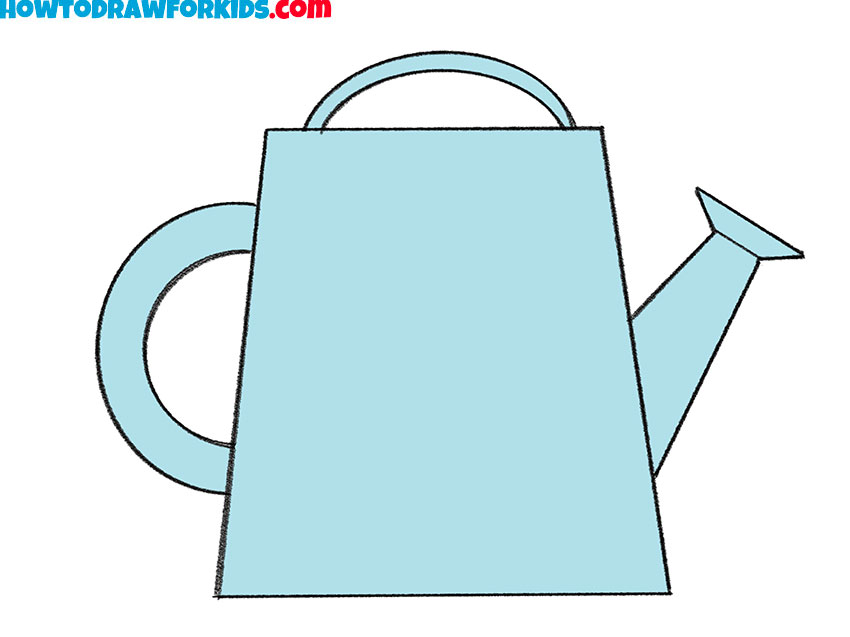
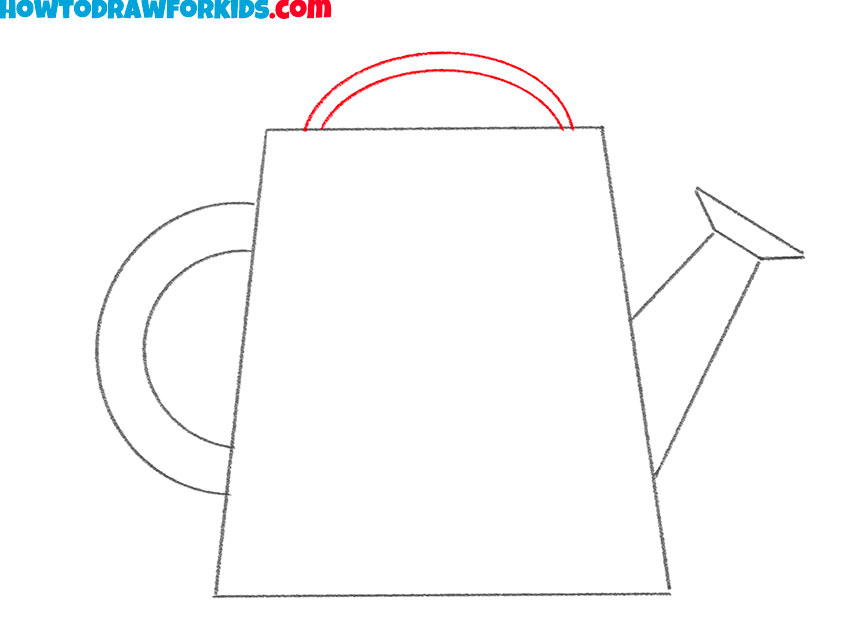
How to Draw a Watering Can at an Angle
This watering can drawing tutorial shows the object placed at an angle. The shape is made from just a few clear lines – a tilted rectangle for the body, an arched handle, and a long spout with a rounded end. The steps are kept minimal, so you can easily create a recognizable object.
Outline a tilted rectangle with slightly rounded corners to form the can’s body. Attach the curved handle on the upper right side, using two parallel arcs. On the lower left corner, draw two straight, narrowing lines that extend outward for the spout. Add a cone-shaped tip and a rounded front for the watering head. Keep the lines smooth and even, then go over the drawing to make them clear. Once the outline is complete, fill the can with a light blue or any color you like.

Conclusion
A watering can is a simple object, but can be a great object for adding to your still life composition or other complex artwork. I often suggest looking at a real watering can while you draw, even if it’s a different style, to understand how each part relates to the others.
Once the outline feels solid, adding color and shading can turn a flat sketch into something with weight and presence. Experiment with different styles – a tall, narrow can, a wide vintage one, or even a decorative design. Small changes in proportion or detail can create a completely new look.
Also, check other drawing tutorial to train your hand. For example, you can learn how to draw a flower or tree, to compliment this gardening object.