How to Draw a Walrus Face
This simple tutorial uses two techniques and easy steps to demonstrate you how to draw a walrus face quickly and without difficulty.
How to Draw a Walrus Face: Introduction
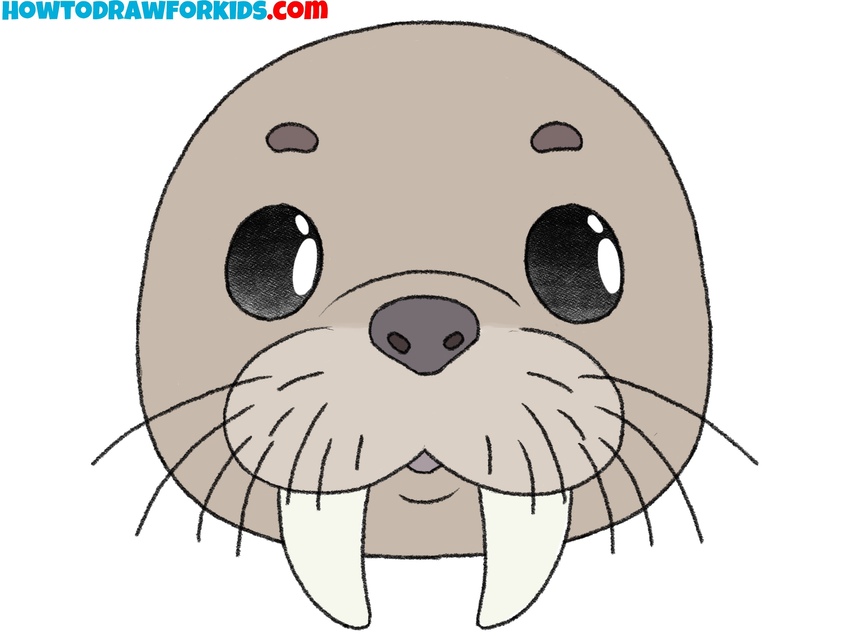
On my website, you can find lessons on drawing various animals. To draw many of them correctly, you must first understand how to depict their parts in more detail. For this reason, to draw a walrus, it is important to learn how to draw a walrus face.
Many animals have distinct features that make them easily recognizable. The walrus, for example, has a characteristic facial structure, including its muzzle and long tusks. To draw a recognizable walrus head, it is essential to represent these details as accurately as possible.
But how can you represent these features on paper correctly? In this tutorial, I will show you a simple way to draw a walrus head, focusing on the most important details without unnecessary complexity.
To further improve your skills and introduce you to new techniques, I have also included an additional simplified lesson, which can be found at the end of this page.
Walrus Face Drawing Tutorial
Materials
- Pencil
- Paper
- Eraser
- Coloring supplies
Time needed: 35 minutes
How to Draw a Walrus Face
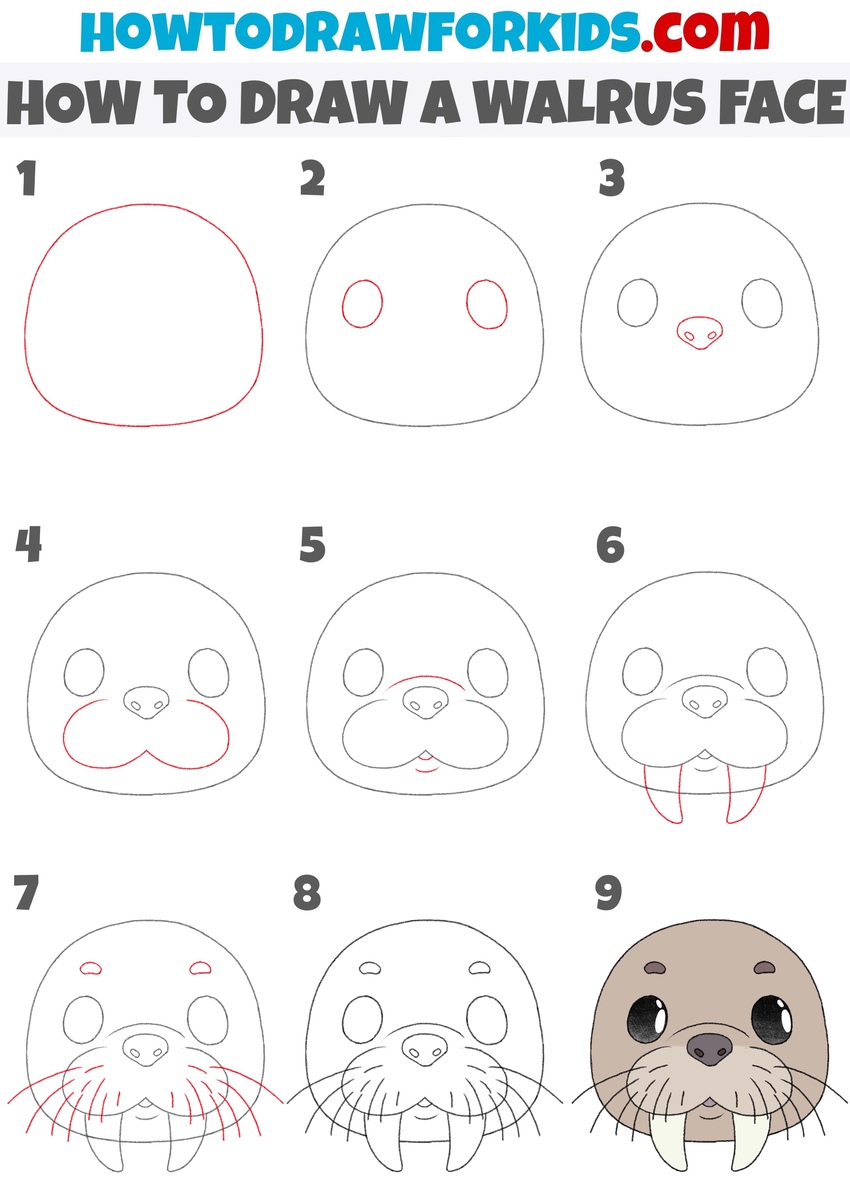
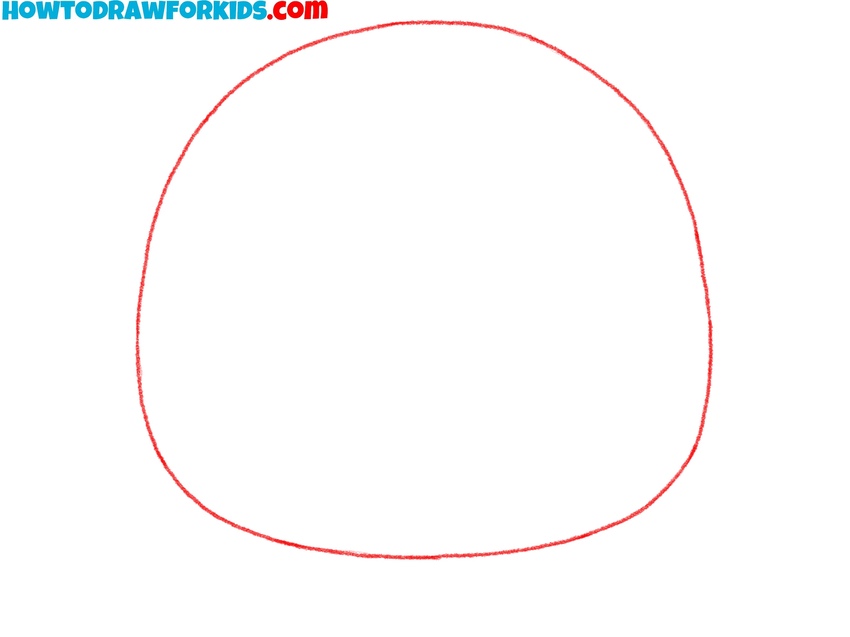
- Sketch the outlines of the head.
To start this tutorial on how to draw a walrus face, sketch a large oval shape for the head. This oval will serve as the main outline of the walrus face and give a base to add the features in later steps. Make sure the oval is slightly wider than it is tall to resemble the broad and rounded head of a walrus.
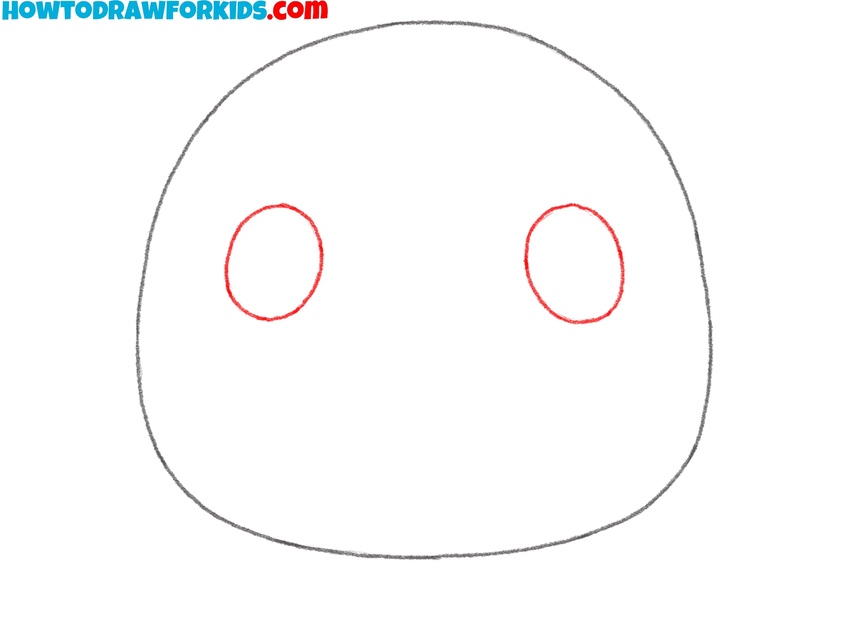
- Draw the eyes of eye animal.
Next, draw two small ovals inside the head outline for the eyes. Position these ovals symmetrically near the upper half of the face, slightly spaced apart. Keep the size of the ovals small but clearly visible. Adjust their shape if necessary for alignment.
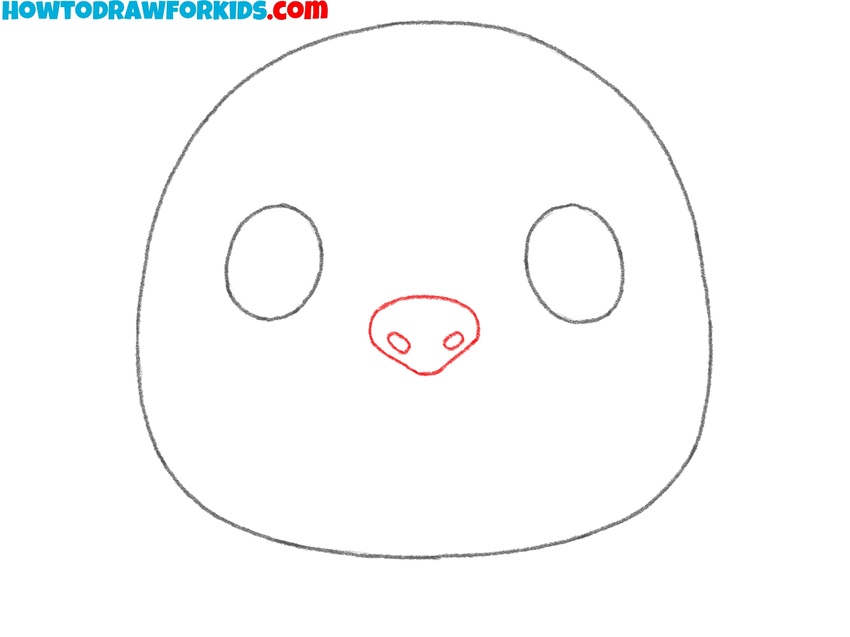
- Sketch the nose.
Now, draw a rounded triangle shape in the center of the face, just below the eyes, to create the nose of ragweed walrus. Then, draw the nostrils of the walrus inside this geometric shape, using two small circles or ovals. Double-check its size and placement.
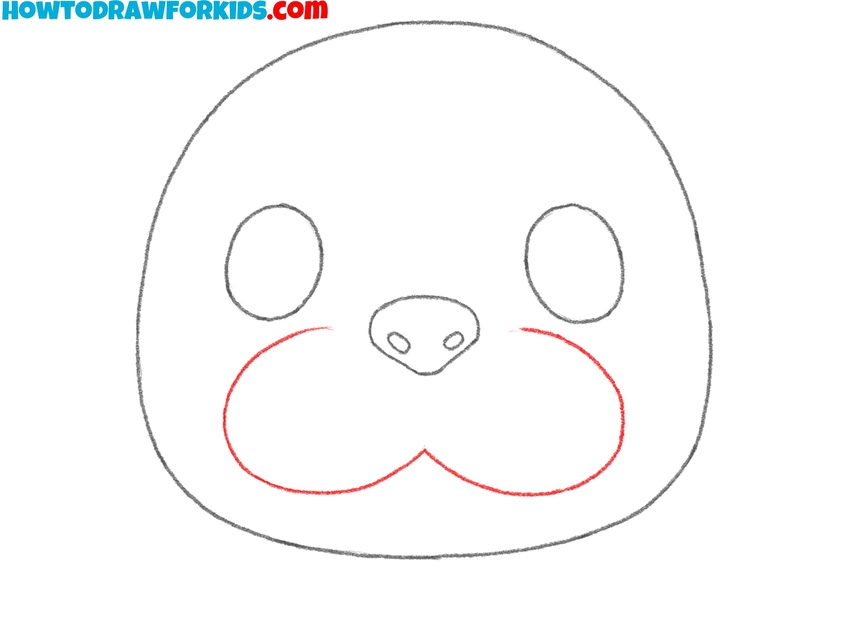
- Draw the snout of the walrus.
Add two rounded, curved shapes extending from the lower sides of the nose to form the snout of the walrus. This part of the walrus’s face looks like a large letter W or the number 3 turned on its side. The snout must be depicted as symmetrically and proportionally as possible.
- Add the mouth of walrus.
To draw the walrus’s mouth, sketch a short curved line straight down the center of the geometric shape from the previous step. Then, draw another similar line slightly lower to represent the lower lip. Add detail and volume to the walrus’s muzzle by drawing its upper edge using a short line positioned above the nose.
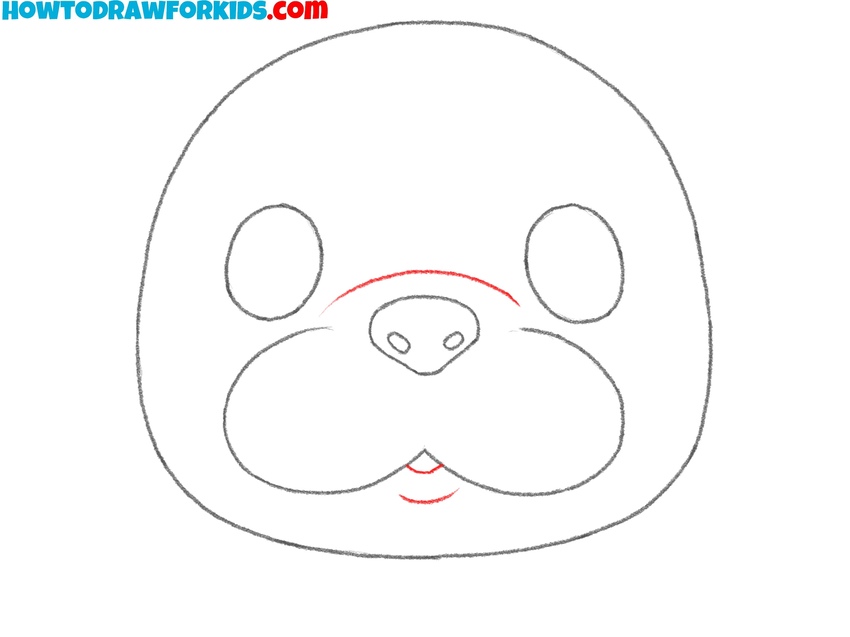
- Draw the walrus’s tusks.
The walrus tusks should be drawn as two elongated and slightly curved triangular shapes. These tusks should start just below the snout and have a slight curve. As with the muzzle, the walrus’ teeth should be as symmetrical as possible.
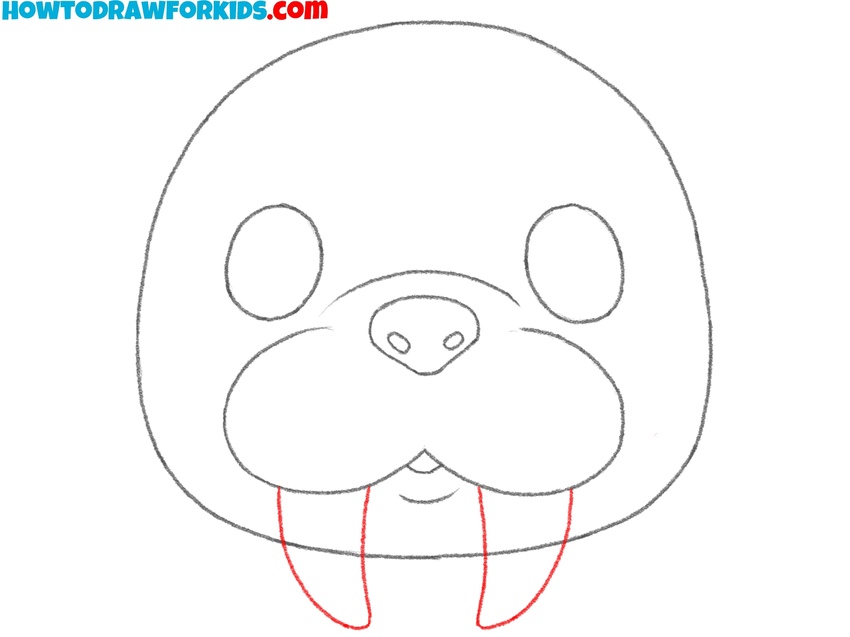
- Draw the whiskers and eyebrows.
To complete the detailing of the walrus face, draw several thin, slightly curved lines radiating from each side of the snout to form the whiskers. Vary the length and angle of the lines slightly to give a natural appearance. Next, draw the eyebrows above the eyes in the form of two curved ovals.

- Finalize the walrus face sketch.
It’s time to finalize the walrus face drawing and prepare it for coloring. Refine the overall appearance of the walrus face by smoothing out the lines, erasing any guidelines, and adjusting proportions as needed. Also, this step is the place to add some extra details if needed.

- Add color to the walrus face.
Use a light brown or beige shade for the face of the walrus. Next, use a lighter brown for the snout. For the tusks, apply a light cream, ivory, or off-white color. Use black for the eyes, leaving some white spots for highlights. Finally, color the eyebrows, nose, and inside of the mouth in a darker brown.
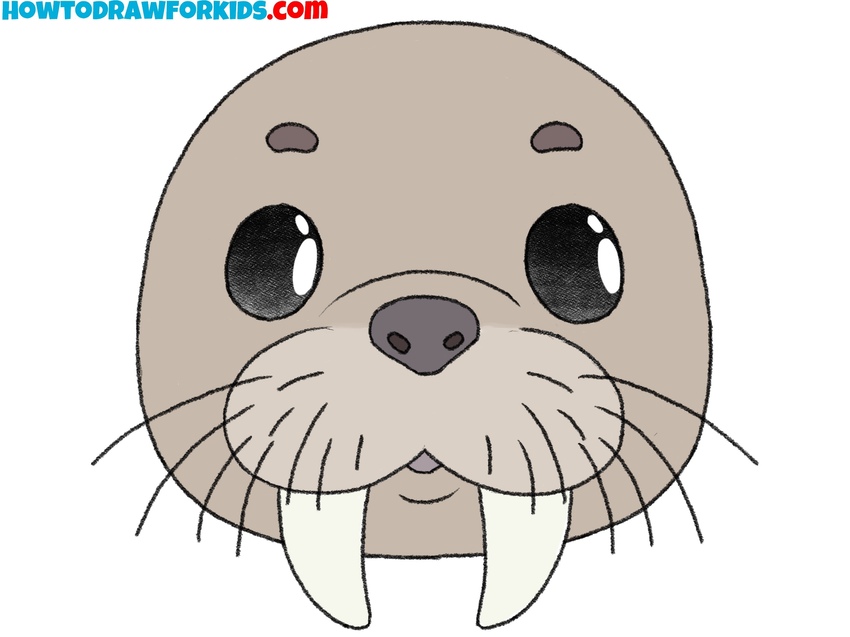
How to Draw a Walrus Face for Preschoolers
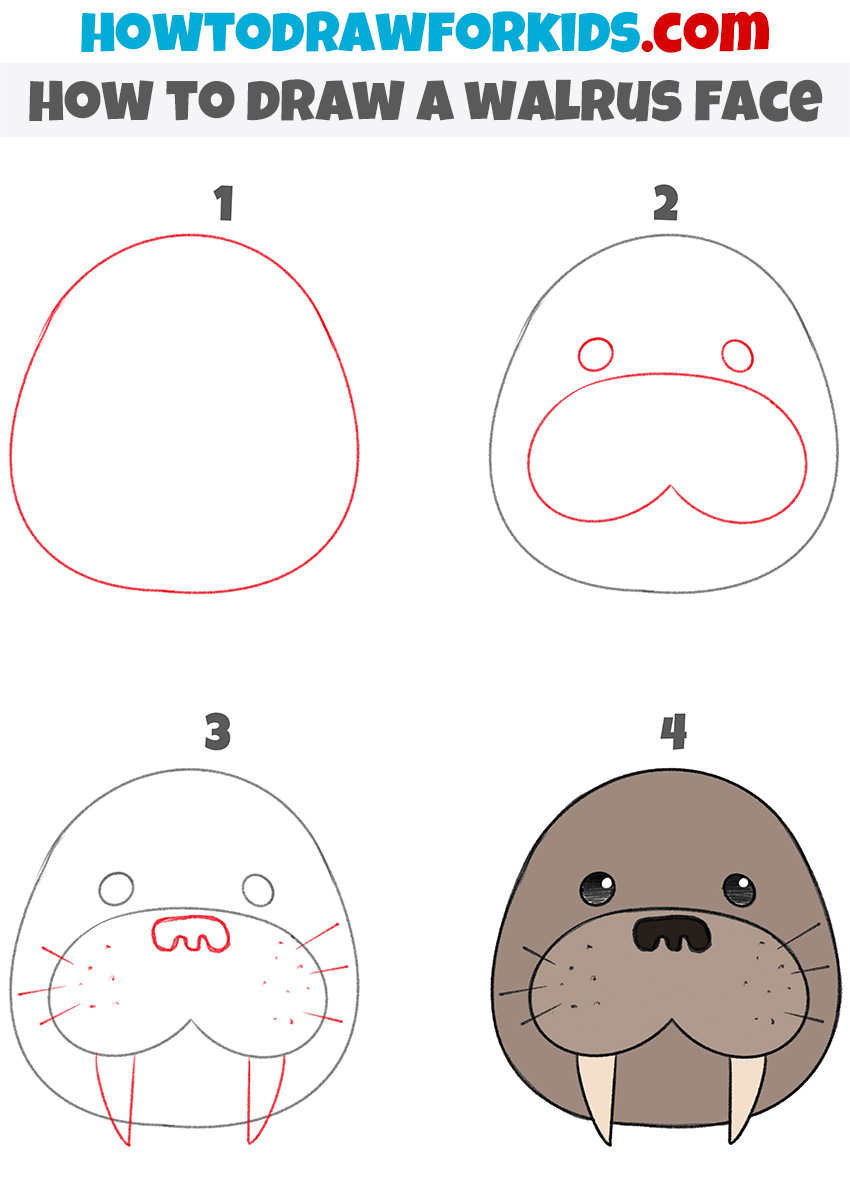
This walrus face drawing tutorial is more simplified compared to the first one. It uses fewer steps (four instead of nine) and avoids detailed features such as the eyebrows and complex whisker lines. The structure is minimal, focusing on creating a recognizable walrus face with basic shapes and simpler elements.
Start by drawing the outline of the walrus face as a large oval shape that tapers slightly at the top. This will serve as the base for the rest of the drawing. Next, add the muzzle by sketching a rounded “W” shape in the lower half of the oval. Above the muzzle, draw two small circles for the eyes.
Then, outline the tusks as two elongated triangular shapes extending downward from the bottom of the muzzle. Add the nose in the form of a rounded rectangle with two small nostrils. To add details, draw several short lines around the muzzle to represent whiskers. Complete the drawing by coloring the walrus face light brown, the tusks cream, and the eyes black, leaving small highlights in them.
Let me also remind you that I have prepared for you a short version of this tutorial in PDF format so that you can easily view this tutorial at any time. Download this file and get absolutely free access to additional materials.
Conclusion
I hope this tutorial was helpful and that you are satisfied with the result. Feel free to share your thoughts about this lesson. I look forward to receiving your comments, questions, and suggestions for new drawing ideas. Don’t forget to subscribe to my social media pages and share this tutorial with your friends if you found it useful.
In addition, to improve your skills in drawing animals and create detailed animal illustrations, make sure to check out the lessons in the Animals section. There, you can find tutorials such as how to draw a bunny or practice drawing bats using very simplified techniques.

