How to Draw a Winter Vest
On my site there are many very simple lessons on drawing clothes, and this guide on how to draw a winter vest step-by-step is one of them.

How to Draw a Winter Vest: Introduction
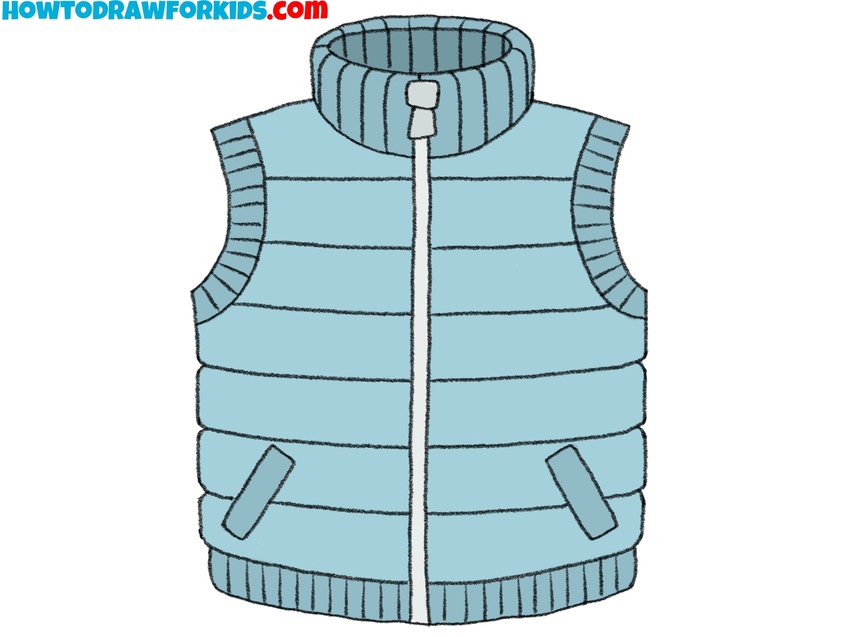
In this tutorial, you will learn how to draw a winter vest. This is a comfortable but not very common type of clothing. A winter vest is a sleeveless jacket with a layer of insulation inside. It is worn when the cold is mild. The material of the vest can vary, and it can be worn over a warm sweater.
Understanding the appearance and components of a winter vest will make it easier for you to draw it accurately. An artist should not simply replicate what is seen, but instead convey the essence of the object by understanding its structure.
In fact, the figure is simple to create, and you should be able to complete it successfully. In the first drawing tutorial, you can see the front view of the vest, which includes a high collar at the top and a zipper in the center. The second lesson depicts approximately the same vest, but in a more simplified form.
Now that we understand the appearance of a winter vest, its components, and have a basic idea of how to depict it on paper, let’s gather the necessary art supplies and start drawing a winter vest.
Winter Vest Drawing Tutorial
Materials
- Pencil
- Paper
- Eraser
- Coloring supplies
Time needed: 30 minutes
How to Draw a Winter Vest
- Sketch the basic shapes of the winter vest.
Use smooth, slightly curved lines to outline the body of the vest, forming a rectangular shape with soft edges. Keep the lines light, as you might adjust them later. This is the basic form onto which we will later add the remaining components of the vest.

- Draw the collar of the vest.
Start by sketching a rounded rectangle shape that sits on the neckline, slightly overlapping the main body outline. This will represent the high collar typical of a winter vest. Don’t forget to draw the inner edge of the vest’s collar using an oval shape.

- Draw the zipper and the zipper pull.
To make your winter vest more realistic, draw a zipper line in the center. Start from the collar’s top edge and draw two straight vertical lines to the bottom edge of the vest. This line will split the front of the vest in half. At the top, add a small rectangular shape to represent the zipper pull.

- Draw the armholes.
To do this, draw two curved lines that mirror each other on the left and right sides of the vest, near the top. Keep the armholes rounded. To give the armholes a more realistic look, draw a couple more curved lines on each side. This will help create the outline of the armhole cuffs.

- Draw the pockets and waist cuff.
Draw two small angled rectangles near the lower part of the vest to represent pockets. Place them symmetrically on each side of the zipper line, at a comfortable height for the hands. The pockets don’t need to be overly detailed at this stage. Also, don’t forget to draw the bottom cuff that lies in the waist area.

- Draw the horizontal padding lines.
To give your winter vest its quilted, padded look, draw horizontal lines across the front. Start from the top and space the lines evenly as you move downward, stopping near the bottom cuff. Be sure to draw slight curves at both ends of each line to achieve a more realistic look.

- Detail the cuffs of the winter vest.
Add details to the collar of the winter vest by drawing vertical stripes within its outline. This ribbing makes the collar look more realistic. After that, draw stripes on the cuffs of the armholes. Finish detailing the cuffs by adding stripes to the waist cuff.

- Finalize the sketch.
Now, focus on polishing the lines of the winter vest, erasing any unnecessary guidelines and sharpening the final outlines. Reinforce the shape of the armholes, collar, and zipper to make the drawing of the winter vest look more finished. Add small details, such as seams around the armholes and bottom edges.

- Add colors to the winter vest.
Choose shades that reflect a typical winter vest, like blue, gray, or green, or opt for a color of your choice. Apply a base color to the body, leaving the zipper and pockets in a contrasting or lighter shades. To make your winter vest drawing look even more realistic, you can add shadows.

How to Draw a Winter Vest for Preschoolers
The second drawing tutorial on how to draw a winter vest is simpler and has fewer details compared to the first. This version has only five steps instead of nine, omitting some additional features like the pocket details and intricate collar ribbing.
To draw an easy winter vest, start by sketching a simple rectangular shape with slightly rounded corners for the main body of the vest. Add a smaller rectangular shape at the top to represent the collar. Draw curved lines on each side to mark the armholes. Next, draw a vertical line down the center of the winter vest to depict the zipper line. This line should divide the vest evenly.
Add horizontal lines across the winter vest’s body to create the quilted padding effect. Finally, color the winter vest, using a solid color for the body and a different shade for the zipper line.
Don’t forget to download the PDF file of this tutorial to get free access to additional materials.

Conclusion
The lesson on how to draw a winter vest is complete. This tutorial was created with simple steps for ease of use. For additional tutorials on drawing clothing items, see the “Clothes” category. For example, you may find tutorials on how to draw a boot or how to draw a vest.
Please consider subscribing to me on social networks like Pinterest and YouTube. This will ensure you don’t miss any new lessons and gives you access to new tutorials and coloring pages.

