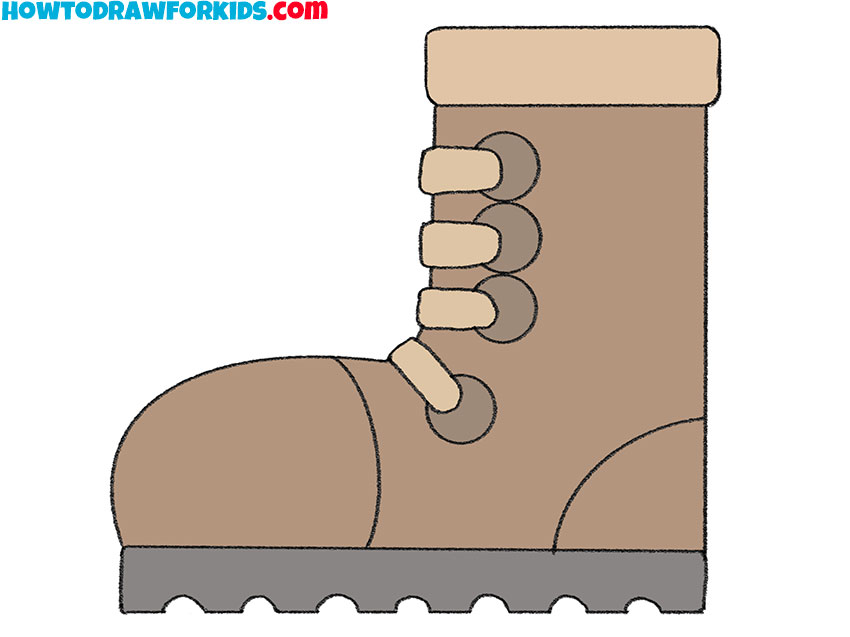
How to Draw a Boot
Lacing up for a creative challenge, today I’m excited to walk you through my how to draw a boot tutorial. It’s a simple guide I’ve developed, drawing from my own experiences as an artist. This method is tailored to empower you with the skill to bring the rugged beauty of a boot to life on your canvas with just a few easy strokes.
How to Draw a Boot: Basic Information
I’m thrilled to present my easy-to-follow how to draw a boot tutorial. With this guide, I’ve distilled the essence of creating a sturdy boot into steps so simple that artists of all levels can march confidently forward in their drawing process. This lesson is my blueprint for turning a complex subject into an approachable artwork.
As we sketch the boot step by step, you’ll notice it takes shape from a series of simple lines and curves. This method, designed by me, highlights the boot’s robust contours and intricate details like the laces and tread. Each part is segmented into elementary forms to help you understand and master the art of drawing complex objects.
Let’s grab our pencils and draw a boot, transforming a blank page into a testament to your developing skill. By layering each element, from the sole to the tongue, you’ll compile a drawing that is more than just a boot- it’s a milestone on your creative path. Follow along, and together we’ll tread the path of artistic growth, one step at a time.
Boot Drawing Tutorial
Materials
- Pencil
- Paper
- Eraser
- Coloring supplies
Time needed: 30 minutes
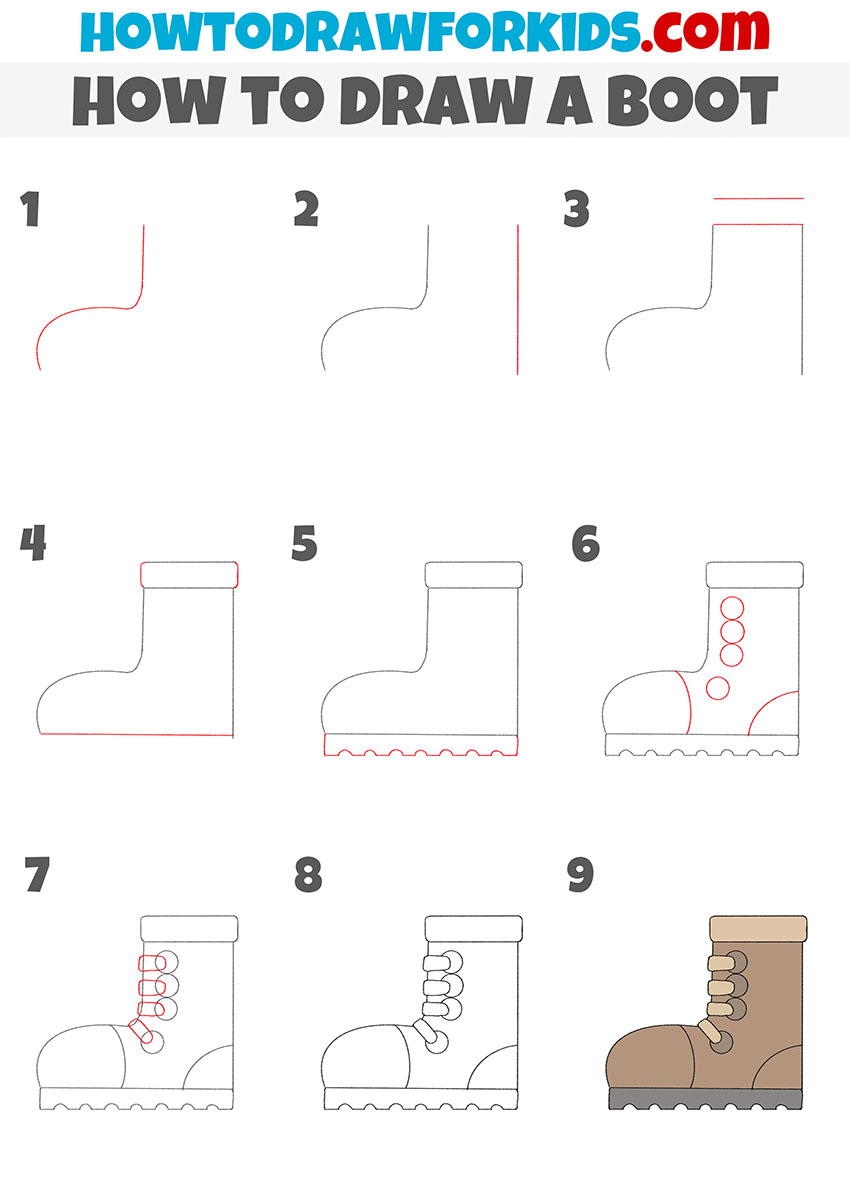
How to Draw a Boot
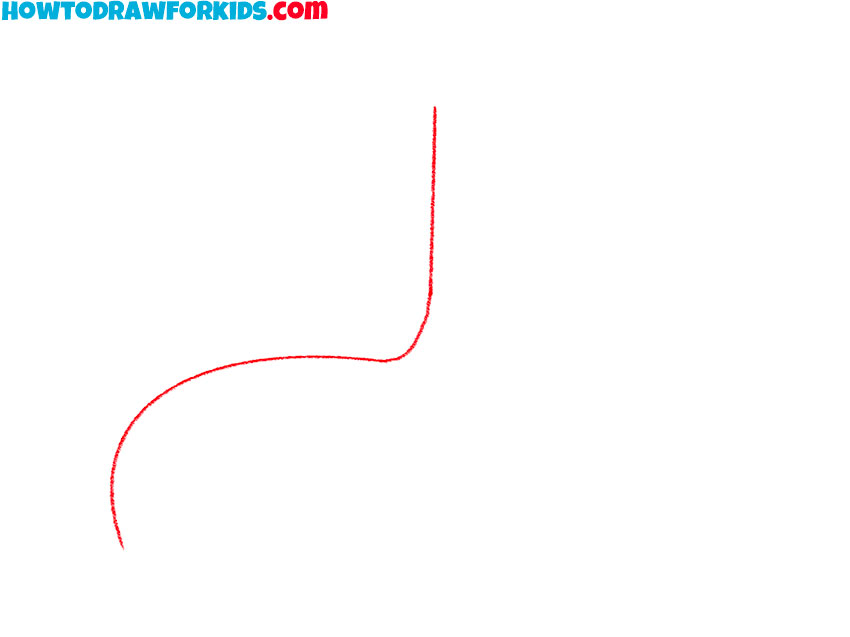
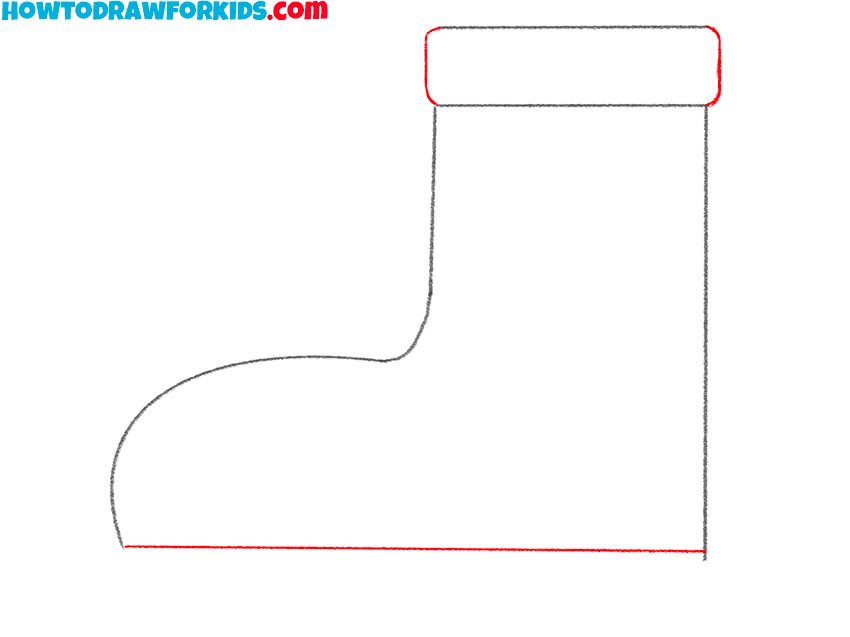
- Draw the front outline of the boot.
Depict a smooth curved line of the same shape as in the example.
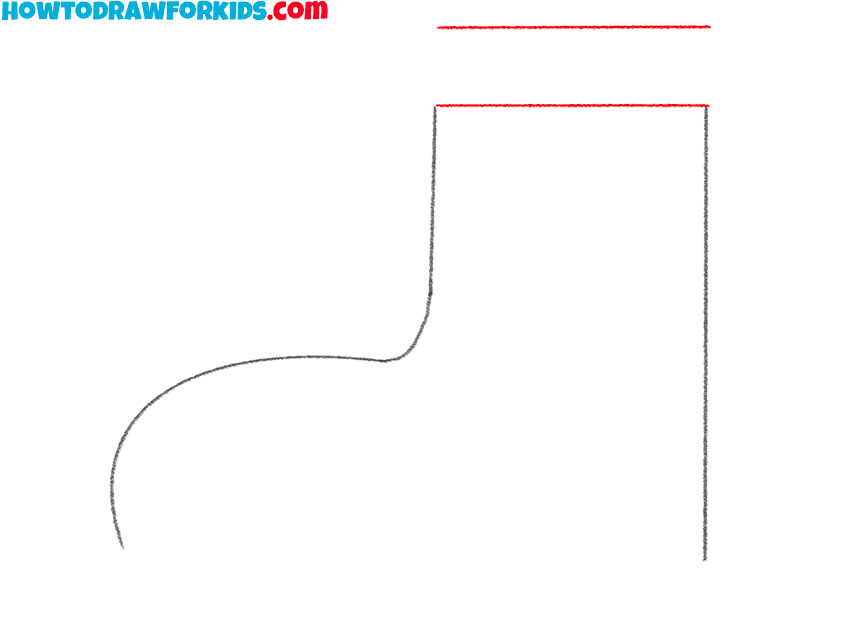
- Add the back outline of the boot.
Depict a straight vertical line on the right side.

- Sketch out the top of the boot.
Draw two parallel horizontal lines at the top.
- Add elements to the top and bottom of the boot.
Draw two connecting lines at the top and one horizontal line at the bottom.
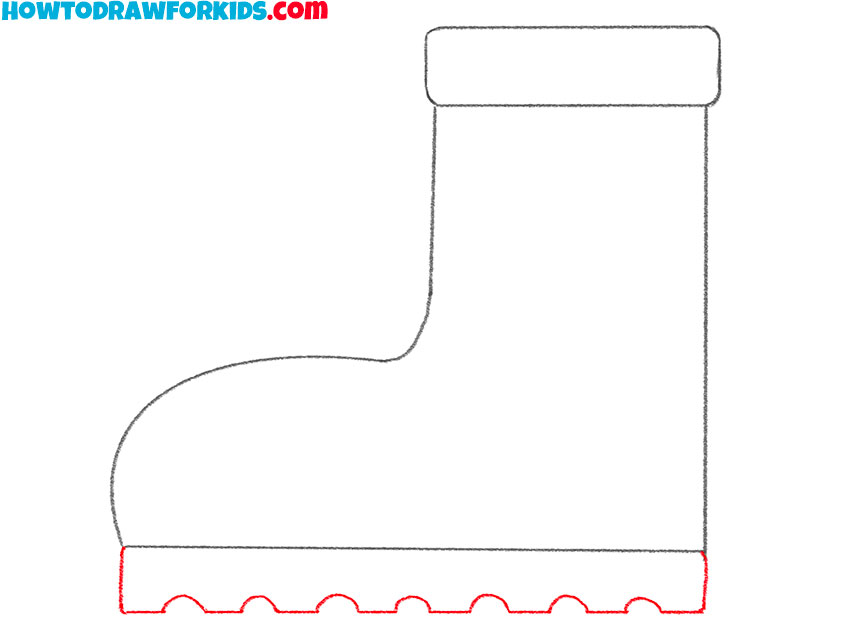
- Draw the sole.
Depict small vertical lines on the sides and draw a figured outline below.
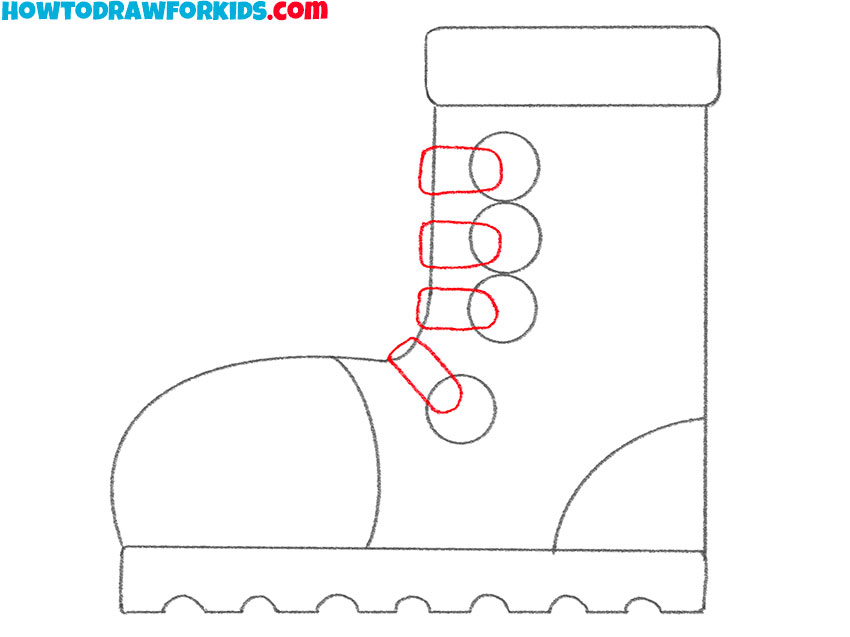
- Depict the rest of the shoe.
Add some circles for lacing, add the heel and front outline.

- Add details.
On the lacing, depict several details of the same shape.
- Correct inaccuracies.
Use the eraser to remove any unnecessary guidelines.
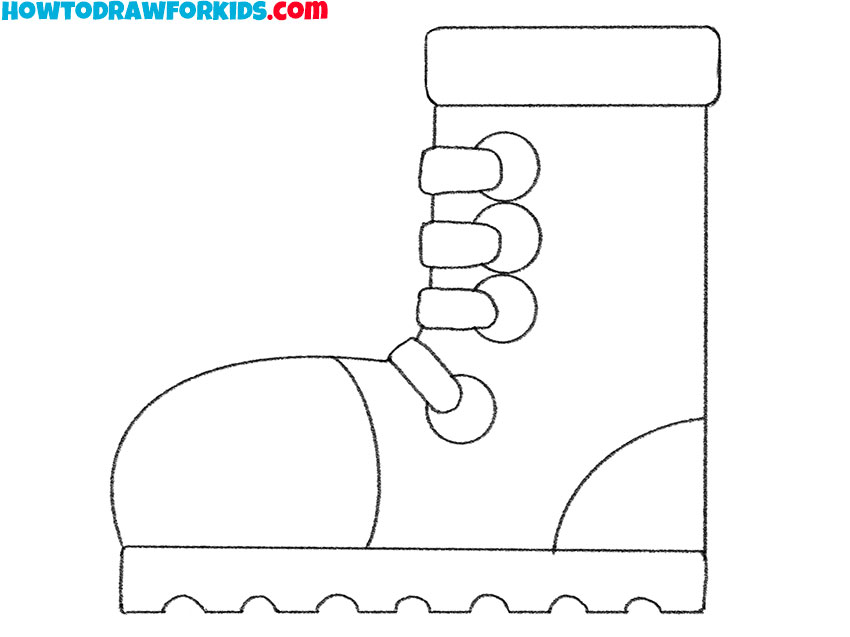
- Color the boot.
You will need gray and brown.
Additional Content
In addition to the interactive lesson, I’ve crafted a complimentary PDF file to accompany this boot drawing tutorial. It’s a succinct version that you can effortlessly download and peruse at your leisure, no internet required. Within its pages, you’ll find enriching material to advance your drawing skills beyond the foundational techniques covered in the primary lesson.
This PDF isn’t just a mirror of what we’ve covered; it’s a treasure chest of exercises and inspiration to deepen your artistic abilities. The content is meticulously selected to challenge and build upon what you’ve learned, ensuring your progression in art continues even when you step away from the screen.
Think of this PDF as a silent mentor, available at the click of a button, ready to guide you through the nuanced world of texture, shadow, and form. After the main lesson concludes, these resources will serve as your scaffolding, supporting your journey as you climb higher in your artistic exploration.
Alternative Drawing Techniques
To ensure your artistic journey doesn’t plateau, I’ve also developed an alternative technique for drawing boots. This fresh method strips down the complexities, focusing on broader strokes and simpler shapes. It’s designed to reinforce the basics and solidify your confidence, paving the way for more intricate works in the future.
This new approach is about getting back to the basics, about finding the essence of the boot in fewer lines and less detail. It’s perfect for practicing proportion and perspective, crucial skills for any artist. Plus, it’s an excellent way to warm up before delving into more detailed work, keeping your skills as sharp as polished leather.
Adopting this simplified method means more than just drawing- it’s about training your eye to see the core of the subject. With each session, your hand will grow steadier, your lines more assured, and your artistic vision clearer. It’s a foundational technique that will serve as a springboard for all your future artwork.
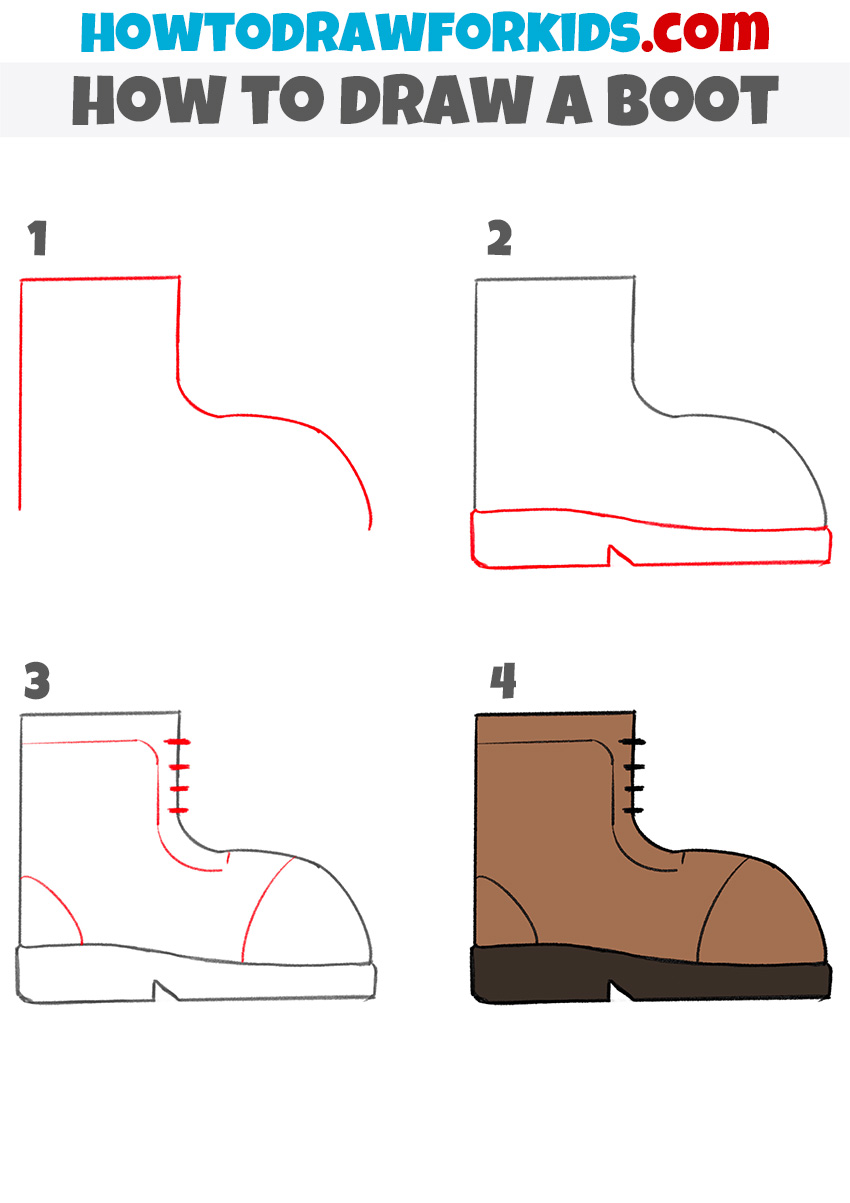
How to Draw a Boot for Kindergarten
For our vibrant young artists in kindergarten, drawing a boot has never been more fun with this four-step method. It begins with a simple line, bending into the shape of a ‘J’ to create the boot’s front. This playful first step is like a game of connect-the-dots but with the freedom of a single, flowing line.
The second step introduces the body of the boot, where we draw straight lines to form the top and sole. It’s a bit like building with blocks, stacking and aligning them to make something that stands tall. This method is crafted especially for little hands, focusing on basic shapes that are easy to replicate.
By the third step, the boot is almost ready to march off the page. We add laces and a tongue with just a few short lines- small touches that bring big character. And finally, we fill in the boot with color, turning the drawing into a sturdy brown boot that any kindergartener would be proud to wear on their adventures.
Steering Clear of Errors in Boot Drawing
As we tie the laces on our drawing session, let’s take a moment to address some common mistakes. These missteps are all part of the learning process, but by recognizing them, we can stride forward with more confidence in our next artistic venture. Here’s a list of potential pitfalls to watch for:
- Forgetting the Boot’s Base Curve: Omitting the slight curve at the bottom can result in a boot lacking stability and form.
- Overlooking the Proportion of the Shaft: Drawing the boot’s shaft too short or too tall can throw off the balance of the boot’s overall design.
- Ignoring the Sole Thickness: The sole is not just a line; it’s the foundation of the boot and should be given appropriate thickness and texture.
- Laces and Eyelets Alignment: Eyelets that are not aligned can lead to laces that seem to defy the boot’s structure, disrupting the drawing’s realism.
- Neglecting the Toe Box Curve: The toe box should bulge outward slightly; flattening it can make the boot appear less three-dimensional.
- Inconsistent Line Weight: Varying line weight unintentionally can break the cohesion of the image, making some parts seem disconnected.
- Uniform Shading: Boots have contours and curves that catch light differently; uniform shading can make your boot look flat and lifeless.
In your artistic journey, every mistake is a lesson and every correction a victory. Remember, each drawing you create is a step forward, so embrace these challenges. Use them to sharpen your eye for detail and to craft a boot that not just stands on paper but also stands out as a testament to your improving skills.
Conclusion
With the final stroke of our boot drawing lesson, the path to greater artistic discovery beckons. Venture further into the world of art on my website, where lessons like how to draw a succulent mango or an illuminating lamp await. Each tutorial is a new doorway to creative mastery, waiting for you to step through.
Should your artistic appetite crave more, I invite you to join my social media family. Follow for the latest updates and never miss the reveal of new lessons that could spark your next masterpiece. And if your heart whispers desires for future tutorials, leave a comment below the lesson. Your input paints the future of our artistic adventures together.