How to Draw a Yak
In this tutorial, I will help little artists improve their drawing skills. In just 9 steps you will learn how to draw a yak quickly and easily
How to Draw a Yak: Introduction
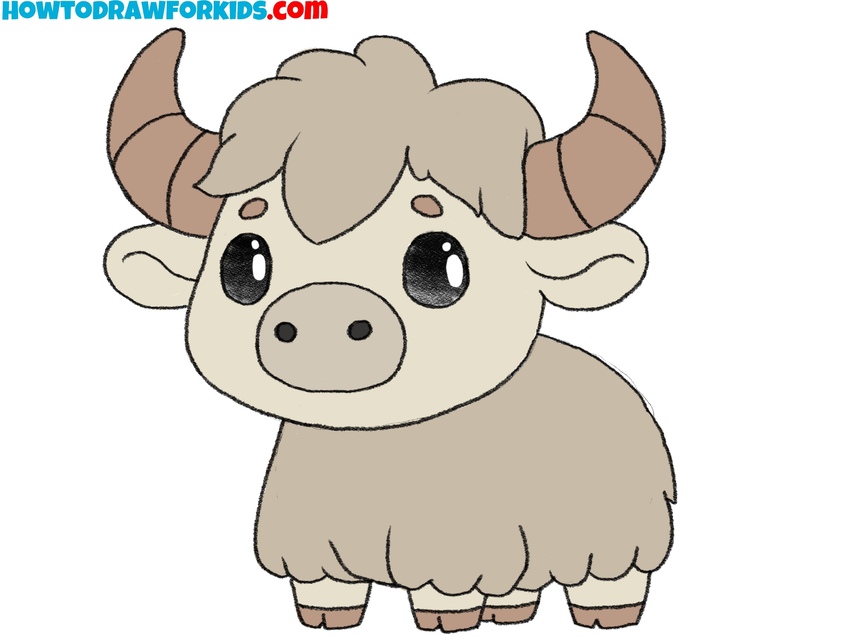
In this tutorial, I will show you how to draw a yak. But first, a few words about this animal. The yak is one of the rarest animals on the planet. Outwardly, yaks look like cows, but unlike the latter, yaks have thick fur.
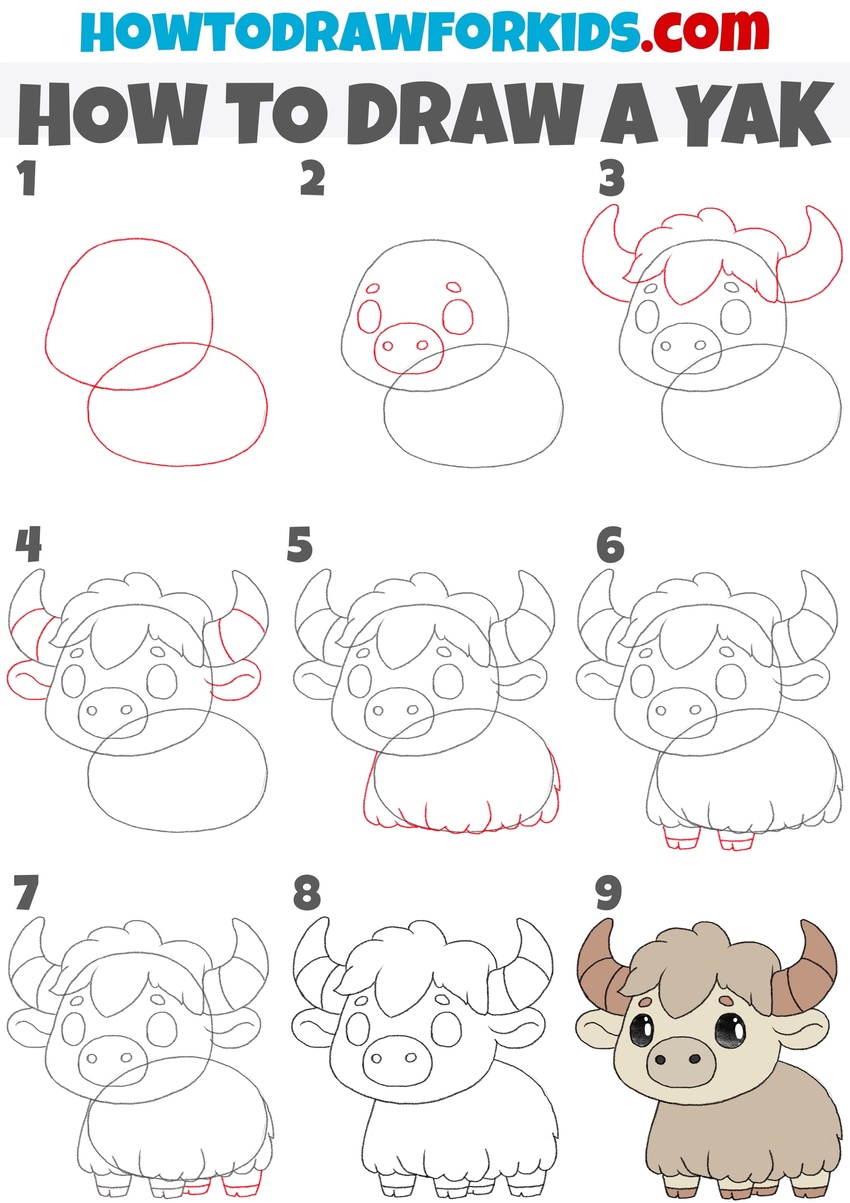
Yak is very difficult to see live, and so that people would not forget how they look, I will teach you how to draw them. This instruction consists of just 9 simple steps that will easily help you draw a yak from the tip of the tail to the horns.
In this tutorial I have drawn a yak in a very simplified and cartoonish style, with big eyes and exaggerated proportions. To simplify the process of drawing this animal, I have divided the tutorial into only 9 steps and used only the simplest details.
After the main lesson, you will find a second lesson on drawing a yak, where I simplified the design and altered the sequence of steps. The second lesson aims to enhance your understanding. Complete both lessons by drawing two yaks to practice different approaches and techniques.
Yak Drawing Tutorial
Materials
- Pencil
- Paper
- Eraser
- Coloring supplies
Time needed: 35 minutes
How to Draw a Yak
- Start with the basic shapes.
Begin your yak drawing by sketching two overlapping circles using light pencil strokes. The larger oval will form the body of the yak, while the smaller circle will represent the head. Position the head circle slightly above and overlapping with the body oval.

- Draw the facial features of the yak.
Next, add features like the nose, which should be a rounded rectangle or triangle at the bottom of the face, and large, expressive eyes above it. The eyes can be drawn as circles or ovals. After that, draw the eyebrows above the eyes and simple nostrils inside the shape of the nose.

- Add the horns and hair.
In this step, draw the horns and some hair on top of the yak’s head. The horns should look like two curved triangles, positioned on either side of the head. Add a tuft of hair at the top, using zigzag lines to create a fluffy texture.

- Draw the ears and derail the horns.
Begin step by drawing the ears on each side of the yak’s head, positioned just below the horns. The ears should be rounded simple lines inside them for detail. Once the ears are in place, add texture to the horns by drawing a few curved lines along their length.

- Illustrate fur on the torso.
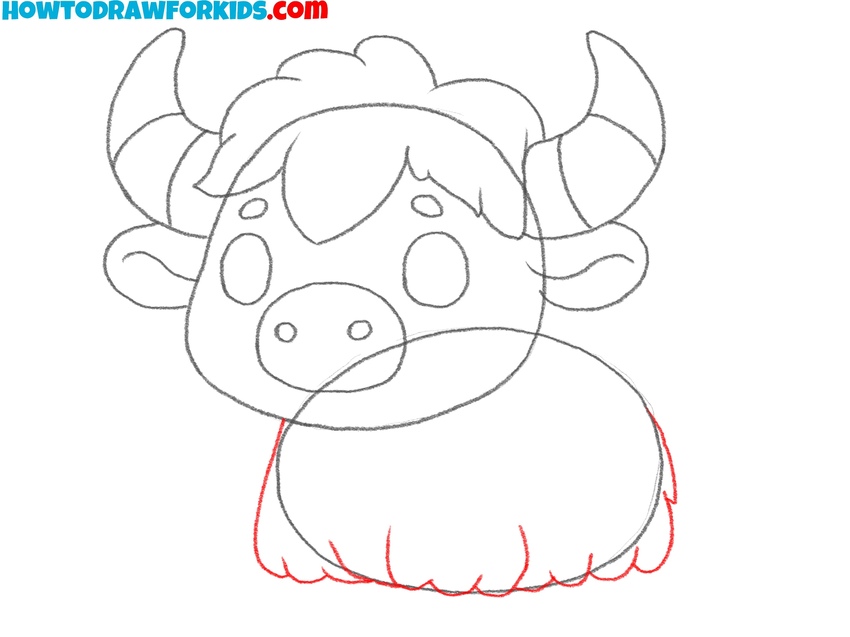
Start by outlining the body below the head with a series of wavy, curved lines to give the impression of thick, woolly fur. Use soft, wavy lines to indicate the fur texture, especially around the belly and sides. Use slightly longer lines of fur to indicate the location of the yak’s front and back legs.
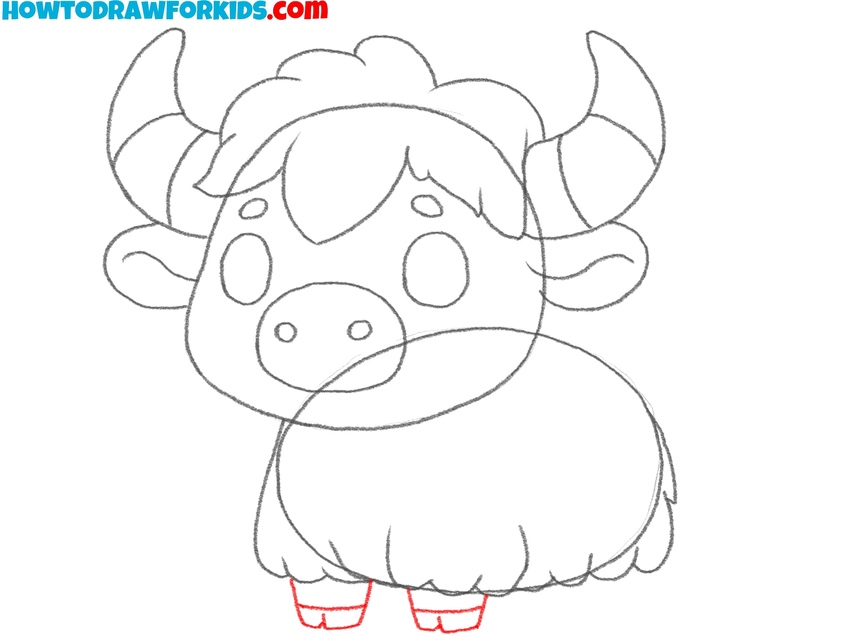
- Sketch the front legs and hooves.
Position the front legs directly under the torso, keeping them short and sturdy. Each leg should be slightly tapered toward the bottom. At the end of each leg, add a small rectangular shape for the hooves. Don’t forget to separate the hooves with simple short lines.
- Add the hind legs and hooves.
Now, add the rear legs and hooves behind the front legs. These legs should be similarly short and thick, positioned slightly further back. Again, add small rectangles at the bottom to represent the hooves. The rear legs will complete the yak’s basik shape.

- Finalize the yak sketch.
In this step, review your yak drawing and erase any remaining guidelines from the earlier steps. This will clean up the yak’s appearance, leaving only the final outline. Go over any lines that need reinforcement, making sure all parts of the yak are clear and polished.

- Color the yak.
For the final step, carefully add color to each part of your yak drawing. Start with the body fur, using a warm, earthy brown or light tan as the base color. For the face, use a similar shade as the body, but consider making it a bit lighter. Color the eyes black, leaving small highlights.

How to Draw a Yak: Additional Tutorial
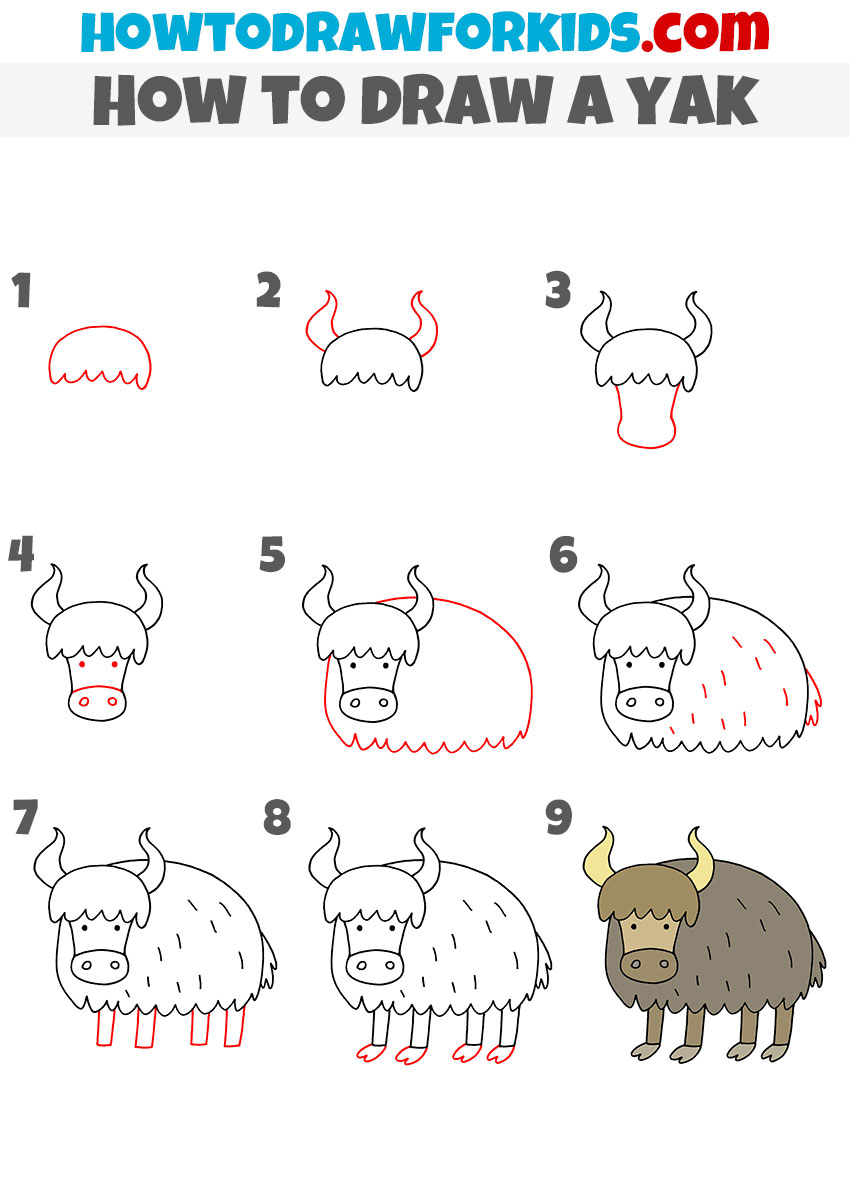
The main differences between this yak drawing tutorial and the first one lie in the level of detail and the simplicity of shapes. In this version, the yak has a more simplified, with fewer details on the face, body, and legs. The steps are also simplified, using only basic shapes and lines, making this version more suitable for beginners or younger artists.
To draw a yak in this tutorial, start with the head’s upper outline, using a rounded shape with a wavy bottom edge to represent the hair. Add curved horns on each side of the head, then extend the face downward with a simple, elongated shape. Draw the nose and eyes, using two small ovals for the nostrils and a two small dots for the eyes.
Next, sketch the yak’s large, rounded body with a wavy line at the bottom to represent the fur. Add simple curved lines on the body for fur texture. Draw four short, rectangular legs extending from the body and finish with small oval shapes at the bottom for hooves. Once the outline is complete, color the yak drawing with brown or gray for the body, darker shades for the face, and yellowish tones for the horns.
Conclusion
Completing all 9 steps of this yak drawing tutorial should have been really simple. Regular practice is recommended to reinforce what you’ve learned. To keep a reference for future practice, consider checking other drawing tutorials from my website. For example, visit my cow drawing tutorial on try to draw a horse with my simple guide.
To further improve your drawing skills, consider following me on Pinterest for updates and additional drawing resources, as well as on YouTube for video versions of my lessons.

