How to Draw an Anime Character
In this step-by-step guide, I will demonstrate how to draw an anime character using several easy methods along with some additional tips.

How to Draw an Anime Character: Basic Information
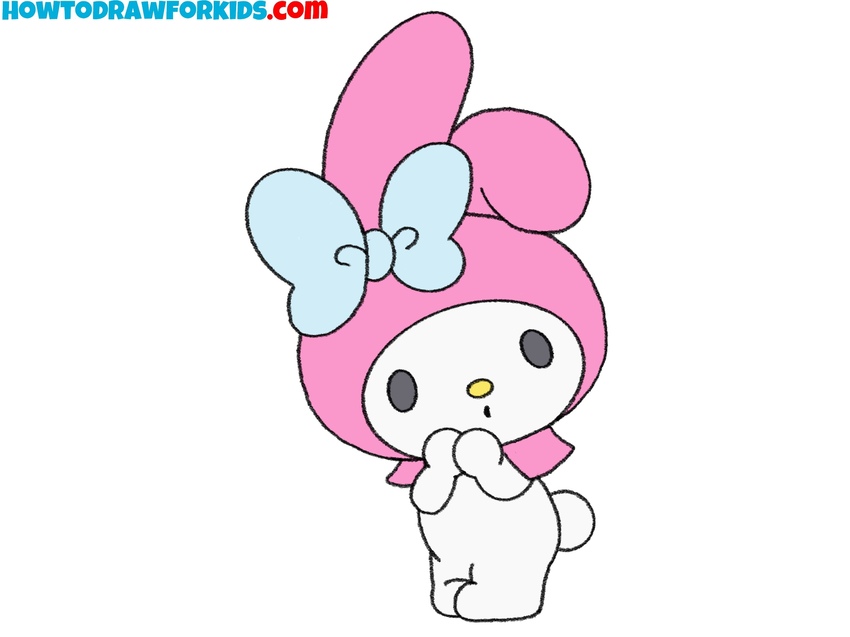
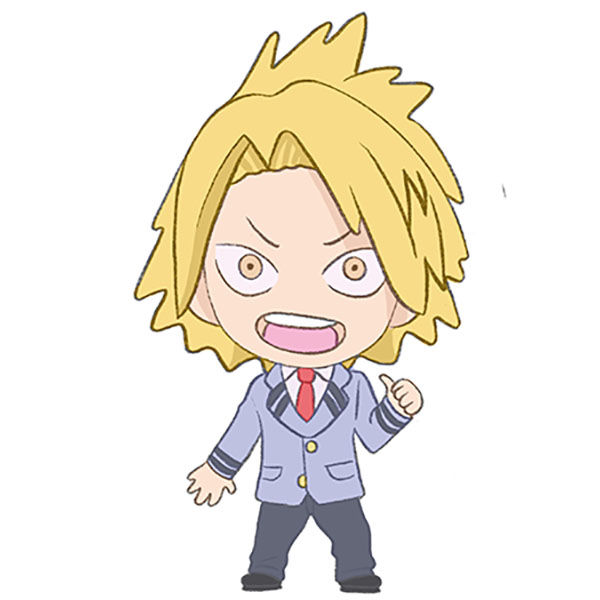
Anime characters are known for their expressive eyes, distinctive hairstyles, and dynamic expressions, which I will cover in detail in this anime character drawing tutorial. I’ve drawn an easy anime character in the chibi style just for you.
Chibi characters are known for their exaggerated features, particularly the oversized heads in proportion to their small bodies, which gives them a child-like appearance. For a beginning artist, this simplified drawing style is most suitable for getting acquainted with the art of anime.
In this style, the simplicity of the body allows for a focus on facial expressions, which are vital for conveying the character’s character. The limbs are short and stout, often lacking in detailed joints or muscle definition seen in more traditional anime figures.
When drawing facial features in anime style, the eyes are the most important aspect. Anime characters often have large, expressive eyes that convey a wide range of emotions. In this lesson I will show you how to correctly depict this detail and other parts of an anime face.
Anime Character Drawing Tutorial
Materials
- Pencil
- Paper
- Eraser
- Coloring supplies
Time needed: 45 minutes
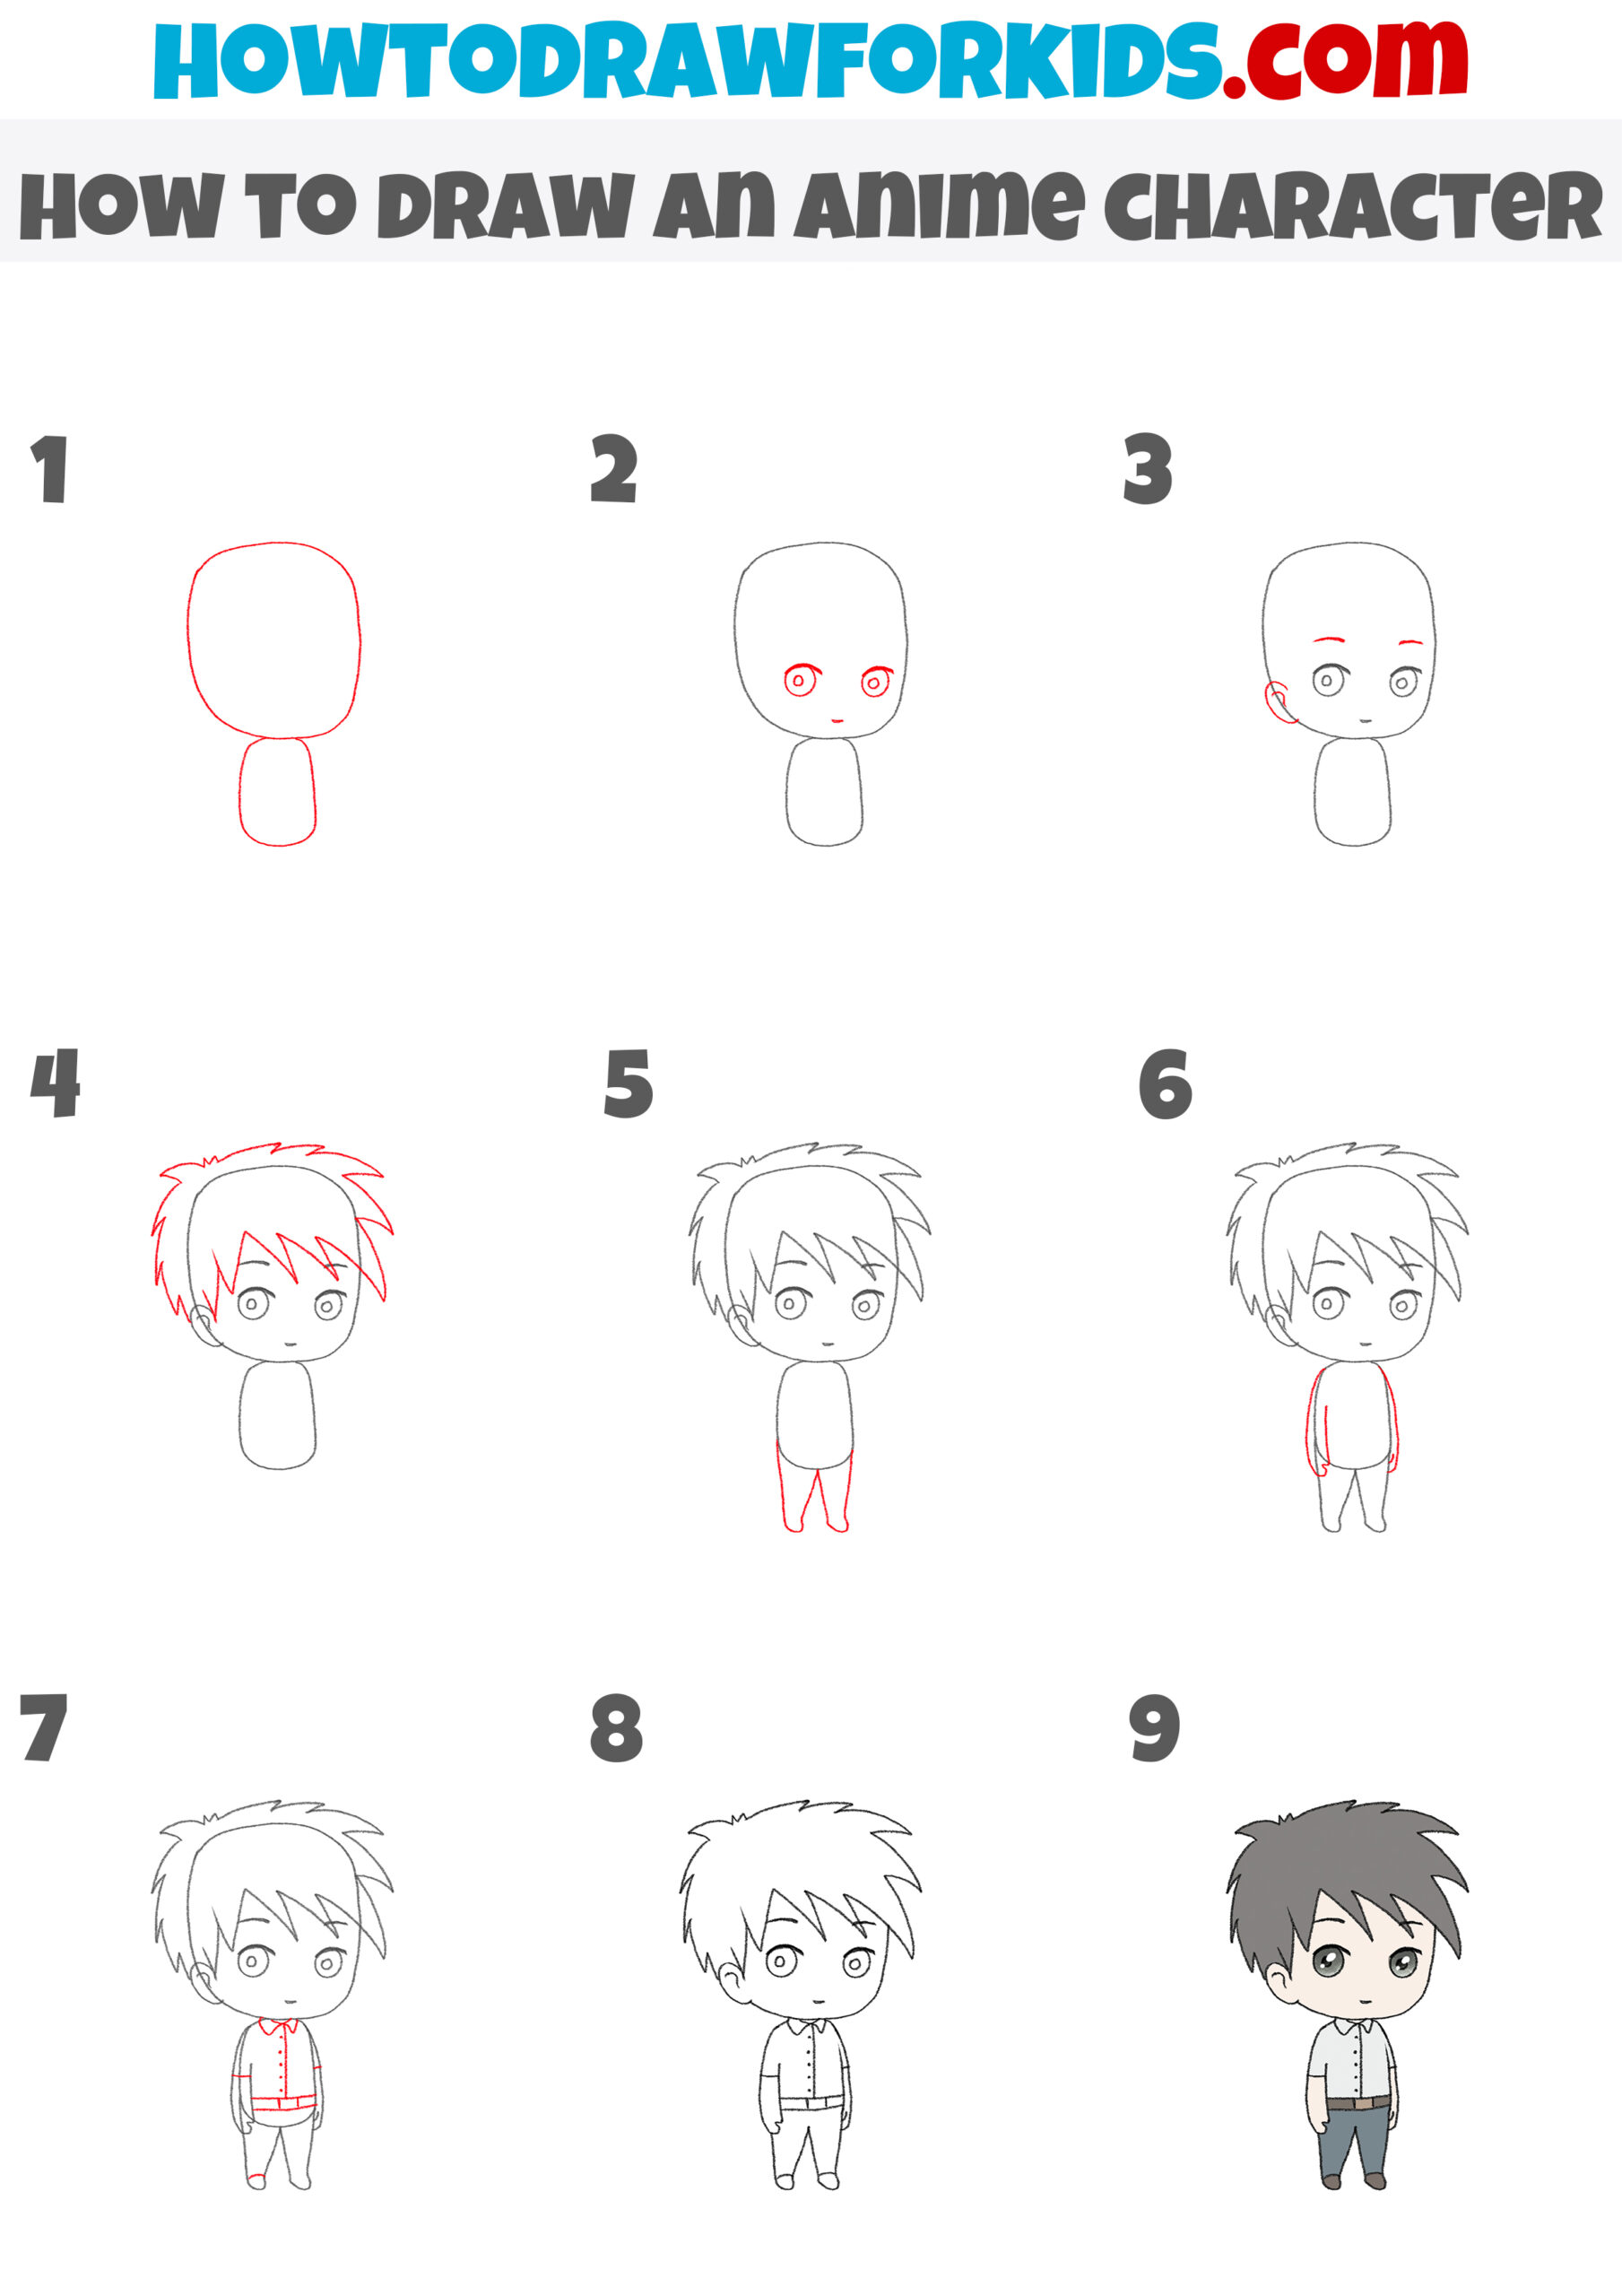
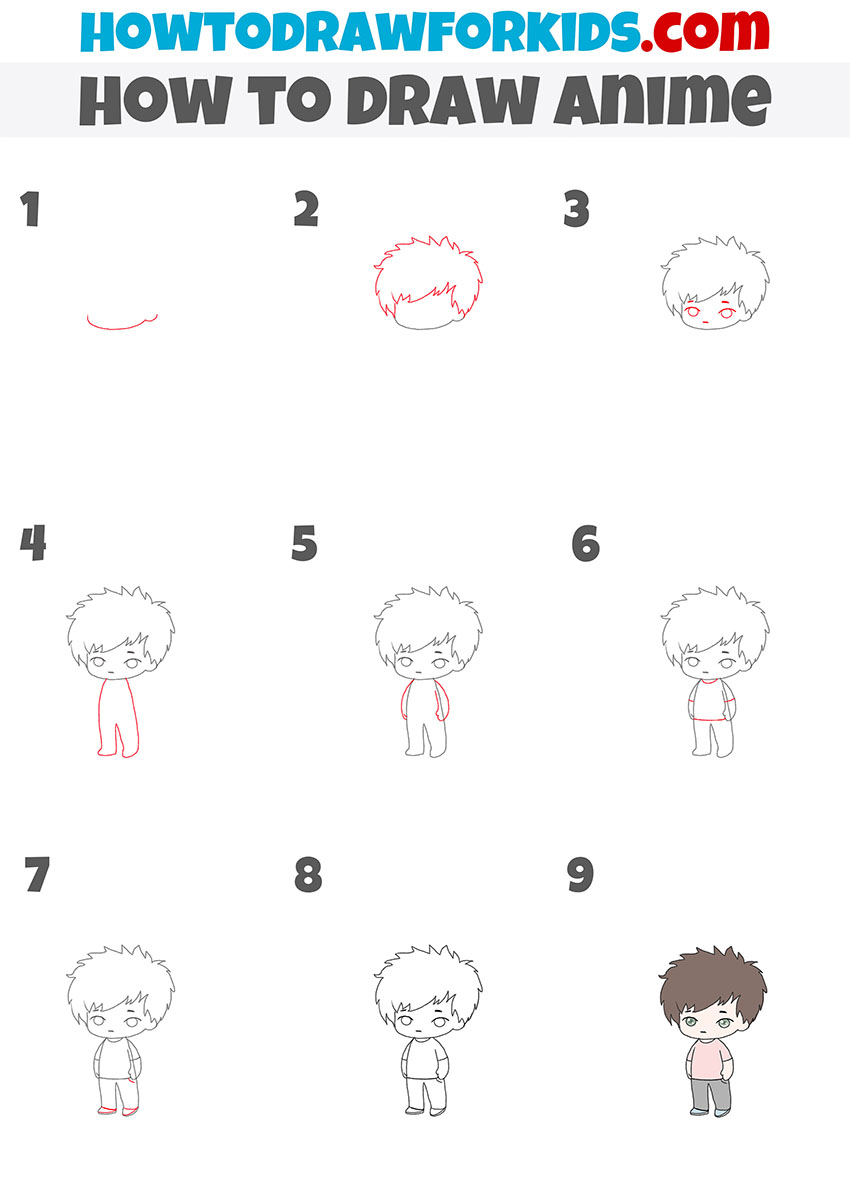
How to Draw an Anime Character
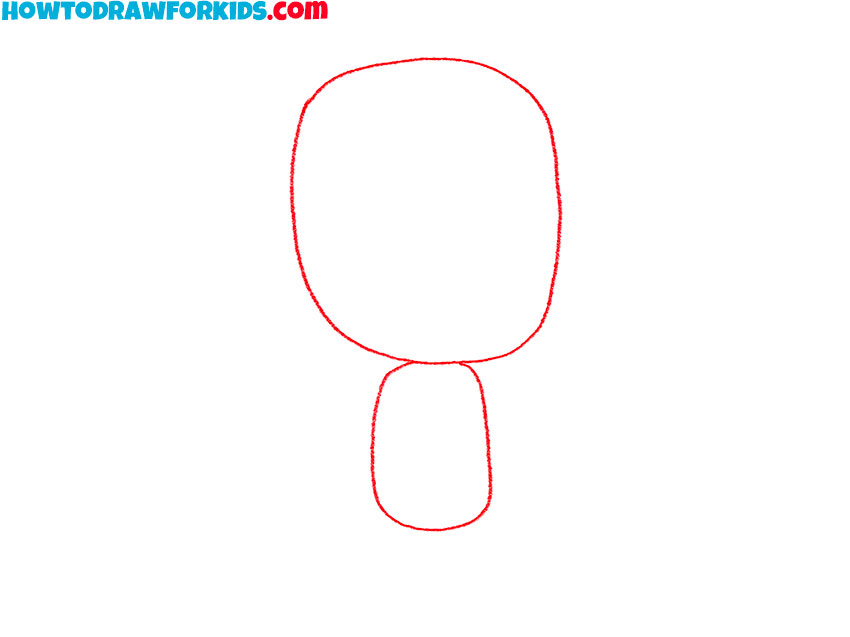
- Draw the head and torso of the anime character.
Sketch a large oval for the head, making sure it’s slightly wider at the top to give a more natural anime look. Below the head, draw a smaller, elongated oval for the torso. This foundational structure will help you maintain the correct proportions as you add more details to your anime character.
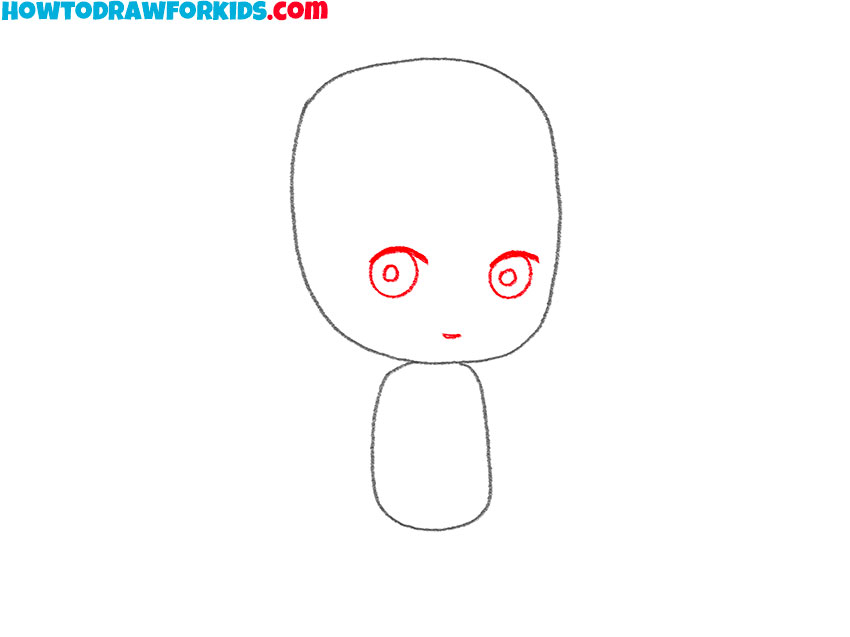
- Add the eyes and mouth.
Next, focus on the facial features, starting with the eyes. Draw two large, round eyes, placing them symmetrically on the head. Position them just below the horizontal center of the head. Add small circles inside the eyes for the pupils and a short line for the mouth.
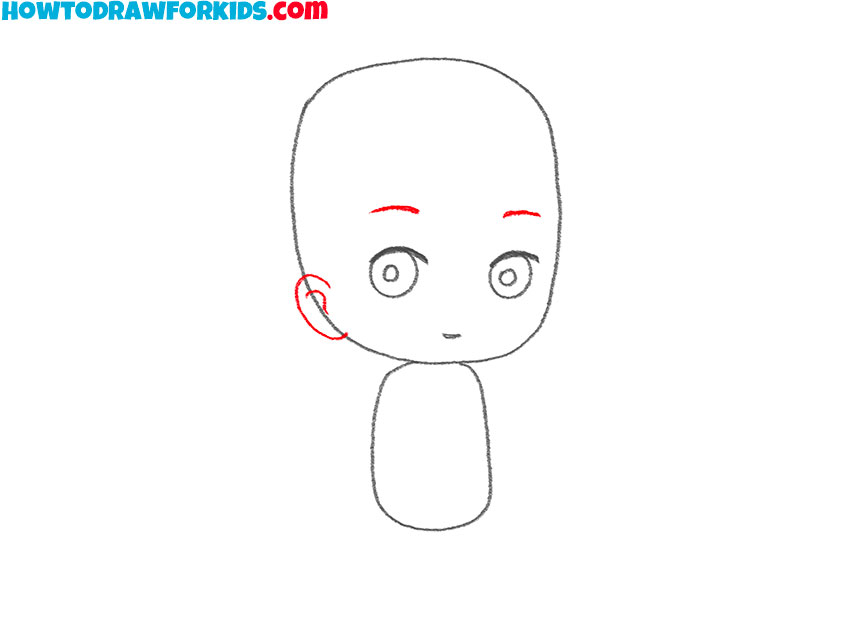
- Illustrate the eyebrows and ear.
Draw two thin, curved lines above each eye to form the eyebrows, giving them a gentle arch for an expressive look. For the ear, draw a small, curved shape on the side of the head. These simple additions help frame the face of the anime character.
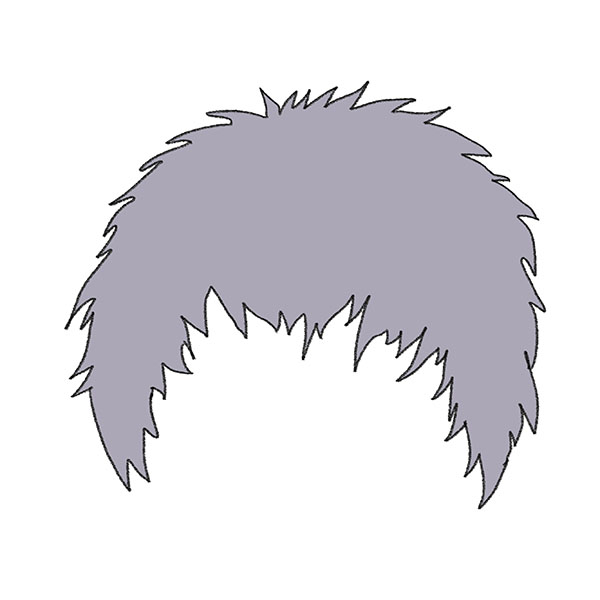
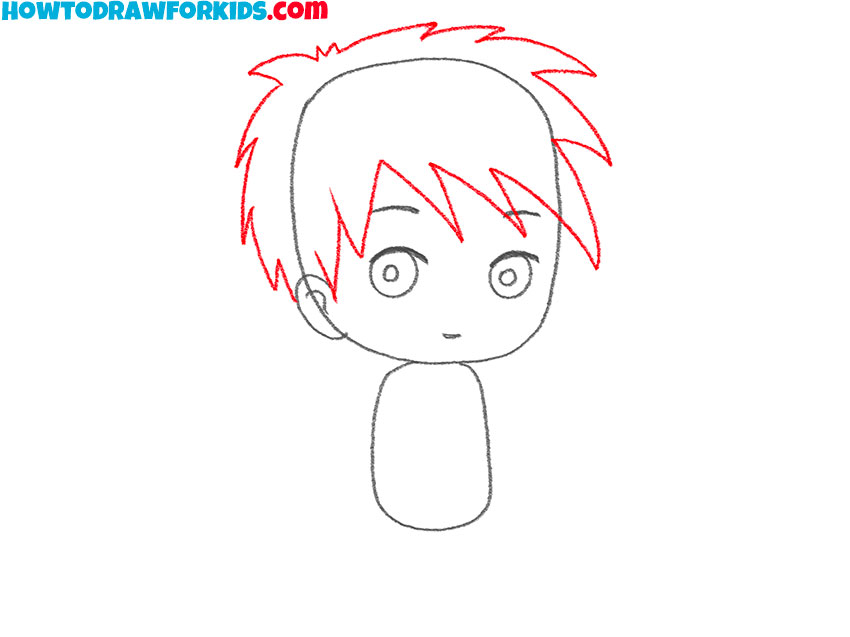
- Draw the anime hair.
Start by outlining the hairline above the forehead, then add spiky, uneven strands of hair extending from the top of the head. Make sure some strands cover part of the forehead and fall naturally around the head. This spiky hairstyle gives your character more anime appearance.
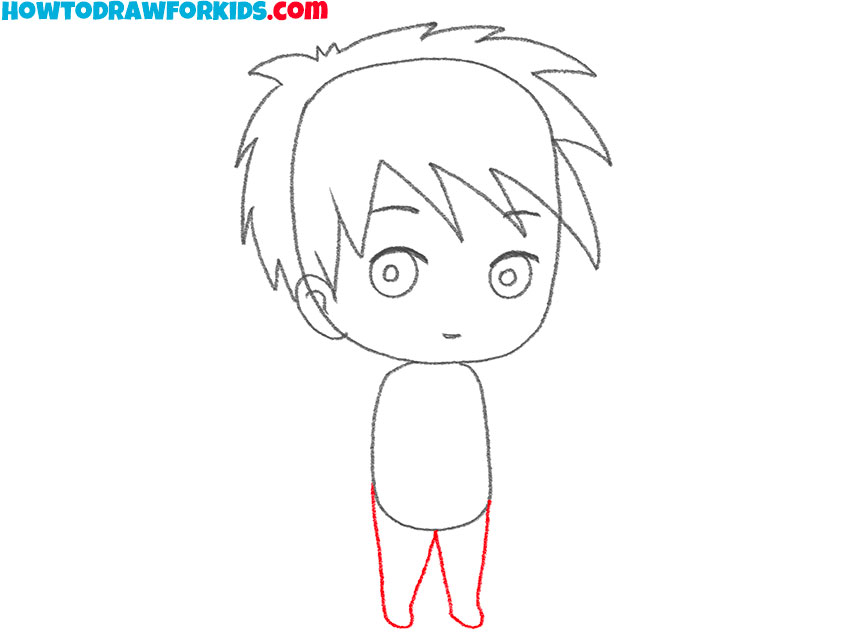
- Illustrate the legs.
Move on to drawing the lower body. From the bottom of the torso, draw two lines downwards for the legs, slightly tapering towards the ankles. Add simple shapes for the feet at the bottom. Keep the proportions small and compact, typical of anime characters.
- Draw the anime character’s arms.
Draw two curved lines extending from the sides of the torso to form the arms. Ensure the arms are ending around the mid-thigh. At the end of each arm, draw simple shapes for the hands. Keep the lines smooth and clean. This addition gives your character a complete form.
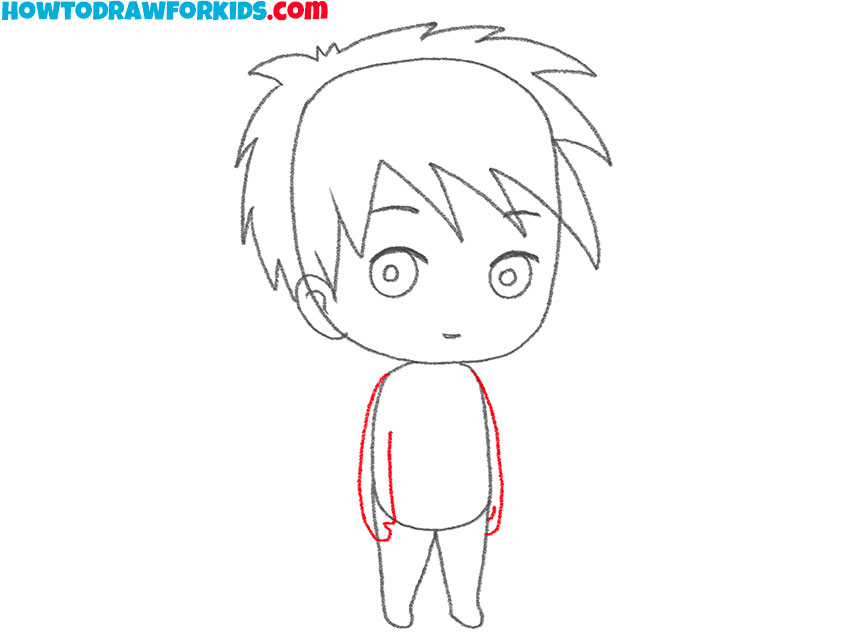
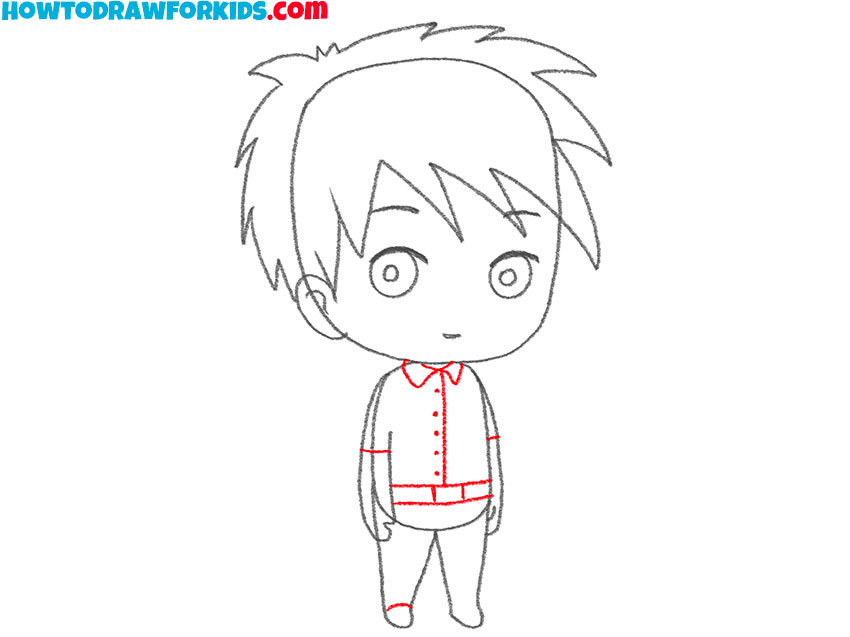
- Sketch the clothes and shoes.
Sketch the outline of the character’s shirt and pants. Draw lines to indicate the collar, sleeves, and bottom hem of the shirt. Add a belt at the waist and lines to define the pants’ shape. These clothing details give the character a more finished look.
- Erase the guidelines and refine the drawing.
In this step, clean up your anime character drawing by erasing any unnecessary guidelines and construction lines. Carefully go over your drawing, removing any stray marks and refining the remaining lines. This process will help make your character look neat and polished.

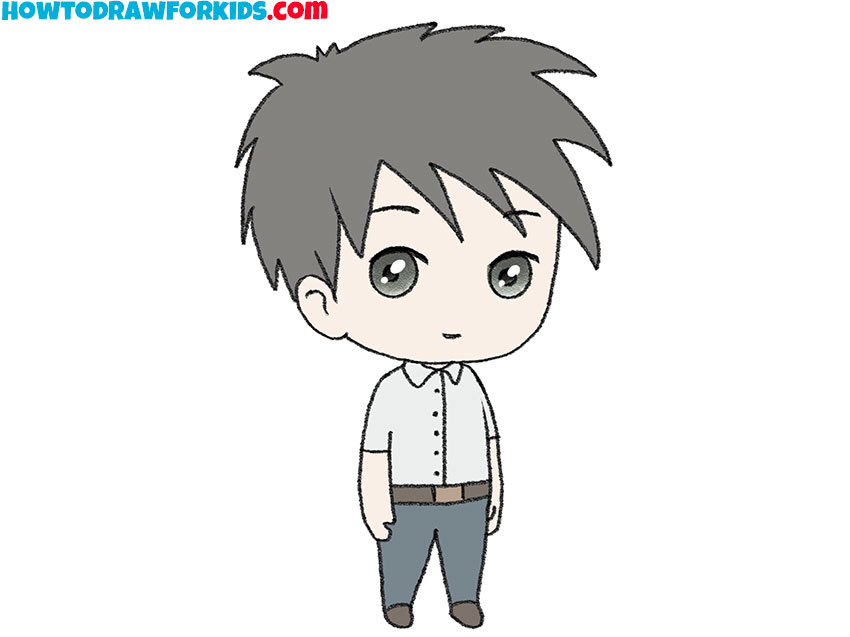
- Color the anime character drawing.
Choose appropriate colors for the hair, skin, and clothing. Carefully color within the lines to ensure a neat and professional finish. Add highlights to the eyes to give your character a more lively look. You can use shading to give the character a three-dimensional look.
Additional Content
For your utmost convenience and ease of access, I’m delighted to offer you this PDF archive. Within this resource, you will find a plethora of additional materials specifically created for drawing anime, including a more detailed focus on the most challenging aspects of the craft.
Significantly, with the assistance of this PDF, you can effortlessly practice drawing anime anywhere and at any time, even in places where the Internet might not be readily available, ensuring continuous learning and improvement.
Alternative Way to Learn How to Draw an Anime Character
I’ve created a variety of methods for drawing anime characters so you can pick any method that suits your skill level or simply appeals to you. Feel free to try out different drawing techniques for practice and find what works best for you. Whether you’re looking for a challenge or just want to have fun, there’s a style for everyone!
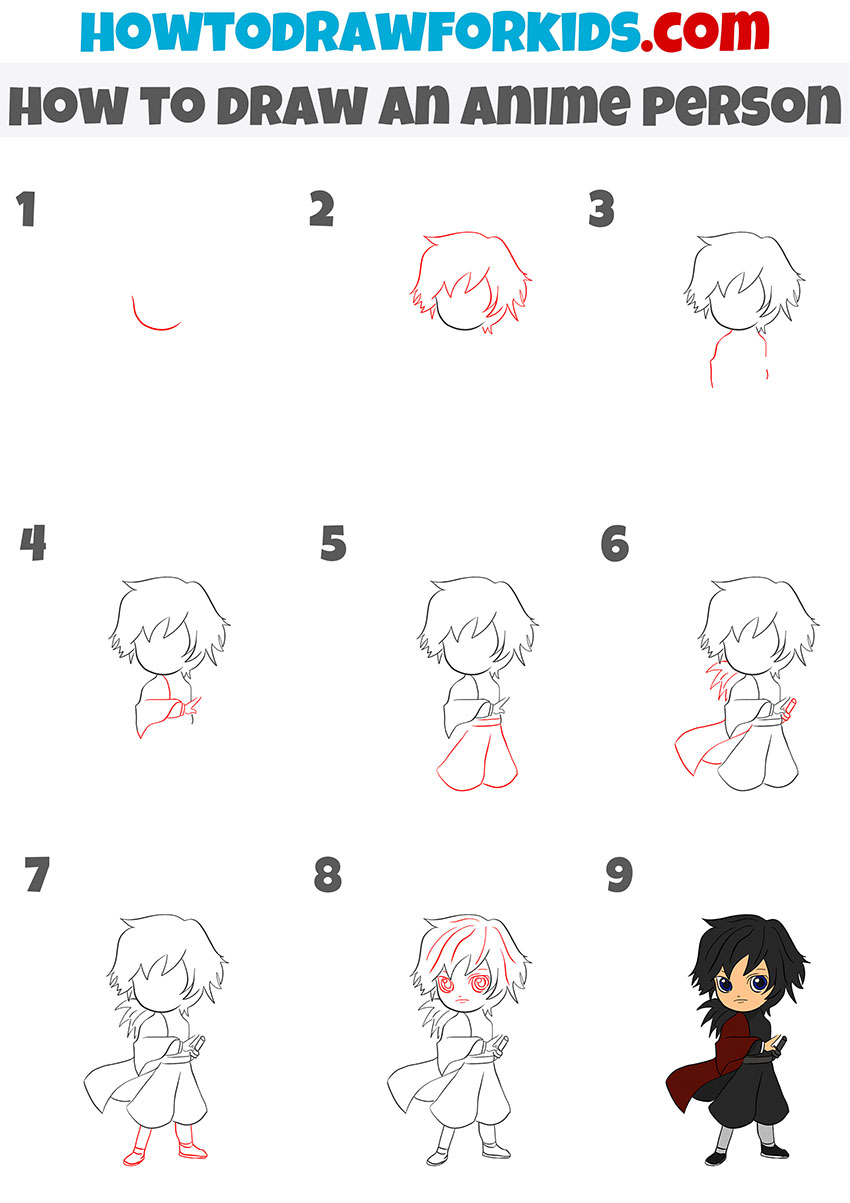
Drawing an Anime Character in Motion
Begin by sketching a simple curved line for the chin and jawline to establish the head’s shape. Next, add the hair, using spiky, uneven lines to give it a dynamic and stylish look. Proceed by drawing the neck and shoulders, creating a smooth transition from the head to the upper body. Add the character’s arm with details such as the fingers and a weapon or accessory in the hand.
For the torso and clothing, draw the upper part of the outfit, followed by the wide, flowing lower garment. Add a belt or sash to define the waist. Next, sketch the character’s legs and feet. Focus on the character’s footwear to complement the overall outfit.
Once the basic structure is complete, add intricate details like facial features, including large expressive eyes and a small nose and mouth, typical of anime style. Finally, color your character, choosing vibrant shades for the hair, clothing, and eyes.
Drawing a Cute Anime Character
This anime character drawing method is characterized by its simplicity and cuteness, making it particularly suitable for beginners or preschool children. The style is really simple, with a focus on rounded shapes and expressive, yet uncomplicated facial features, which can be easily replicated by young learners.
Start by sketching a curved line for the chin and jawline. Next, draw the hair with spiky, uneven lines for a dynamic look. Add the facial features: large eyes, a small nose, and mouth, typical of anime style.
Draw the body by sketching the torso and legs, keeping the proportions small and compact. Add the arms and hands in a natural pose. Detail the clothing with simple lines to indicate the shirt and pants. Finally, erase any unnecessary guidelines and color your anime character.
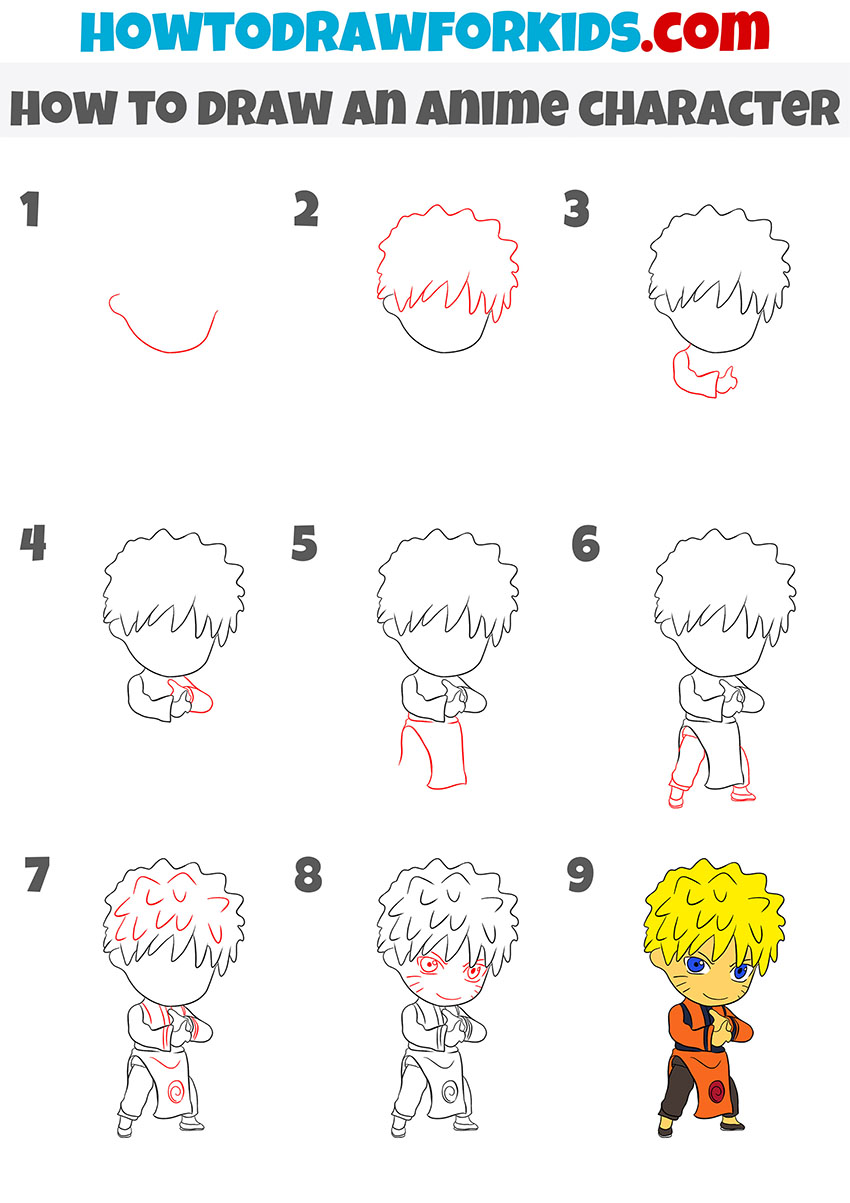
Drawing an Anime Character in a Battle Stance
This drawing technique effectively serves as a step-by-step guide on how to draw an anime character, initially beginning with a pronounced and textured hairstyle.
Start by sketching a curved line for the jawline. Next, draw the spiky hair with bold, uneven lines. Add the character’s neck and upper torso, including one arm bent at the elbow with a fist in front. Proceed to draw the other arm and hands in a fighting position.
Outline the pants, ensuring a dynamic stance. Add details to the outfit, such as a belt and patterns. Finish by drawing the face with intense eyes and markings. Finally, color your character with vibrant hues.
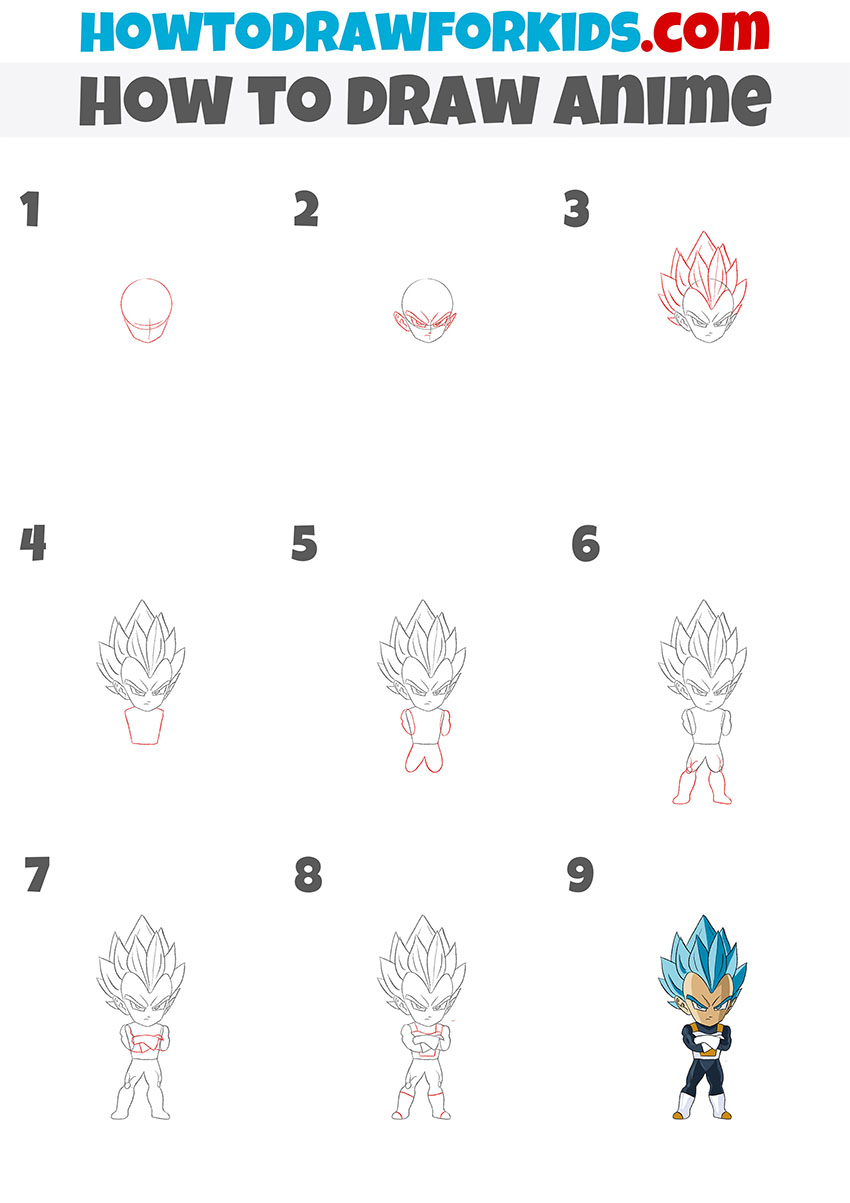
How to Draw an Anime Character: Advanced Level
This little more advanced tutorial guides you through drawing an anime character in a powerful stance.
Begin by sketching an oval for the head and adding facial guidelines. Draw the intense eyes and facial features, ensuring a fierce expression. Next, sketch the iconic spiky hair, using bold, sharp lines.
Outline the broad shoulders, then draw the upper torso. Add the folded muscular arms. Sketch the lower body, focusing on strong legs in a confident stance. Refine the outfit details, including armor and boots. Finally, erase any unnecessary lines, color your character and add shadows.
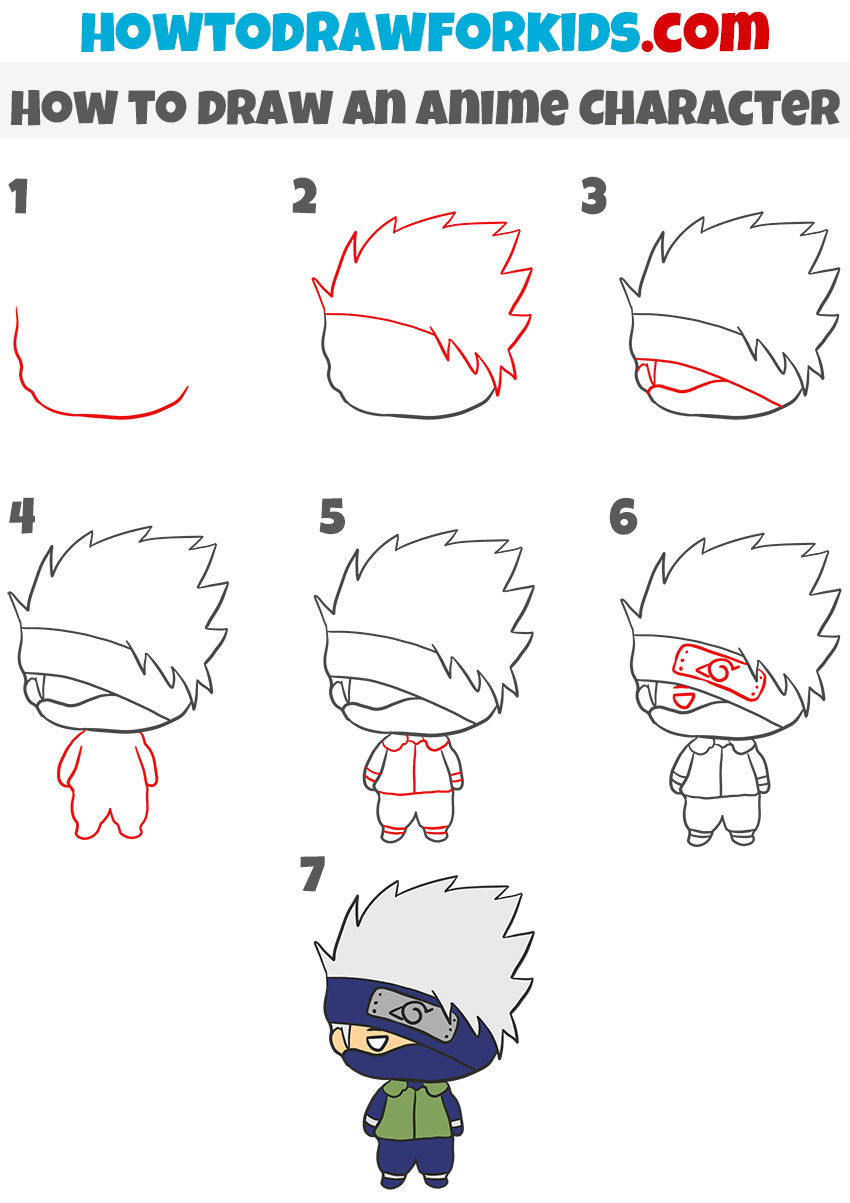
How to Draw an Anime Character: Simple Method
This tutorial offers a more simplified method compared to the advanced one above, making it perfect for beginners and preschoolers.
Begin by sketching a curved line for the lower face. Next, add the spiky hair using sharp, uneven lines for a dynamic look. Draw a horizontal line for the headband across the forehead. Outline the face mask and add one eye visible above the mask.
Sketch the basic body shape with simple, rounded lines for the torso and legs. Add details to the outfit, such as the jacket and pants. Refine the headband by adding the symbol and other small features. Finally, color your character, using distinct colors for the hair, outfit, and headband.
This approach simplifies the drawing process, making it potentially easier and more approachable for beginners. Those looking to learn the basics of anime illustration will find it particularly helpful.
Conclusion
Congratulations on completing thia step-by-step anime character drawing tutorial! By following these guides, you’ve practiced and refined anime drawing skills, from capturing facial expressions and dynamic poses to adding detailed hair and clothing.
These instructions, varying from simplified methods to more advanced techniques, cater to artists at different skill levels. The simpler tutorial helps beginners grasp fundamental concepts, while the more advanced tutorial challenges those looking to further train their drawing abilities.
Drawing anime characters is a great way to train your overall drawing skills. By focusing on the unique aspects of anime art, such as exaggerated facial features, expressive eyes, and stylized hair, you’ve learned how to convey emotions and movement effectively. These skills are valuable not only for anime art but for any style you choose to learn in the future.
I hope you found these tutorials helpful and interesting. If you did, please share this article with your friends and other artists. Don’t forget to subscribe to my social networks for more tutorials and tips on drawing anime characters and other art styles.
Finally, I’d love to hear your thoughts and suggestions, so please leave a comment below with your feedback or any specific tutorials you’d like to see in the future.