How to Draw a Motorcycle
Capturing the essence of speed and precision, I’m eager to take you through a simple approach on how to draw a motorcycle. This lesson is crafted to build from the ground up, starting with simple lines that form the base and gradually adding to the complexity. It’s designed to make the process as smooth as the ride on an open road.
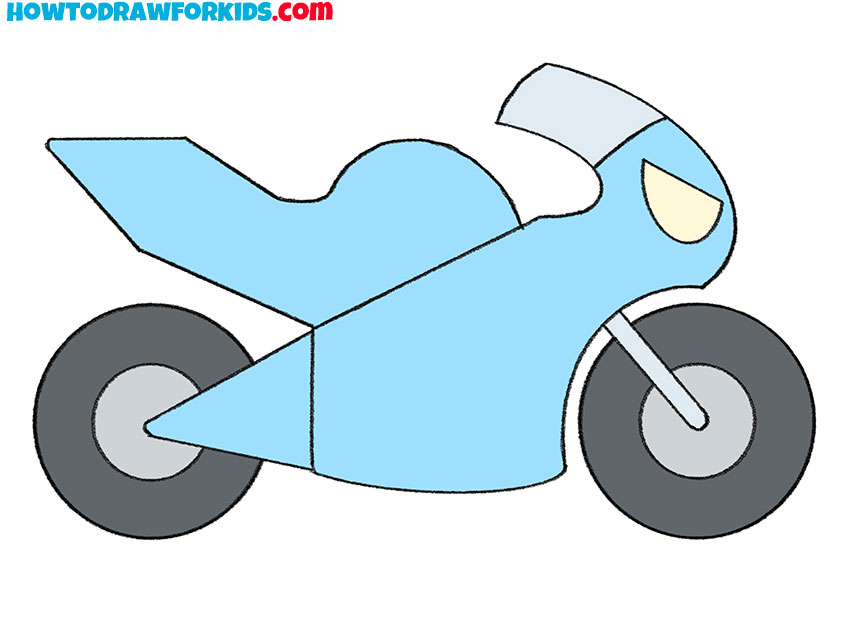
How to Draw a Motorcycle: Basic Information
In this artistic tutorial, I’m excited to show you how to draw a motorcycle, transforming simple shapes into a sleek, mechanical marvel. We begin with fundamental forms, sketching out the basic outline that captures the bike’s structure. This foundational step is vital, as it sets the stage for the more intricate details to come.
The motorcycle we’re drawing is defined by its streamlined body and rounded wheels, which are illustrated using easy-to-follow steps. My aim is to guide you in creating a bike that’s both stylistically accurate and easy on the eyes, with proportions that reflect a real motorcycle’s power and design.
As you follow along and draw a motorcycle, you’ll learn to appreciate the importance of each curve and angle. By the lesson’s end, you’ll have honed your ability to translate the complex form of a motorcycle into a striking piece of art, using a method that’s straightforward yet effective.
Motorcycle Drawing Tutorial
Materials
- Pencil
- Paper
- Eraser
- Coloring supplies
Time needed: 30 minutes
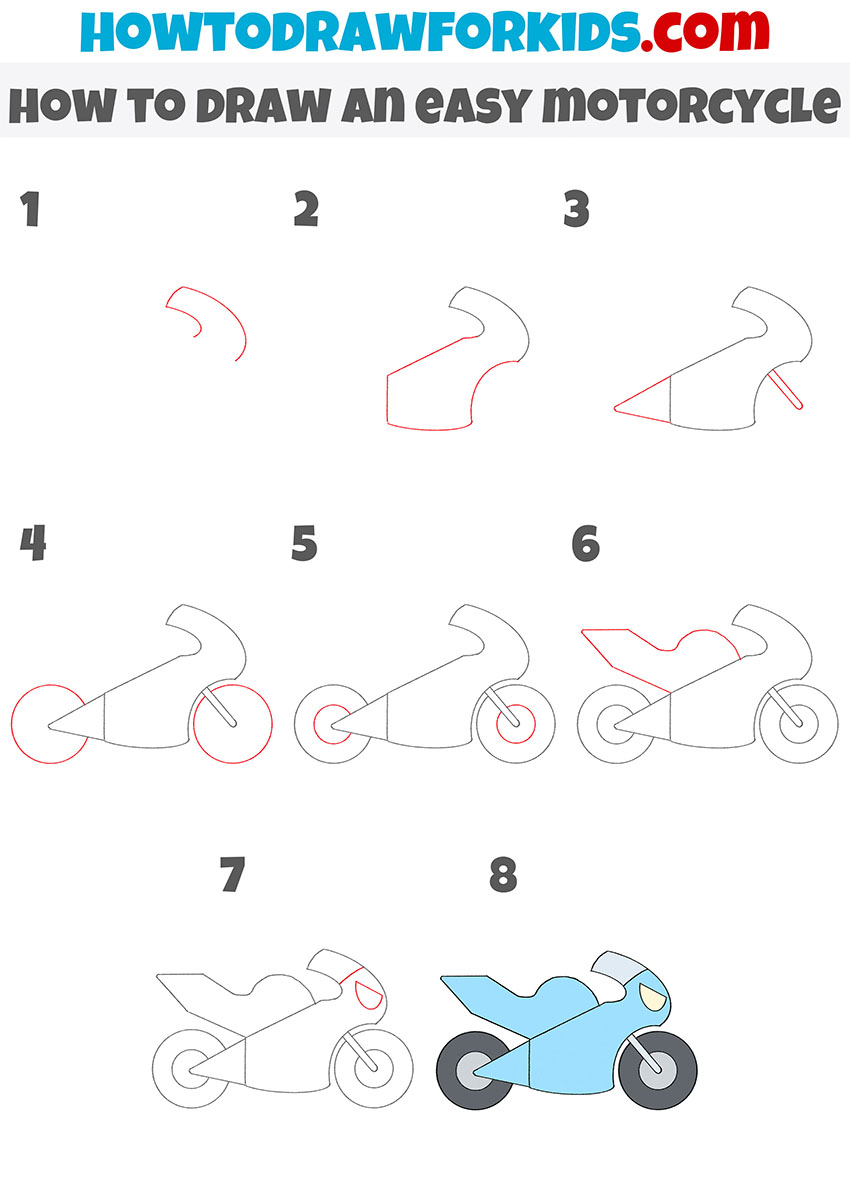
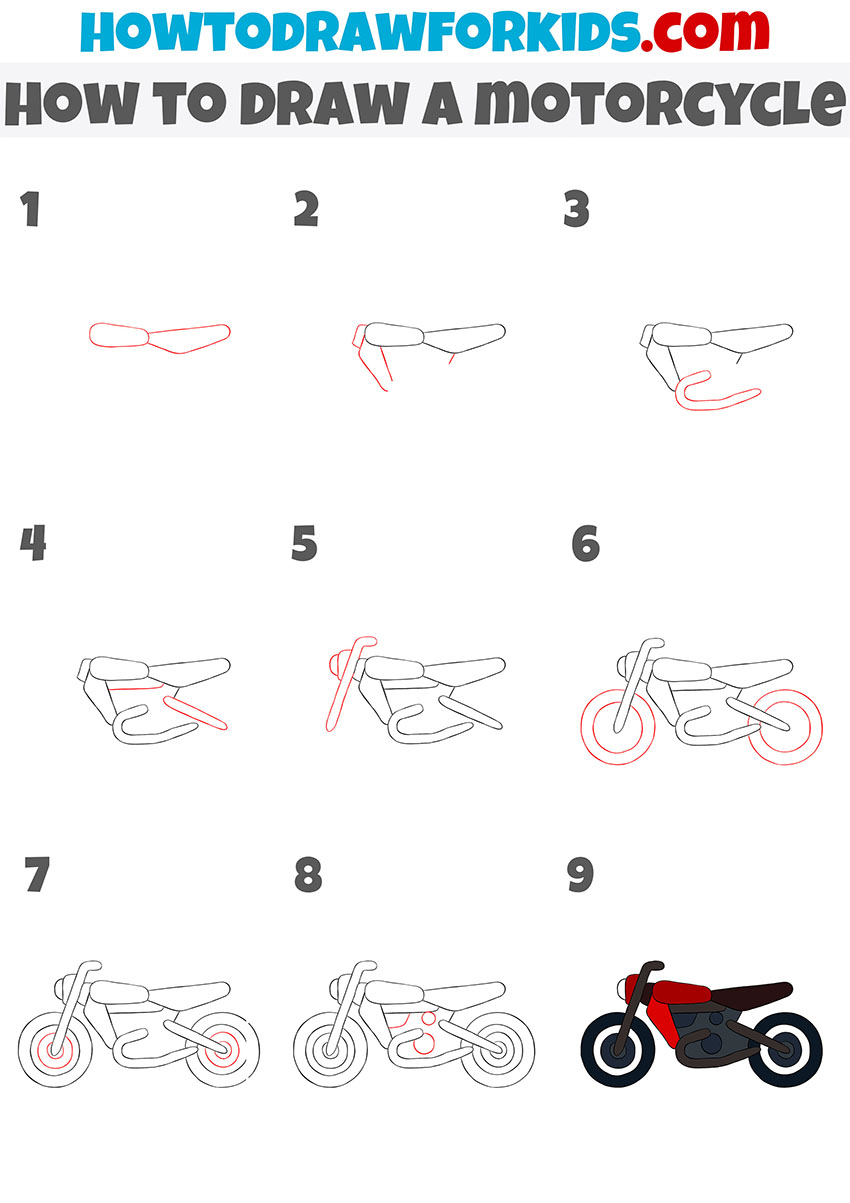
How to Draw a Motorcycle
- Draw the steering wheel.
Depict curved lines as shown in the example.

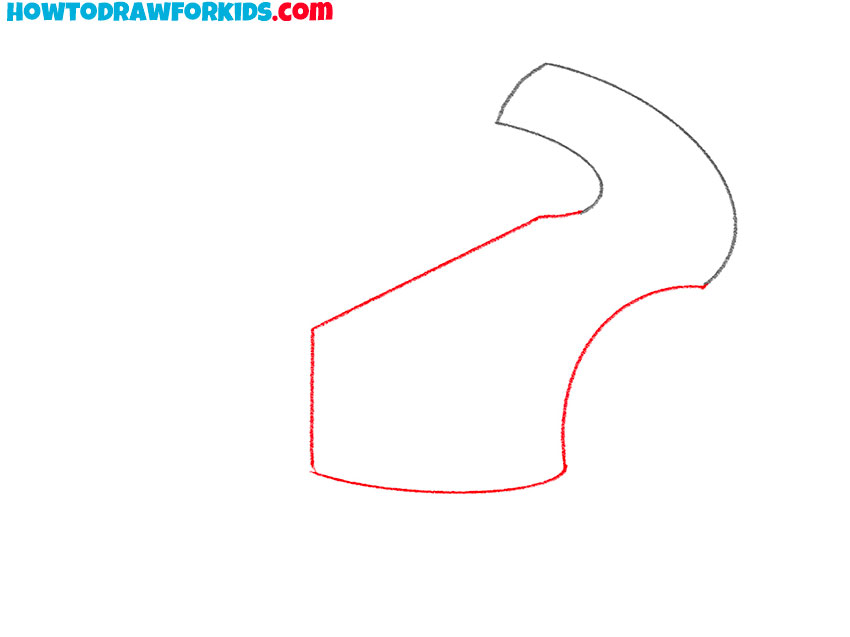
- Add the main body of the motorcycle.
In this step, use straight and curved lines.
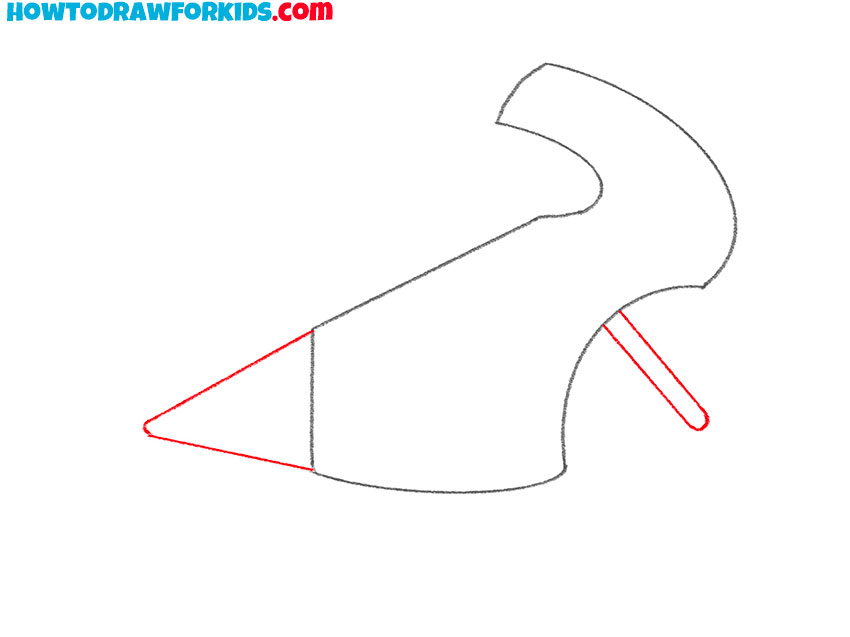
- Depict the back of the motorcycle and the front fork.
The rear of the motorcycle has a triangular shape. In front, add the thin tube.
- Sketch out the wheels.
Draw two identical circles.
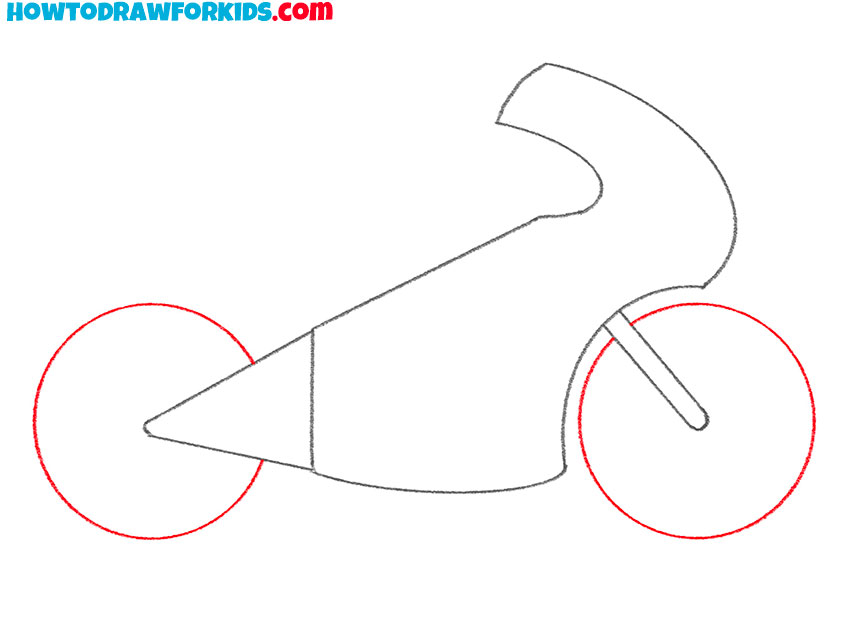
- Add the inside of the wheels.
Depict two small circles in the center of each wheel.
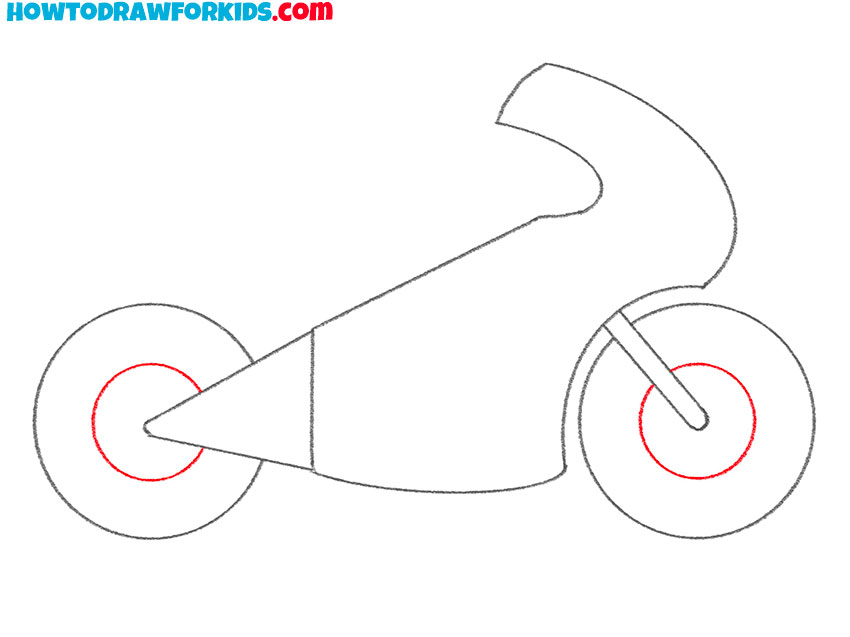
- Draw the top of the motorcycle.
Use smooth curved lines to draw the top.
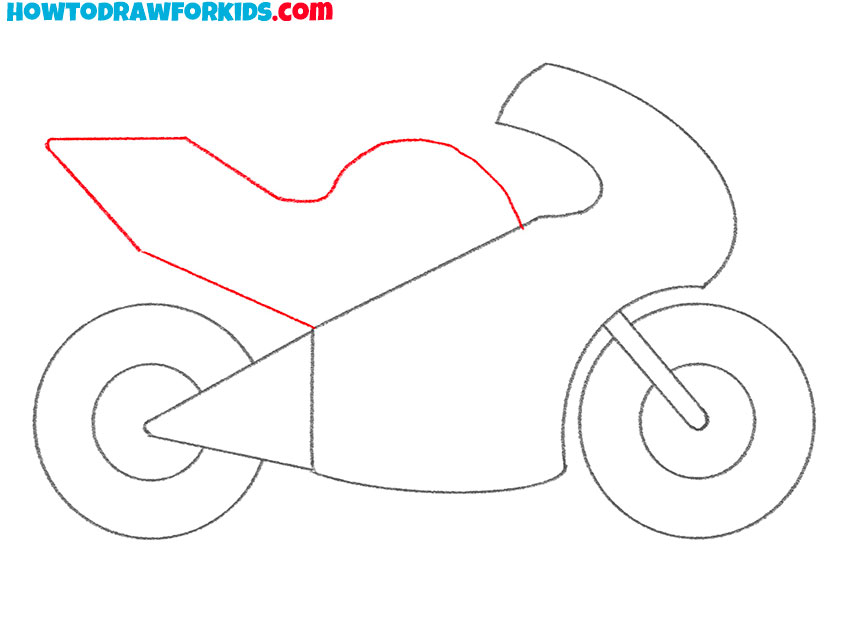
- Detail the steering part.
Add small curly elements.
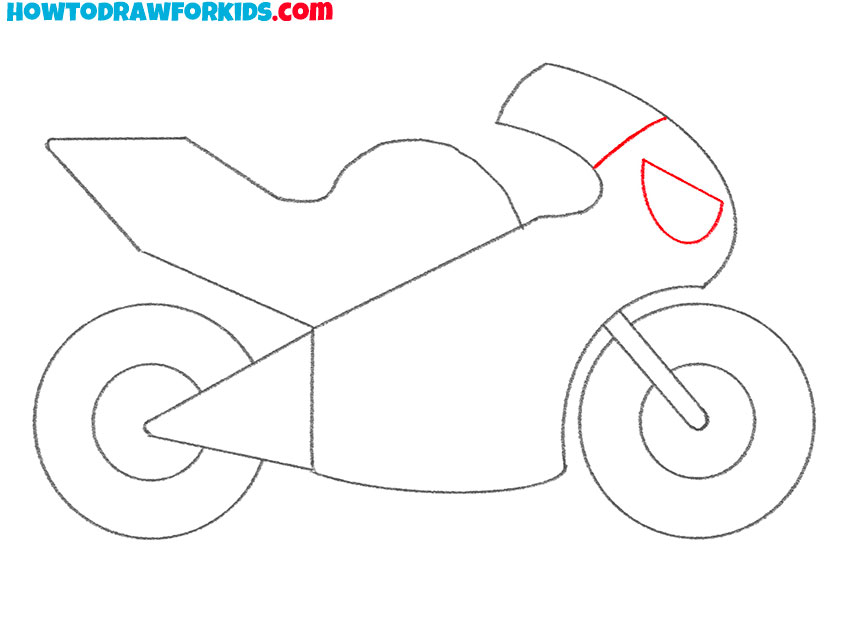
- Color the motorcycle.
Use different shades of blue and gray.

Additional Content
In support of your artistic endeavors, I have crafted a free PDF file for this drawing lesson, offering a concise version of the steps to draw a motorcycle. This digital guide is yours to download, providing the flexibility to practice your skills anywhere, at any time, even when you’re offline and away from the buzz of technology.
This PDF has been carefully formatted to be user-friendly, presenting the stages of drawing in a clear and digestible manner. It’s an excellent resource for quick reference, allowing you to reinforce the lesson’s key points and further engrain the techniques in your memory as you practice.
I’m pleased to extend this complimentary resource to you, reinforcing my commitment to making art accessible and learning continuous. Whether you’re in a café, a park, or the comfort of your own home, this PDF will serve as a trusty companion on your journey to mastering the art of drawing a motorcycle.
Alternative Drawing Technique
Adopting a slightly more complex approach, I’ve crafted an alternative technique to draw a motorcycle, designed to stretch your artistic capabilities. It’s ideal for those who have mastered the basics and are looking to add realism to their motorcycle arts, encouraging a deeper dive into the mechanics and of these powerful machines.
By engaging with this nuanced technique, you will not only refine your drawing skills but also develop a greater appreciation for the design and structure of motorcycles. This method emphasizes the importance of observing and capturing the subtle textures and reflections that give the motorcycle its character and vitality.
How to Draw a Realistic Motorcycle
This realistic method starts with the fundamental shapes that form the bike’s body, capturing the sleek and aerodynamic design that these machines are known for. The process involves replicating the subtle curves and angles that make motorcycles both a marvel of engineering and a subject of beauty in the world of art.
As the drawing progresses, the focus shifts to defining features like the wheels and handlebars, which require careful attention to detail to ensure accuracy and proportion. This method teaches the artist to create a sense of depth and dimension, essential for rendering a realistic motorcycle that appears as if it could leap off the page.
In the final stages, the addition of shadows and highlights brings the motorcycle to life, offering a study in contrast and form. By patiently layering these elements, the drawing gains a lifelike quality, capturing not just the image of a motorcycle but the essence of speed and freedom it represents.
Navigating Your Motorcycle Drawing Questions
As we throttle down from our artistic ride, you may find yourself with questions still spinning like wheels on the road. In the spirit of continued learning and shared curiosity, I’ve compiled a list of frequently asked questions that arose during this lesson on drawing a motorcycle.
- How can I make my motorcycle drawing look more three-dimensional? Focus on mastering perspective, adding shadows and highlights, and ensuring accurate proportions to give your drawing depth.
- What should I do if my motorcycle doesn’t look realistic? Review the proportions and shapes of each part of the motorcycle, and don’t hesitate to use reference images to guide your adjustments.
- How do I choose the right shading for different parts of the motorcycle? Observe where the light source is coming from in your drawing, and shade accordingly, with darker tones for areas furthest from the light.
- Can I add a rider on the motorcycle in this drawing lesson? Absolutely, adding a rider can bring life and context to your motorcycle drawing, just ensure the scale and proportions match the bike.
I hope these answers rev up your confidence and clarity as you continue to sketch and grow. Every question you ask is a signal of your commitment to the craft and your journey towards becoming a more skilled artist.
Conclusion
As we roll to a stop on our motorcycle drawing tutorial, I invite you to continue fueling your artistic growth with the diverse lessons available on my website. Whether you’re intrigued by the fantasy of sketching a dragon’s head or the simplicity of capturing a drop of water, there’s a tutorial to spark every imagination.
Connect with me on social media to ensure you’re up to speed with the latest lessons and artistic insights. Your thoughts and suggestions are the compass that guides my content creation, so please leave your comments and wishes for future tutorials below. Together, we’ll keep the wheels of creativity turning.


