How to Draw a Sea Turtle
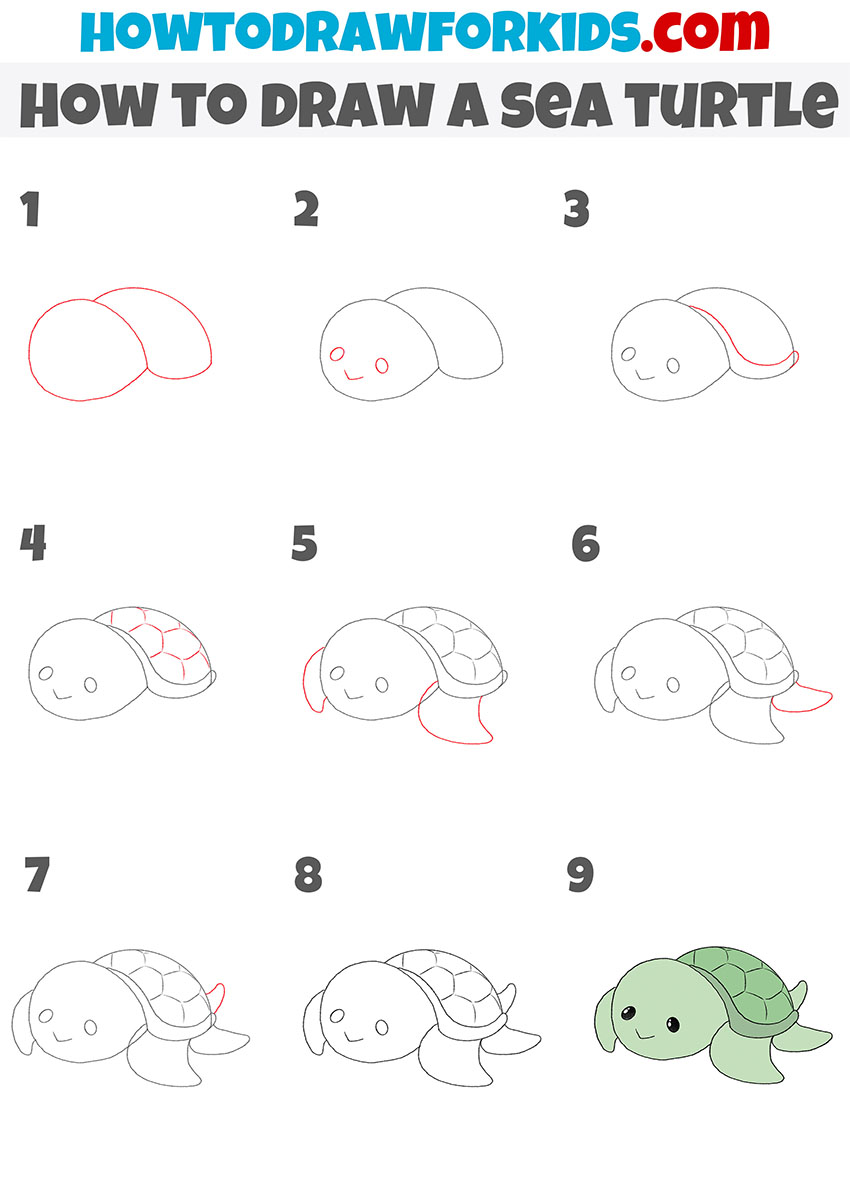
Today, I crafted a straightforward and easy-to-follow guide on how to draw a sea turtle. I’ll share some insights into the structural features of this charming creature, and then we’ll start the drawing process.
How to Draw a Sea Turtle: Basic Information
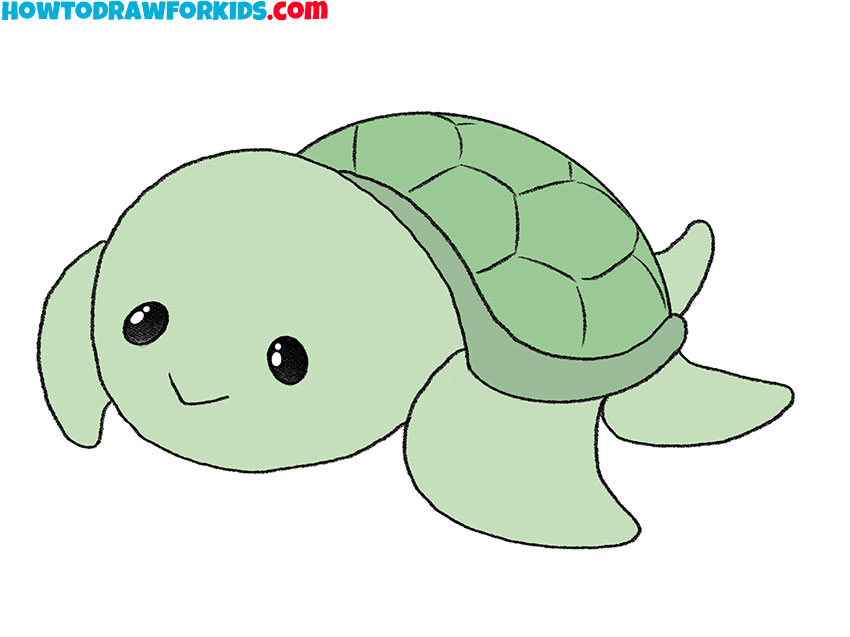
So what are some structural features about a sea turtle that would be important to artists? Firstly, it is a rounded shell, which consists of pentagonal panels. This is actually bone tissue, part of the turtle’s skeleton, so you need to use smooth and clear contours when drawing the shell.
Another notable feature of the sea turtle’s appearance is its fins. This creature moves swiftly and gracefully underwater, so we will be sure to depict its limbs as flat, streamlined fins.
Be sure to pay attention to the angle. The turtle is depicted as if it is swimming towards the viewer. To create this effect, I applied the rules of perspective—where the closest objects appear larger than those further away. This is why the turtle features a large head and forelimbs paired with a smaller shell.
In this guide, I employ a cartoonish drawing style, characterized by simplified facial features, large heads, and soft, rounded shapes. Throughout each step, I will share special techniques and tips that highlight the nuances of this approach.
Sea Turtle Drawing Tutorial
Materials
- Pencil
- Paper
- Eraser
- Coloring supplies
Time needed: 30 minutes
How to Draw a Sea Turtle
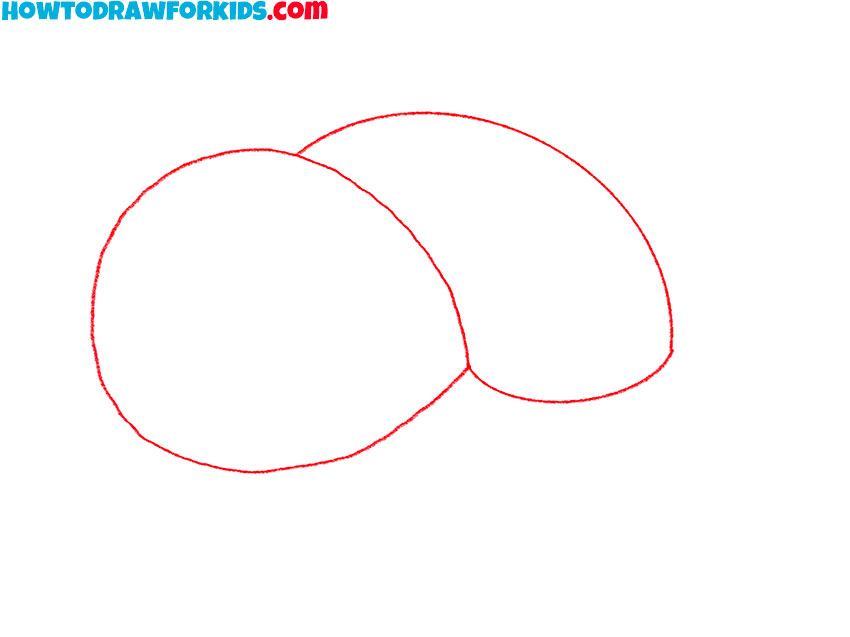
- Draw the outline of the turtle’s head and torso.
Begin by drawing two overlapping ovals, one for the head and the other for the main part of the shell. This foundational step sets the stage for the sea turtle’s body structure. Focus on creating smooth, even lines to form the basic shapes.
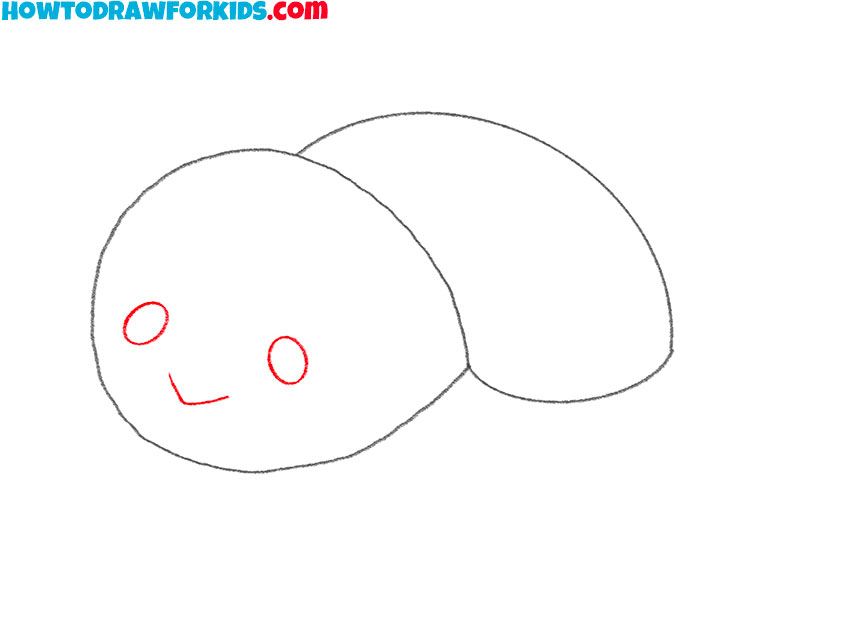
- Add facial features.
Next, add facial details to the turtle’s head. Draw two small circles for the eyes and a curved line below them for a smiling mouth. These features are essential for conveying a friendly and charming expression, typical of cartoon characters.
- Depict the shell element.
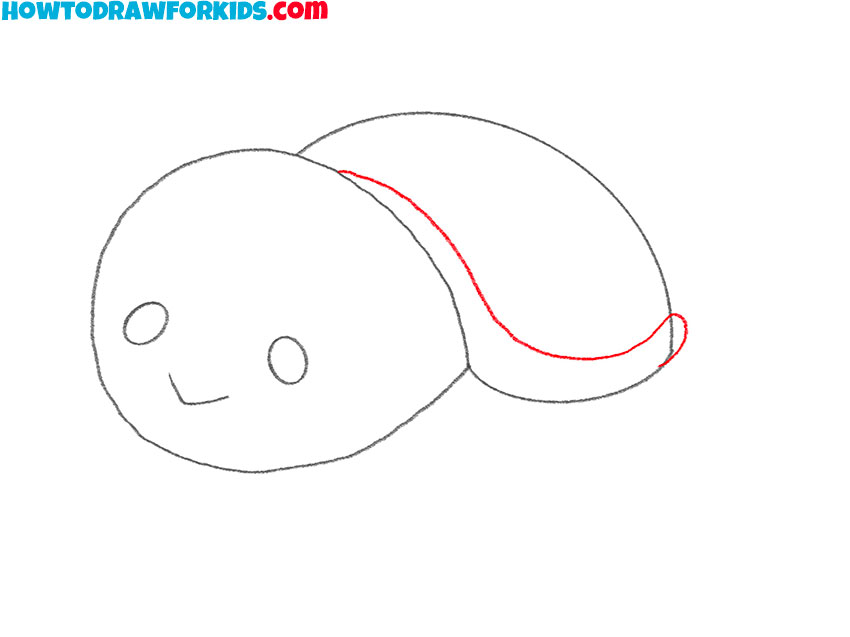
Now, refine the shell by drawing a curved line from the head down to the end of the larger oval. This line will serve as the turtle’s shell border and give more definition to the shell. The curve should be gentle, following the shape of the body to maintain a natural look.
- Add decorative elements to the shell.
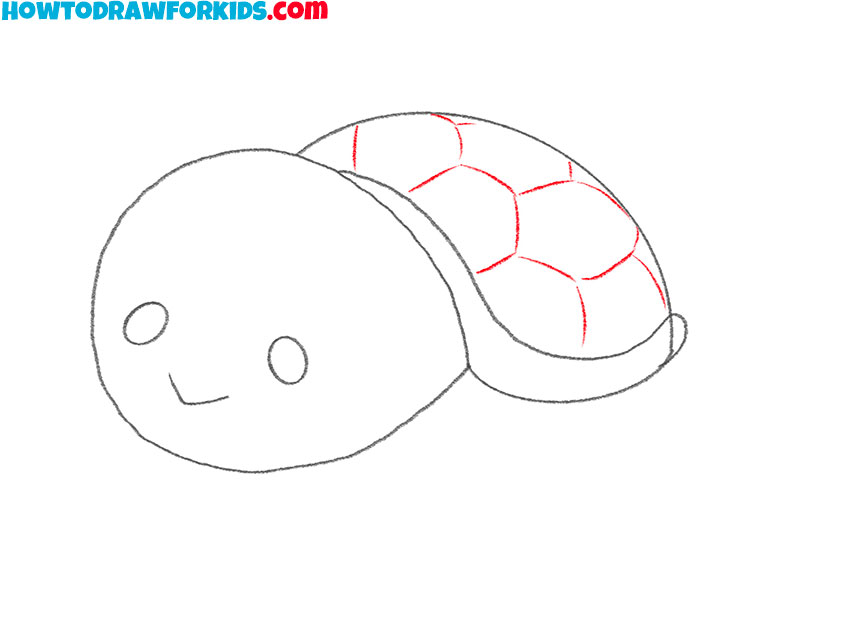
Draw the patterns on the turtle’s shell by adding hexagonal shapes within the large oval. These shapes should be evenly spaced and cover most of the shell area. This detail adds texture and realism while still keeping the design simple and cartoon-like.
- Draw the sea turtle’s front flippers.
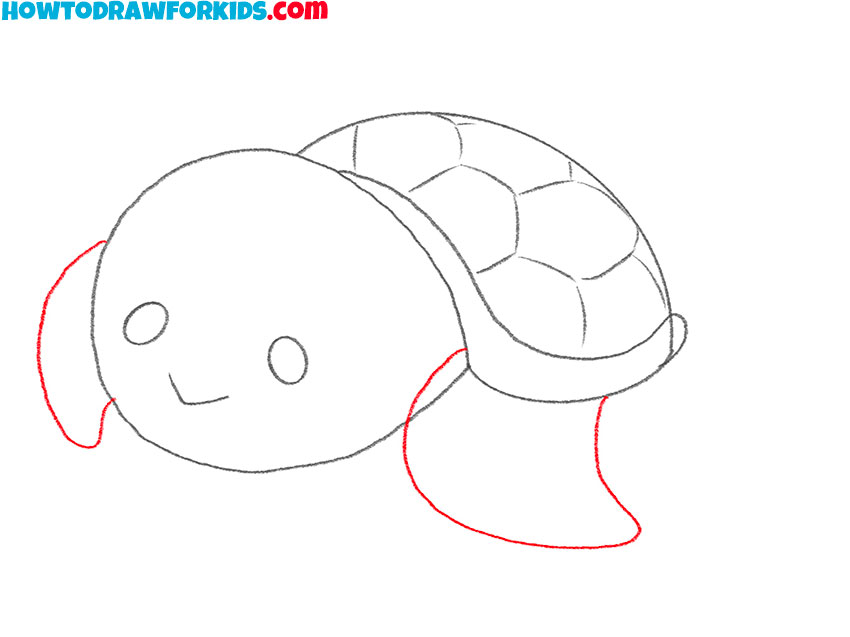
Next, draw the front flippers by adding two curved lines extending from either side of the turtle’s head. The flippers should be shaped like elongated ovals, with the ends slightly pointed. This gives the impression of the turtle’s limbs in a relaxed, natural position.
- Add the turtle’s back flippers.
Add the rear flipper by drawing one more elongated oval extending from the bottom of the shell. This flipper should be slightly smaller and angled downward, giving the turtle a balanced and cohesive appearance.
Focus on symmetry and proportion to ensure the rear flippers align well with the front ones.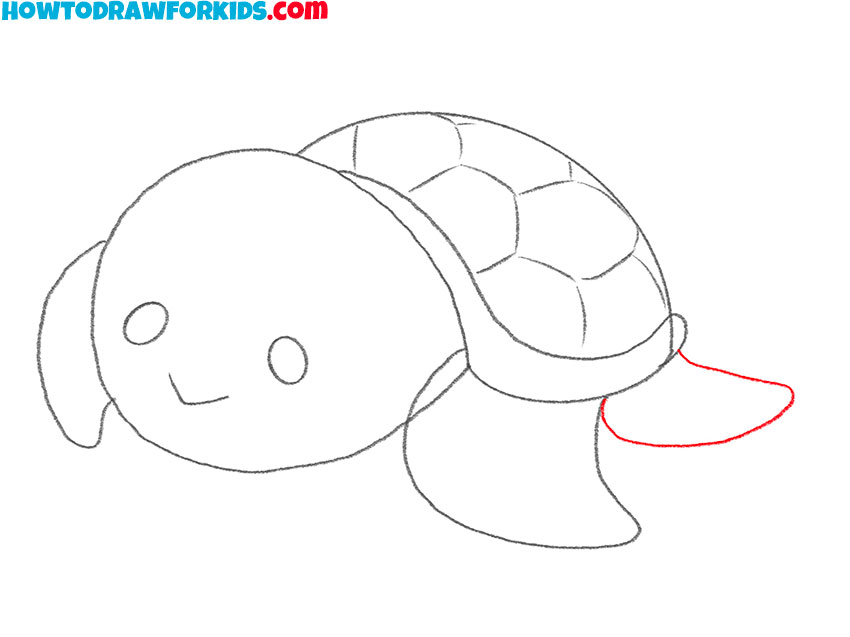
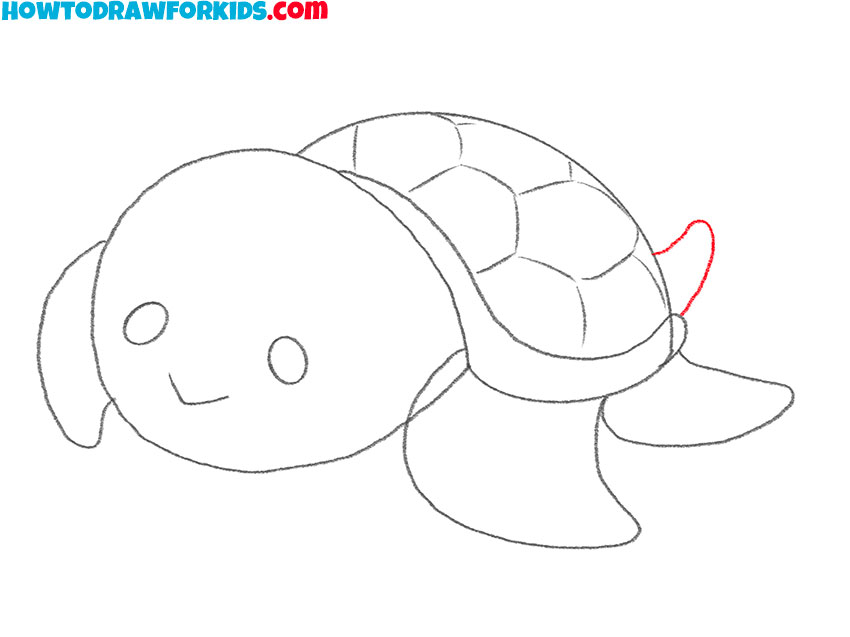
- Depict the turtle’s tail.
AComplete the outline of the turtle by adding a small tail at the back of the shell. The tail should be a simple curved line, adding a final touch to the turtle’s form. This small detail enhances the overall silhouette without complicating the design.
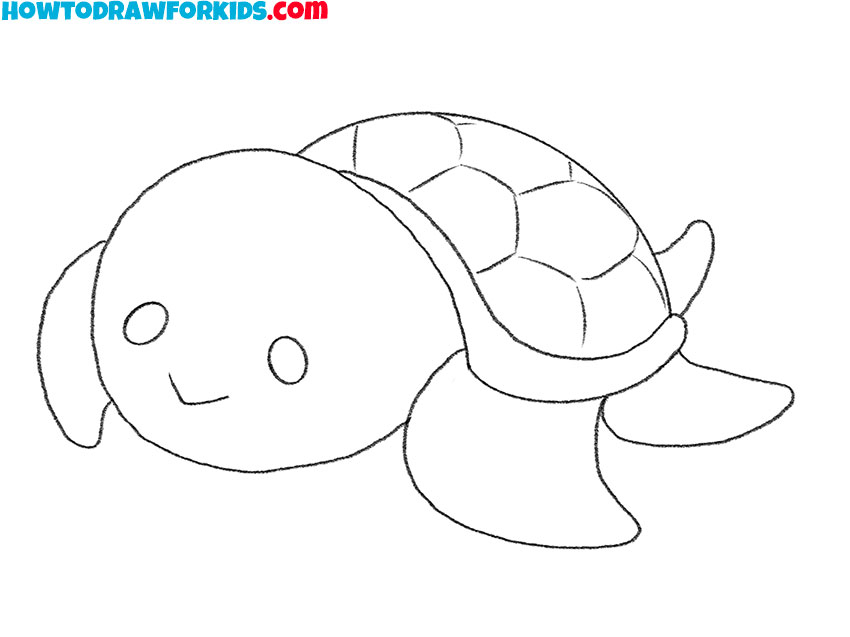
- Correct inaccuracies.
Review and refine your drawing by going over the lines to make them more defined. Erase any unnecessary or overlapping lines from the initial sketches. This step ensures that your turtle looks clean and polished, ready for the final touches.
- Color the drawing.
Finally, add color to your sea turtle. Use shades of green for the shell and body, ensuring the colors are bright and cheerful. The eyes can be black or dark brown, and you might add a bit of highlights to give the turtle more realism.

Additional Content
Attached to this turtle drawing lesson is a PDF that includes a concise version of this tutorial for quick reference. This PDF provides the essential steps in a streamlined format, making it easy to follow along as you draw. Additionally, the PDF contains two more ways to draw a turtle, offering alternative techniques and styles for those looking to expand their drawing skills.
Alternative Drawing Methods
As you become more comfortable with this guide on how to draw a sea turtle, you might be interested in exploring another way to draw a turtle, which we will discuss below. This alternative method will introduce different techniques and styles, offering more variety and helping you expand your artistic skills.
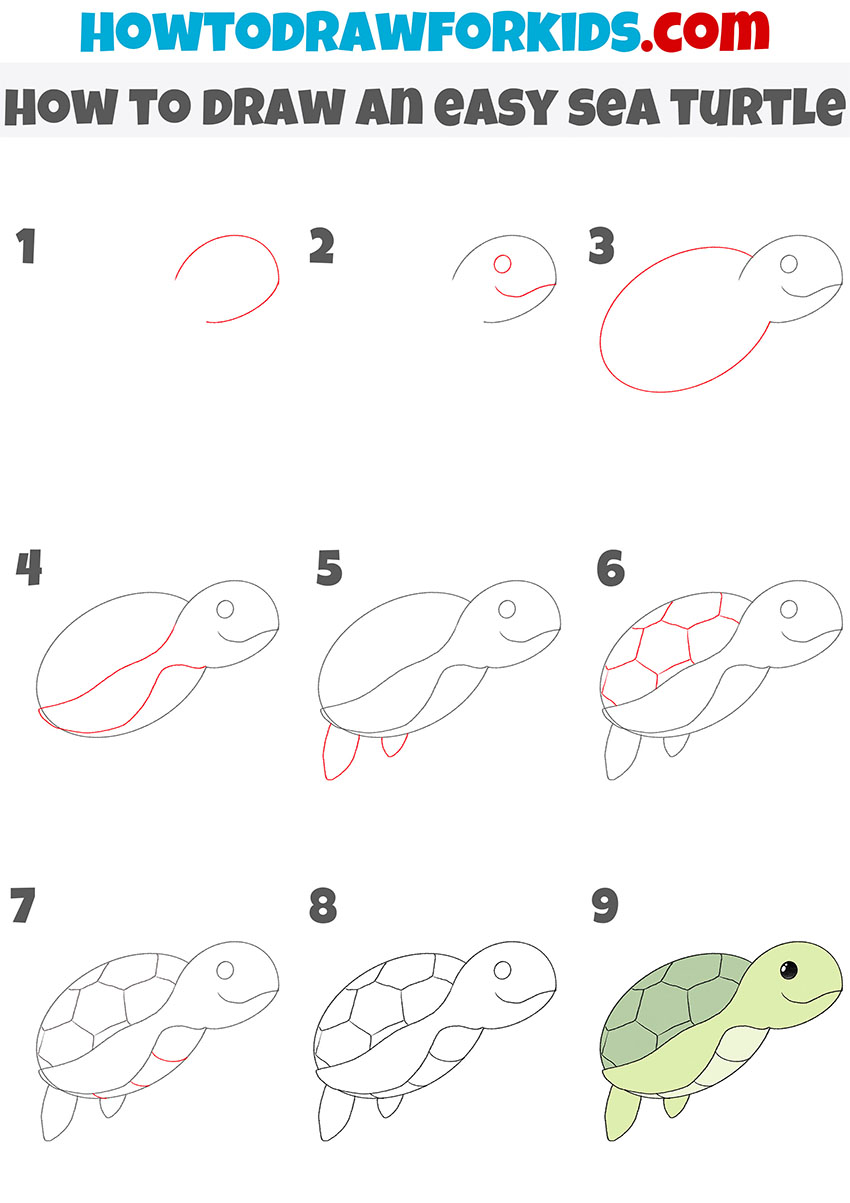
How to Draw a Sea Turtle from a Different Angle
In this alternative approach, I guide you through the delightful process of drawing a sea turtle from a unique perspective. We start with a curved line for the shell, adding depth and life to our marine friend. This angle offers a fresh take on the turtle’s form, showcasing its elegant shape from a new vantage point.
Step by step, we’ll add definition to the turtle’s features, capturing its gentle nature. Through this method, you’ll learn to depict not just the turtle’s physical attributes, but also its serene presence in the oceanic world. This lesson provides an opportunity to expand your repertoire and see this beloved sea creature in a different light.
By the end of this tutorial, you’ll have a charming illustration of a sea turtle, viewed as if you’re swimming alongside it in the sea.
Polishing Your Sea Turtle Sketches
Here is a collection of typical oversights you might encounter while drawing a sea turtle, accompanied by suggestions to steer your next attempt towards success.
- Overlooking Proportions: A frequent slip is misjudging the size ratio between the turtle’s head and its shell. To avoid this, begin by sketching a rough size guide before detailing.
- Neglecting the Shell Pattern: The shell’s hexagonal pattern can be intricate. A common error is to rush this part, which can lead to a less realistic depiction. Slow down and observe the pattern carefully to replicate it faithfully.
- Misplacing the Limbs: It’s easy to draw the flippers out of alignment with the body. Ensure the front flippers are positioned correctly, leading from the midpoint of the shell, and the back flippers trail slightly behind.
- Flat Shading: Shading adds depth, but uniform shading can flatten your image. Vary the pressure on your pencil to create light and shadow that suggest the turtle’s curved form.
- Forgetting the Texture: The skin of a sea turtle is not smooth, and a common mistake is to leave it untextured. Add fine lines to suggest the roughness of the skin and the scutes on the shell.
Each mistake you correct empowers your artistic voice, making your drawings more confident and expressive.
Addressing Your Sea Turtle Drawing FAQs
Let us anchor our skills with a trove of answers to the most common inquiries, ensuring no doubt is left adrift as we conclude our artistic voyage.
- Why does my sea turtle look flat? To infuse your sea turtle with life, pay close attention to shading. A gentle gradation from light to dark will give your turtle’s shell the rounded appearance it deserves.
- How can I make my sea turtle’s shell pattern more realistic? Study the unique mosaic of a real turtle’s shell. Replicate the irregular segments and subtle color variations to enhance realism in your drawing.
- I’m struggling with the flippers. Any tips? Remember, sea turtle flippers are long and paddle-like. Practice drawing them in different positions to get a feel for how they move and interact with the water.
Conclusion
Follow my social media profiles. It’s there that I announce new content. I deeply value your input and suggestions for future tutorials. Drop your ideas and feedback in the comments under each lesson.



Hi