How to Draw an Iris
Drawing flowers is a simple and enjoyable activity, and that’s exactly what we’ll be doing in this tutorial on how to draw an iris flower.

How to Draw an Iris: Introduction
Like most flowers, the iris follows a basic structure covered in the general flower drawing lesson. However, it also has unique features that require more precise and specific techniques. This tutorial builds on your foundational knowledge and helps you practice more refined skills.
Irises share structural similarities with roses, daisies, and many other flowers, but they have distinct characteristics. The flower consists of multiple sections: an upright central petal group and side petals that often curve downward. The stem is tall and slender, and the leaves are long and blade-shaped. To draw an iris correctly, you need to understand this layout and apply the basic techniques you’ve already learned.
Despite its complexity, this iris drawing tutorial will help you confidently sketch the flower and even try alternative shapes or colors. You’ll also reinforce your understanding of flower structure and gain another useful method for drawing floral subjects with clarity and accuracy.
Iris Drawing Tutorial
Materials
- Pencil
- Paper
- Eraser
- Coloring supplies
Time needed: 30 minutes
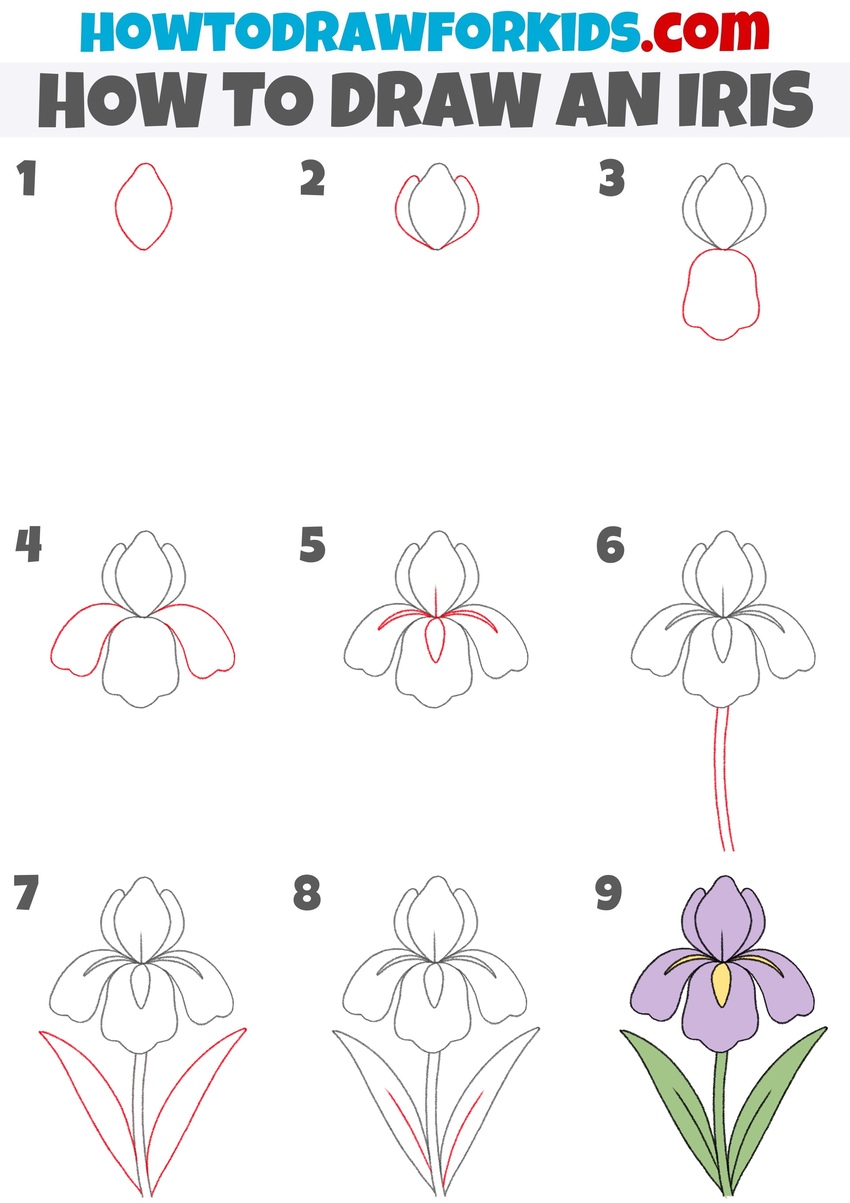
How to Draw an Iris
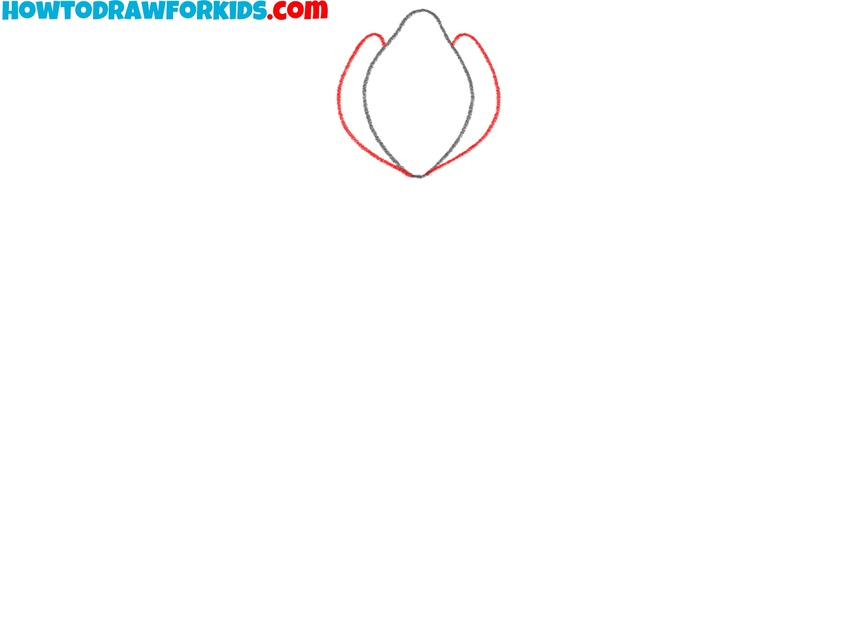
- Create the upper center petal.
Sketch the central petal of the iris. Make a vertically elongated oval shape with a slightly pointed top and a wavy bottom edge. Try to keep both sides symmetrical. If you want your flower to look more natural or stylized, you can make the lines a bit uneven or slightly jagged, which can illustrate delicate folds or texture.

- Draw outer top petals of the iris.
Draw the two upper side petals extending outward from behind the central one. These petals should mirror each other. Their shape can resemble narrow rounded triangles or elongated teardrops, depending on how wide or narrow you want your flower to look. You can also try adjusting their curve.
- Draw the iris’s lower central petal.
Sketch a wide, rounded shape that droops downward for this petal. This petal should appear simple and symmetrical. Use smooth lines with slight scalloping at the bottom. You can change the shape of the scallops to make the petal look fuller or thinner.
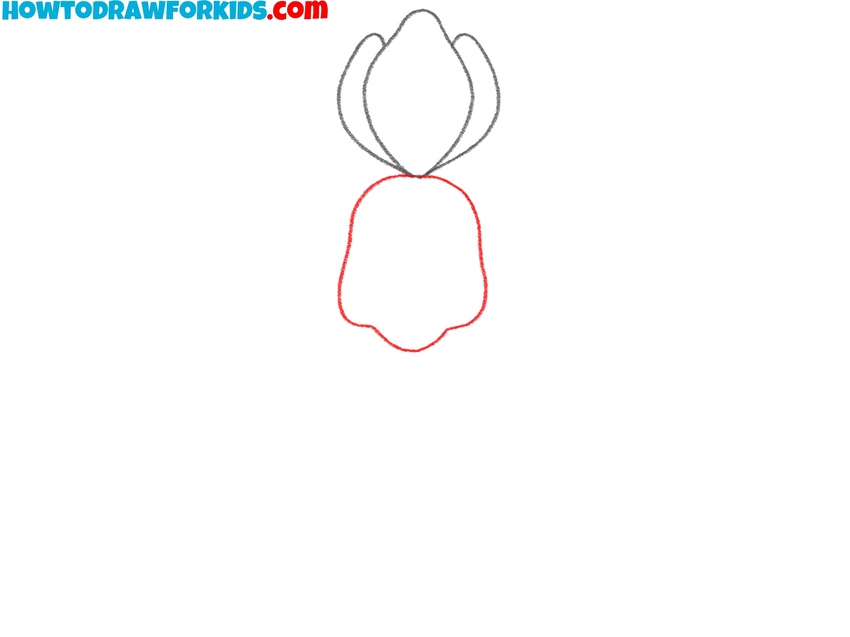
- Add the bottom side petals.
Add the large side petals extending out from both sides of the lower central petal. These petals should be wide and curve down slightly to match the typical iris shape. You can draw them either symmetrical or with slight variation to make the drawing more natural.
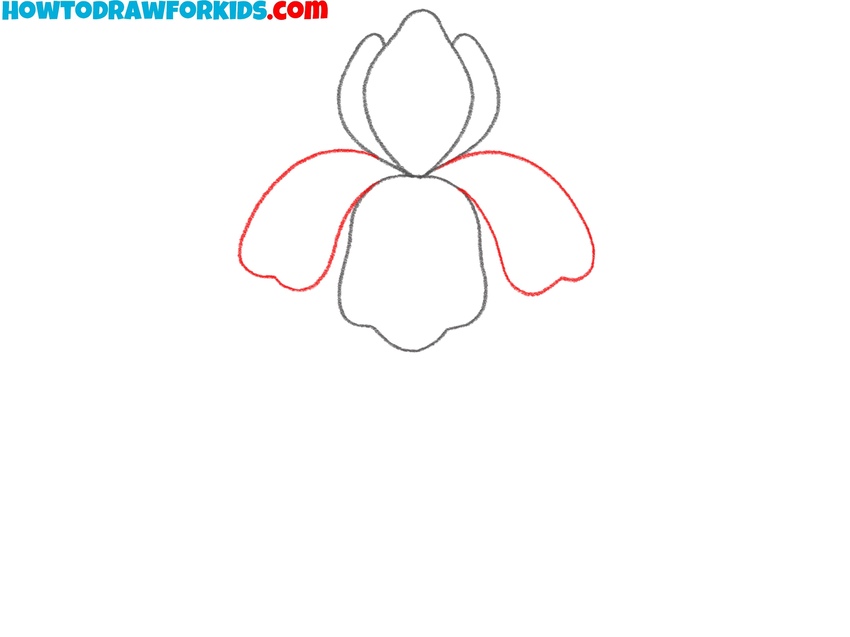
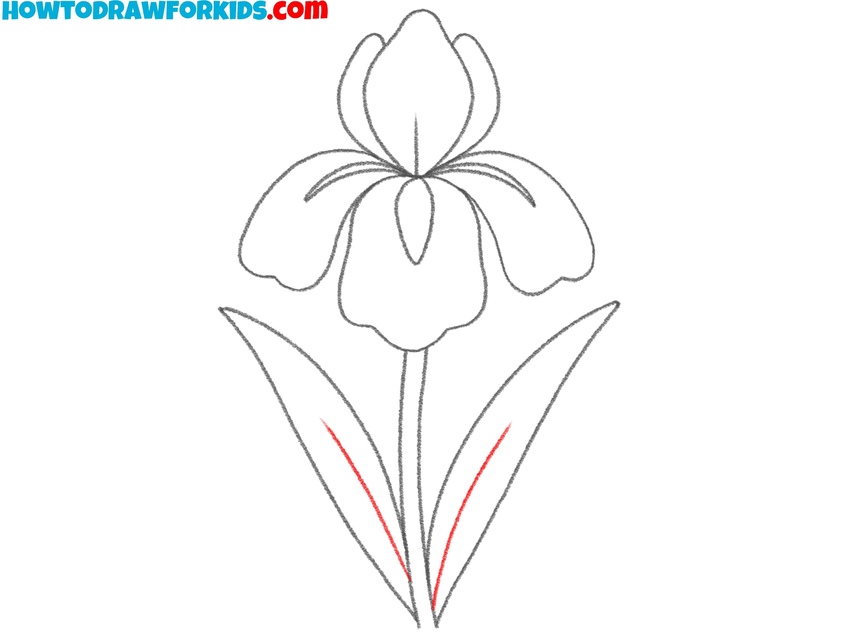
- Add signals to the petals.
Draw thin elongated ovals running through each petal to illustrate the signals and folds that give irises their texture. By adjusting the thickness of the signals you can convey perspective in your iris drawing. You can change the thickness or direction of these lines depending on the specific iris type you want to imitate.

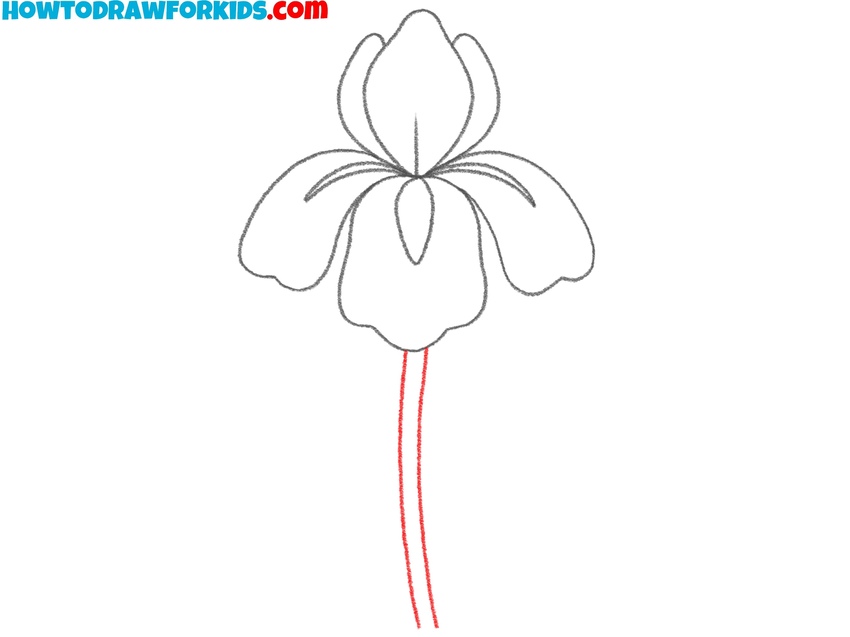
- Draw the iris’s stem.
From the bottom of the flower, draw two slightly curved vertical lines to form the stem. It should be fairly narrow and straight, though adding a subtle curve makes it look more organic. You can also draw the iris stem leaning slightly if you want the flower to look like it’s bending.
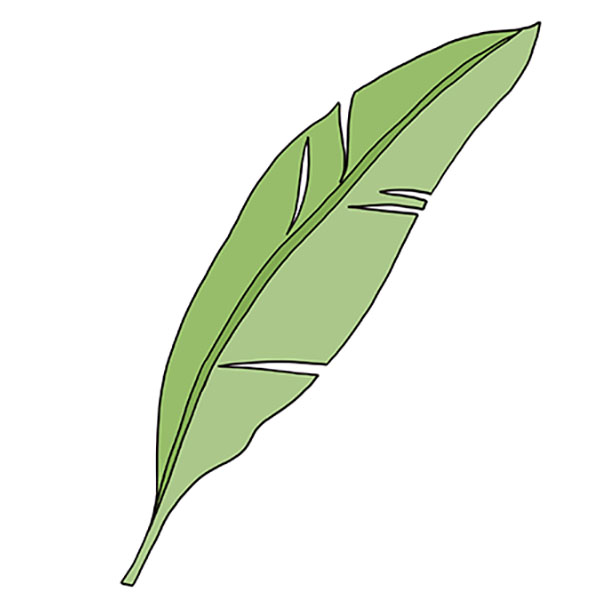
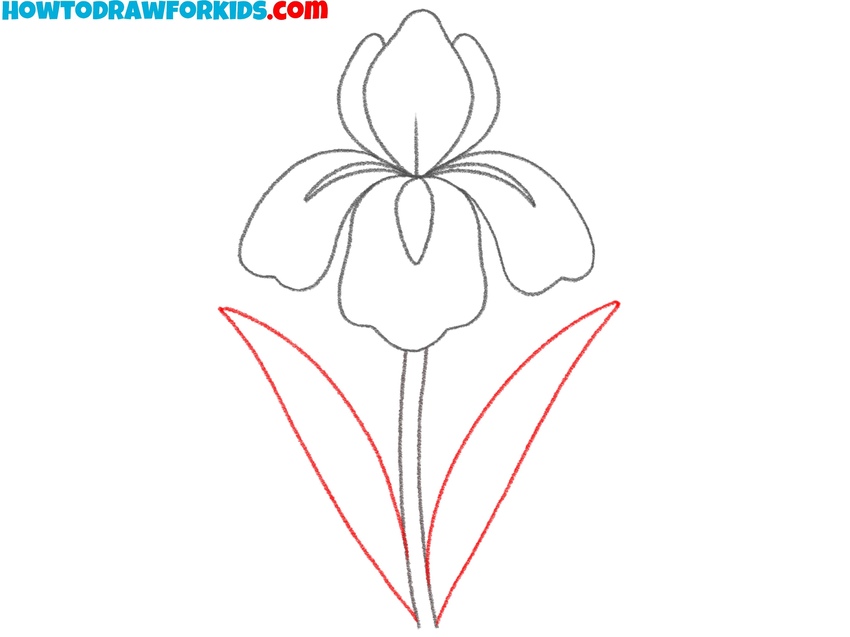
- Form the pointed leaf shapes.
Sketch two long, pointed leaves starting near the base of the stem and fanning out diagonally. The leaves should be tall and narrow with a visible taper to the tip. Their placement can vary; for example, you can draw them both to one side to show wind movement or one leaf in front and one behind the stem.
- Draw the midribs on the leaves.
Draw a single long curved line down the center of each iris leaf to indicate the midrib. This simple addition makes the leaves look more natural. If you’d like to add more detail, you can include a few shorter veins branching off from the center line.
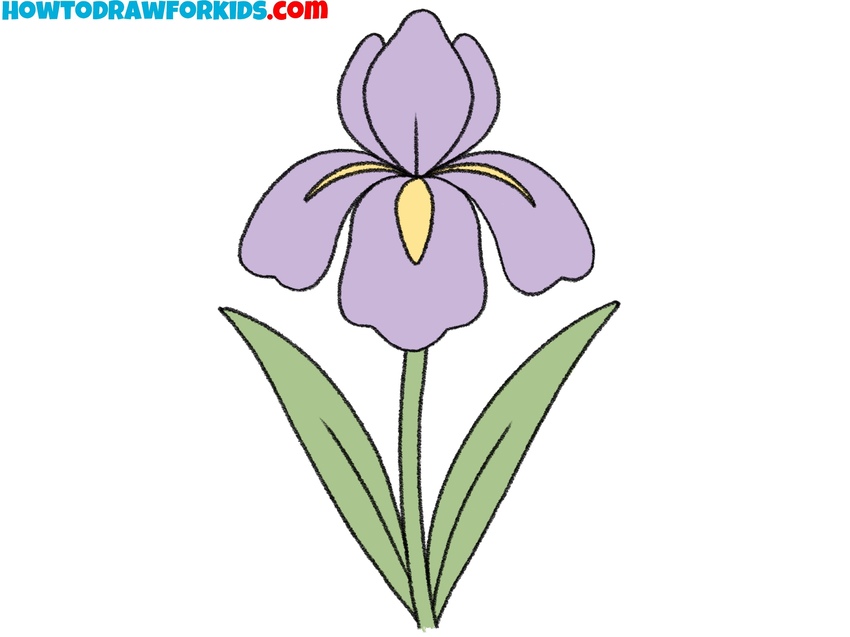
- Color the iris drawing.
Choose colors for your iris. The most common are purple, violet, or blue petals with yellow or white details. Use green for the stem and leaves. You can also experiment with different colors like white, pink, or burgundy for creative variations.
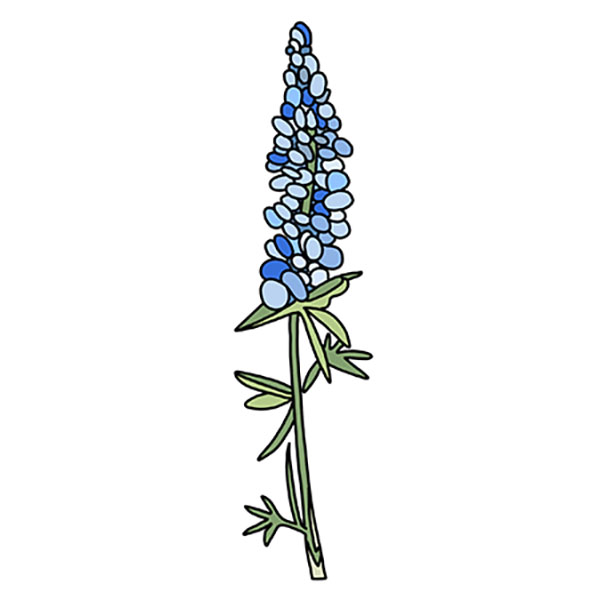
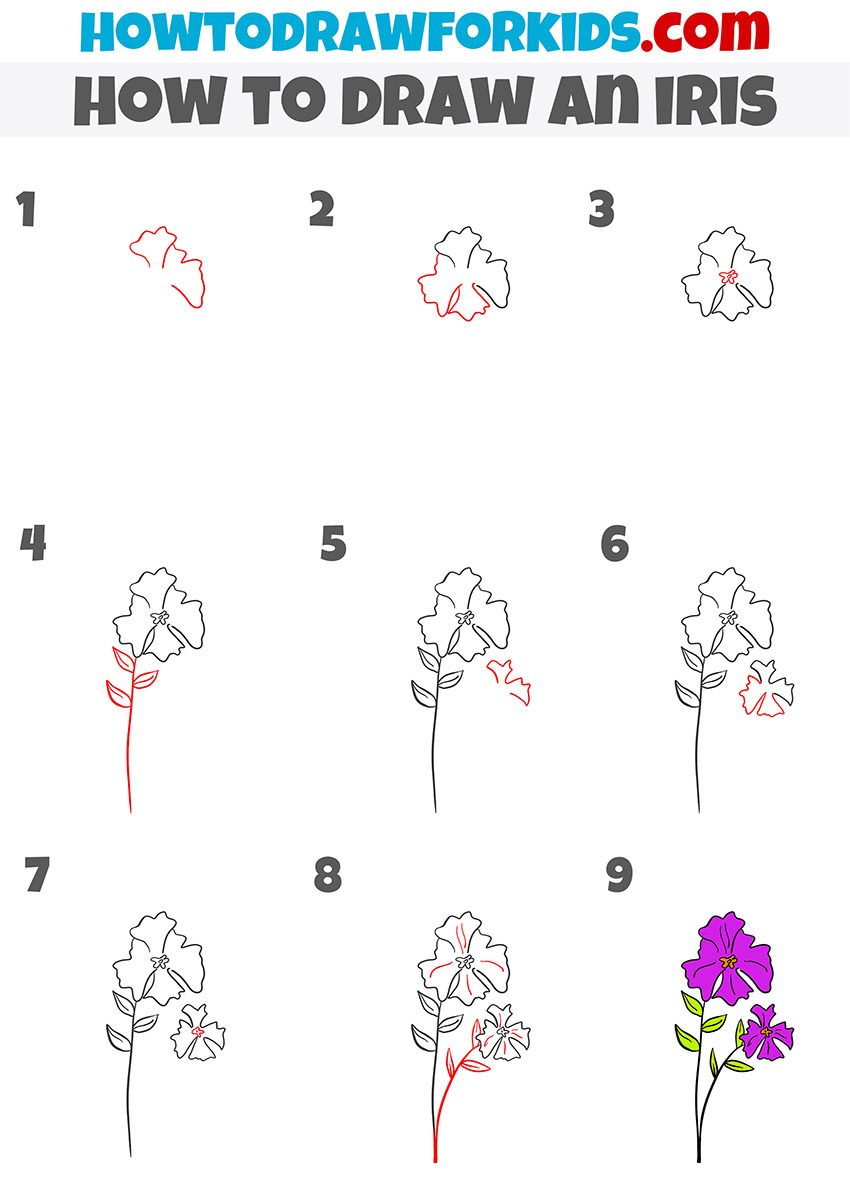
Alternative Iris Drawing Tutorial
The tutorial presented here differs from the first iris drawing tutorial in both composition and style. Instead of a large, symmetrical flower shown from the front, this method demonstrates how to draw an iris with multiple blossoms on a single vertical stem.
The petals are shaped more loosely, with less geometric symmetry, and the flower structure is drawn from a slightly turned angle. It also includes more variation in petal shapes, additional small buds, and a naturalistic leaf pattern that differs from the broad leaves in the original version.
Sketch the upper flower using freeform curved outlines. Continue by drawing the layered petals below and a small central stamen. Add a long stem, followed by a few narrow leaves on both sides. On the stem, draw a smaller secondary flower using the same method. Add details inside both blossoms to create petal folds or vein lines. Finish the composition by drawing another bud or petal and a curved connecting stem.
If you want to repeat this lesson, then download the PDF file below. This will allow you to complete the lesson at any time, even if there is no Internet access.
Conclusion
Despite the complexity, today we successfully completed an iris drawing and learned an additional method that offers a noticeably different structure compared to the first, main tutorial. As I’ve mentioned before, drawing flowers is a repetitive process, but each flower has its own characteristics that make it unique.
These skills will come in handy when you want to paint a beautiful still life. You can draw some more irises and paint them in different colors. Try different options – paint the petals in a solid color, or create smooth transitions. Develop your creative imagination and try new things.
To continue improving your flower drawing skills, I recommend trying the tulip drawing tutorial – another well-known and widely recognized flower – or switch to the daisy flower drawing tutorial, where you can practice drawing one of the simplest flower shapes in a clean, polished manner. To make sure you don’t miss new flower tutorials or any other drawing lessons, be sure to follow me on social media and visit the website regularly.