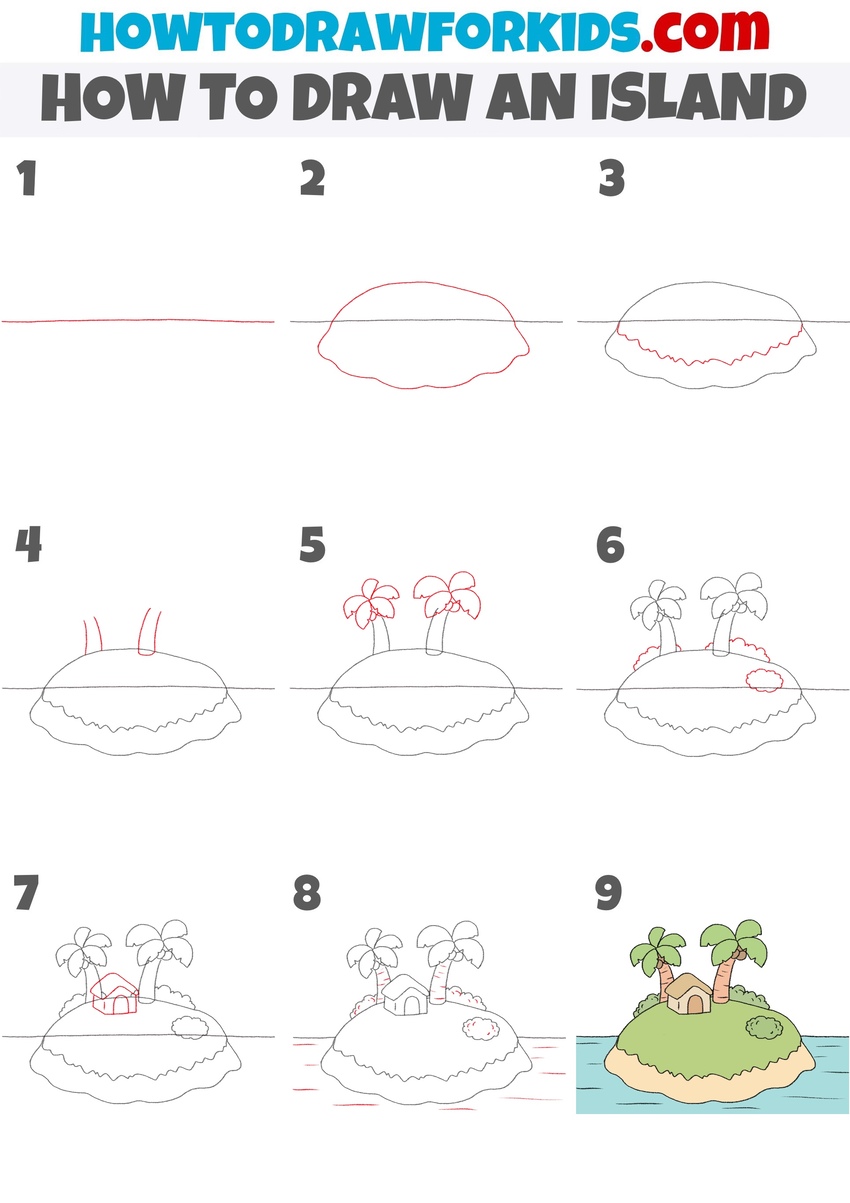
How to Draw an Island
I really enjoy drawing different landscapes, and I hope you do too—because today we’re going to learn how to draw an island.

How to Draw an Island: Introduction
Islands come in many forms – some are small and simple, while others are massive, stretching thousands of miles. In this tutorial, however, we won’t be drawing anything too large or complex. Instead, I’ll show you how to draw an island that looks vary small and compact. This version will include a tiny patch of land with a single tree, a bit of vegetation, and a small, cozy house in the center.
This is the main, basic how to draw an island tutorial. At the end of the lesson, you’ll also find a bonus tutorial that shows how to draw an uninhabited island – one without any buildings or signs of life. Together, these two versions will help you understand how to draw islands in different forms and styles, from inhabited to completely natural.
Both tutorials are meant to give you a strong foundation for drawing islands. Like many other lessons on my site, they provide a general structure, which you can build upon with your own ideas and details. The steps are kept simple to make it easy for beginners to follow along.
You’re free to add anything you’d like to your island drawing. You can include people, birds flying overhead, or any extra features you think would make your version more complete and personal.
Island Drawing Tutorial
Materials
- Pencil
- Paper
- Eraser
- Coloring supplies
Time needed: 40 minutes
How to Draw an Island
- Sketch the horizon line.
Start your island drawing by sketching a straight horizontal line across the page. This will represent the horizon where the sky meets the sea. Try to keep the line level and about one-third down from the top of the page, leaving enough space both above and below for the sky and the island itself.

- Draw the outline of the island.
Now draw the shape of the island just below the horizon line, sketching a wide, irregular oval. The top line of the island should gently curve. The bottom edge should have a wavy or bumpy contour to resemble the uneven shoreline or sandy edges. The island should sit just below the horizon line.
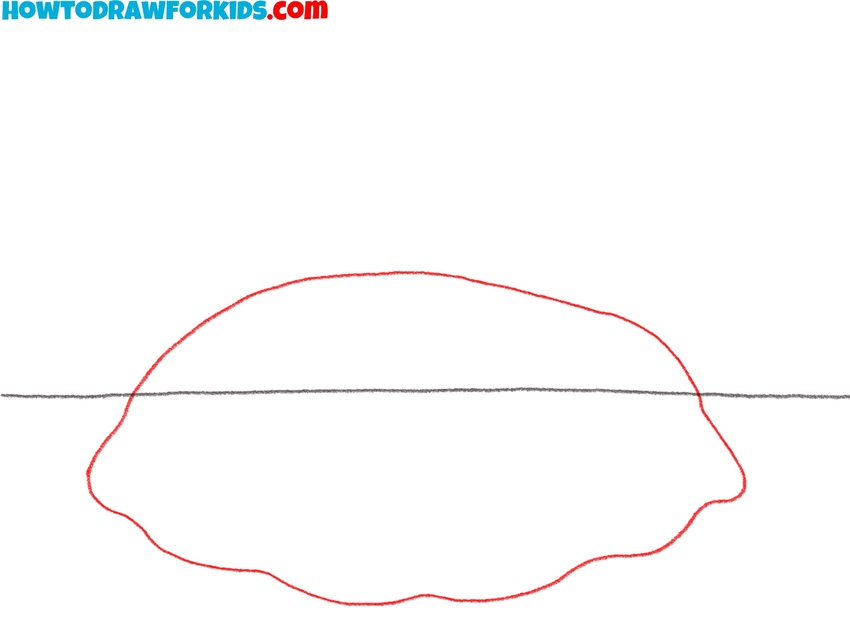
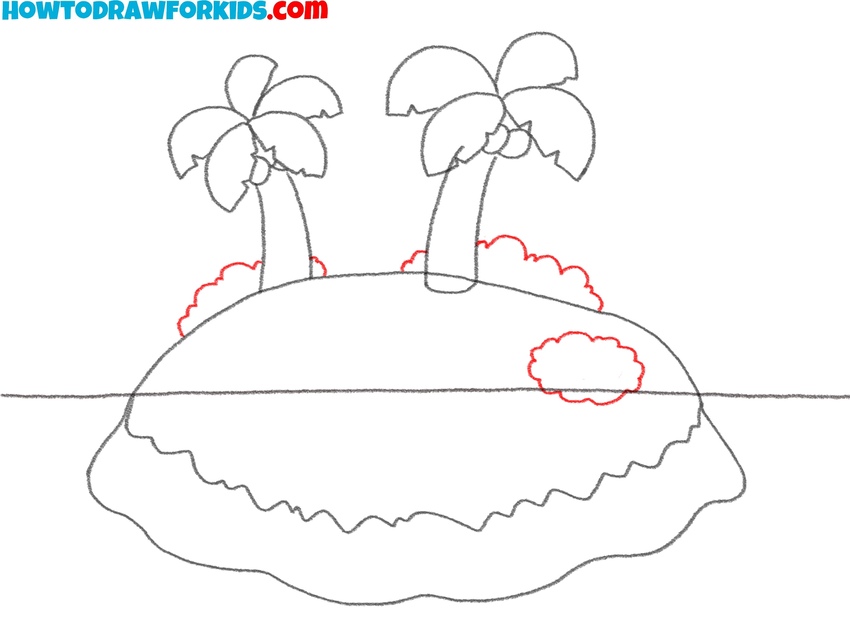
- Add the shoreline texture.
In this step, give the lower part of the island a more detailed shoreline by drawing a wavy line along the bottom edge. This line should follow the general curve of the island but include small, uneven zigzags or curves to represent the separation between the sand and grass textures.
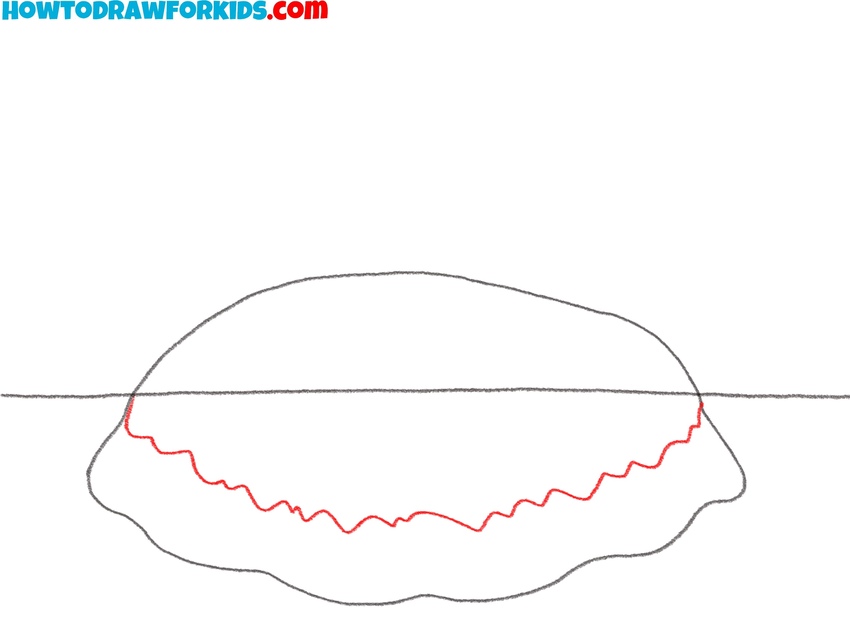
- Sketch the tree trunks.
Add two curved lines coming up from the island to represent the trunks of the palm trees. Draw the palm trees just above the horizon line and angle them slightly away from each other to make the trees look more natural and spread out. Make the trunks wide at the base and narrower as they rise.
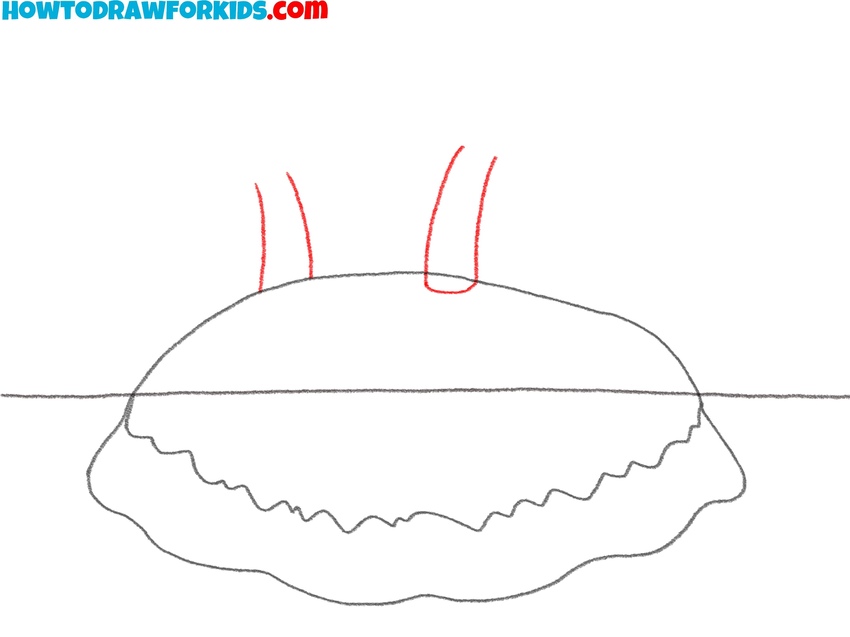
- Add the palm leaves and coconuts.
Now, to draw the palm leaves, add several long, curved shapes extending from each tree trunk’s top. Each palm should have about five or six leaves, placed around the top to create a fan shape. Vary their angles slightly to keep the trees looking natural. You can overlap some leaves.
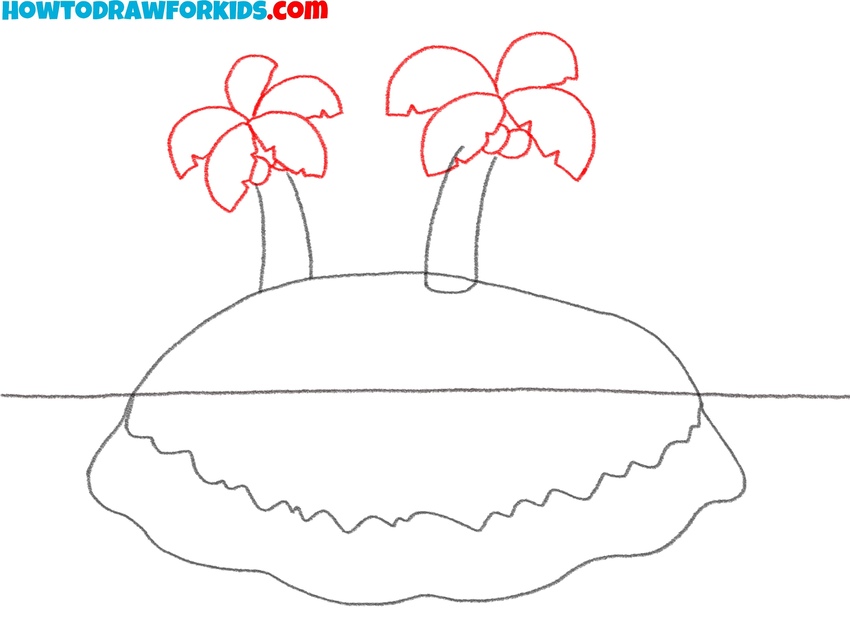
- Add bushs on the island.
Now add small bushes to the right and left sides of the island to break up the space and add more detail. Draw irregular, fluffy shapes that look like clouds or a bunch of overlapping bumps. Keep the base of the bushes touching the island’s top surface and allow it to overlap slightly with the lower part of the palm trees.
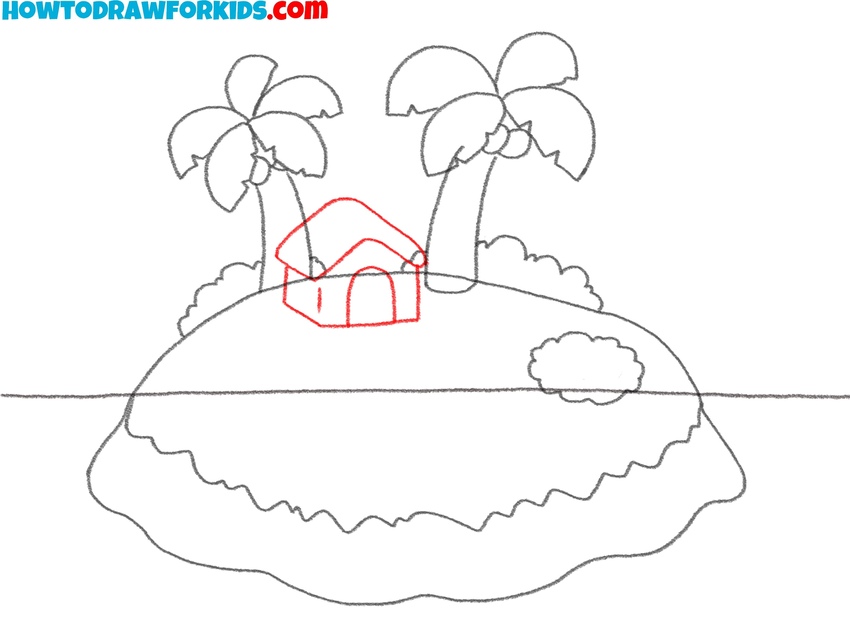
- Draw the house on the island.
First, sketch a square or rectangular base and add a triangular roof on top. The house should be small enough to fit between the trees and bush without looking crowded. After that, add a small door or window to give it more detail. You don’t need to add much detail.
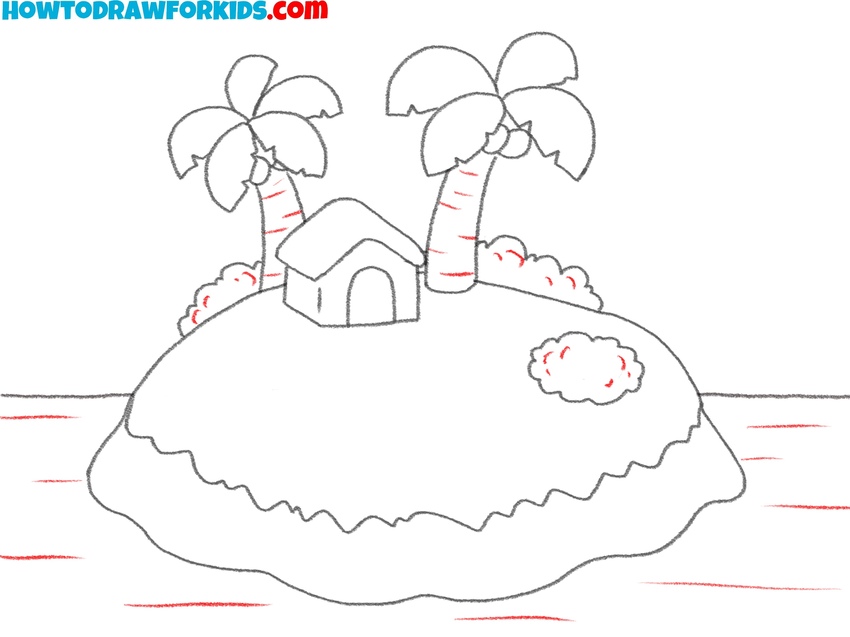
- Add final details to the island and ocean.
Now finish your island drawing by adding final small details around the island. You can draw waves by sketching some lines on the water surface. Add some texture lines on the trees or small bushes around the island’s edge if you’d like. Also, erase the guidelines from the sketch.
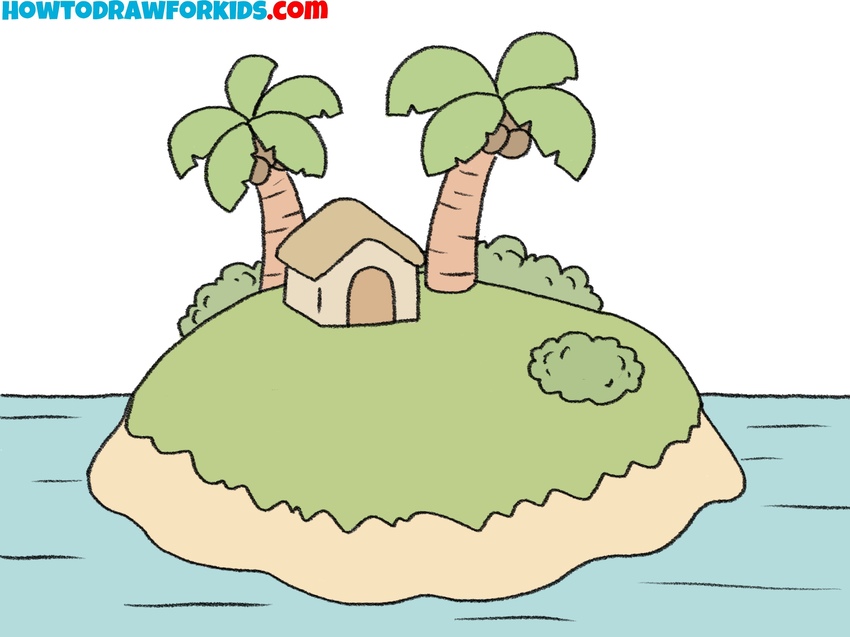
- Color the island drawing.
To color the island, use green for the grass on top of the island and a light tan or yellow for the sandy lower area. The palm leaves should be a bright green, and the trunks a soft brown or orange. Color the house in light, warm tones like beige or pale yellow. The ocean can be filled with a blue or turquoise shade.
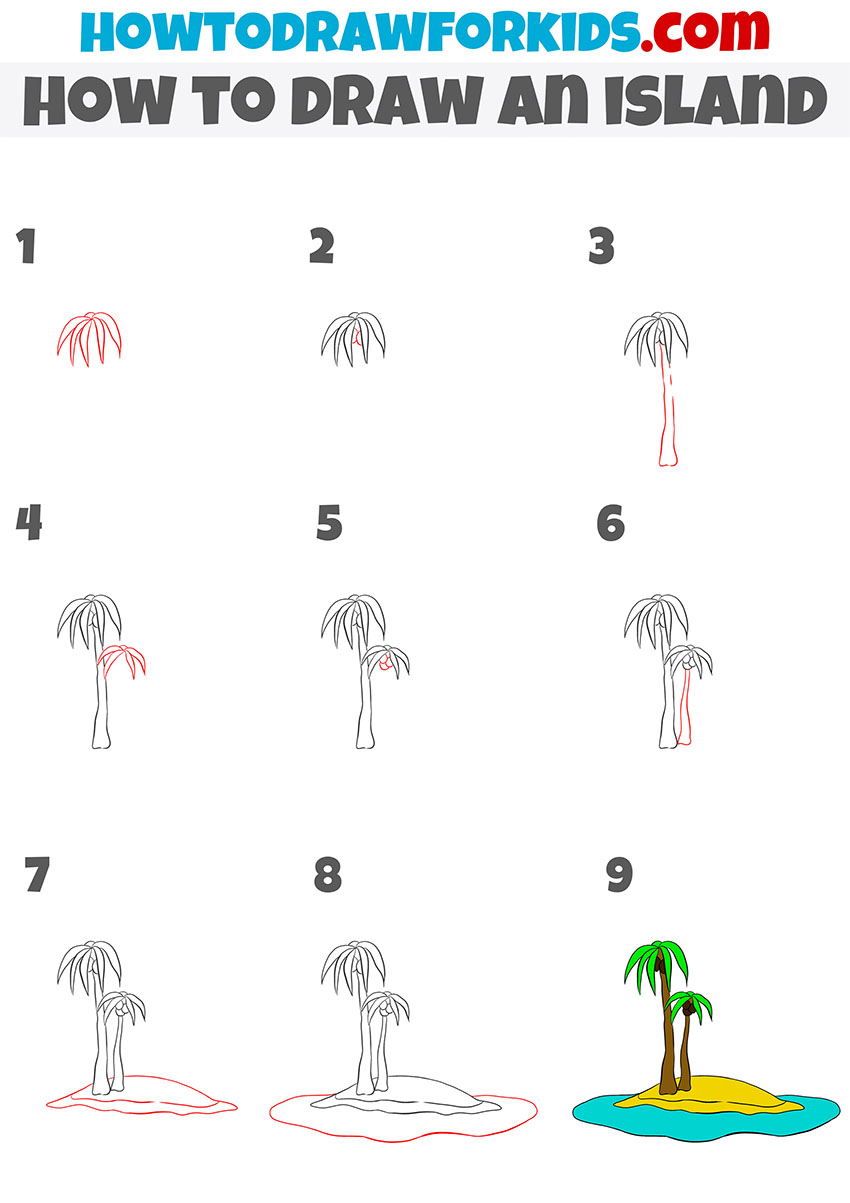
Simple Island Drawing Tutorial
This version of the tutorial on how to draw an island uses a slightly different approach compared to the first one. Instead of starting with a full landscape, this version focuses on drawing a pair of palm trees first and building the island around them. The design is simpler, with fewer small details and no buildings or bushes. The final coloring is also more vibrant, with distinct green, yellow, and blue areas to represent the palms, sand, and water.
To begin this tutorial on how to draw an island, sketch the leaves of the first palm tree using curved shapes that droop downward. Then, add the central trunk, making it wider at the bottom and slightly wavy. Draw another set of leaves and a second trunk for the second palm, positioning it to the side and slightly behind the first.
Add small details like coconuts between the leaves. Sketch the sandy island base beneath the trunks with smooth, irregular curves, then outline the shoreline using a larger shape around it. Finish the island drawing tutorial by coloring the palm leaves green, the trunks brown, the sand yellow, and the surrounding water bright blue.
If you wish, you can add additional details to the drawing. For example, you can draw a bird or two flying above the island, or you can draw a boat floating nearby on the water. You might also add seashells along the shore, a sun in the sky, or even a few clouds to complete the scene.
Conclusion
So, young artists, did you find this tutorial on how to draw an island interesting and helpful? Which version of the island did you enjoy drawing the most? Did you follow the examples exactly, or did you add your own extra details and elements to make the drawings more unique?
If you liked this tutorial and want to keep practicing, be sure to check out other sections of my website. There, you’ll find a wide variety of drawing lessons, along with additional materials like coloring pages and articles about art.