How to Draw Broken Glass
Broken glass has a very complex shape, but in this guide we will simplify it, keeping convincing to learn how to draw broken glass.


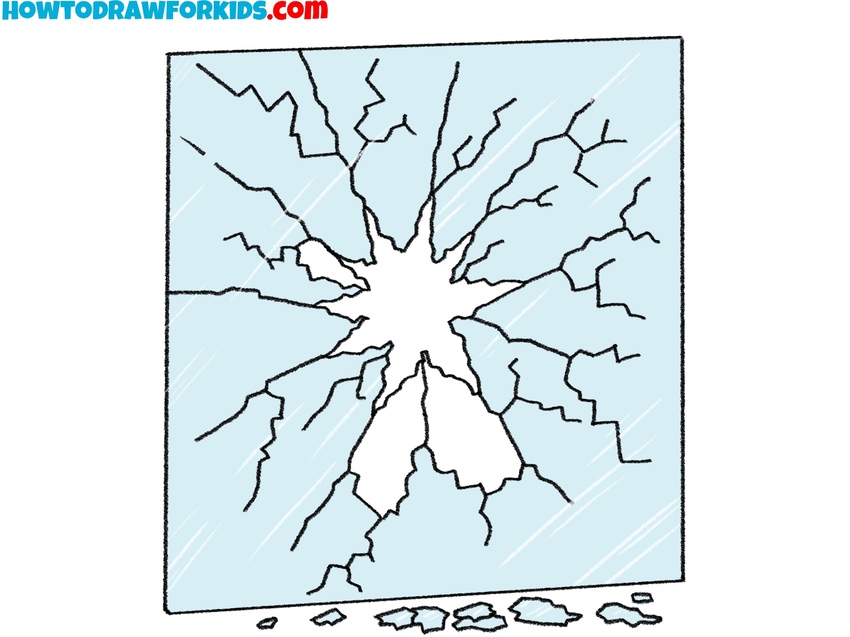
Now I will show you how to draw broken glass. Glass is a rather fragile material and a hole and cracks form on its surface when a small but hard object hits it. That is what you see in the picture.
In the middle, there is an uneven-shaped hole, from which large and small cracks go in different directions. This view has a broken window pane or glass of a vehicle.
You will easily complete this lesson and have a good time. The main thing is to remember the sequence of steps, and the lines themselves can have an arbitrary shape. Free lines are allowed in this lesson, it is not necessary to repeat every crack exactly.
You can use both straight and jagged lines to draw cracks. Consistently follow all the drawing steps and use small hints, then you will get a good result.
Materials
- Pencil
- Paper
- Eraser
- Coloring supplies
Time needed: 15 minutes
How to Draw Broken Glass
- Sketch the glass border.
Before showing the cracks, it’s important to decide on the boundary of the glass. Lightly sketch a large square or rectangular shape to represent the pane. Keep the edges straight. This outline is the frame that sill contain the break pattern.

- Draw the broken center.
Broken glass usually radiates from a single point of impact. To show this, sketch a starburst-like shape near the center of the pane. Use short, jagged strokes so that it looks irregular. Each pointed edge should vary in length, as cracks rarely appear evenly. This inner shape represents the immediate hole or heavily fractured part of the glass where the force hit.

- Draw out the main fracture lines.
From the sharp tips of the starburst center, begin drawing long, irregular lines stretching outward across the pane. These cracks should vary in direction, angle, and length, and should not look identical. Use shaky or slightly zigzag strokes to avoid making the cracks appear too smooth. A good idea is to let some lines stretch all the way to the edges of the pane, while others stop halfway.

- Sketch the smaller cracks.
Now that you have the main fractures, begin sketching smaller cracks branching off the longer lines. Think of these as thinner veins breaking away from the larger ones. Use shorter, lighter strokes that run at different angles from the existing cracks.

- Sketch the fallen shards.
To make the broken glass drawing feel more realistic, sketch small shards lying along the bottom edge of the pane. These fragments can be drawn as irregular, angular shapes, similar to pebbles but with sharp corners. Vary their size, making some larger and others quite tiny, scattered unevenly.

- Paint the surface of the broken glass blue.
Once the outlines look sharp, add a soft light blue tone to the glass to give it a transparent feel. To make the glass look more realistic, add highlights using white strokes of different length.

Bonus: Easy Broken Glass Drawing Technique
Outline a large, uneven circle to represent the main surface. From the center, draw several short cracks radiating to the edges as jagged lines. Add smaller branching cracks around the main ones.
Draw out some cracks longer to illustrate the direction of the impact, while others stay short. Vary the thickness of the lines. You can also draw additional cracks in between.
Don’t make the cracks too symmetrical, as irregular spacing makes the drawing look more natural. Finish the drawing by using different shades of blue to convey the glass surface.


