How to Draw Buzz Lightyear
Using two simple methods, you’ll learn how to draw Buzz Lightyear, one of the most popular characters from the Toy Story series.
How to Draw Buzz Lightyear: Introduction
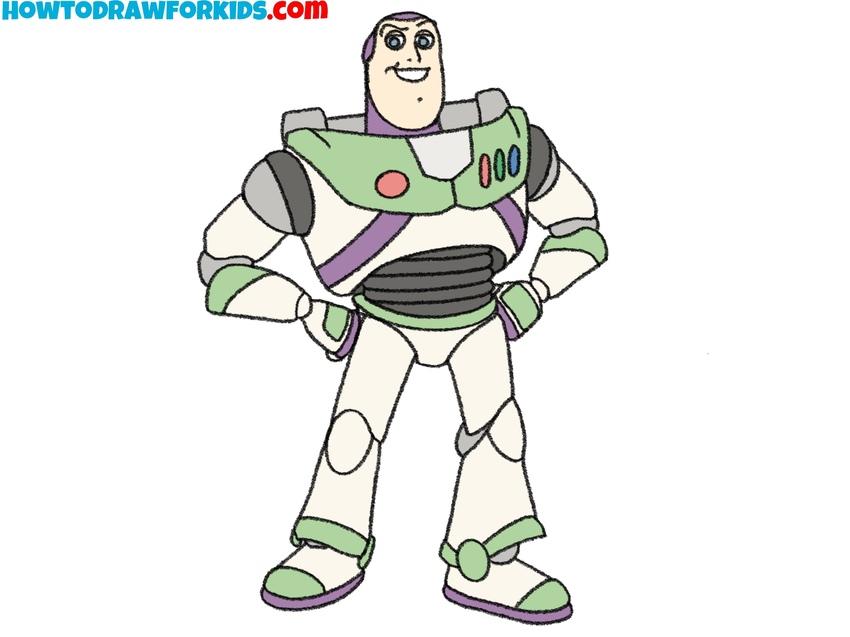
In this tutorial, I will show you how to draw Buzz Lightyear. This is one of the main characters of the cartoon “Toy Story”. As you remember, the main characters of the cartoon are toys and Buzz is also a plastic toy in the shape of an astronaut. Buzz is a wise and courageous space police officer who has leadership qualities and instills enthusiasm in those around him. Of the entire toy team, Buzz is the bravest and always ready to help, this is a real hero in outer space.
As you can see, Buzz Lightyear is wearing a special space suit and has a spacesuit on his head. White suit. The helmet has a communication device. Try to carefully draw all the details of the costume.
For your convenience, the lesson is divided into several steps. Each step is one simple action. Draw all the elements in a sequence and use my tips.
Buzz Lightyear Drawing Tutorial
Materials
- Pencil
- Paper
- Eraser
- Coloring supplies
Time needed: 45 minutes
How to Draw Buzz Lightyear
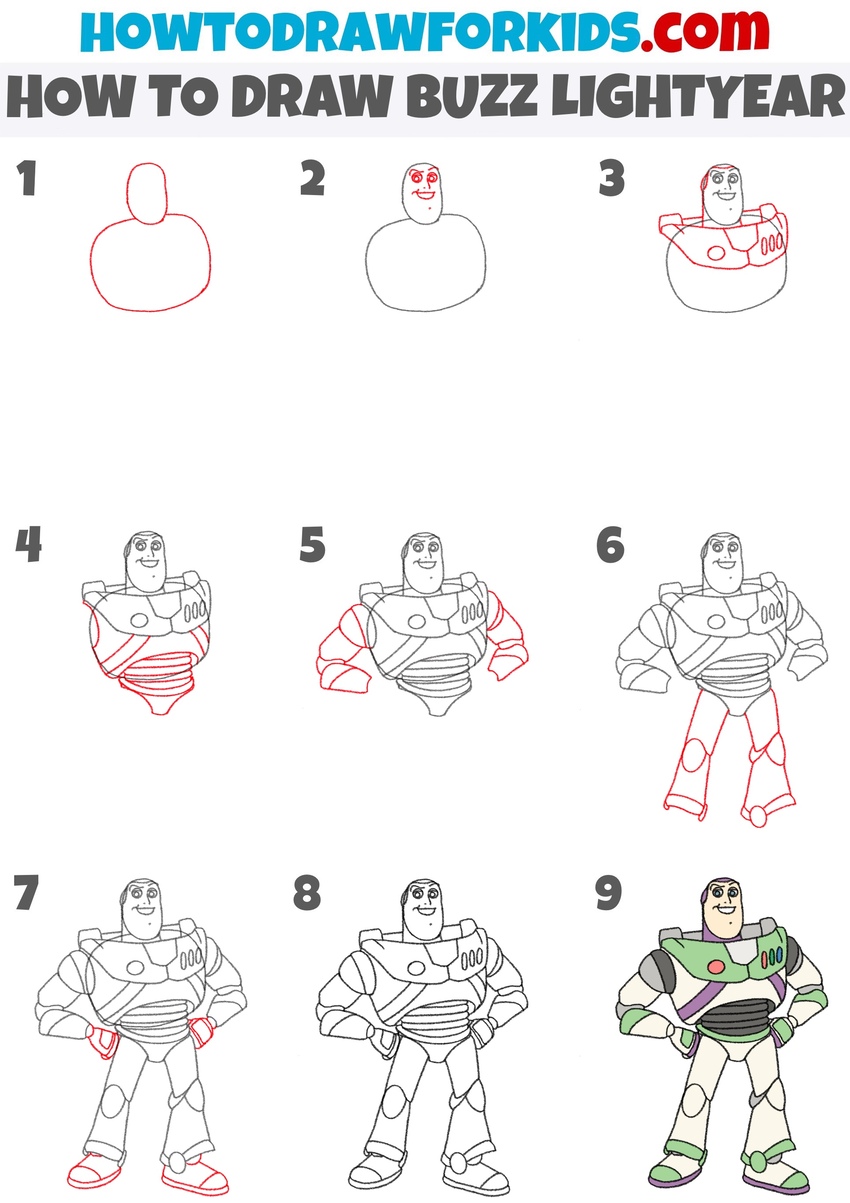
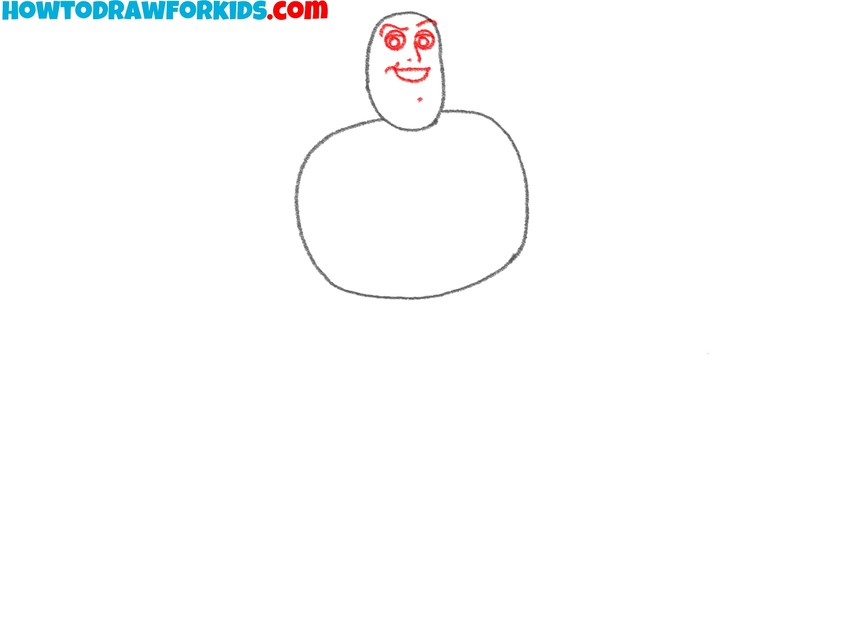
- Sketch the head and torso.
Sketch two basic shapes to draw the foundation of Buzz Lightyear’s figure. Create a smaller vertical oval for the head and connect it to a larger rounded shape beneath it for the torso. The torso should look wide and bulky, since Buzz is designed as a heroic character.

- Draw Buzz Lightyear’s face.
Draw two oval eyes near the top of Buzz Lightyear‘s head. Above the eyes, sketch the eyebrows, below the eyes sketch a small nose, and a smiling mouth. You can lightly mark a vertical guideline down the middle of the face and a horizontal line across it to help keep everything symmetrical.
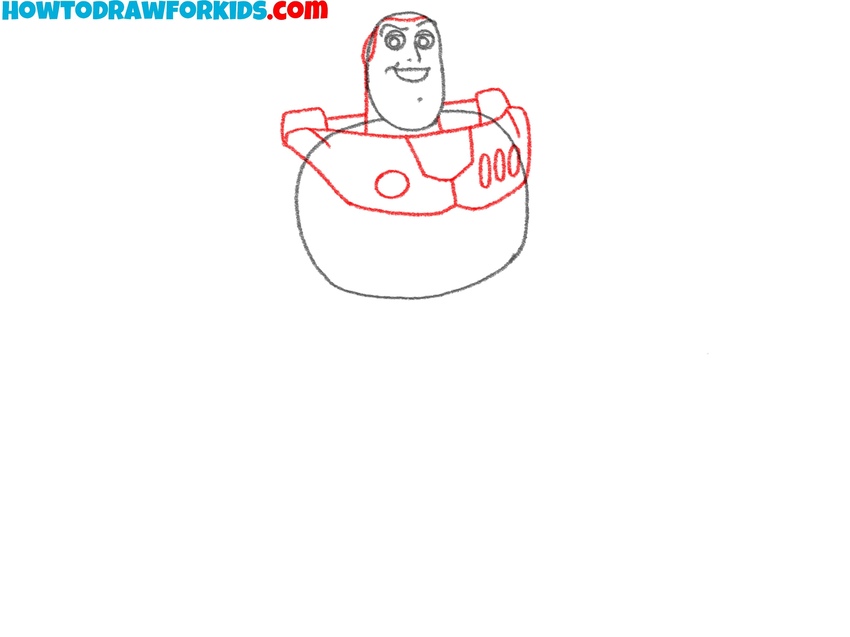
- Illustrate the chest with buttons.
Now illustrate the large shoulder pads and the chest piece of Buzz’s spacesuit. Create angled shapes from each side of the torso to form the broad shoulder armor. Draw curved shapes across the chest to indicate the control panel and add small oval shapes for the buttons. Outline the head and neck.
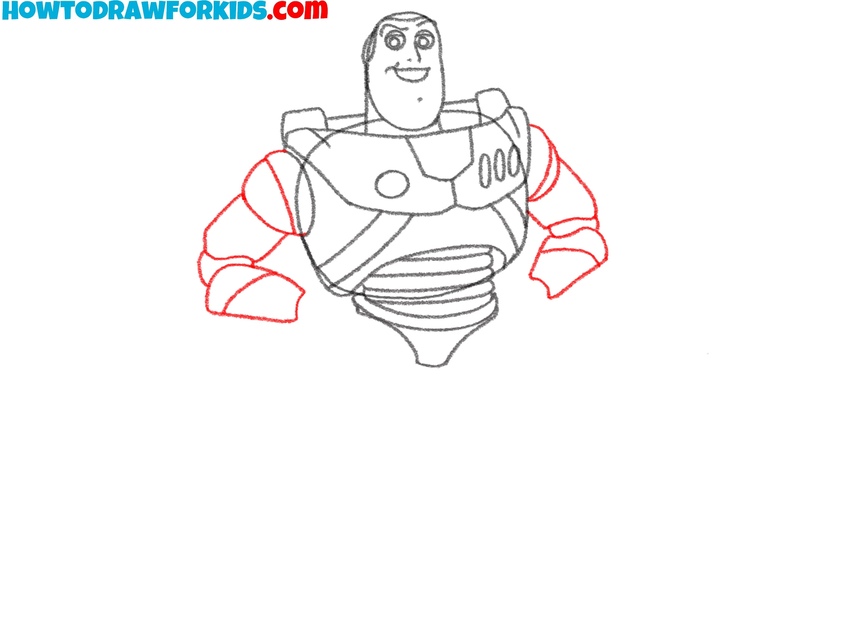
- Detail the lower torso area.
Develop the chest area further by adding curved lines to convey the look of Buzz’s suit. Draw the chest with strong and dark lines, then two stripes on both sides. Outline the lower torso area with horizontal ribbed lines. Finish the torso by drawing the pelvis as a triangular shape.

- Draw the left and right arms.
Continue Buzz’s figure by sketching both arms. Each arm should consist of small details and armor parts, conveying the padded sections of the suit. Sketch the upper arms and shoulders, then add elbow joints, and finally sketch the forearms with armor-like outlines. Make both arms the similar in size.
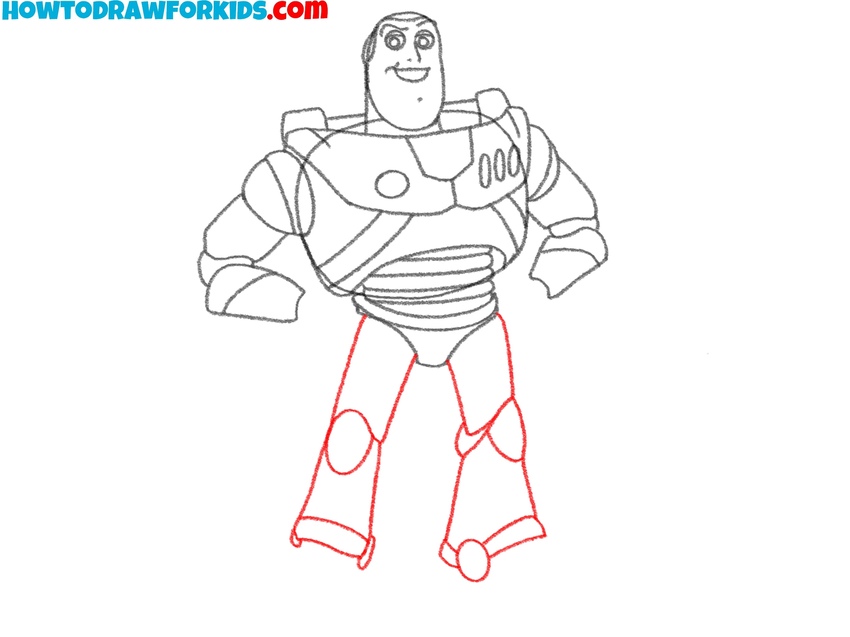
- Add the legs below the torso.
Illustrate the lower half of Buzz’s body by drawing both legs of the toy astronaut. Use straight and curved lines combined to create the armored look, with knee sections clearly marked. Make the lower legs slightly wider at the bottom. Try to replicate the heroic proportions of the character.
- Add the gloves and boots.
Draw the large boots that complete Buzz’s lower legs, giving them bulky appearance. Then sketch Buzz’s gloved hands resting on his hips. Make the gloves bulky with clear separation at the fingers, but avoid adding too many tiny details. The hands and feet should look symmetrical.

- Erase the guidelines and trace the sketch.
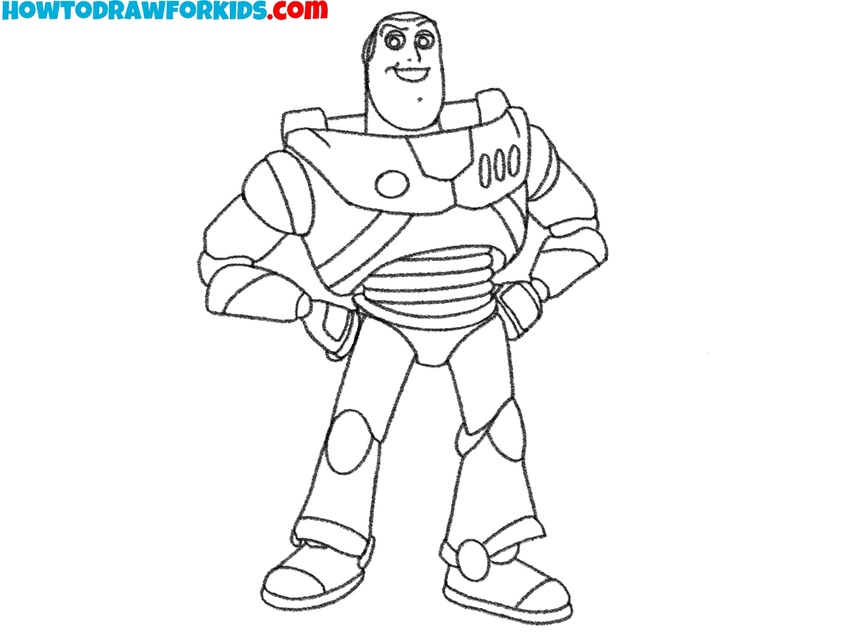
Go over the entire drawing of Buzz Lightyear to clean up and finalize the outlines. Erase any unnecessary construction lines and darken the important contours. Pay special attention to symmetry of the body parts. In other words, make the figure polished and make it ready for coloring.
- Apply the signature colors.
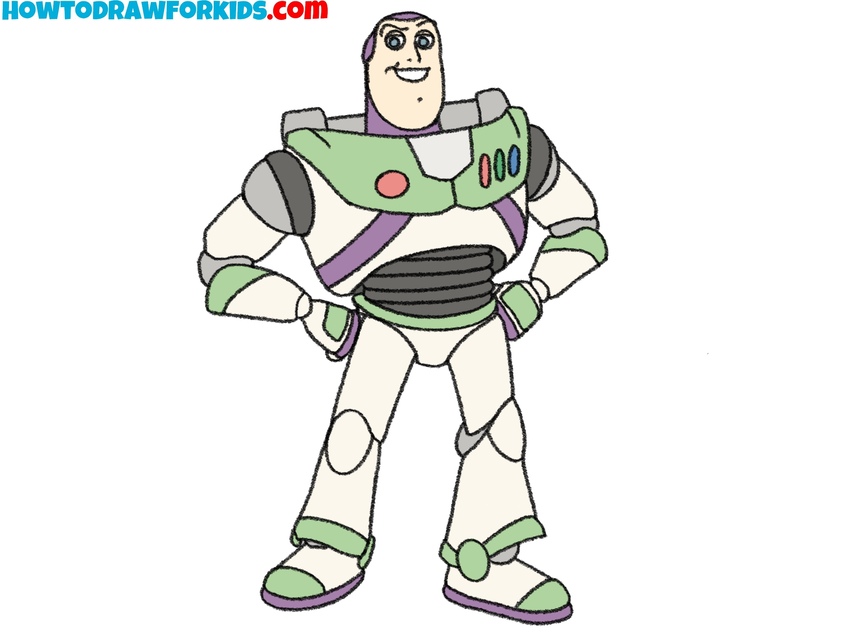
And now, color Buzz Lightyear’s spacesuit in a combination of green, purple, and white or light gray for the main sections of the armor. Color the boots and gloves in matching tones, and add small red and blue details on the chest panel. Fill the face with a natural skin tone, and keep the eyes white with dark pupils.
Easy Buzz Lightyear Drawing Tutorial
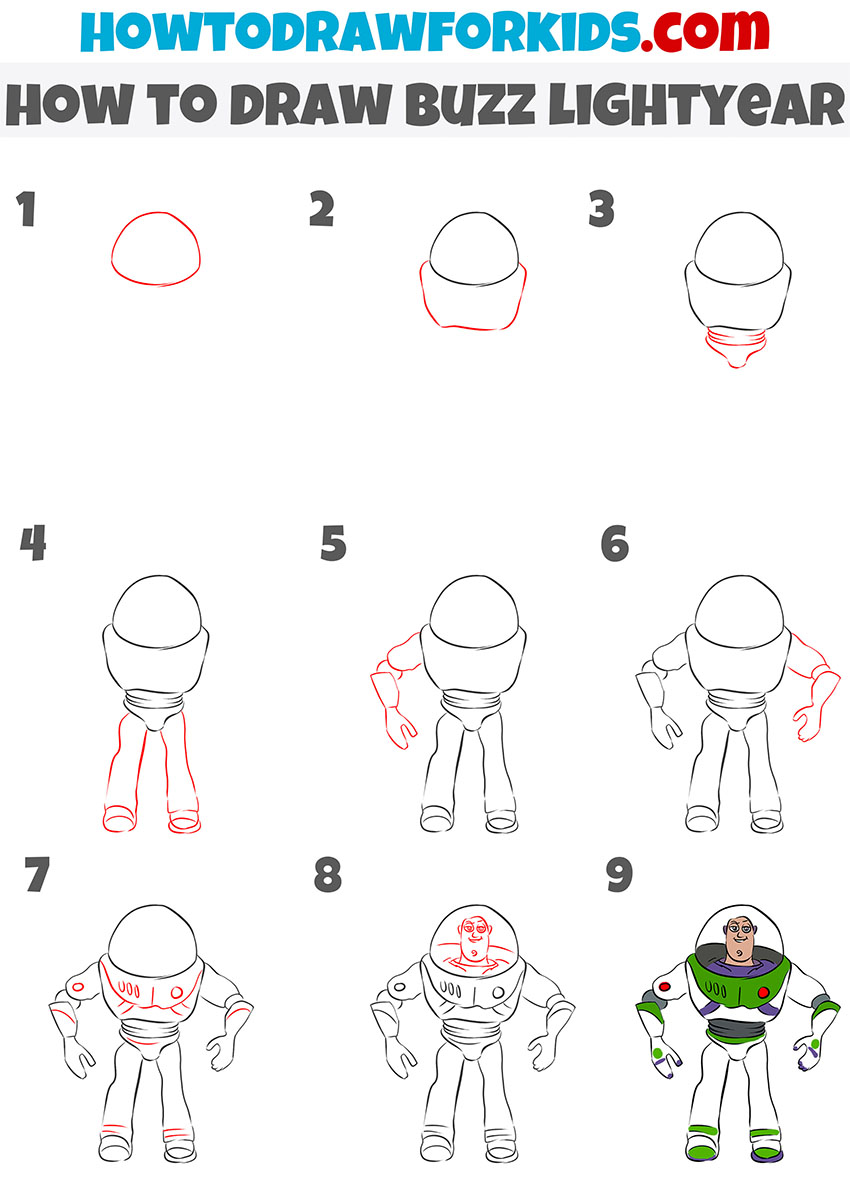
In this additional tutorial, you are shown another simple method of how to draw Buzz Lightyear with a different step-by-step sequence. The approach avoids complicated construction lines, which makes it easier for younger artists.
To complete this Buzz Lightyear drawing, sketch a rounded helmet shape, then add the torso beneath it with a wide chest outline. Illustrate the connecting section of the suit at the waist, using horizontal ribbed lines. Continue the figure by drawing two straight legs with wide boots. Add both arms with armor-like sections, including the gloves with visible fingers.
Draw circular details and small buttons across the chest to illustrate Buzz’s recognizable suit features. Inside the helmet, draw the face with simple lines for the eyes, eyebrows, nose, and mouth. Refine the outline by erasing rough marks, then add the final colors. Fill the suit with green, purple, and white tones, using black for the ribbed waist area and natural skin tones for the face.
Also, at the end of the lesson, you can use the PDF file that I have prepared specially for your convenience. This will help you return to the lesson at any convenient time.
Conclusion
Now you have learned how to draw this character. I hope Buzz Lightyear looks great and you are proud of your work. You can share your impressions in the comments below this tutorial.

