

How to Draw Ariel
Learn how to draw Ariel in a simplified style, with clear proportions, a flowing hairstyle, and a curved mermaid tail.
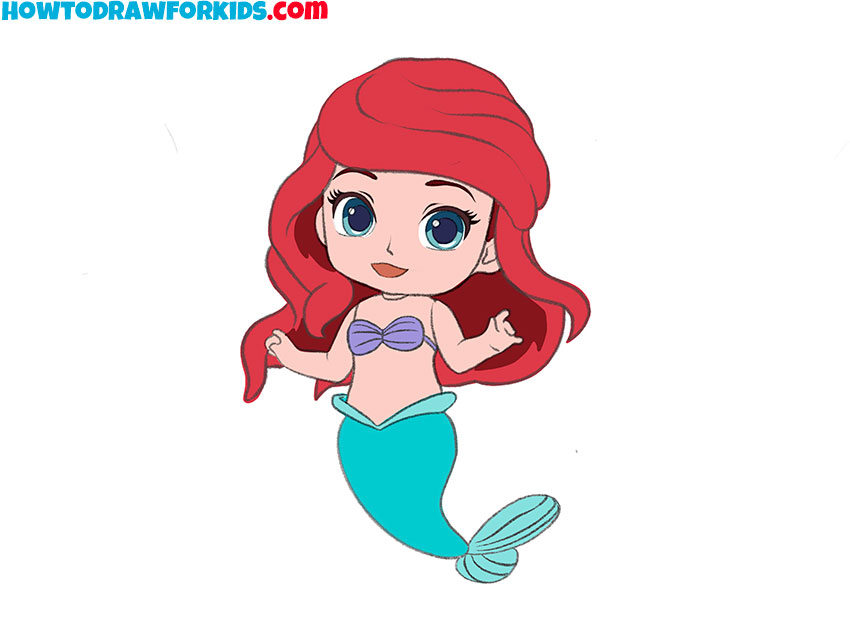
Prepare to Draw Ariel
Ariel’s head is much larger than her body in this simplified design. This proportion gives the character an even more cartoon appearance.
The details are also greatly simplified, so a child can easily convey the character on paper.
In my experience, it’s precisely this highly simplified version that inspires the most enthusiasm in a budding artist to repeat the illustration and alleviates most of the difficulties in the process.
Ariel Drawing Tutorial
Materials
- Pencil
- Paper
- Eraser
- Coloring supplies (red, purple, and blue-green)
Time needed: 35 minutes
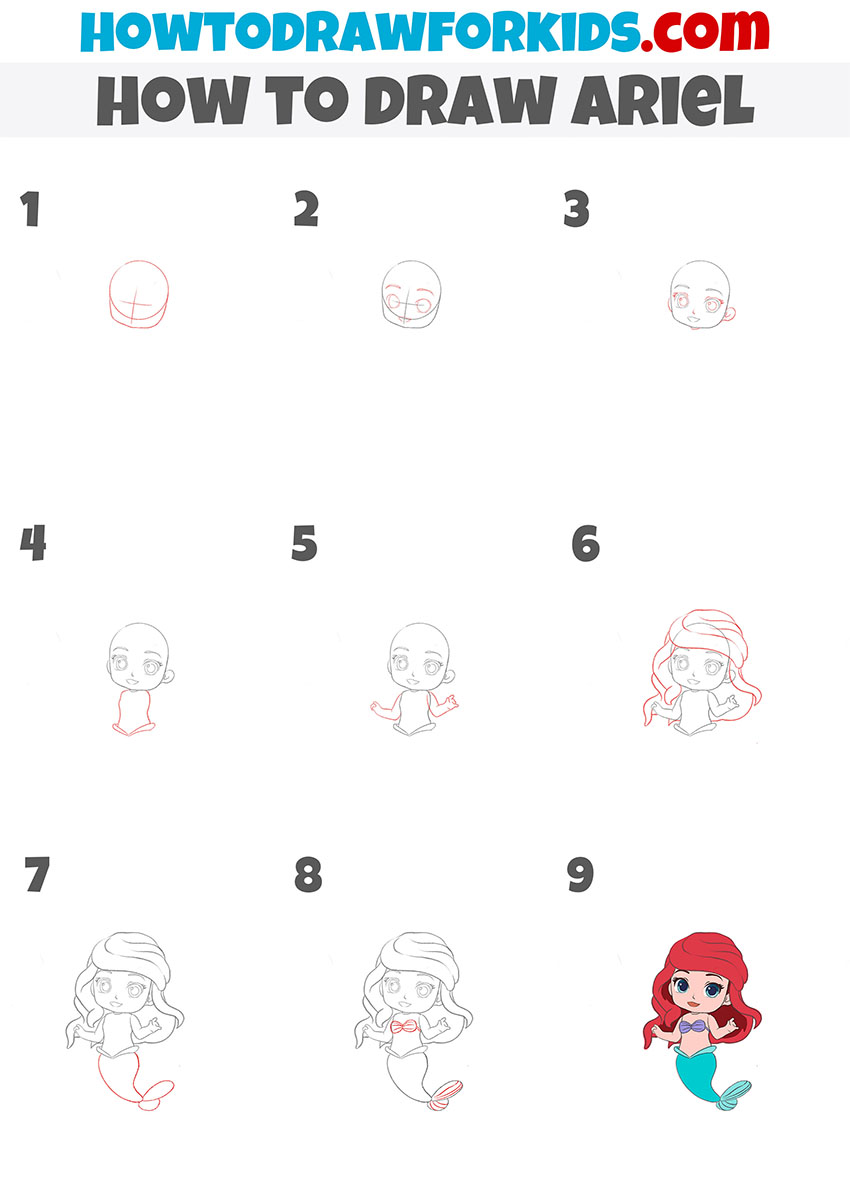
How to draw Ariel step by step
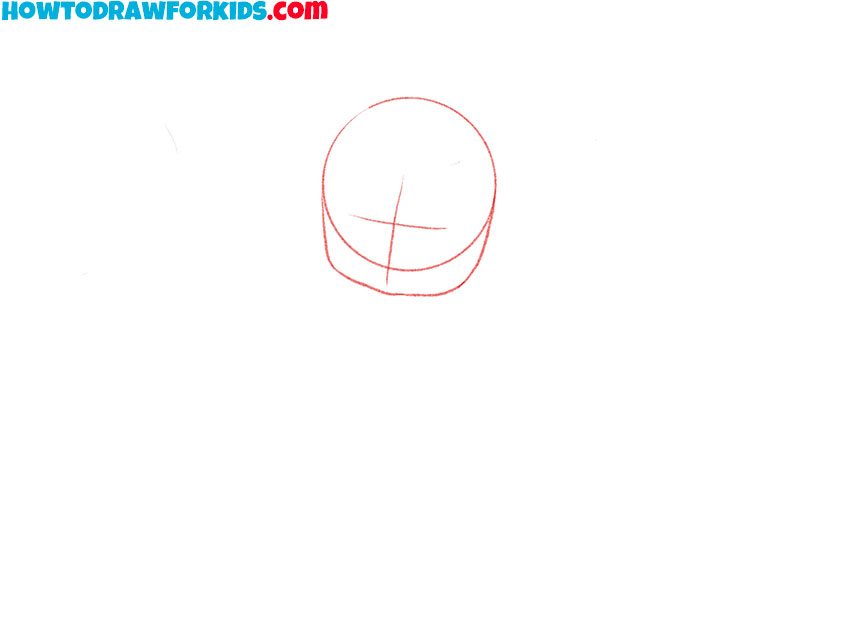
- Outline Ariel’s head and guidelines.
Sketch Ariel’s large head with a slight tilt. Add one horizontal guideline for the eyes and a shorter line for the mouth. Leave the lower part of the face wide rather than narrowing it sharply.
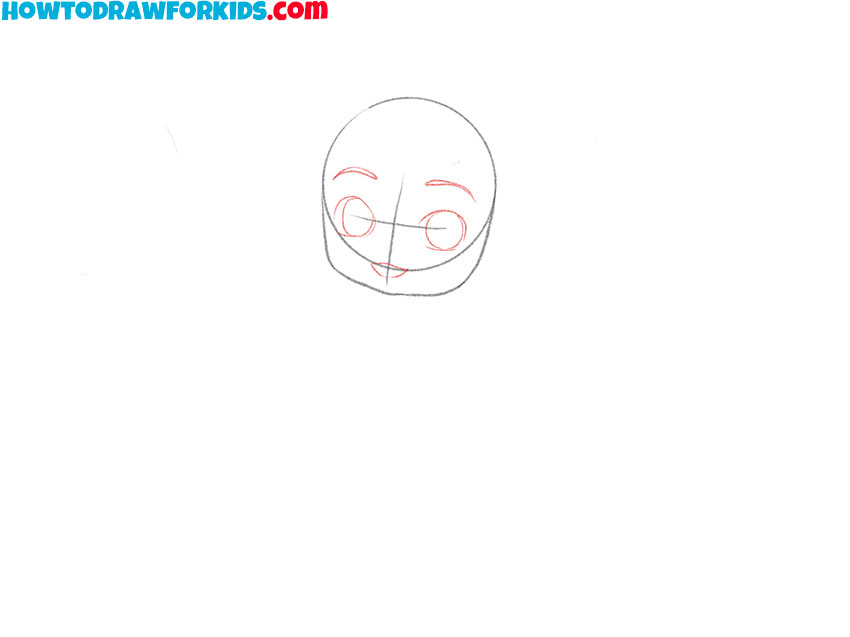
- Add Ariel’s facial features.
Inside the head, draw two large eyes along the horizontal guideline. Add a small mouth below them and place short eyebrows above the eyes. Use simple shapes.
- Detail the eyes, ears, and neck.
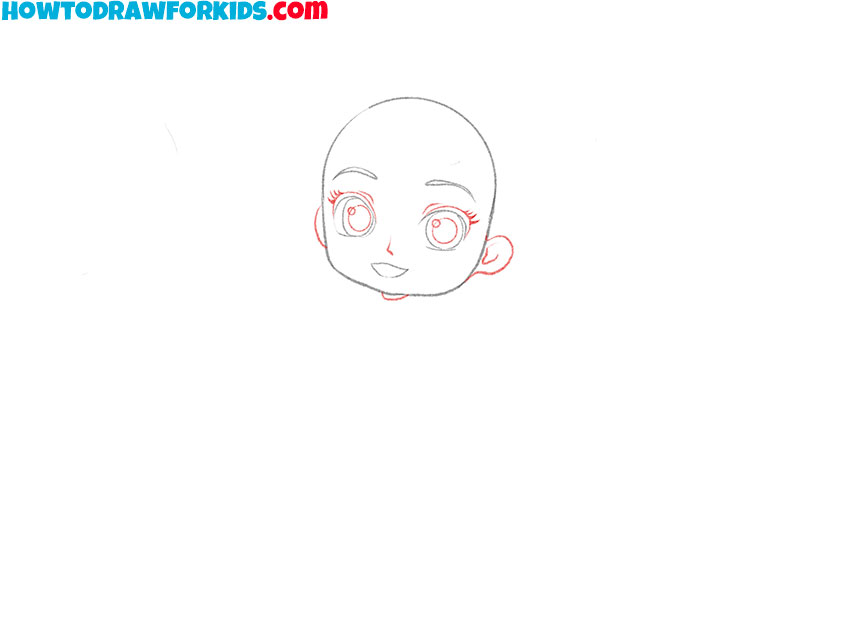
Add pupils and small highlights inside Ariel’s eyes, then draw short curved eyelashes. Outline an ear on each side of the head and add two short lines below the face for the neck.
- Draw the mermaid’s upper body.
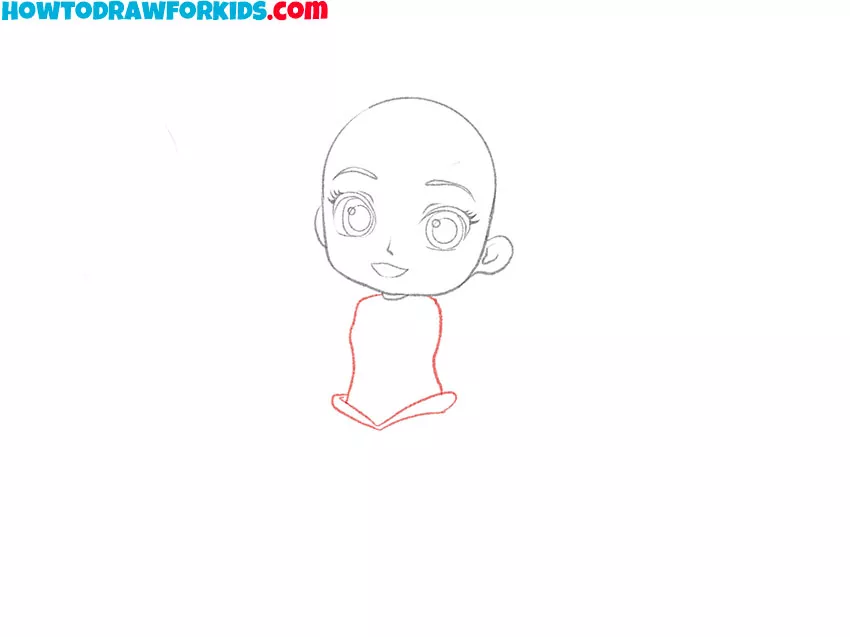
Below the neck, outline Ariel’s short torso. Make the body smaller than the head and widen it slightly near the waist, where it will connect to the upper part of the mermaid tail.
- Sketch Ariel’s arms and hands.
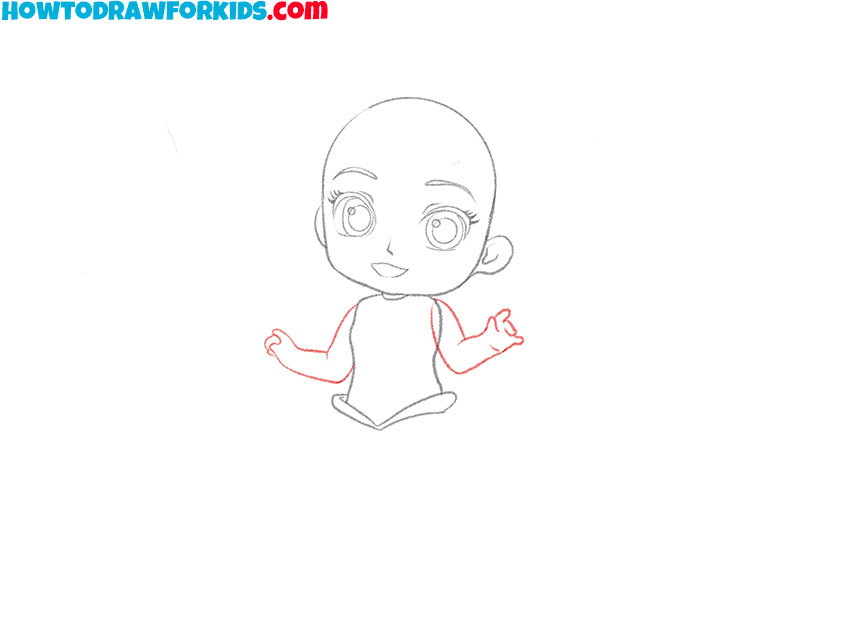
Extend two short arms from the shoulders and place the hands near the center of the body. Mark the fingers with small curved lines, using the simple arm shapes already shown in the step.
- Outline Ariel’s flowing hair.
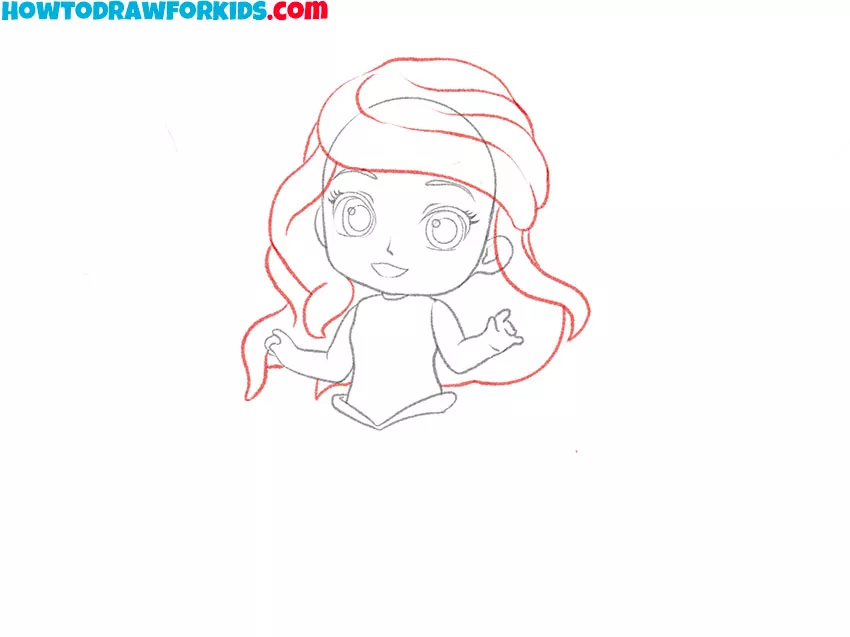
Draw the outer shape of Ariel’s hair around the head and behind the body. Add a few inner curves to divide the larger sections, but avoid filling the hairstyle with many thin strands.
- Add Ariel’s curved mermaid tail.
Continue the body into a long tail that curves to one side and narrows near the tip. Add two wide fins at the end, using soft curves instead of pointed triangular shapes.
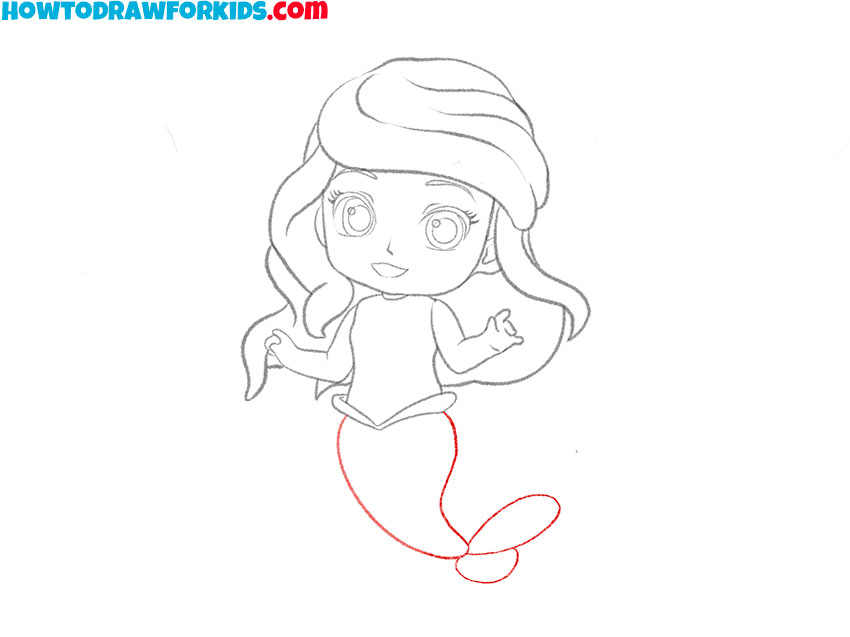
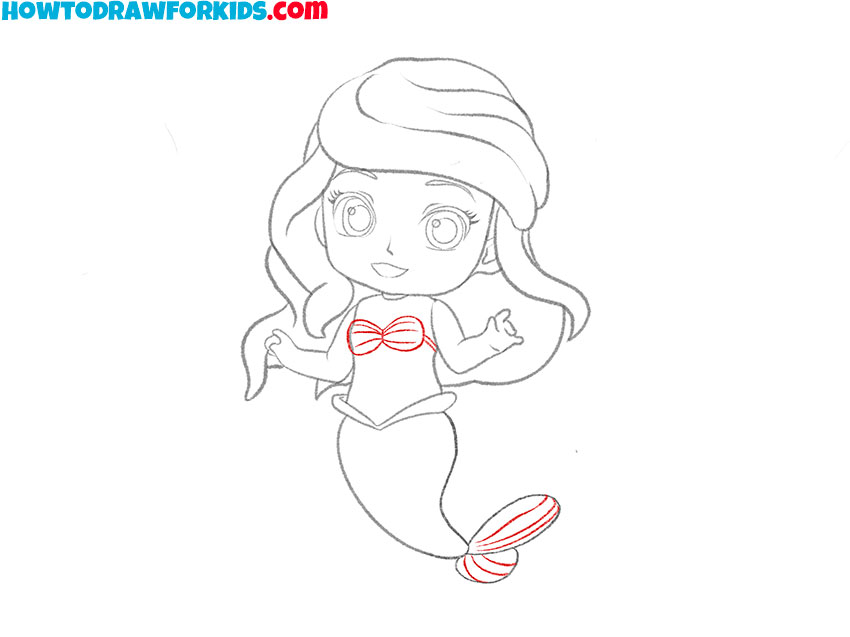
- Draw the bodice and tail details.
Outline Ariel’s shell bodice across the upper torso. Add several curved lines inside the tail fins to show their structure, then erase any guidelines that cross the final outlines.
- Color the Ariel drawing.
Color Ariel’s hair red and make the shell top purple. Use a blue-green shade for the tail and fins, then add beige to the skin and blue to the eyes.
Ariel Drawing Printables
The PDF contains a shorter version of the tutorial and worksheets for practicing Ariel’s proportions away from the screen.
Cute Ariel Drawing Tutorial
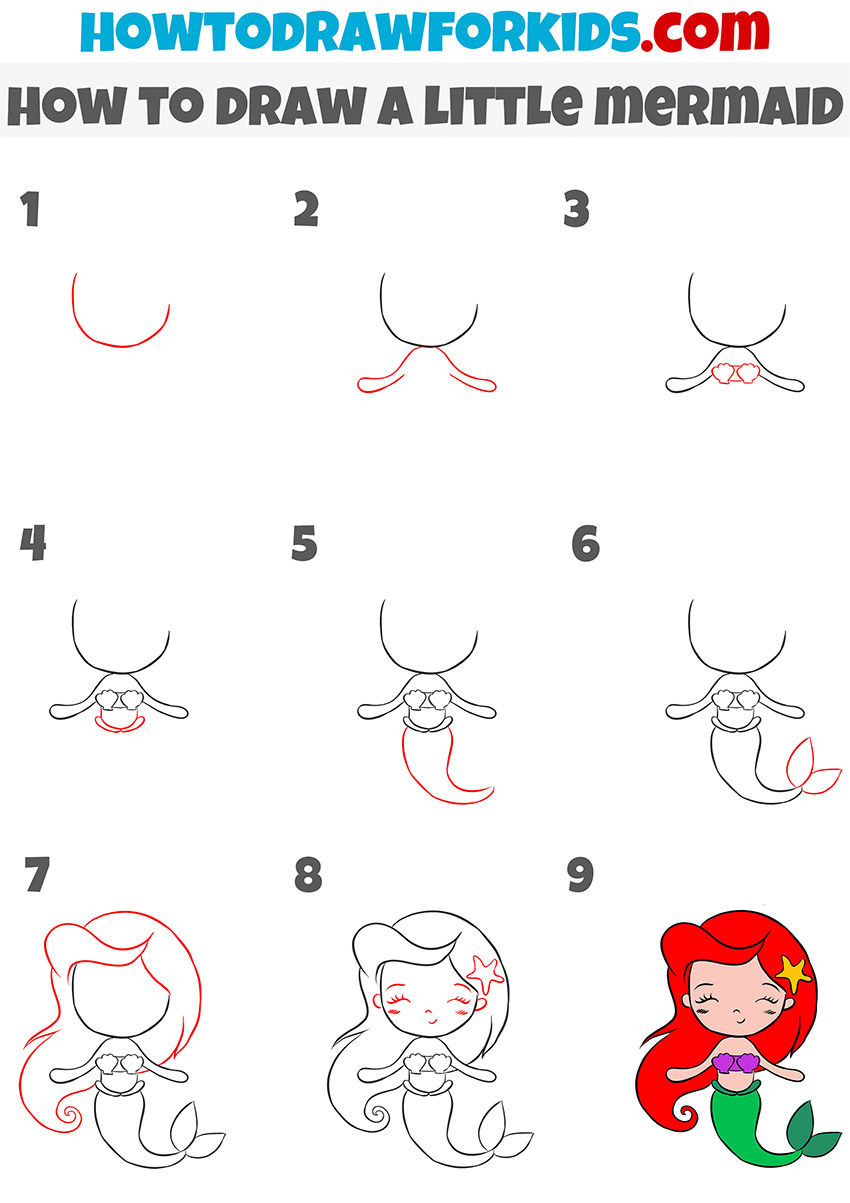
This method gives Ariel a larger head and a smaller body. The different shape of the tail fins and starfish accessories also separate this version from the first design.
Pay close attention to the size of the head. If it becomes too small, the figure will lose the proportions used in this simplified style.
The color scheme here is also different, though not by much. Notice how much the overall look can change with slightly different details and tones.
Improve Your Ariel Drawing
A few small additions can make the picture more complete without changing Ariel’s main outline:
- Add a light side and a shadow side to the figure. My guide to drawing light and shadow explains where these areas should be placed.
- Use short curved strokes to suggest scales on the tail. Leave some space between them so the pattern does not cover the entire shape.
- Place Ariel underwater by drawing the sea behind her, then add a few rocks or plants near the bottom.
- Add a small fish or crab beside Ariel, but make the sea creature much smaller so the main character remains the focus.
These details work best when they support the figure rather than filling every empty area around it.
Conclusion
Ariel’s large head and short torso make this version easier to construct than a figure with more natural proportions from the original cartoon.
For another character with similar proportions, try drawing a Disney princess. This will give you more practice placing large facial features on a small figure.
You can also practice the lower half separately by drawing a mermaid. Pay attention to the curve that runs through the body and continues into the tail.
To add another underwater subject, continue by drawing a fish beside Ariel. Use a simpler outline so it does not compete with the main character.


A have Ariel colored and it’s very good