How to Draw Camelot
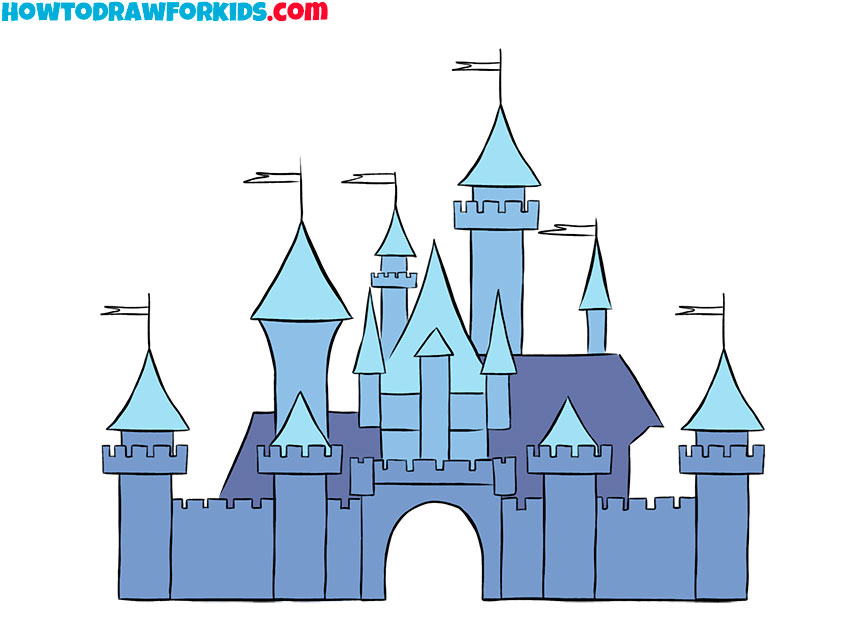
This tutorial will show you how to draw Camelot – the iconic castle from the legends of King Arthur and the Knights of the Round Table.
How to Draw Camelot: Basic Information
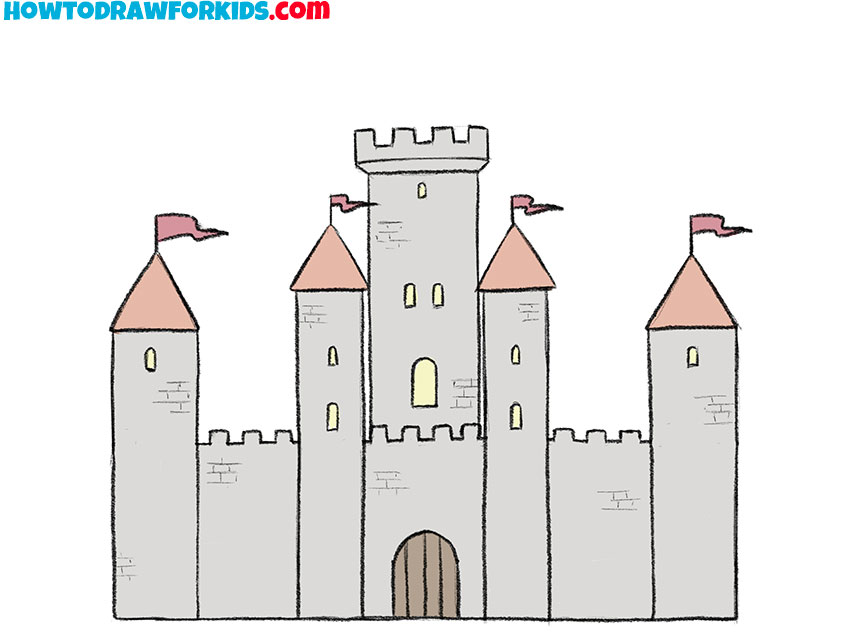
Camelot represents a medieval castle style, often depicted with towers, battlements, and fortifications. By drawing Camelot, young artists engage with historical architecture, learning to interpret and recreate elements used in medieval structures.
When drawing Camelot, pay special attention to the fact that it consists mainly of straight lines. The ability to draw straight lines of different lengths is very useful for an artist, and this tutorial teaches how to create them very effectively.
Camelot, like many castles, relies heavily on symmetrical structures. Drawing Camelot requires a focus on creating symmetry. By working on both sides of the castle simultaneously, students can learn to create mirrored shapes. This is a really important skill for any artist.
In addition, Camelot serves as an effective background for other drawings. For example, if you want to draw a king or create a drawing of a knight, Camelot can provide an appropriate setting for these characters.
Camelot Drawing Tutorial
Materials
- Pencil
- Paper
- Eraser
- Coloring supplies
Time needed: 30 minutes
How to Draw Camelot
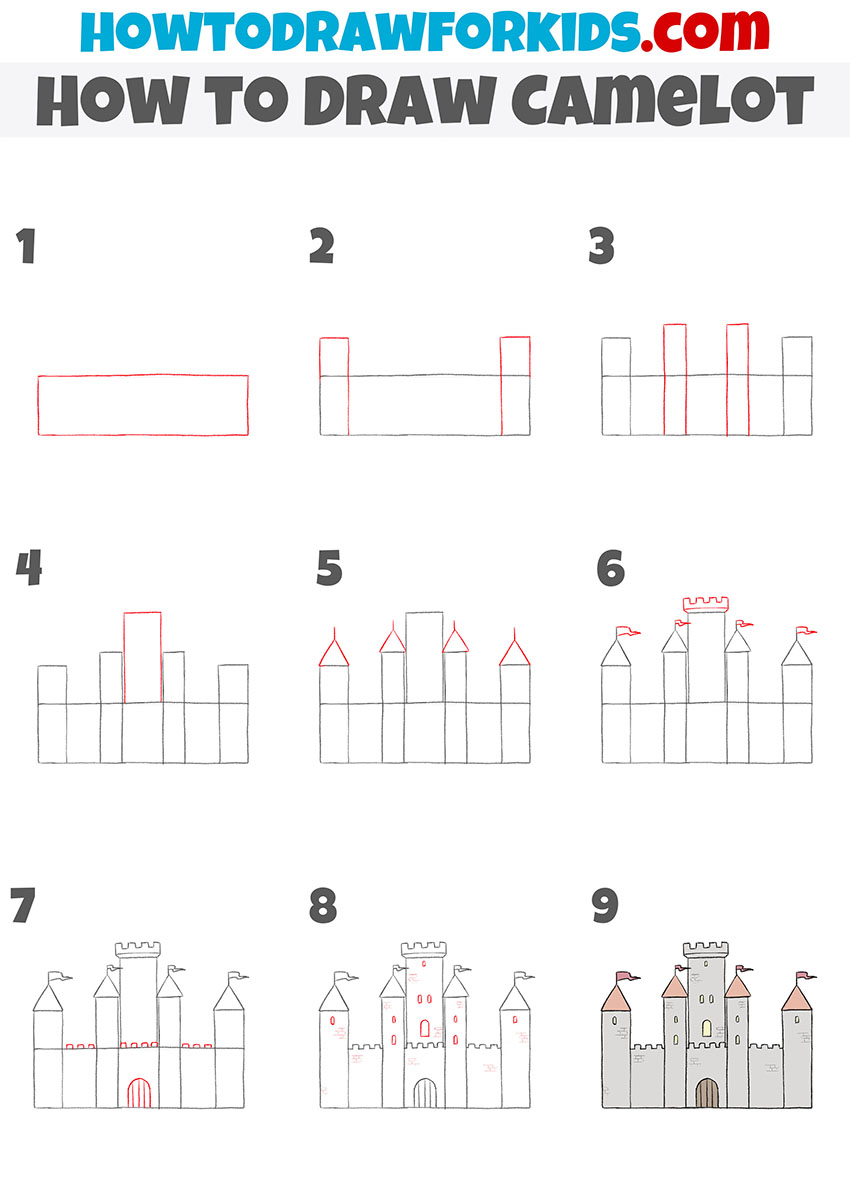
- Draw the base rectangle for the walls.
Start by drawing a wide, horizontal rectangle in the center of your paper. This rectangle will serve as the main foundation of the Make the rectangle as wide as you want the base of Camelot to be, but not too tall since this is just the lower part of the structure.

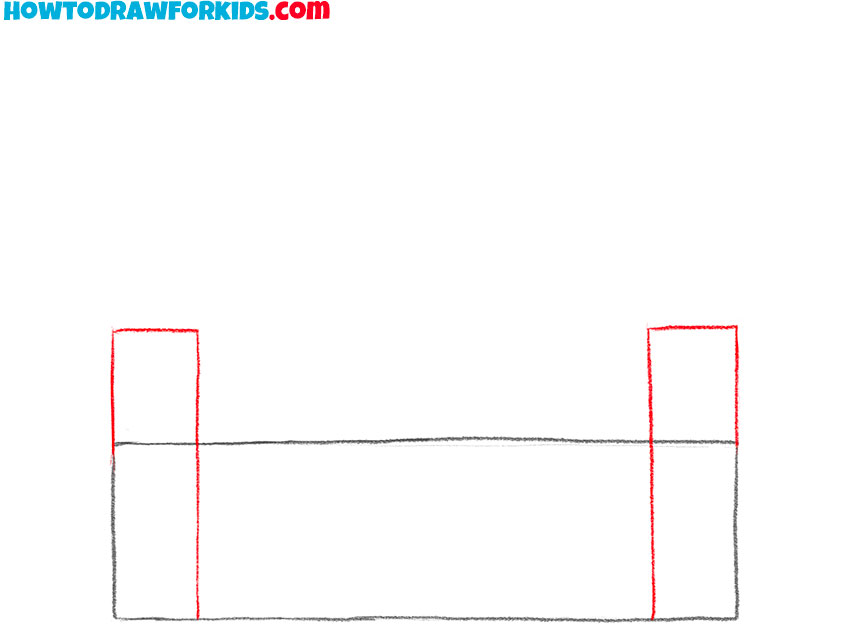
- Add the side towers.
Next, draw two tall rectangles on either side of the base rectangle to represent the side towers of Camelot. These towers should be slightly taller than the base. These towers will later support additional details, making them important parts of the Camelot drawing.
- Create the central towers.
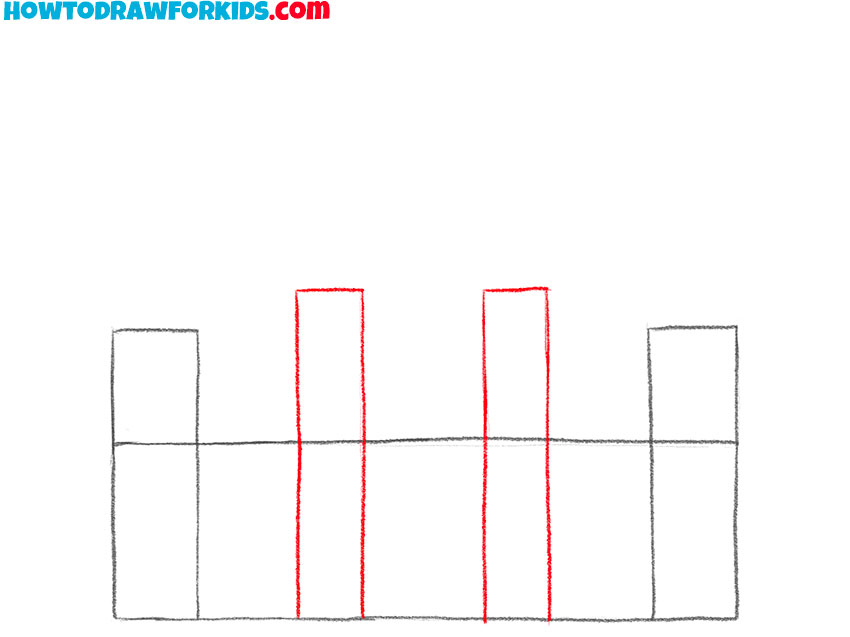
Now, draw three additional narrow rectangles extending upwards from the base, positioned between the two side towers. These will act as the central towers and battlements of Camelot. Place them at regular intervals across the base. Try to keep these lines straight and uniform in width.
- Draw the tallest central tower of Camelot.
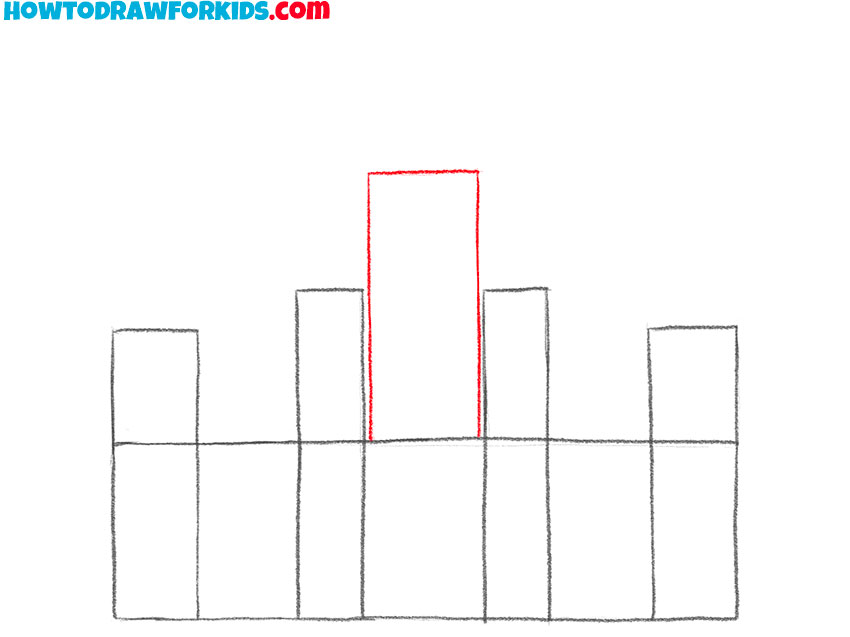
In this step, add a tall, wide rectangle in the center of Camelot. This rectangle represents the tallest tower in Camelot. Perhaps it is in this tower of Camelot that the great Merlin sits, or perhaps it is there that the legendary round table is located.
- Add triangular rooftops to the towers.
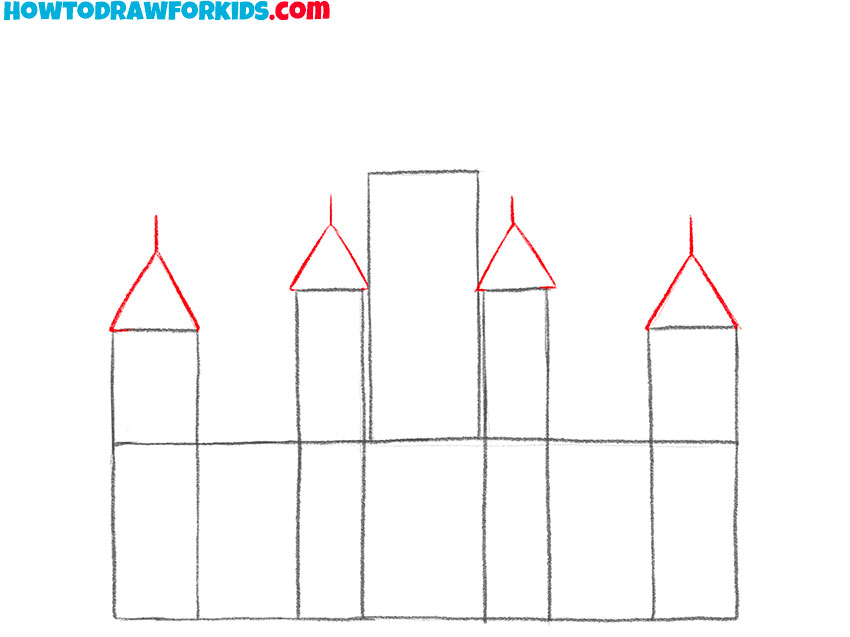
Now, add triangular rooftops to the tops of the outer towers of Camelot. The triangles should be of a similar size and shape. These rooftops give Camelot a classic look and add height to each tower. Also, draw straight lines above each for shafts of flags.
- Draw the battlements of the central tower and flags.
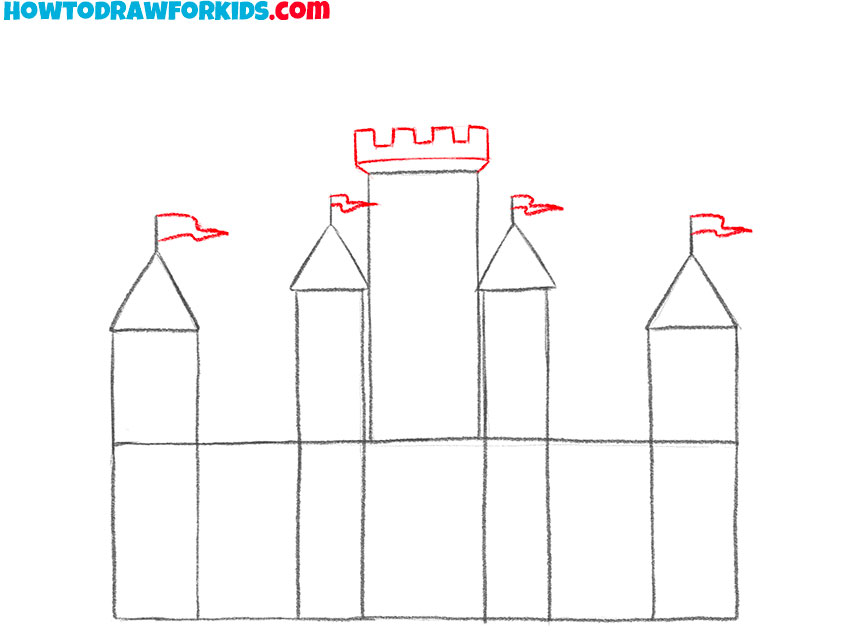
At this stage, add a battlement to the top of the central tower by drawing a rectangular shape with small notches along the upper edge. Then, draw small flags on top of each Camelot tower by sketching long, wavy shapes on each of the thin poles from the previous step.
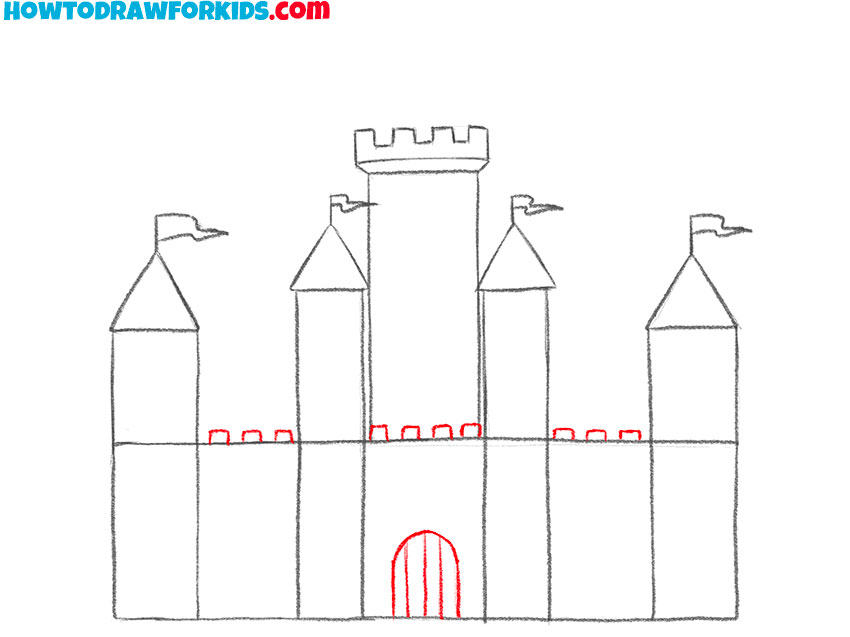
- Add the door and battlements.
Draw an arched doorway in the middle of the base rectangle to give your Camelot drawing an entrance. To make the Camelot door look more natural, draw a series of vertical lines on its surface to imitate wooden boards. Next, draw the battlement on the upper edges of the walls of Camelot.
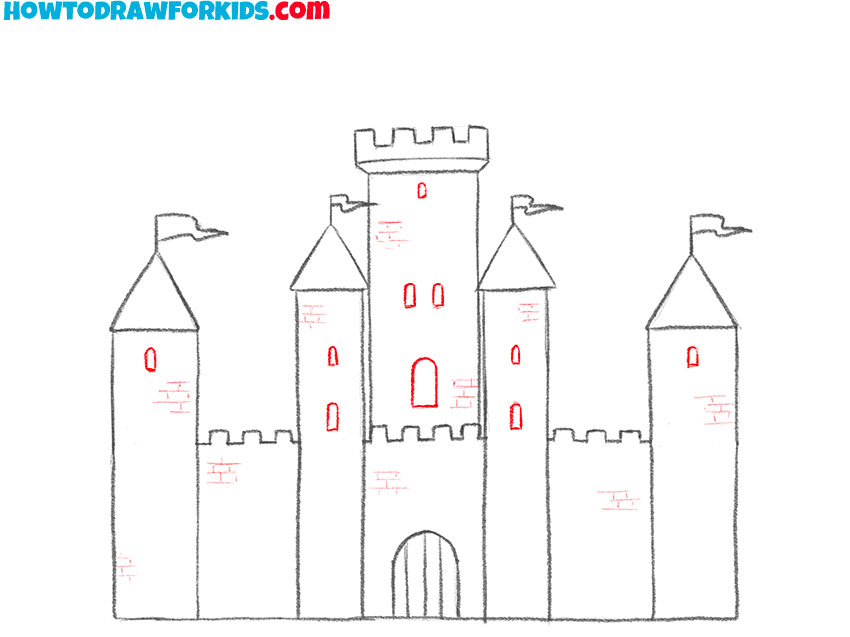
- Sketch the bricks and windows.
Draw small, irregular lines along the Camelot towers and base to represent bricks or stones. Place these lines carefully, as too many can make the drawing look cluttered. Then, add a series of small windows across the Camelot towers and walls.
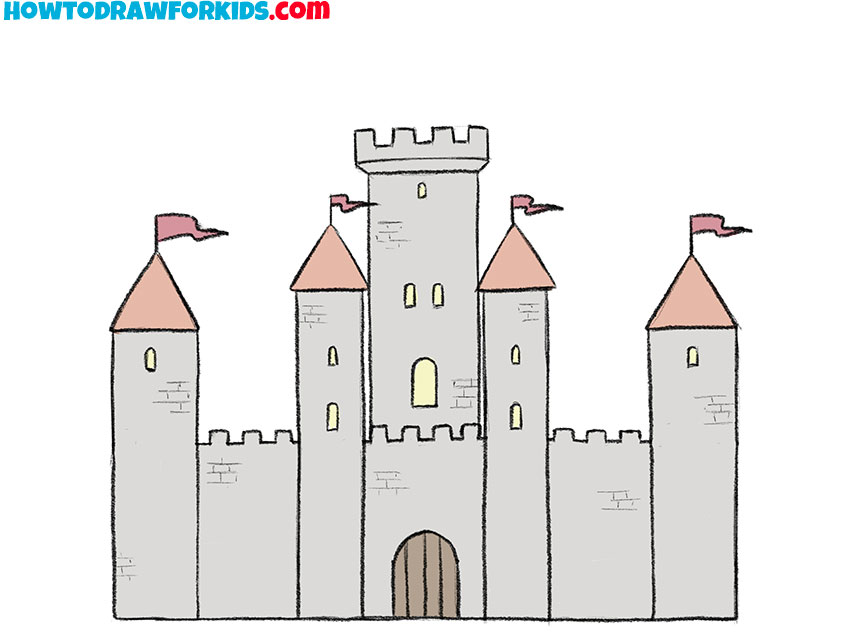
- Add colors to your Camelot.
Use shades of gray for the stone walls, light brown, orange or red for the rooftops, and a any color for the flags. Next, paint the door brown. To give your Camelot drawing the look of a residential building, paint the windows yellow to represent light.
Additional Content
Good news for young artists and history fans. A free PDF file for this drawing lesson on Camelot is available. It’s a condensed version of the tutorial, created for quick and easy reference.
You can download it and have access to the guide wherever you go, with no need for internet. This guide allows you to practice and draw Camelot at any time and place.
How to Draw Camelot: FAQ
Yes, you can add features like flags, banners, or even a moat around the castle. Adding extra elements can make your Camelot drawing unique and and interesting. You might also draw surrounding scenery, such as trees or mountains, to create a setting for Camelot.
Using a ruler can help keep the walls, towers, and other structures even on both sides of the castle. Drawing light guidelines down the center of the page can also help align elements symmetrically. Working on both sides of the castle simultaneously ensures each section mirrors the other, which is very important for achieving a symmetrical appearance in your Camelot drawing.
Yes, the techniques in this tutorial are useful for drawing other castle designs. By modifying features such as tower shapes, wall heights, and additional structures, you can create different types of castles while applying the same principles. This flexibility makes the tutorial a good foundation for practicing castle drawing in general.
Conclusion
This completes the Camelot drawing lesson. For further practice, consider trying the lesson on drawing a hoise. Also, you can try drawing a skyscraper. These tutorials will train your drawing skills and give more practice in sketching buildings.
Remember to share your drawings and join our community on social media. For example, you can subscribe to me on YouTube for video versions of my tutorial or on Pinterest for drawing collages. New lessons are regularly available, so following ensures you won’t miss any opportunities to practice new subjects.

