How to Draw Ice Cream
In this lesson I will tell you how to draw ice cream in a few very simple steps. We’ll also look at a few other ways to draw ice cream. You can choose any option that you like.
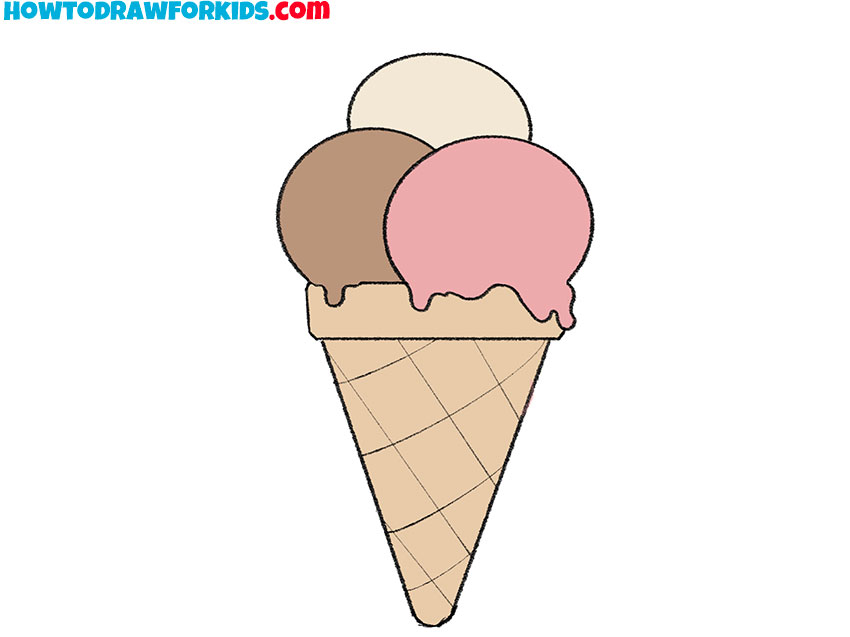

Table of Contents
- Basic information on how to draw ice cream
- Steps on how to draw ice cream
- Additional content
- Alternative Ways to Learn to Draw Ice Cream
- Conclusion
Basic Information on How to Draw Ice Cream
Drawing ice cream is a fairly simple task. Especially if we mean a simplified or cartoonish drawing style. But even in this case there are many basic aspects that need to be taken into account. This is how the magic of drawing works – you just create a few very right shapes in the right places, then add the right details. As a result, you see very cool art, and many people don’t understand how it’s possible to draw so cool.
If we mean drawing ice cream, first we need to imagine what it looks like. You can draw any kind of ice cream, however we drew ice cream on a waffle cone. It’s very easy to break down into steps and quite realistic to draw. By the way, coloring work is also very important. You can draw a really cool ice cream, but ruin it with bad colors. We will give a couple of tips on how to avoid this at the end of the drawing lesson.
We recommend following the sequence of our first drawing lesson and then working with the rest or drawing your own version of ice cream. In the first lesson we will try to introduce you to the basic sequence of steps. With this you can draw any ice cream to your taste.
Materials
- Pencil
- Paper
- Eraser
- Coloring supplies
Steps on How to Draw Ice Cream
Time needed: 20 minutes
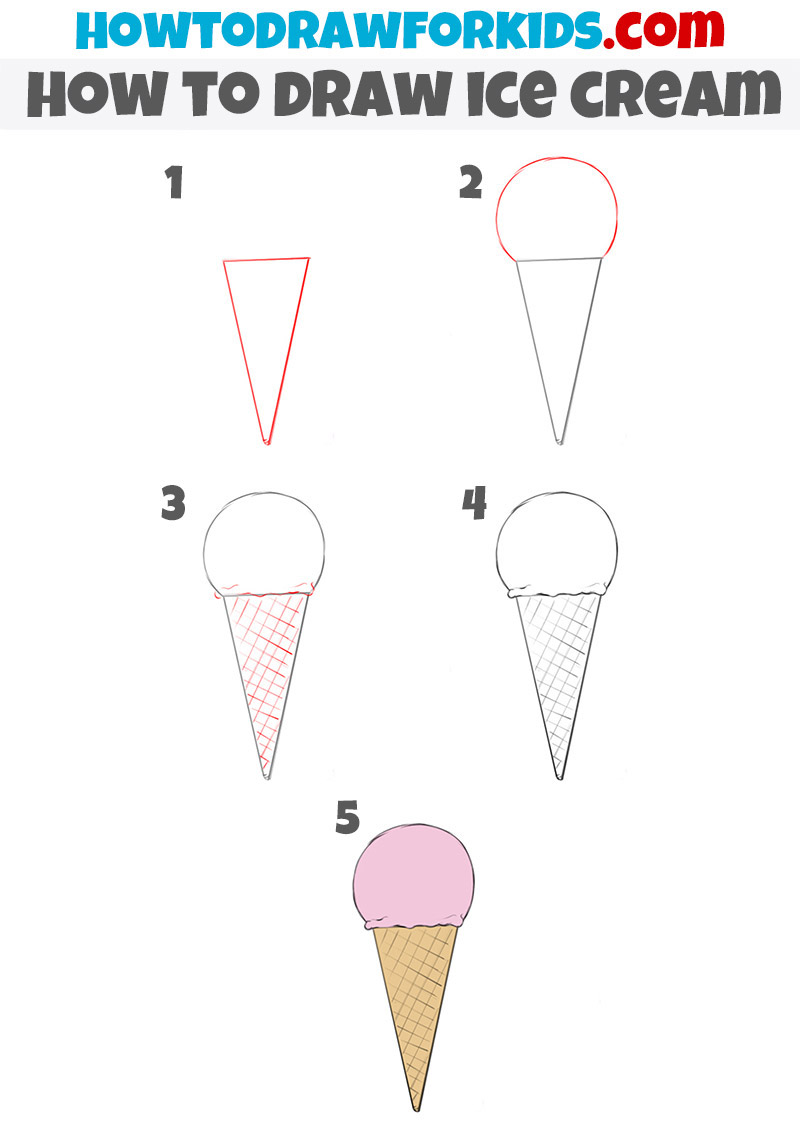
How to Draw Ice Cream
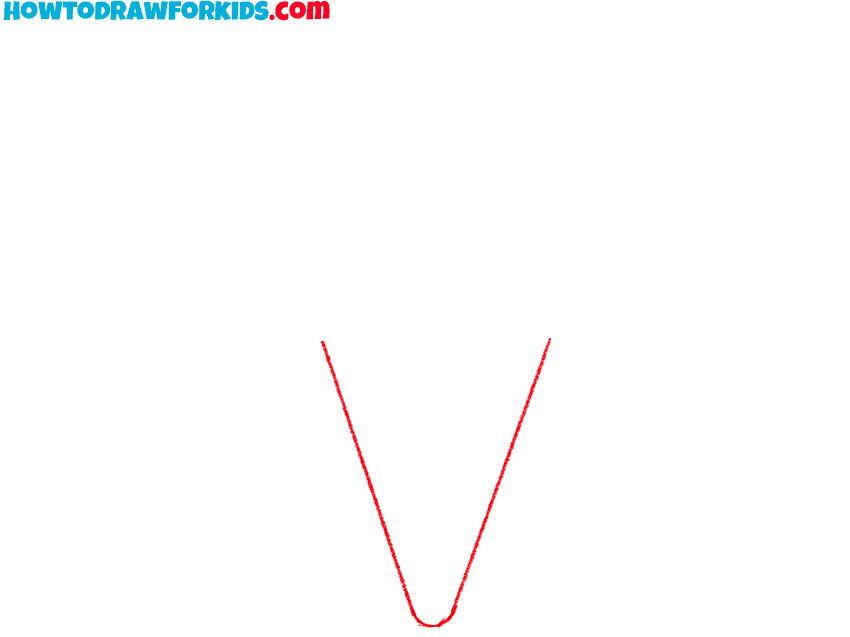
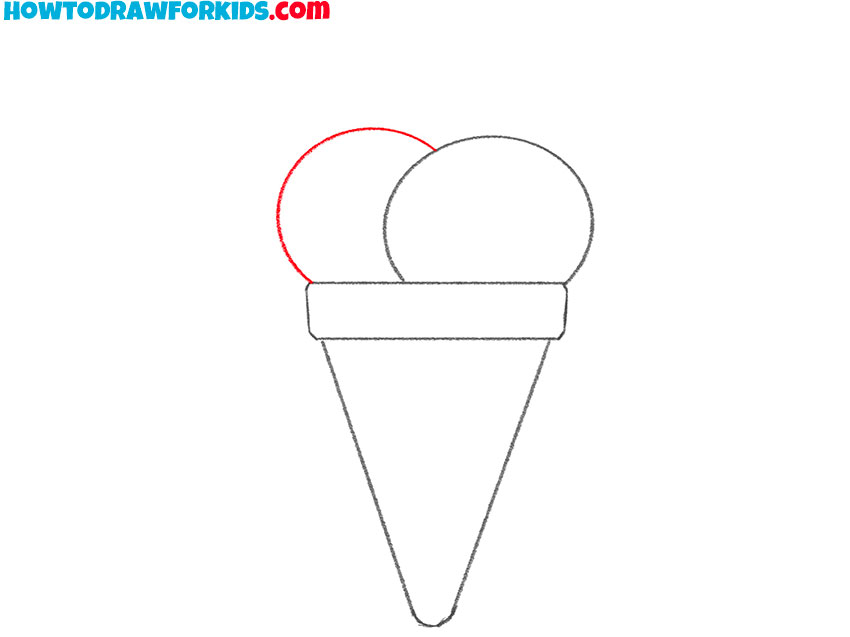
- Start drawing the wafer cone.
Draw a shape that looks like an inverted triangle without a base. Note that there is no sharp angle – instead, draw a rounded, smooth area. Place it slightly below the middle of your piece of paper.
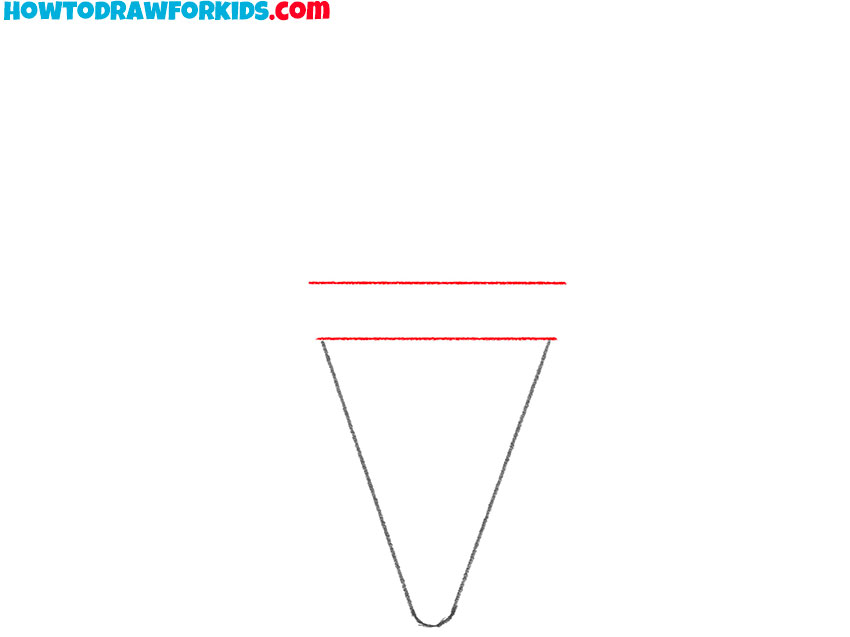
- Add the outline of the wafer cone top edge.
Draw two parallel horizontal lines as in our example. There should be a small distance between the lines. Try to draw this without using a ruler.
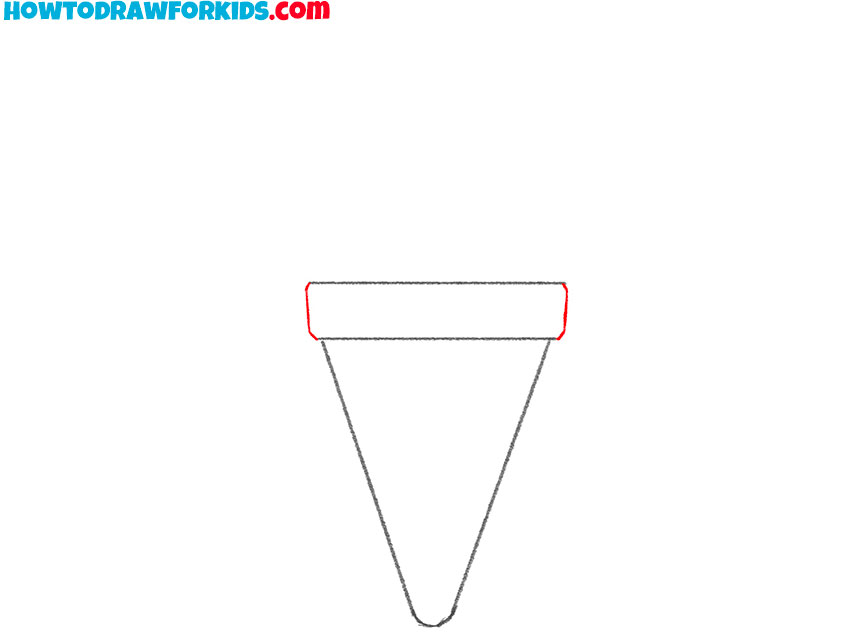
- Draw the sides of the top of the wafer cone.
Connect the lines from the previous step. Avoid sharp corners. The lines are connected in smooth, rounded areas – try to draw it that way. The resulting figure should be slightly wider than the base of the triangle from the first and second steps.
- Depict the first ice cream ball
Imagine the arrangement of ice cream scoops. The simplest and most beautiful way would be to arrange it as if the ice cream were placed very tightly. So much so that it doesn’t fit completely into the waffle cone. To do this, first draw an oval like in our example.

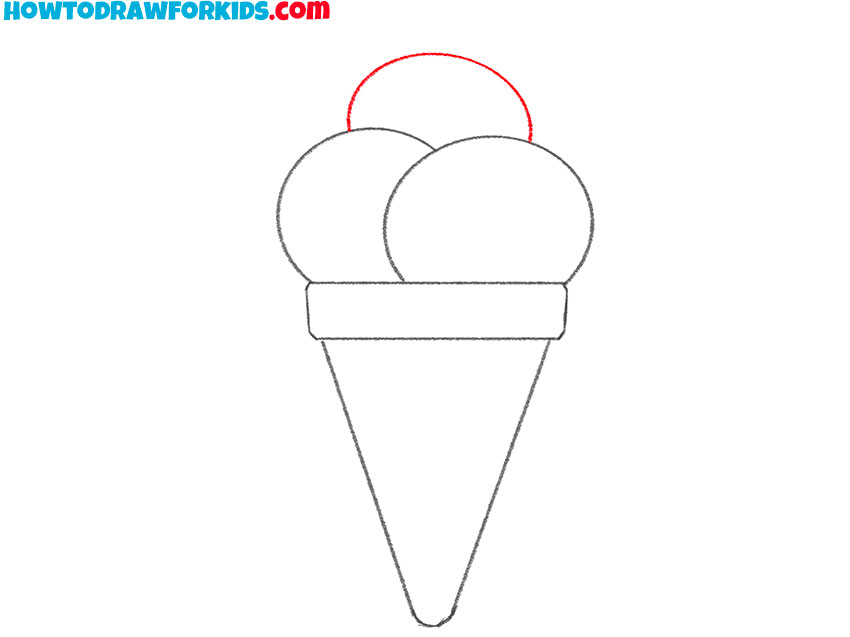
- Add one more ice cream ball.
Now draw another oval, which will also extend beyond the lines of the waffle cone. It’s okay if it’s a little asymmetrical.
- Draw the third ice cream ball.
A third scoop of ice cream would also look great. If you draw too many balls, it may look unrealistic. Three is a great choice.
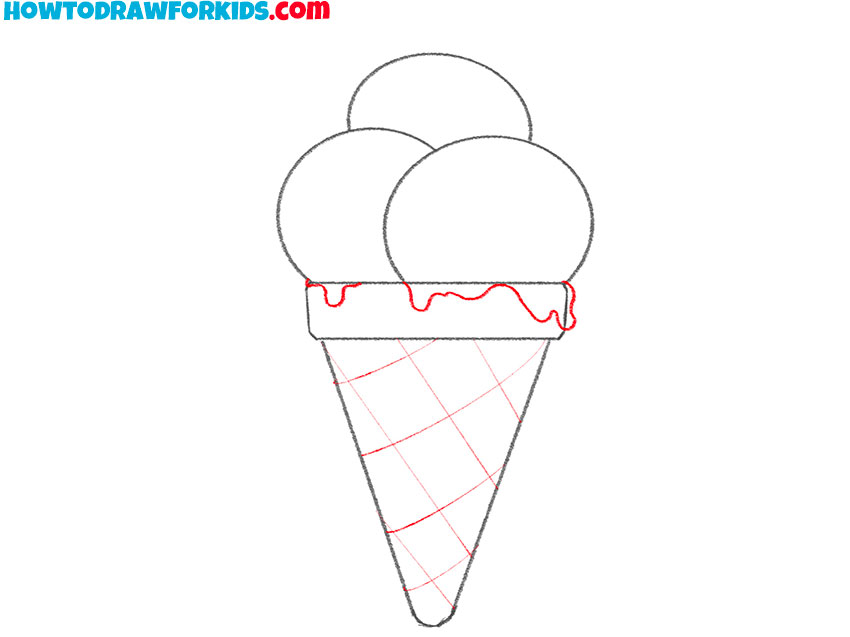
- Add the decorative elements.
This is a very important step. Ice cream can’t be just circles if you want some realism. Add smooth, curved lines to represent melted ice cream. Don’t forget the lines on the waffle cone.
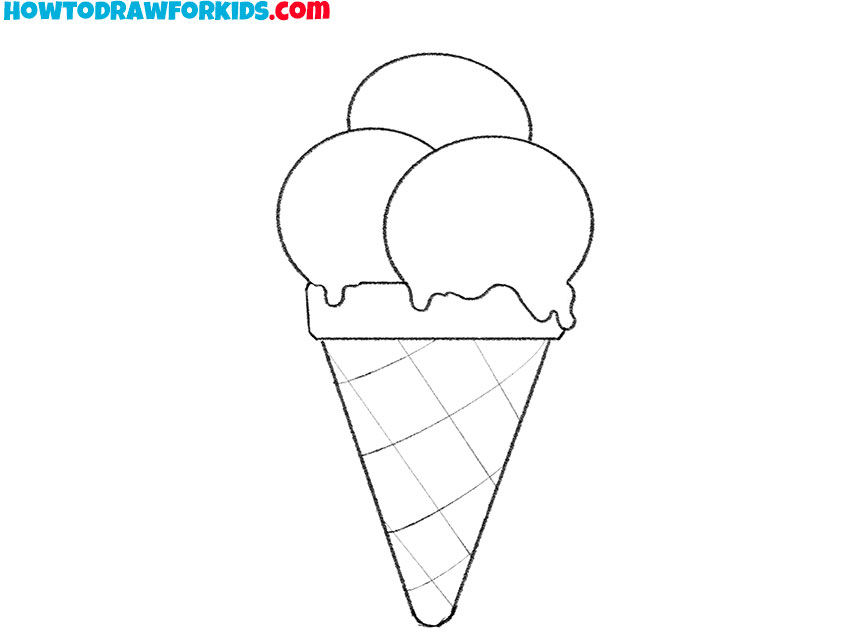
- Erase unnecessary lines.
Use an eraser to remove auxiliary lines that appeared during the drawing process.
- Color the drawing.
Avoid too bright or contrasting colors, especially when painting the waffle cup. The ice cream itself is also rarely too bright, so pastel colors will look great.

Additional content
So, I think you have drawn a very yummy ice cream! If you liked this lesson you can share it with your friends. Traditionally, I have prepared for you a PDF file with a short version of this drawing lesson. Download this file to return to this lesson whenever it is convenient for you.
Alternative Ways to Learn to Draw Ice Cream
In addition to our basic ice cream drawing lesson, you can also practice drawing other options. Each of them has its own special external details, which I will tell you about.
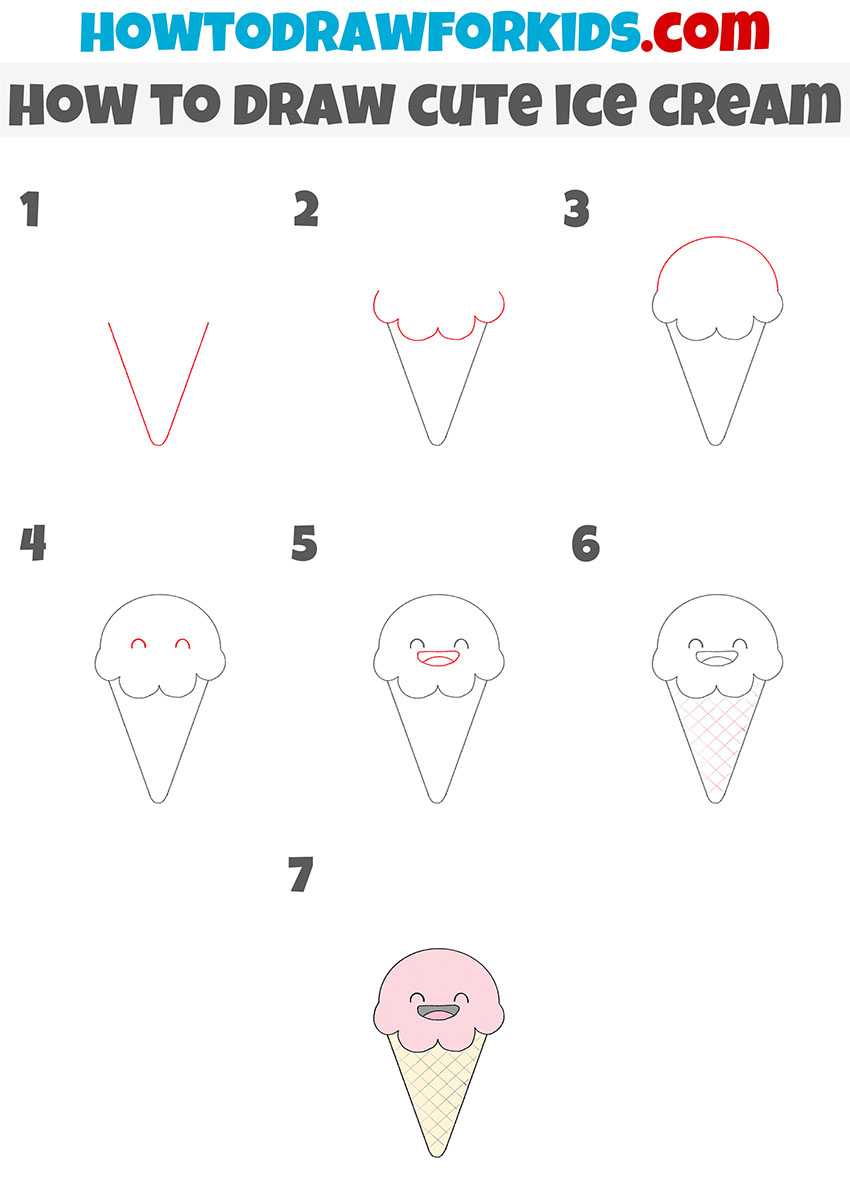
How to Draw Cute Ice Cream
There are only seven steps in this ice cream drawing tutorial. This is a comic and cartoon variation of the main lesson. It’s not too realistic but would look great on a greeting card or postal envelope.
How to Draw Ice Cream for Beginners
And this drawing is very similar to the one we used as the main one. However, in the first drawing lesson we presented a waffle cone with several scoops of ice cream. In this case, we see a waffle cone and a smooth, rounded contour of the ice cream, which is not divided into balls. Also a very good option for drawing, try working with it.
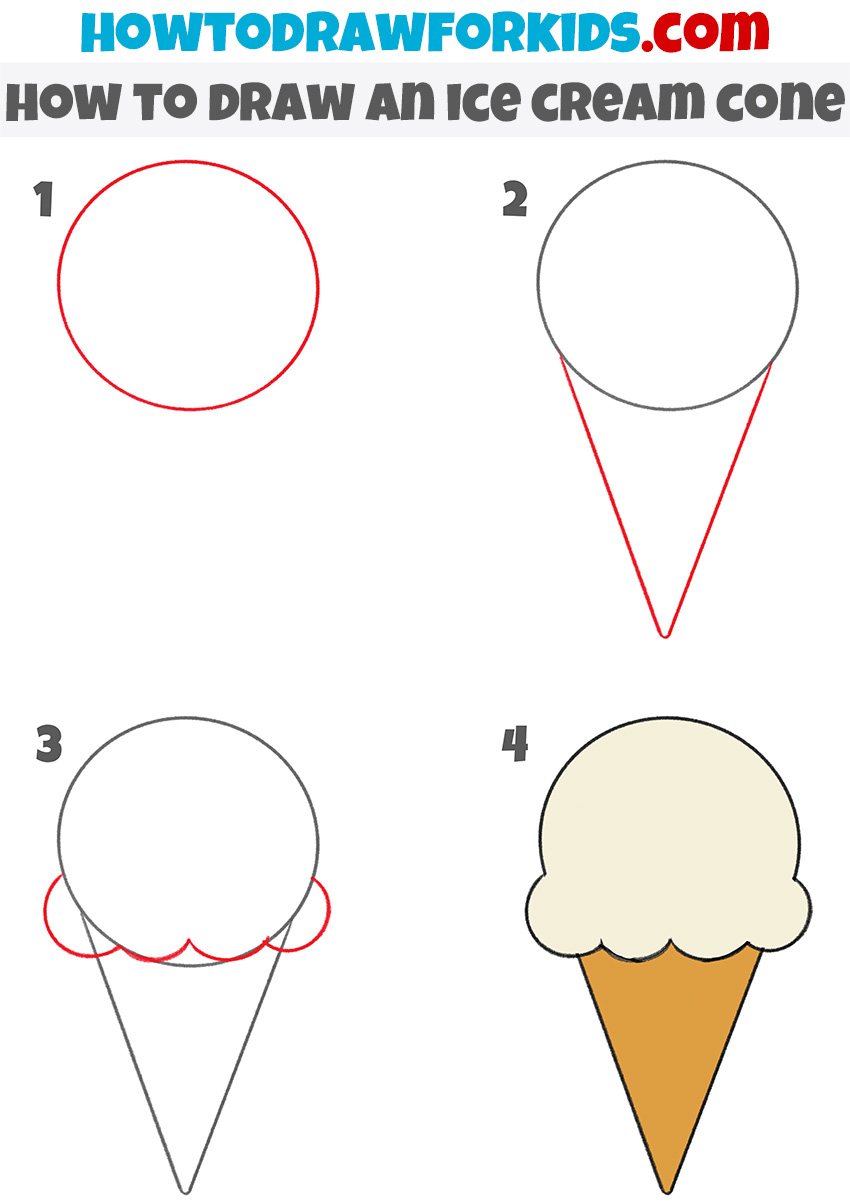
Ice Cream Cone Drawing for Kindergarten
This is the easiest ice cream drawing tutorial you can find on our site. We have greatly simplified each stage and reduced the number of steps to create a lesson for those who first picked up a pencil to draw. We also used drawing basic geometric shapes as the first steps.
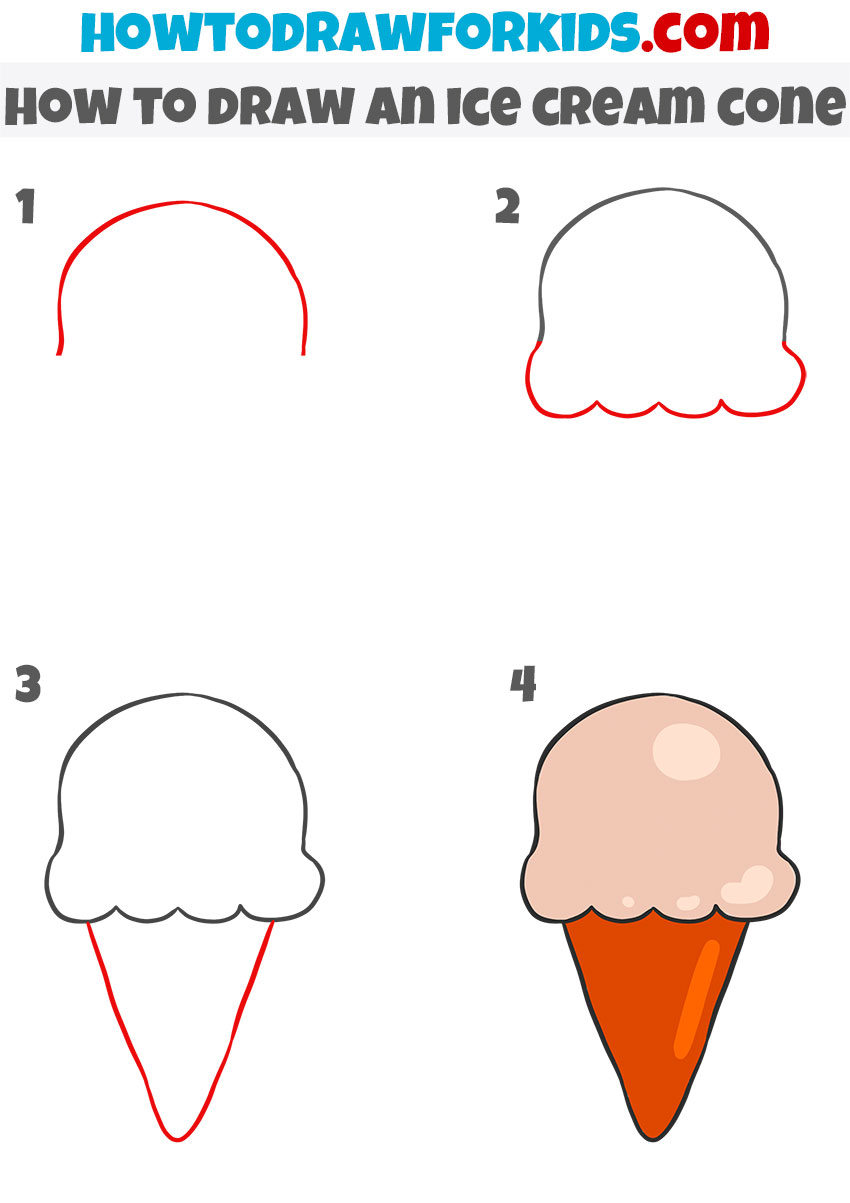
Ice Cream Cone Drawing
This is the last variation of ice cream drawing for today. Here you can see the art is a little more complex than the previous one due to the addition of highlights. Also in this case, we used a step-by-step method without drawing geometric shapes. Try working with all the tutorials to decide what suits you best.
Conclusion
We hope you had a great time practicing your ice cream drawing skills. Especially for this, we have selected several interesting tutorials, including the simplest ones for beginning artists. We will welcome your feedback in the comments. See you in new drawing lessons!


awssome really easy