How to Draw a Paw
Learn how to draw a paw in just 5 easy steps! This tutorial will show you a simple drawing technique, so you can create a cute drawing.
The instructions are designed specifically for beginner artists and include steps that you can quickly complete. Here is a very simple way to draw a paw that you will quickly master.
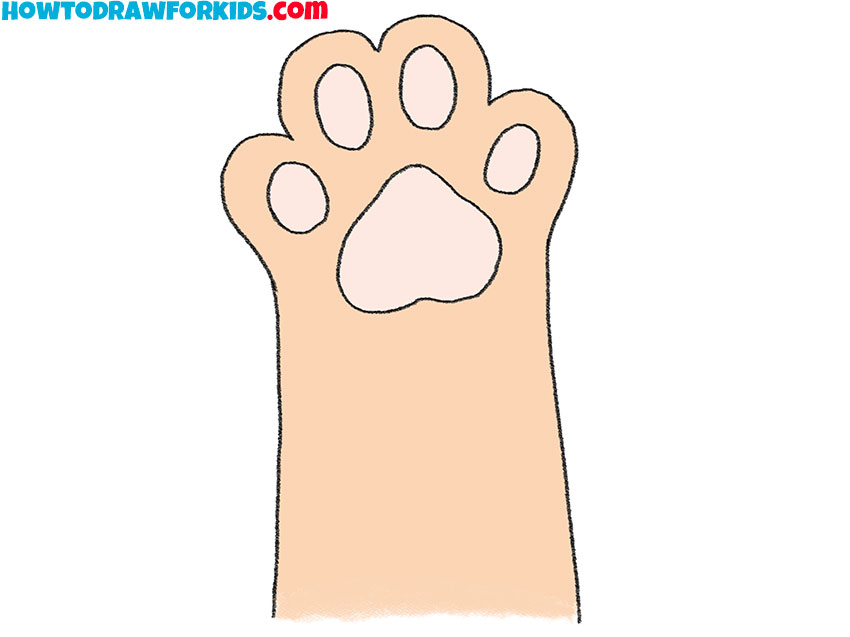
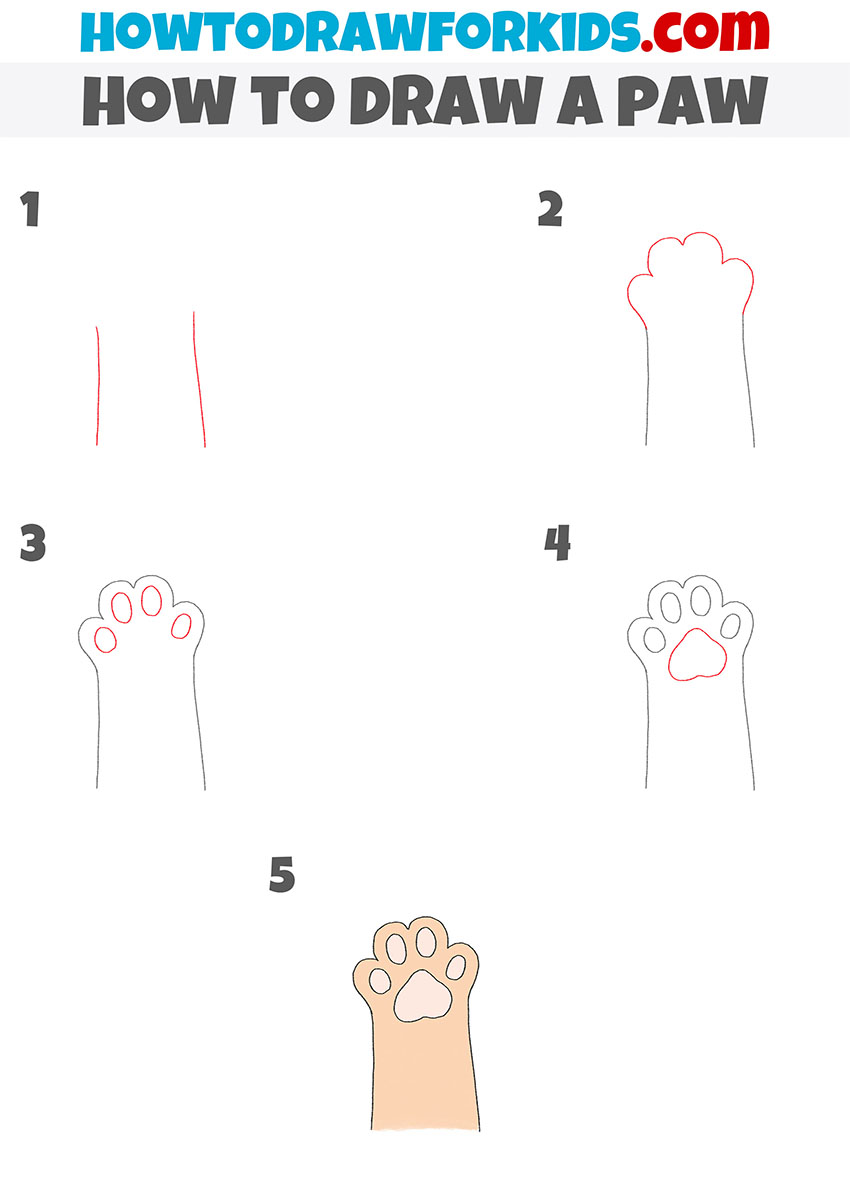
Table of Contents
Basic Information on How to Draw a Paw
The lesson on how to draw a paw presents a very simple way of drawing. This is exactly what the paw of cartoon characters looks like, so the skills you’ve acquired can be useful for drawing the paw of a cartoon kitten, puma, lion cub or other animal.
This lesson will require your ability to maintain symmetry, because the upper part of the paw can be divided into two halves. The middle fingers protrude forward, and the side fingers are located lower.
Each finger has an oval shape, and in this tutorial you will practice drawing even ovals. You can see that in this picture the paw pad is shaped like a heart, with the pointy end facing up.
Materials
- Pencil
- Paper
- Eraser
- Coloring supplies
Steps on How to Draw a Paw
Time needed: 30 minutes
How to Draw a Paw
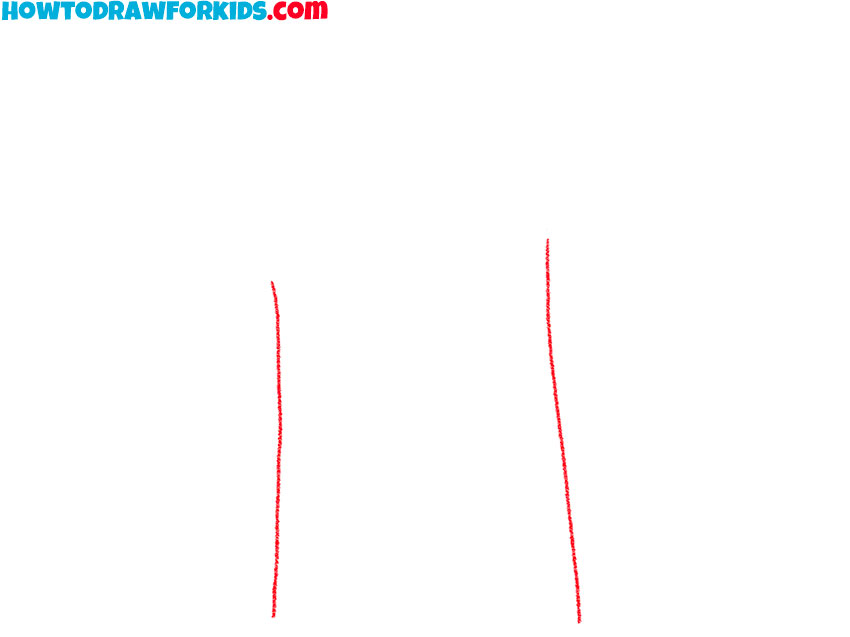
- Draw the side contours of the paw.
Start by drawing two vertical lines almost parallel to each other; these lines will guide the width of the paw and ensure symmetry. The top third of the paper should be clean and free of lines.
- Add the upper outline of the paw.
Above the parallel lines, draw a cloud-like shape with three bumps on top of the paw’s toes. Ensure it connects smoothly to the lines, which form the leg.

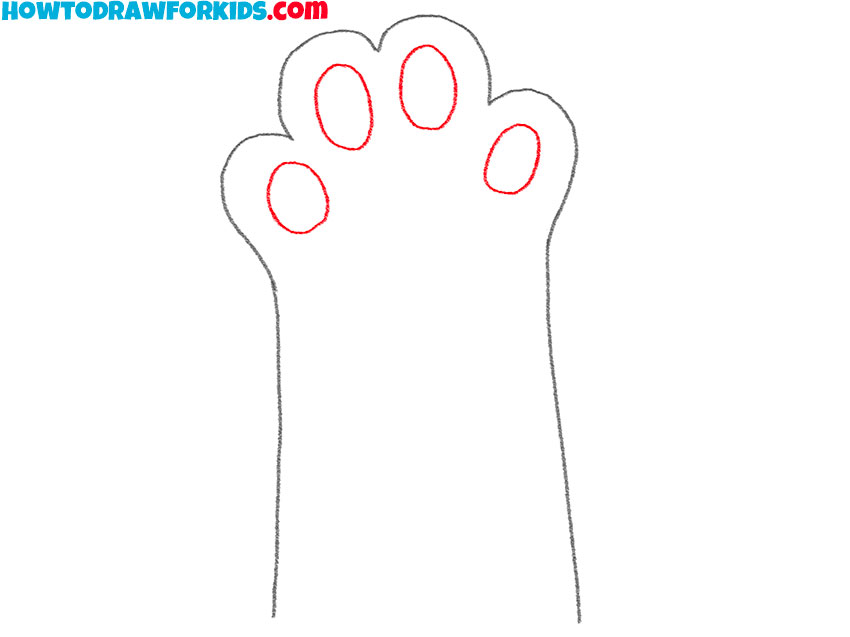
- Depict the pads on the toes.
This is a very simple but very important step. Draw an oval inside the outline of each finger. The ovals should be located at the same distance from the boundaries of the fingers.
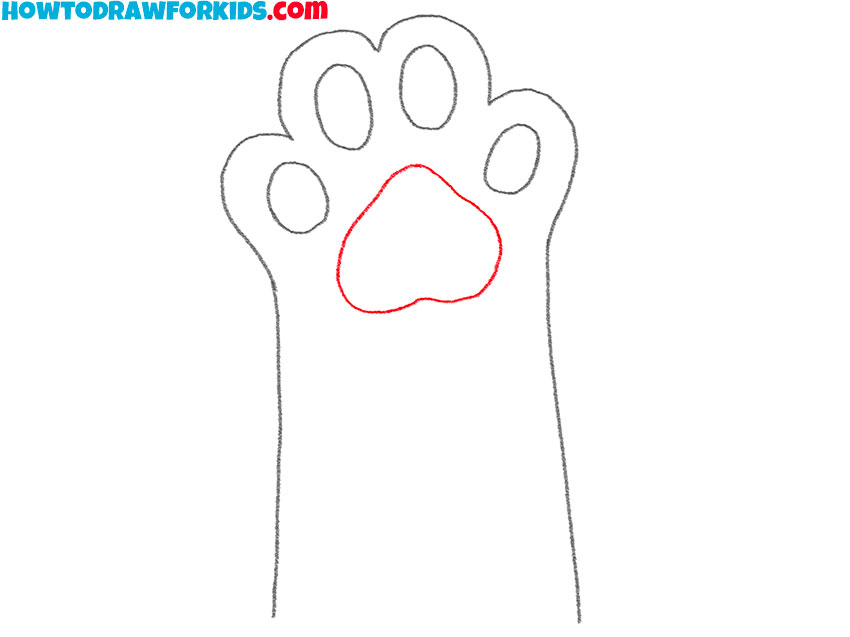
- Add another paw pad.
Sketch a heart-shaped figure in the space below the toe circles, touching the bottom two. This will be the main pad of the paw, adding realism to your drawing.
- Color the drawing.
Color the paw with a suitable shade, like a soft tan or pink, depending on the animal. Add slight shading around the pads to create depth, completing your paw illustration.
Additional Content
Now I invite you to download a free PDF file that contains all the useful information about this lesson. In this file you will find quick instructions, a coloring page, a tracing worksheet, and a grid drawing worksheet. Save the file to your device and use it at any time, even when the Internet is unavailable.
Final Touches
To consolidate the acquired skills, you can further practice and draw several more similar drawings, each time adding something new to your drawing. For example,
- Add highlights to the toes and paw pad
- Gently highlight the dark areas between your fingers.
- Using short strokes, draw individual strands of fur on the paw
The more you practice, the better your work will be and your confidence in your creativity will increase. Draw as often as possible and improve your skills with my simple and fun lessons.
Conclusion
So, the paw drawing lesson is over. The more you practice, the better your work will be and your confidence in your creativity will increase. Draw as typically as possible and improve your skills with my simple and fun lessons.