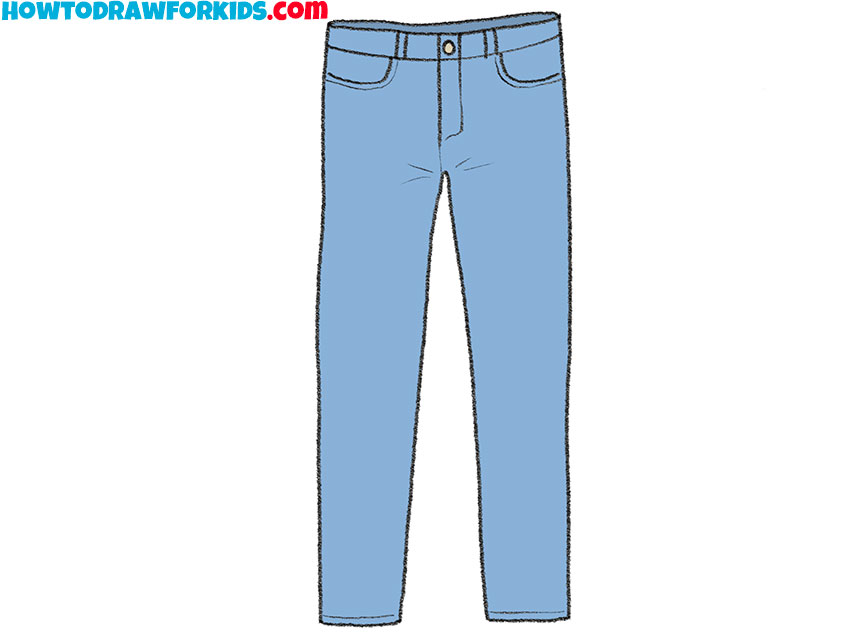
How to Draw Jeans
As we venture into the artistic rendering of clothing, I’m here to guide you through how to draw jeans. This step-by-step tutorial simplifies the intricate textures and seams into approachable artistry. It’s my goal to demystify the process, showing you that even the casual complexity of denim can be captured on paper.
How to Draw Jeans: Basic Information
In this drawing lesson, I’m thrilled to unfold the process of how to draw jeans, turning fabric and thread into an artist’s vision. With each line and curve, we’ll piece together the iconic look of denim, ensuring that even novices can sketch with confidence. My approach will take you through the nuances of texture and form.
Detailing these jeans, we move beyond basic outlines to the defining features: the stitch lines, the zipper, and the belt loops. It’s a meticulous process, ensuring each element is proportionate and well-placed. This lesson doesn’t just teach you to replicate an image but to understand the harmony of lines that creates the illusion of denim.
By the final stroke, the jeans will emerge not as a flat sketch but as a garment with weight and texture. In teaching you to draw jeans, I aim to impart the techniques that allow depth and realism to permeate your work. This is more than an art lesson; it’s a step towards seeing and capturing the world with greater fidelity
Jeans Drawing Tutorial
Materials
- Pencil
- Paper
- Eraser
- Coloring supplies
Time needed: 30 minutes
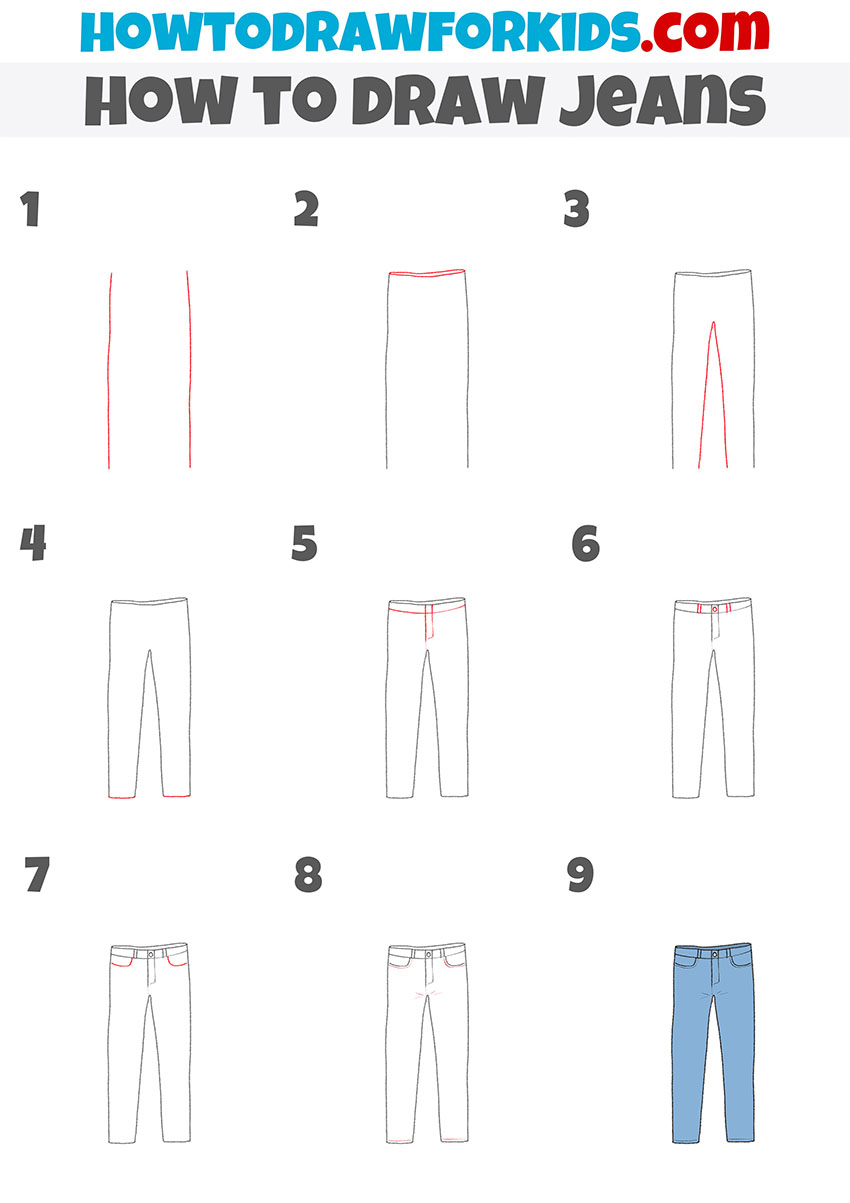
How to Draw Jeans
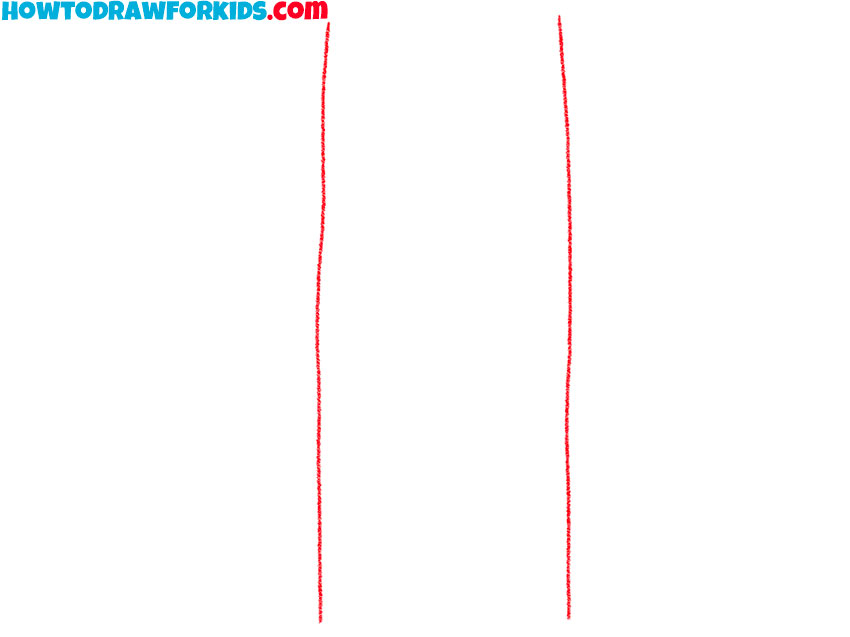
- Draw the side edges of the legs of the jeans.
To complete this simple step, you need to draw two slightly curved lines, as shown in the picture.
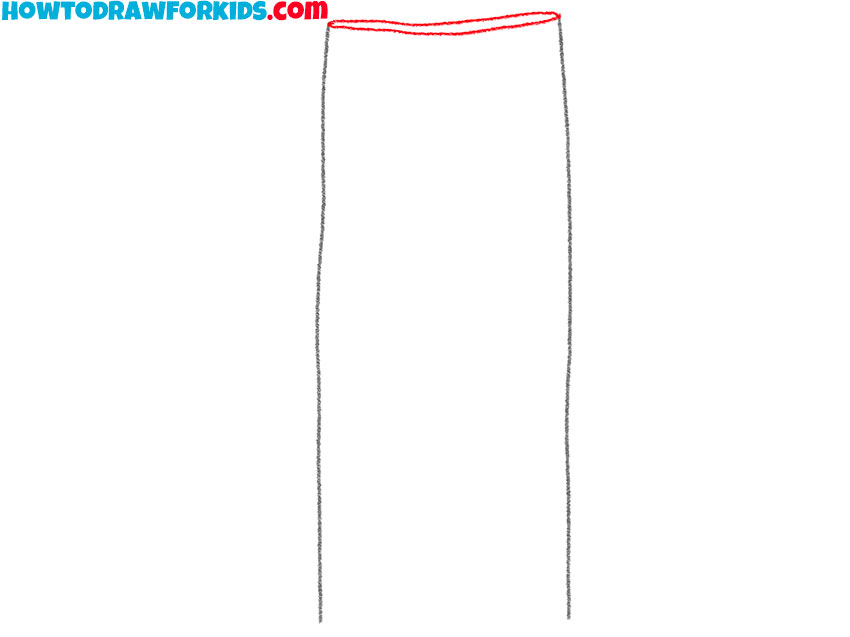
- Add the top of the jeans.
Now you need to connect the top edges of the previously drawn lines with a curved line.
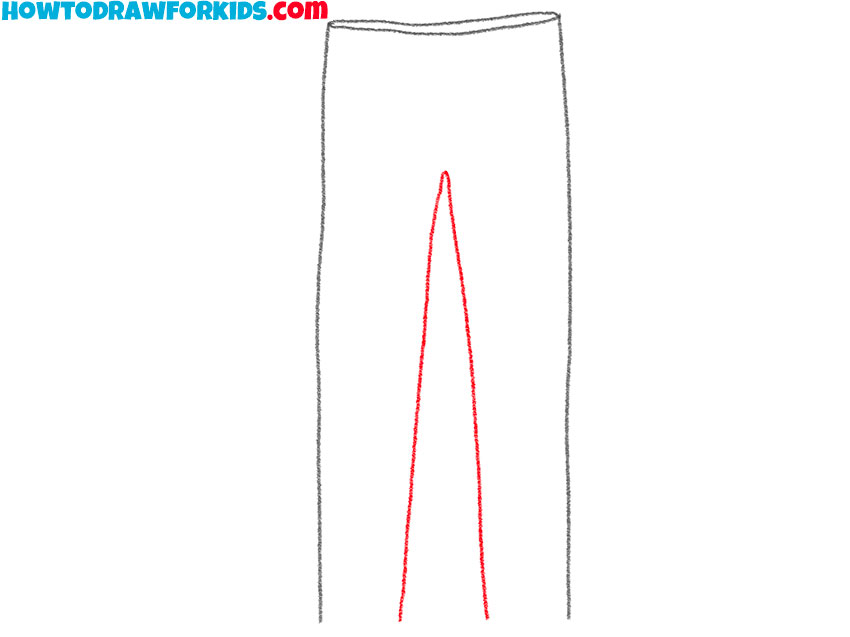
- Depict the inner contours of the legs.
To add the inside of the jeans, draw a long, curved line as shown.
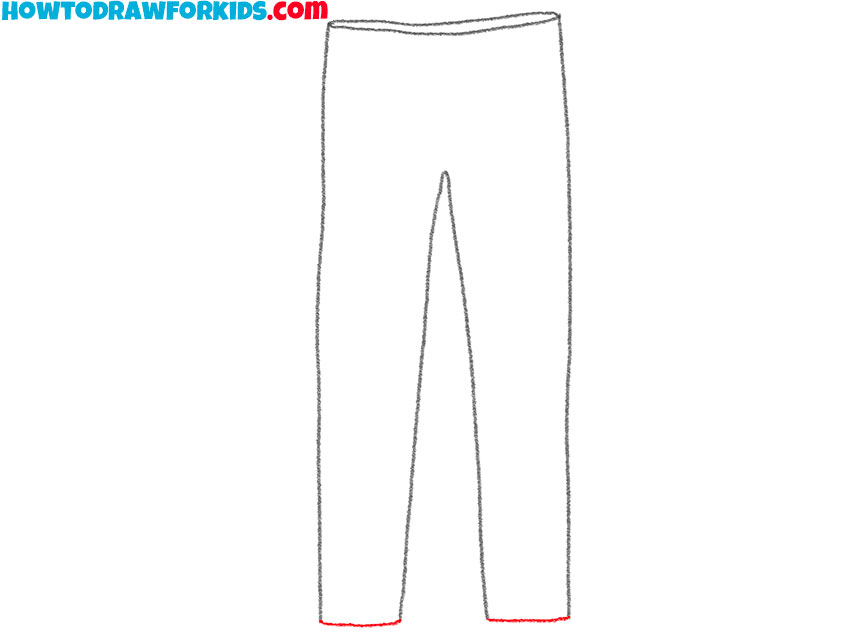
- Sketch out the bottom contours of the legs.
Using two small lines, connect the lower ends of the previously drawn curved lines.
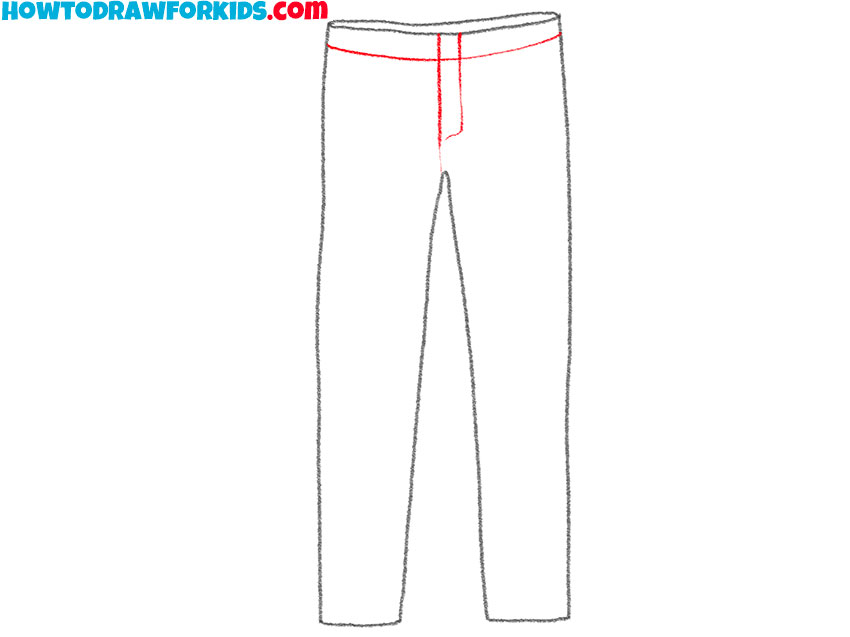
- Add a line of belt and fly.
Use a straight line, an arc, and a thin, curved line to add these elements.
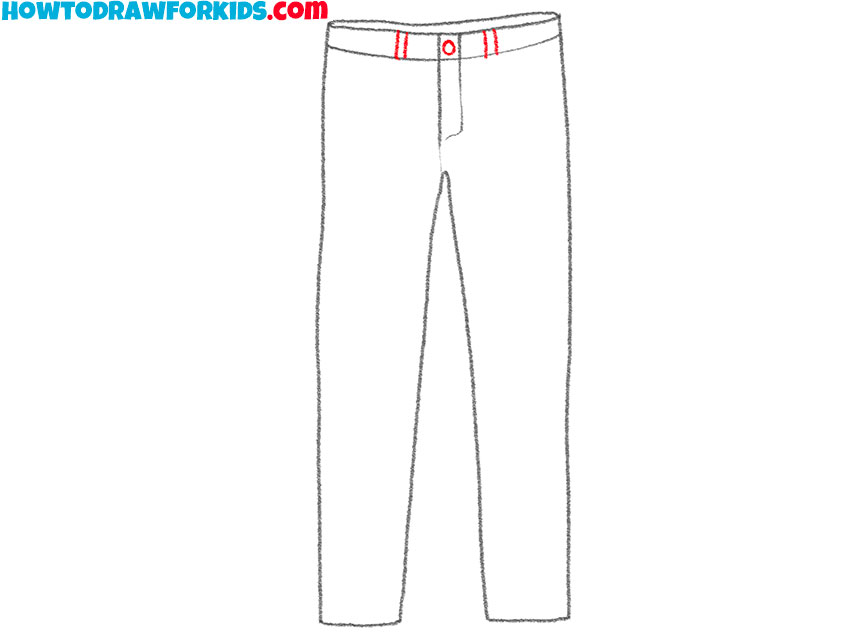
- Draw the button and belt elements.
Depict the button in the form of a circle, and also add the same short lines at the level of the belt.
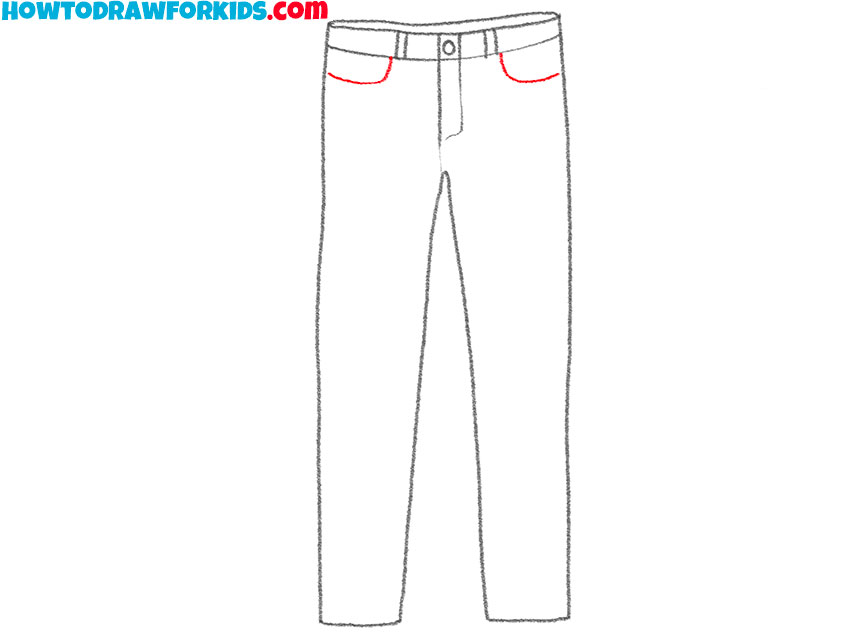
- Add the outlines of the jeans pockets.
On the right and left sides of the jeans, draw curved lines near the belt line.
- Make the drawing more realistic.
To make the jeans look more realistic and voluminous, add thin, curved lines.
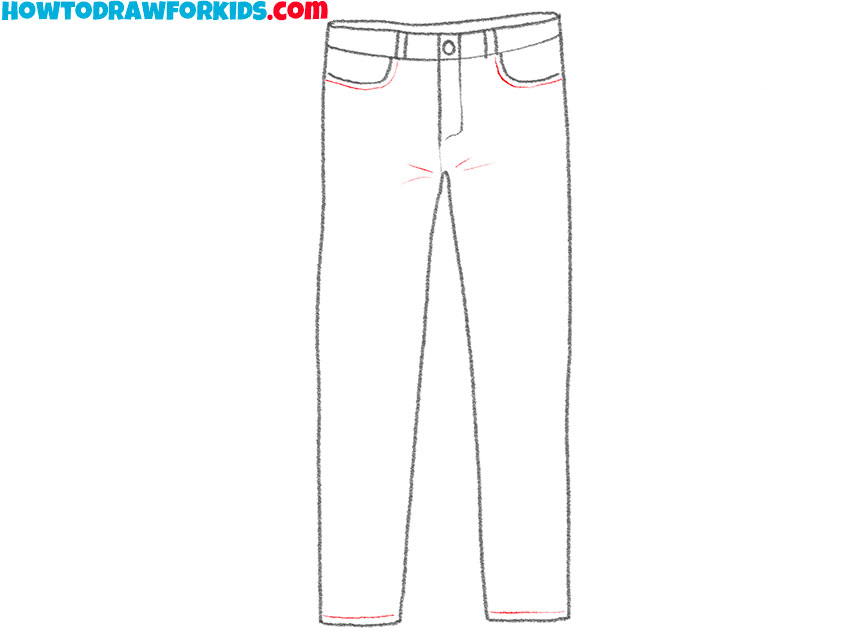
- Color the drawing.
To color the jeans, you will need blue.
Additional Content
Alongside our detailed lesson, I’ve fashioned a free PDF file, a succinct companion to the comprehensive guide on drawing jeans. This resource is readily available to download, allowing you to dive back into practice wherever you may be, without the need for constant internet access.
This PDF is not a mere echo of the steps you’ve already learned; rather, it’s a curated collection of supplementary exercises. These are designed to refine the skills you’ve developed, focusing on deepening your grasp of the nuanced textures and folds that make denim come alive on paper.
Think of this PDF as a bridge to furthering your artistic pursuit, providing a pathway to perfect the casual creases and rugged details of jeans. After laying the groundwork through the main lesson, these additional materials will support and expand your artistic expression, ensuring continuous improvement in your drawing journey.
Alternative Drawing Method
In response to those seeking a more straightforward path, I’ve developed an alternative technique for drawing jeans that simplifies the process significantly. This method reduces the complexity of the details, focusing instead on capturing the overall shape and basic folds of denim. It’s ideal for beginners or those looking to practice without pressure.
By concentrating on broader, more general features, this new approach allows for quicker completion and a less intimidating experience. It’s perfect for reinforcing the basic principles of garment drawing, such as proportion and simple line work. This method is not only easier but also builds a strong foundation for more detailed artistic endeavors.
Adopt this simplified technique to enhance your drawing efficiency and confidence. It provides a relaxed way to practice and improve, encouraging continuous development in your artistic journey. Each sketch you complete will reinforce your skills, paving the way for more complex projects in the future.
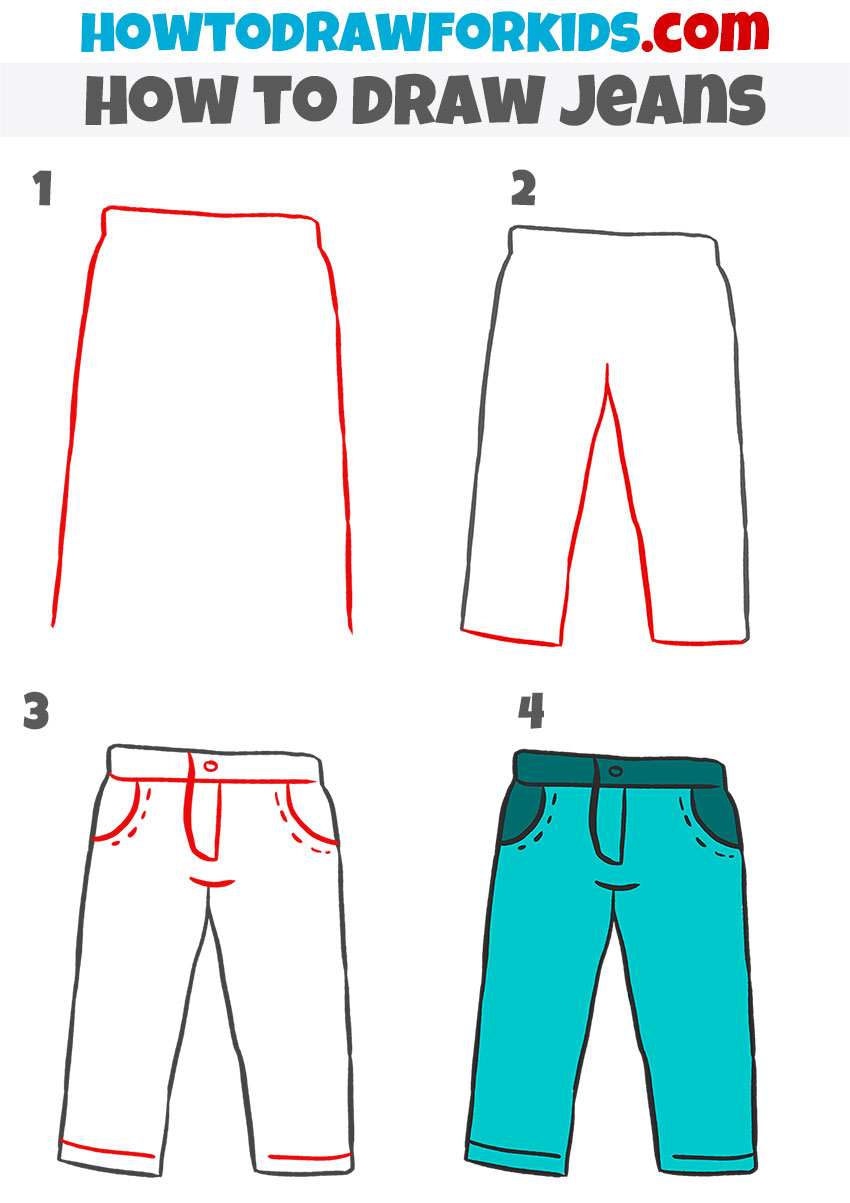
How to Draw Jeans for Kindergarten
This simple alternative method for drawing jeans is tailored for young, creative minds in kindergarten. The first step starts with two vertical lines for the legs and connects them with a horizontal line at the top, forming a basic pants outline. It’s a method that encourages the understanding of shapes and how they relate to everyday objects.
In the second step, we introduce the concept of symmetry by drawing an inverted ‘V’ to represent the space between the legs. This technique helps the young artist to make their jeans look wearable. The shape is easy to replicate and continues to build on the idea of using basic lines to form complex objects.
Finally, we add personality to our jeans with the addition of a waistband and pockets in the third step, and then we bring the drawing to life with color in the fourth step. It’s here that the children can express themselves, choosing whichever hues they like to fill in their creation.
Crafting the Casual: Advanced Tips for Sketching Jeans
In the quiet moments following the completion of our jeans drawing lesson, we find the space to reflect and refine. The mastery of art is an ever-evolving journey, and here are some tailored tips to enhance the sketches that sprung forth from our imagination to the page.
- Refine the Outlines: Practice drawing the initial lines with a steady hand to improve the smoothness and symmetry of your jeans’ outline.
- Enhance Proportions: Pay attention to the length and width ratio of the jeans to ensure they’re in proportion to the size of the waistband and leg openings.
- Add Depth with Shading: Work on shading techniques to give the jeans a three-dimensional look, emphasizing the areas where natural creases and shadows would form.
- Detail the Texture: Experiment with creating denim textures, using cross-hatching or stippling methods to replicate the fabric’s weave.
- Perfect the Pockets: Focus on the curvature and placement of the pockets, making sure they sit naturally on the hips of your jeans.
- Button and Zipper: Spend time perfecting small details like the button and zipper, which are small but significant features of the jeans.
- Belt Loops: Practice drawing evenly spaced and sized belt loops, ensuring they loop around the waistband believably.
- Explore Color: Try different shades and tints to add color to your jeans, which can bring a whole new dimension to your drawing.
- Fold and Crease Work: Observe how fabric folds and creases, practicing these lines to make your jeans look lived-in and realistic.
- Seam Lines: Use a ruler or freehand draw to add seam lines, enhancing the realism of your jeans drawing.
As we put our pencils down, let these tips act as the map to uncharted territories in your drawing skills. With detailed attention to the guidelines provided, each future sketch will bring you closer to the artistry you aspire to achieve. Keep these pointers in mind, and watch as every new pair of jeans you draw comes to life with more authenticity and precision.
Conclusion
Now that we’ve drawn the final thread on our jeans sketching, you might be keen to sketch more wardrobe essentials or seasonal delights. Unfurl your creative wings on my website, where you can learn to etch the festive boughs of a Christmas tree or the stately poise of a Thanksgiving turkey, each lesson crafted with care for artists of all levels.
Let’s keep the dialogue flowing and the pencils moving. Follow me on social media for a stream of new content, crafted with your artistic growth in mind. And if there’s a particular subject you’re itching to draw, drop a comment under the lessons. Your feedback is the compass that guides the journey of our shared artistic exploration.