How to Draw Dory
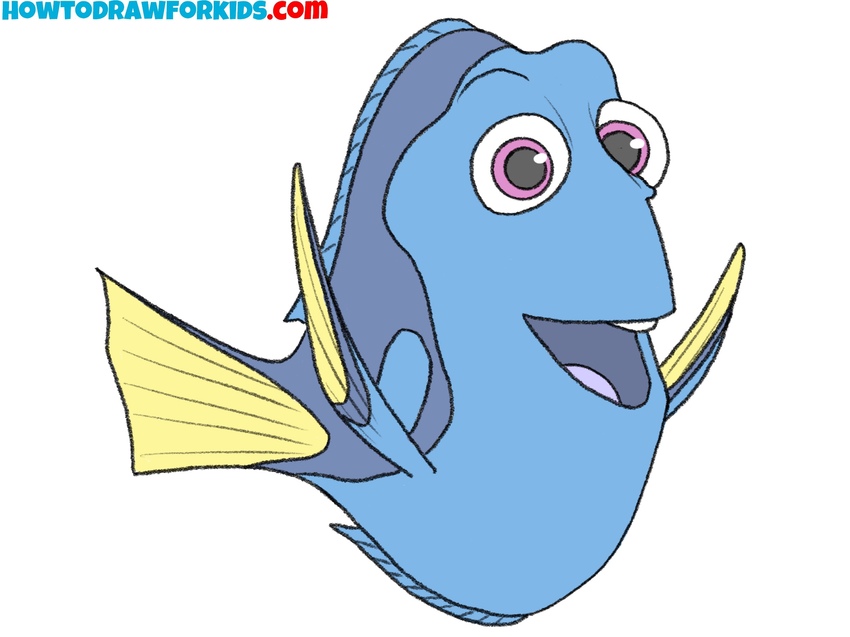
Finding Dory and Finding Nemo are among my favorite cartoons, and I will show you how to draw Dory, one of the main characters.
How to Draw Dory: Introduction
In this tutorial on how to draw Dory, we will learn how to depict this character, which is a cartoon version of the paracanthurus fish. We will focus on drawing a fish with the characteristic features found in cartoons. These features make cartoon characters, such as those in Finding Nemo and Finding Dory, easily recognizable.
Cartoon characters have distinct traits that help identify them. In this lesson, we will pay attention to conveying the image of Dory as accurately as possible. This will help ensure the character looks close to the original version from the films.
Additionally, this tutorial will provide you with important skills for drawing fictional characters of various shapes, including fish, animals, and even people. You will also learn how cartoonists achieve the desired stylization in their drawings.
At the end of the lesson, I will show you an alternative method for drawing Dory. This method involves a different set of steps and approach. Both lessons, despite their differences, will give you a deeper understanding of character creation in animation.
Dory Drawing Tutorial
Materials
- Pencil
- Paper
- Eraser
- Coloring supplies
Time needed: 40 minutes
How to Draw Dory
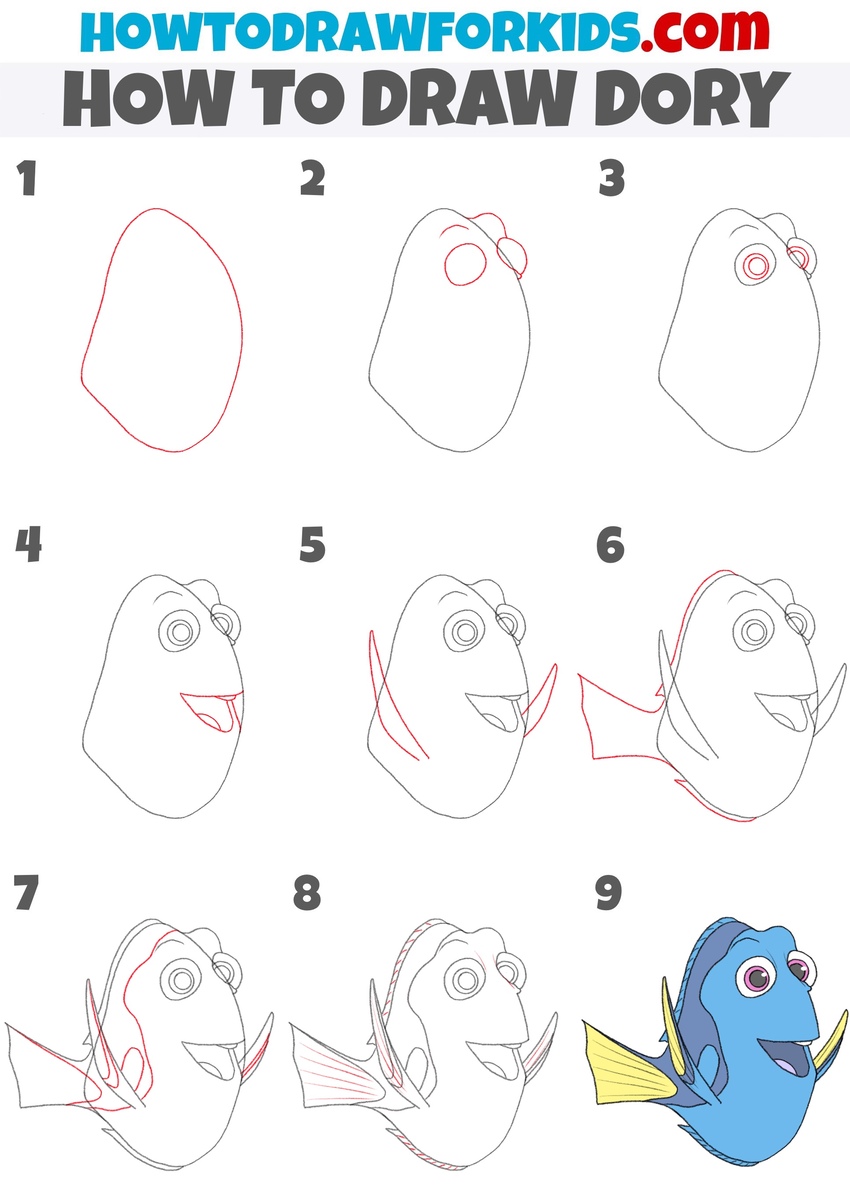
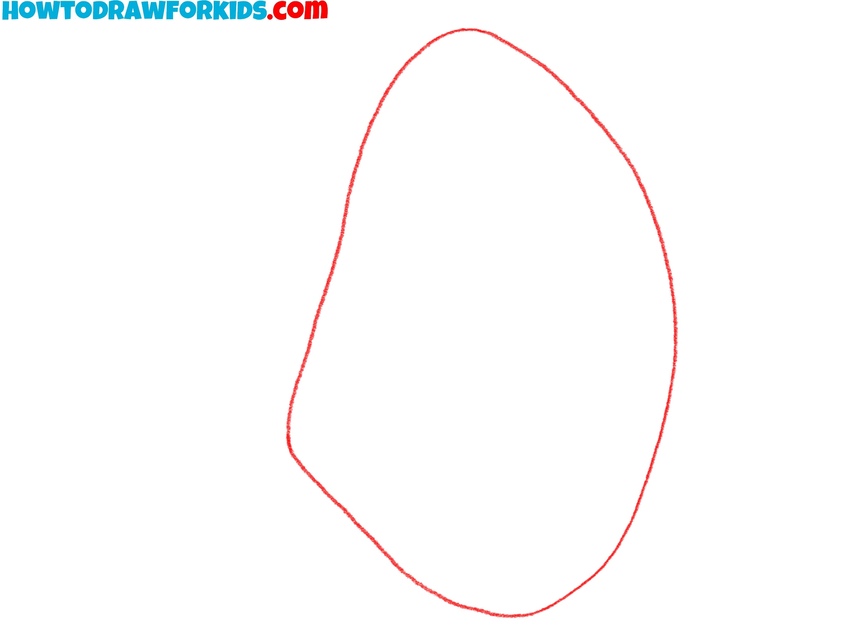
- Sketch the body of the character.
In this first step of the Dory drawing tutorial, we begin by sketching a rough outline of the character’s body. Sketch a shape resembling an oval, which will represent the overall form of Dory’s head and body. This basic structure will serve as the foundation for the rest of the drawing.
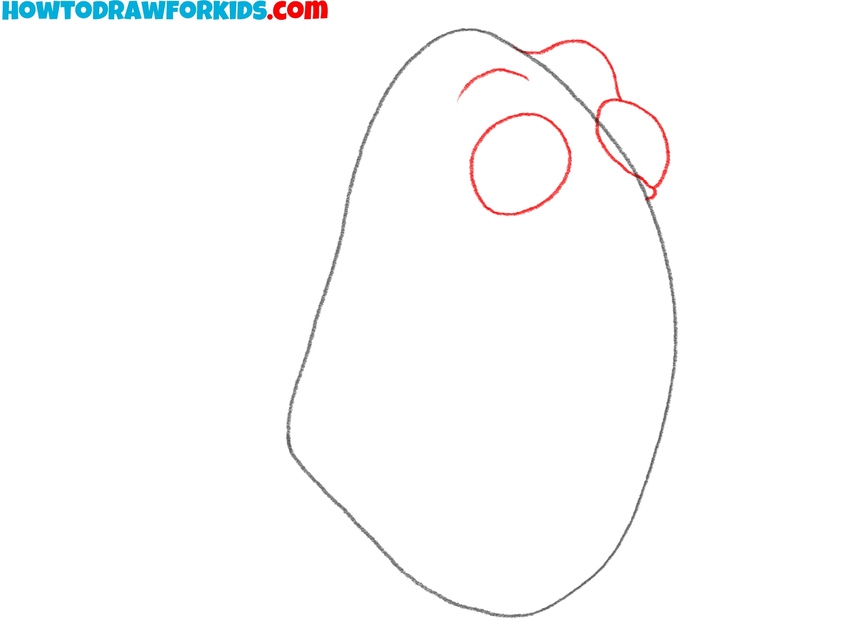
- Sketch the eyes and brow ridges.
Draw two large, circular eyes near the top of Dory’s head. These eyes are an important part of the cartoonish look of Dory, so ensure they are exaggerated in size compared to the rest of the face. Next, draw the brow ridges above the eyes using a pair of simple, smooth lines.
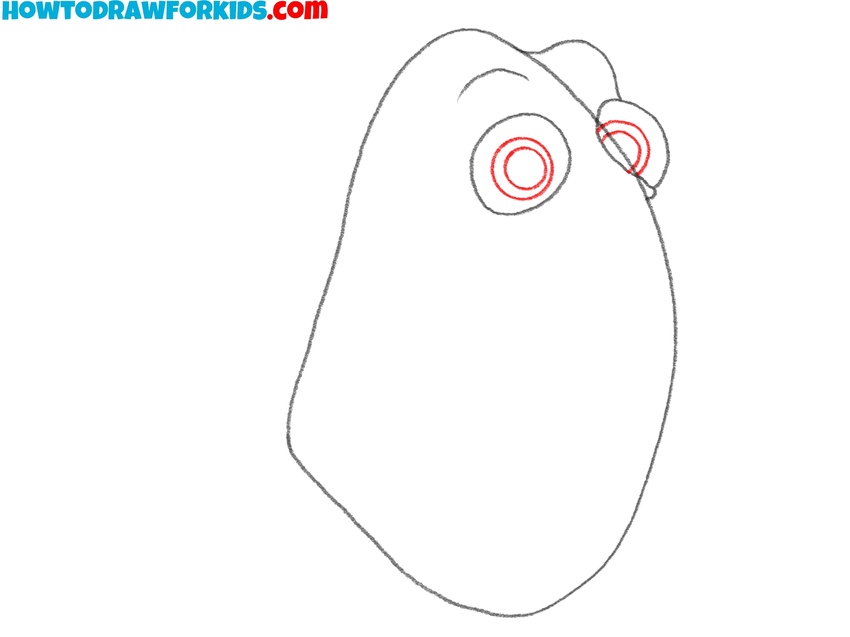
- Add the irises and pupils of the character.
Inside each eye, draw two smaller circles to represent the irises. After that, draw the pupils inside the irises with a couple of even smaller circles. The pupils should be located exactly in the center of the irises. Adjust the position of the irises and pupils to change the direction of gaze.
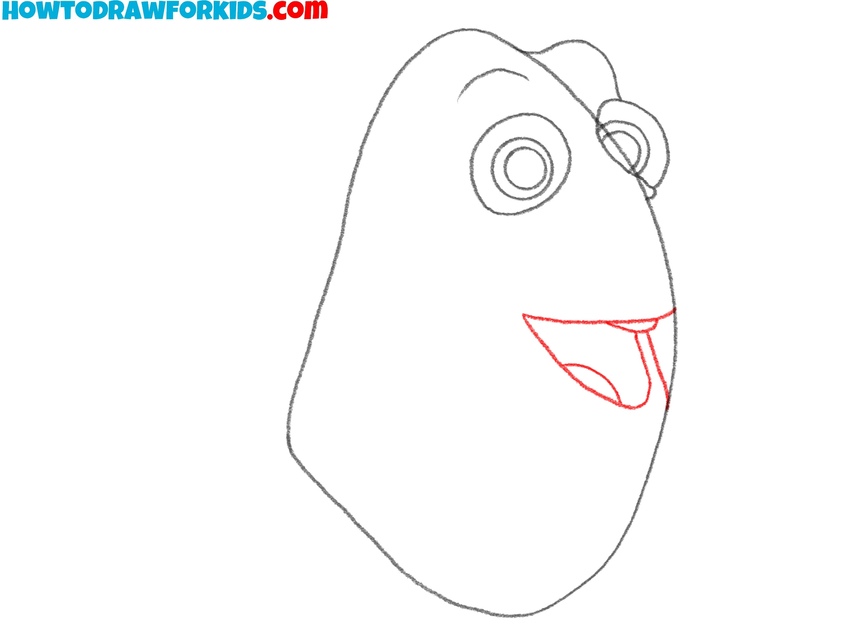
- Draw the smile of Dory.
Draw two wide, curved lines for the smile, and add another smaller curved line inside the mouth for the tongue. Next, draw Dory’s top teeth using a small curved line. Don’t try to go into too much detail when drawing the smile and teeth.
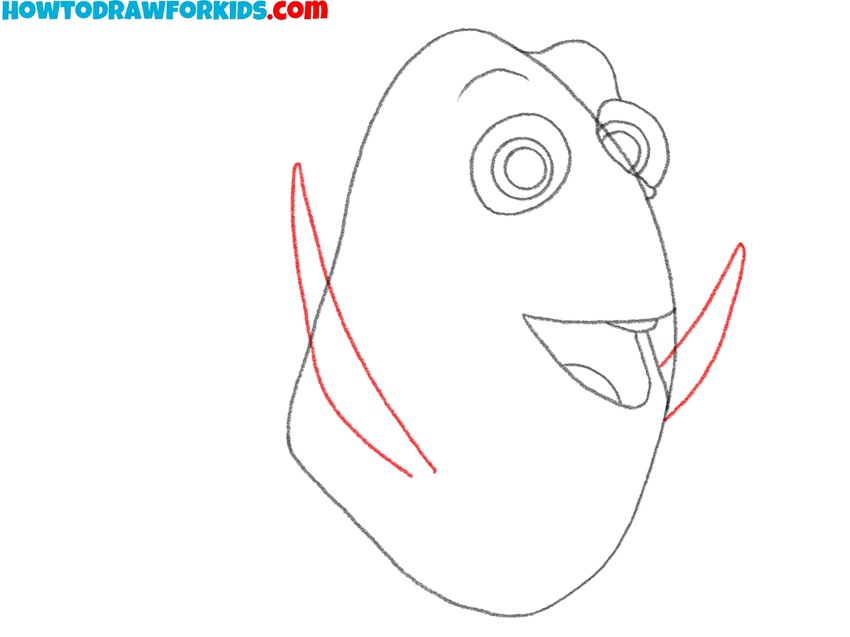
- Draw Dory’s pectoral fins.
Now it’s time to add Dory’s fins, which help define her body shape. Start by drawing the pectoral fins on either side of her body, just below the eyes. These fins should be somewhat elongated and curved, with a gentle arch that mimics the natural shape of a fish’s fins.
- Add the tail and dorsal fins.
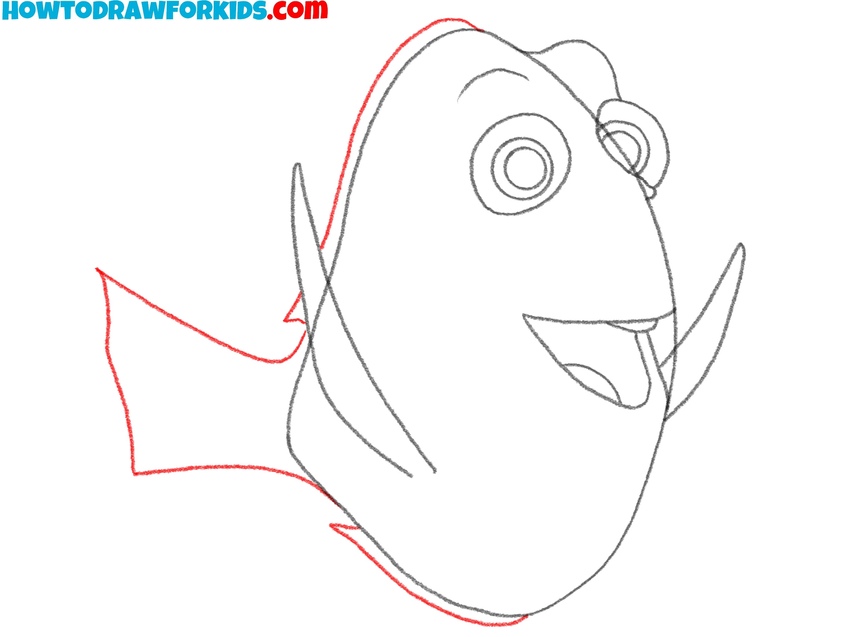
Draw a flowing tail fin extending from the back of Dory’s body. This tail should be wide and triangular. Then, draw the dorsal fin along the top of Dory’s body, making it curved. After that, draw a similar long line for the fin on Dory’s belly.
- Draw the pattern on the fish’s body.
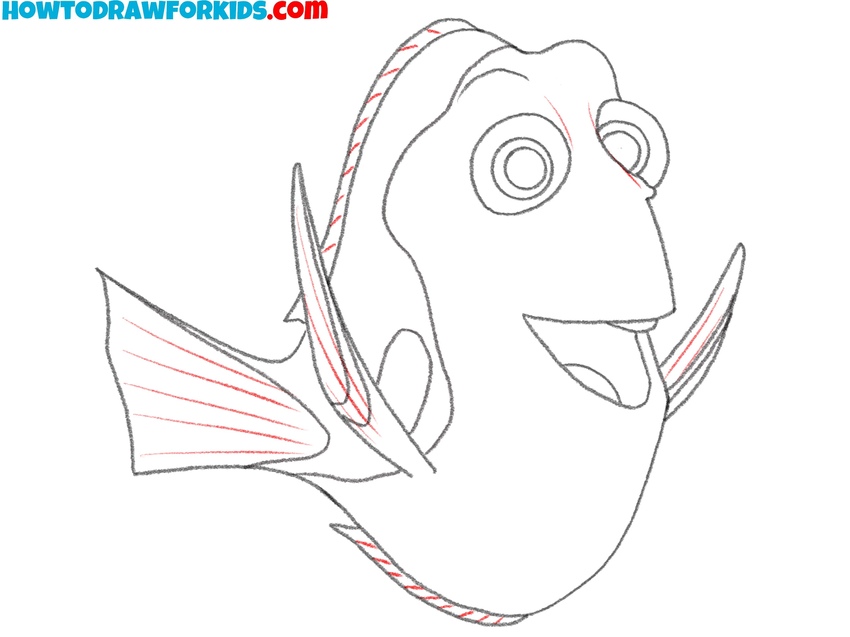
With the fins and facial features in place, use smooth, curved lines to draw a pattern on the body that is characteristic of this type of fish. First, draw smooth patterns on Dory’s body, then move on to the fins, drawing patterns with small flowing lines.

- Erase the guidelines and add texture to the fins.
In this step, you will focus on the finer details that will make Dory’s design more polished and recognizable. Start by erasing all unnecessary auxiliary lines from the drawing of Dory. Next, draw the texture of the fins with a series of evenly spaced light lines.
- Color the drawing of Dory.
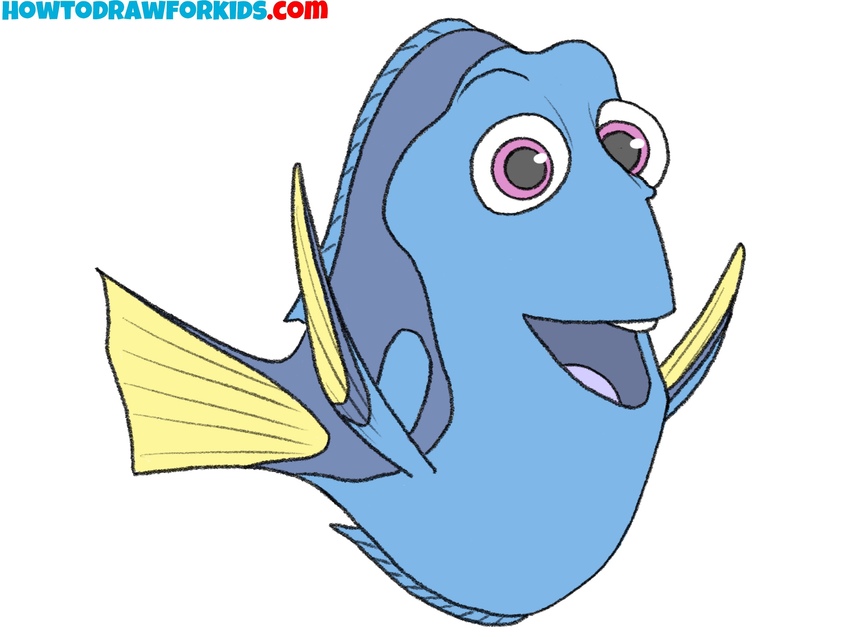
Begin by filling in her body with a bright blue color, capturing the tone of the regal blue tang fish. For the fins, use yellow to highlight the character’s distinct coloring. Color the eyes with a mix of white, pink, and black. For the mouth and tongue, use light pink or red tones.
How to Draw Dory: Alternative Technique
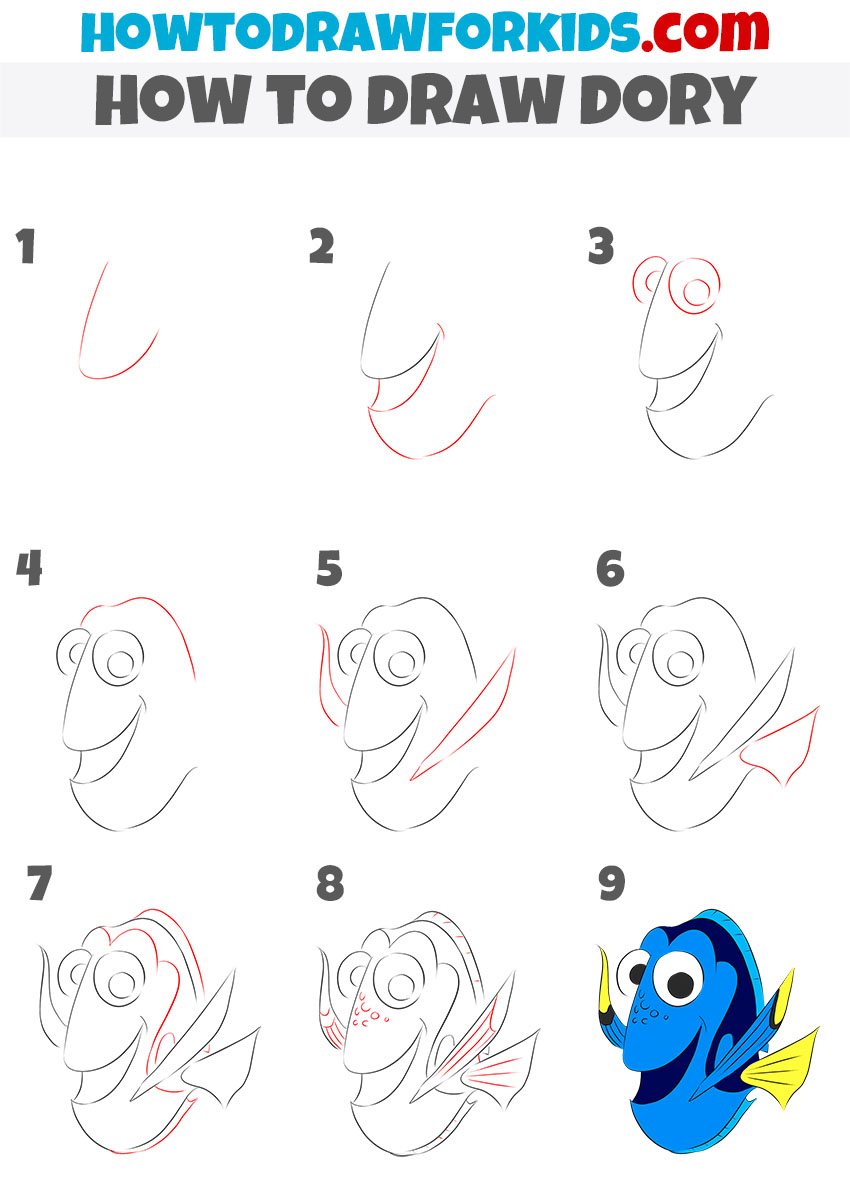
The second tutorial differs from the first one in several ways. The focus is on drawing Dory’s face from a different point of view. Additionally, the steps in this tutorial are more focused on outlining the facial features, particularly Dory’s mouth and fins, before moving on to the tail and body. It involves fewer detailed steps for the body, making it a simpler approach compared to the previous tutorial.
In this tutorial on how to draw Dory, begin by sketching the basic shape of the fish’s face. Draw an elongated curve that forms the outline of her upper jaw. Next, add Dory’s lower jay with a wide, curved line, capturing her smile. Then, sketch her large, round eyes, placing them near the top of the head. These are essential features that contribute to the cartoonish look of Dory.
After the eyes, outline her fins, starting with the pectoral fins on each side. These fins should be curved, following the natural shape of a fish’s body. Continue by adding the tail fin at the back, making sure it’s broad and triangular. Add the details to the face, such as the patterns and some light spots at the nose area. Finally, color Dory using blue for the body and yellow for the fins.
Conclusion
Great job! You can now draw Dory well. Did you like the drawing you created? I hope you enjoyed the process of drawing and found the Dory drawing tutorial helpful.
Please leave your feedback, questions, and suggestions for new lessons in the comments. I would appreciate hearing which of these two methods works best for you.
Keep practicing your drawing skills, even if your first attempt wasn’t perfect. With each attempt, your drawings will improve. Additionally, be sure to explore other drawing tutorials on my website to continue practicing. Try drawing a koi fish or another animal with the help of my simple tutorials.

