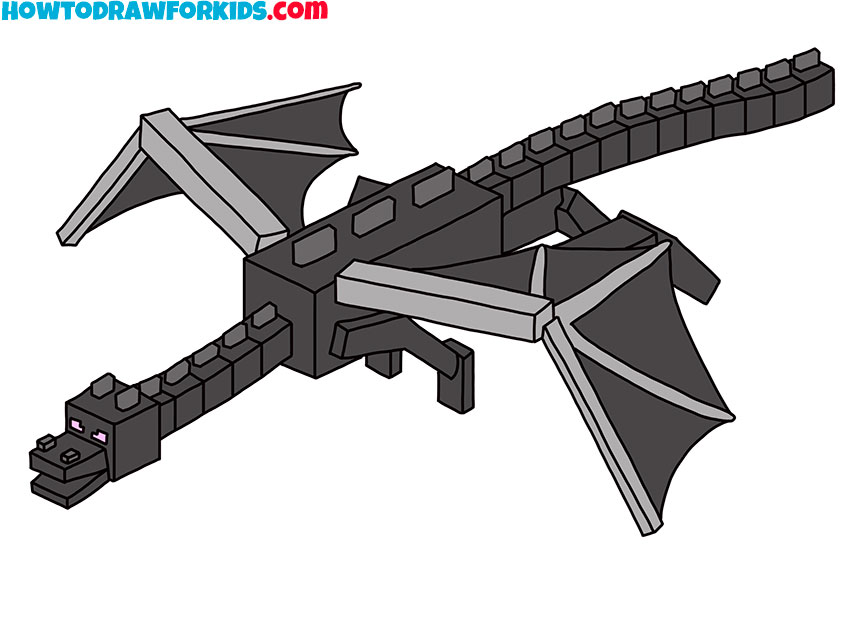
How to Draw Ender Dragon
Our subject is one of the most famous monsters from the Minecraft universe, shown in steps of the tutorial on how to draw Ender Dragon.
How to Draw Ender Dragon: Basic Information
Welcome to my step-by-step journey on how to draw the Ender Dragon, a creature that captivates the imagination of gamers and artists alike. My approach breaks down the dragon’s formidable form, offering a simple yet effective way to depict its grandeur.
The Ender Dragon’s majestic wings and segmented body are the stars of this lesson. I’ve focused on the flow of lines and the balance of proportions to guide you smoothly through each phase. As the artist, you’ll find joy in adding the spikes, the tail, and the dragon’s fearsome head, bringing it to life with every pencil stroke.
To draw the Ender Dragon, patience and attention to detail are your allies. Following my method, you’ll piece together the dragon’s fearsome silhouette and intricate scales. By the end of this lesson, not only will you have learned to sketch the Ender Dragon, but you’ll also carry with you the confidence to tackle even more complex subjects.
Ender Dragon Drawing Tutorial
Materials
- Pencil
- Paper
- Eraser
- Coloring supplies
Time needed: 30 minutes
How to Draw Ender Dragon
- Sketch the open mouth with straight lines.
The Ender Dragon’s design in Minecraft is built from cubes, so begin with the mouth and sketch a couple of small cubes in 3D, using straight lines for the sides. Minecraft characters always keep their geometry clean, so avoid curved lines here.

- Draw the eyes and nostrils of Ender Dragon.
After the mouth cubes are finished, sketch in the dragon’s simple facial features. Draw small square eyes near the front of the head and a couple of rectangular nostrils above the mouth. Use straight edges instead of curves, to stay consistent with the Minecraft style.

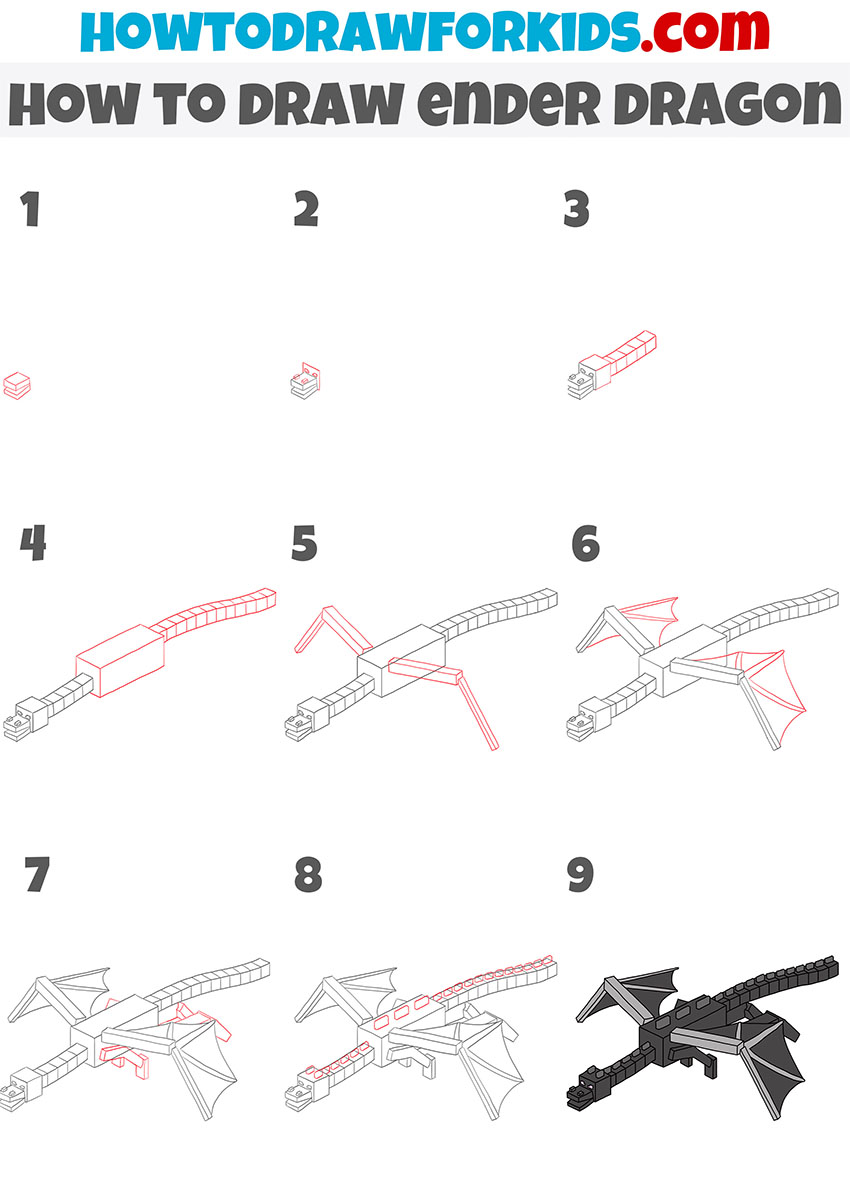
- Build the neck blocks.
After that, draw the back of the head, continuing the cube of the face. To connect the head to the body, sketch a series of cubes extending backward to form the dragon’s neck. Start with one attached to the head, then add several more in a straight line. In Minecraft drawing, consistency is very important: the edges of each cube should stay parallel so the neck doesn’t look twisted.
- Draw the body and tail blocks.
At the end of the neck, draw a large rectangular block for Ender Dragon’s torso. This shape should be much wider than the cubes used for the neck and head, since it represents the dragon’s main body mass. Use long, straight lines to create a solid, boxy shape. After the torso, draw the tail from the back of the body, continuing the same cube-by-cube construction used for the neck.

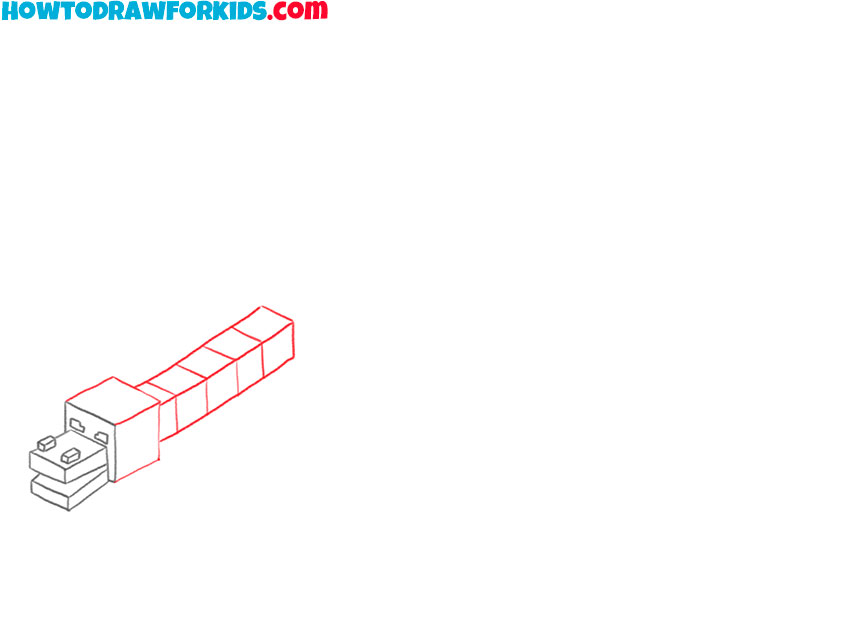
- Sketch the long wing beams.
Now it’s time to draw Ender Dragon’s wings, starting with the long rectangular supports. Draw two diagonal blocky shapes on the sides of the body. Each should look like a long stick made of rectangular segments. Try to keep both wings symmetrical.
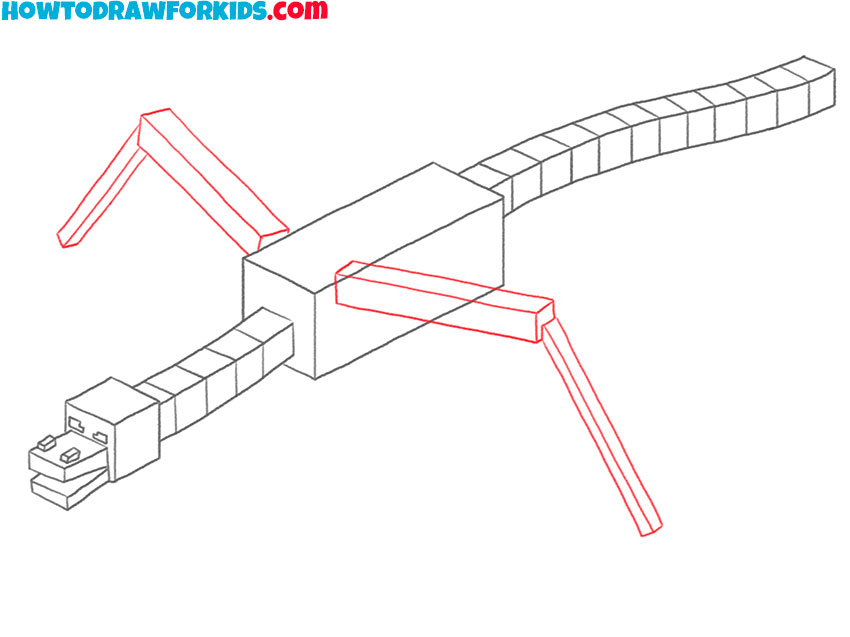
- Add the triangular wing membranes.
After drawing the supports, draw the wing membranes by connecting the beams with long straight lines, forming large triangular shapes. These areas should look like stretched fabric but remain geometric, fitting the Minecraft block style.

- Sketch the front and rear legs.
Next, add the dragon’s legs using rectangular block forms attached to the underside of the body. Each leg should end in simple cube-like feet. Be careful not to make them too detailed, because Minecraft creatures are defined by their blockiness and simplicity.
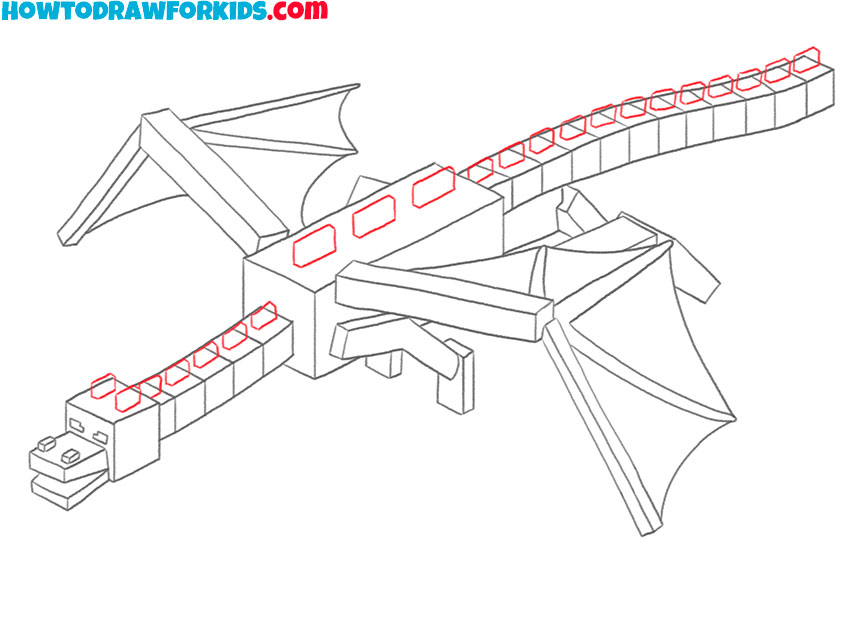
- Sketch the rectangular scales.
To complete the Dragon’s main body parts, draw small rectangular plates running along the dragon’s back and tail. These look like scales or spines but are still square. You can also add lines to illustrate the divisions between body blocks.
- Add black and purple shades.
In Minecraft, the Ender Dragon is almost entirely dark, so coloring is about using the shapes of the same color. For the eyes, choose a bright violet or purple, this is the only part of the dragon that glows, so the contrast against the black body is what gives it its intimidating look. To make your Ender Dragon look more dimensional, you can shade the side edges of the cubes darker than the top surfaces.

Additional Content
To enrich your experience and ensure you have all the tools you need to succeed, I’ve carefully prepared a free PDF file to accompany our Ender Dragon drawing lesson. This file is a succinct version of our full tutorial, capturing the essential steps and tips in a format that’s perfect for on-the-go learning.
Whether you find yourself without internet connectivity or simply prefer having a physical copy to reference, this downloadable guide is your ticket to artistic progress.
Alternative Drawing Technique
Recognizing the importance of practice in the evolution of your artistic abilities, I’ve created an alternate technique for drawing the Ender Dragon. This new approach invites you to see the creature from a different perspective and to tackle its intricate details with a fresh set of eyes.
The goal is to offer you a path that not only broadens your skill set but also instills a deeper confidence in your ability to capture the Ender Dragon’s might and mystique.
Drawing the Ender Dragon Flying in a Different Direction
The alternative method focuses on a more detailed assembly of the Ender Dragon’s body parts, reflecting its flight in a different direction. Unlike the first method, where the dragon’s form is outlined in broader strokes, this approach builds the dragon piece by piece.
Starting with the head, we move on to construct the body with precise geometric shapes, ensuring each segment – from the neck to the tail – is proportionally accurate and detailed. The wings are sketched with particular attention to the individual wing bones, providing a clearer structure before fleshing them out.

Conclusion
With the flourish of your final stroke, the Ender Dragon soars off the page, and into the annals of our collective creativity. But dear artists, this is merely a single shade in the spectrum of our artistic journey. My digital atelier is alive with an array of lessons, from the tropical twist of an pineapple or the soft serenade of a flower bouquet.
Yearn for more? Join our circle on social media, where the muse of inspiration visits daily. Your visions and wishes are the seeds from which our next lessons grow – share them in the comments, and let’s cultivate a garden of artistic wonders together.