How to Draw Fairy Wings
If you really love fairies and other magical creatures, then this tutorial on how to draw fairy wings is created especially for you.
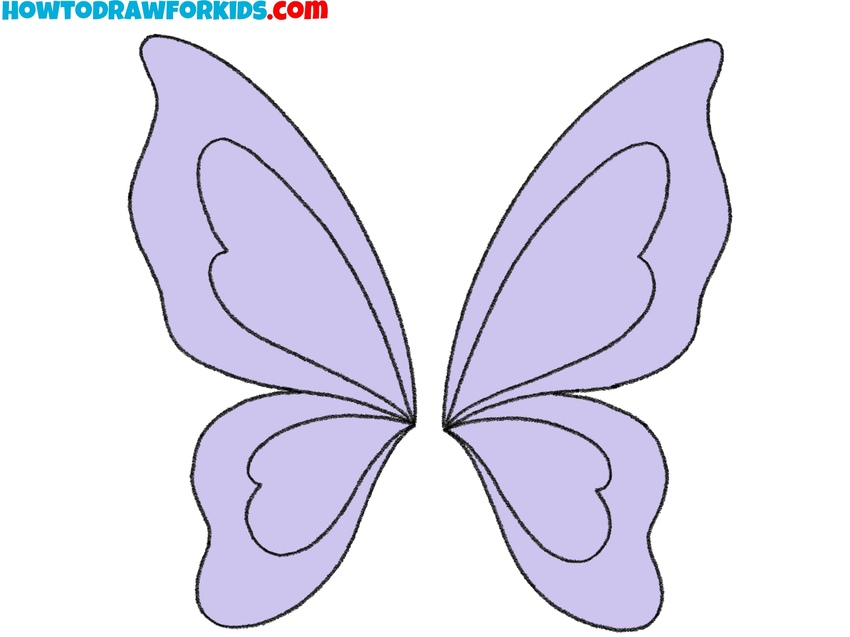

I am glad to offer you another interesting lesson in which you will learn how to draw fairy wings. A fairy is a mythical creature that has the ability to perform miracles. Usually, a fairy is represented as a small slender girl who has wings and thus easily moves in space.
The wings are very thin, beautiful, and look like butterfly wings. The wings are made up of two parts that are identical in shape. The surface of the wings has a beautiful pattern in the form of numerous veins.
This lesson will be useful and exciting for you, because it’s a very basic skill for drawing a fairy. I hope that you can easily cope with this task and be satisfied with the result.
In this lesson, you must pay attention and make sure that both wings are the same size and shape. Symmetry is the most important thing. Be careful while coloring the drawing. Try to get a smooth transition from one color to another.
Materials
- Pencil
- Paper
- Eraser
- Coloring supplies
Time needed: 15 minutes
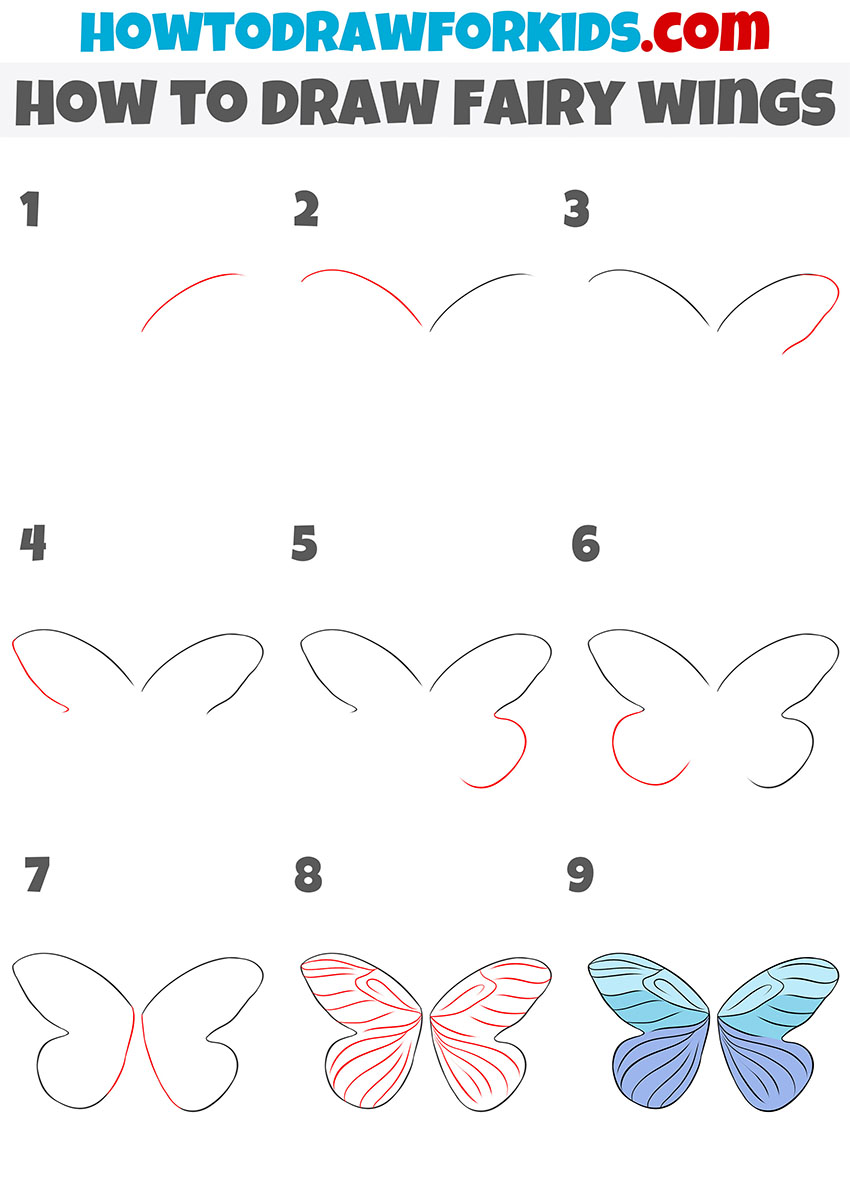
How to draw a fairy step by step
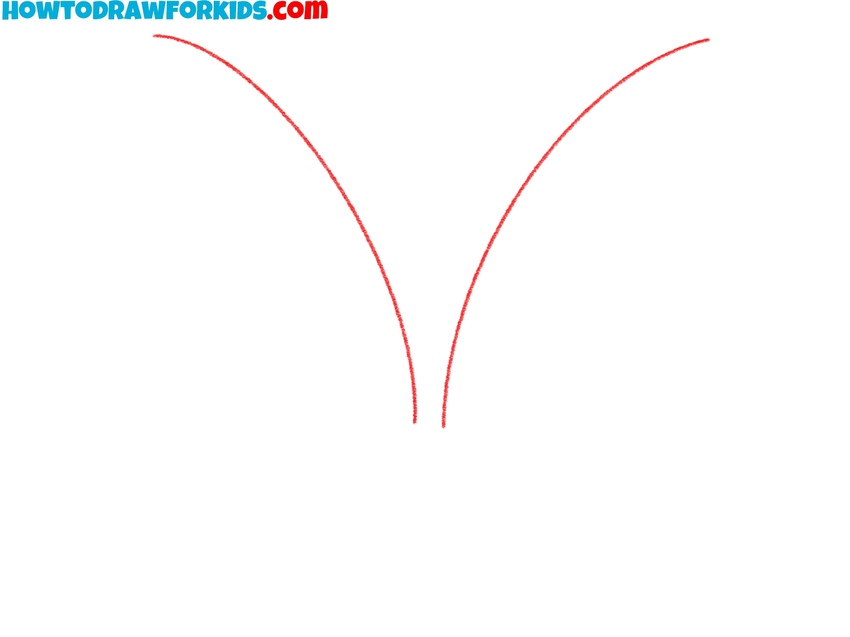
- Sketch the upper arcs of the wings.
Begin by sketching two smooth, curved lines that spread outward from a single area near the bottom center. These will serve as the upper edges of the fairy wings and help establish symmetry. Each line should rise diagonally and bend gently outward, forming a soft V-shape. Keep both sides as even as possible.
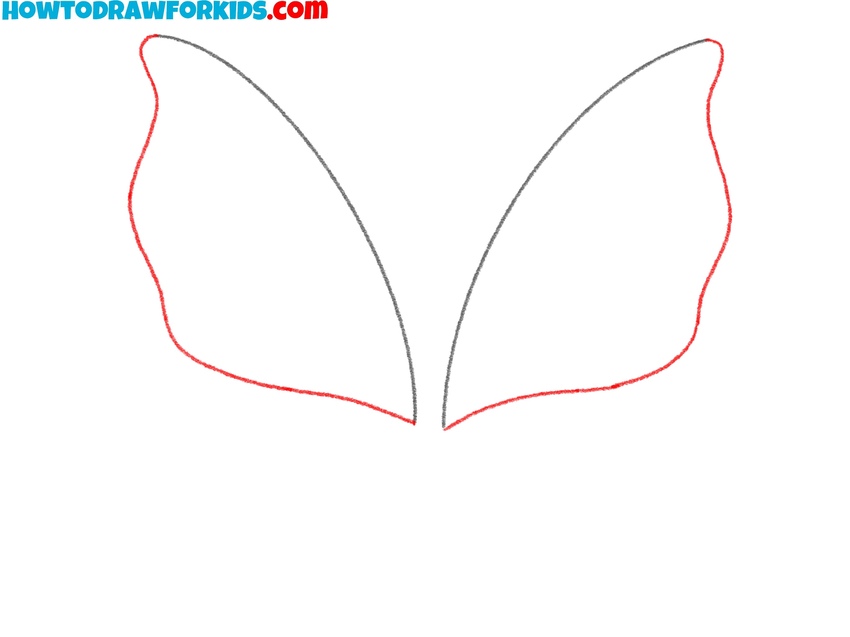
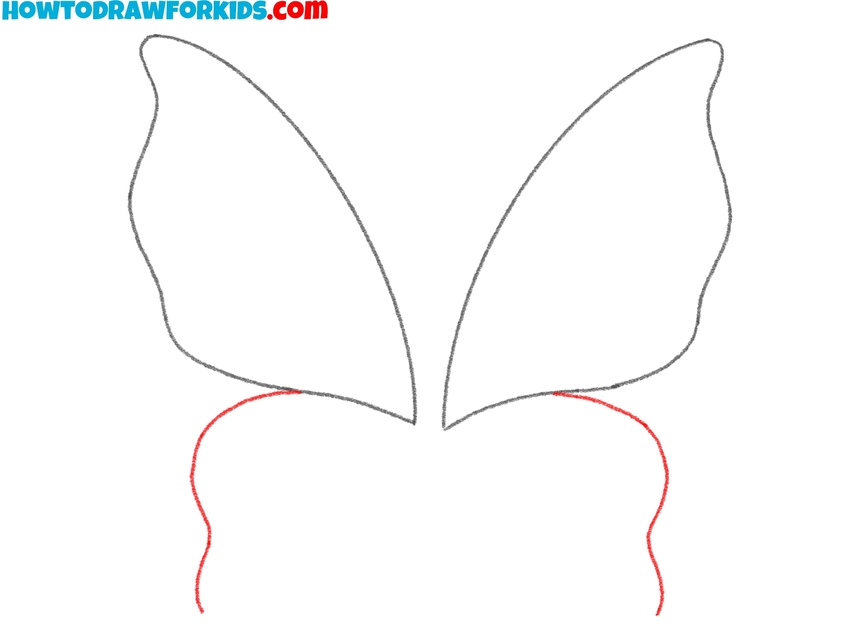
- Draw the bottom edges upper fairy wings.
On each side, sketch a long, flowing bottom contour that starts from the top of the lines from the previous step and moves back to the central area. The upper wings should resemble elongated shapes with wavy edges. Make sure both sides are symmetrical.
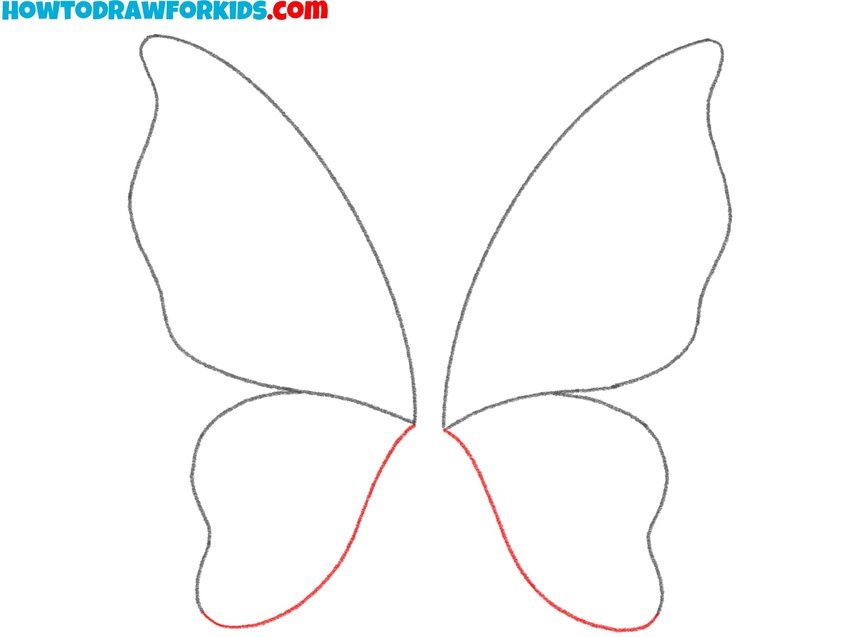
- Start sketching the lower wing outlines.
Now draw the bottom pair of fairy wings extending below the upper ones. From the same central point where the upper wings meet, start sketching shorter, rounded shapes. The lower wings should appear smaller compared to the top ones. Ensure that both sides mirror each other in height and width.
- Complete drawing the lower fairy wings.
Connect the edges of the lower wings at a single central point, where they would attach to the fairy’s back. Smooth out any uneven curves. Strengthen the overall outline by checking alignment and symmetry. You can lightly adjust line shapes of the fairy wings before moving to the next step.
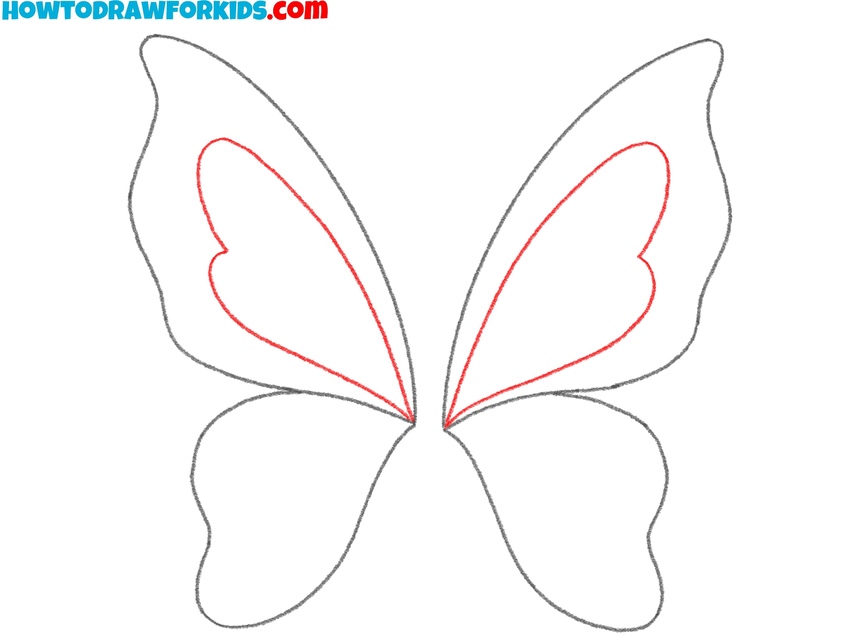
- Add inner patterns to upper wings.
Inside each upper wing, draw smaller shapes that follow the outer contour, forming an elegant inner layer. Start from the central point and create a curved shape that mirrors the outer edge, ending near the wing tip. The inner shapes can be heart-like or petal-shaped to evoke a fantasy or butterfly-inspired look.
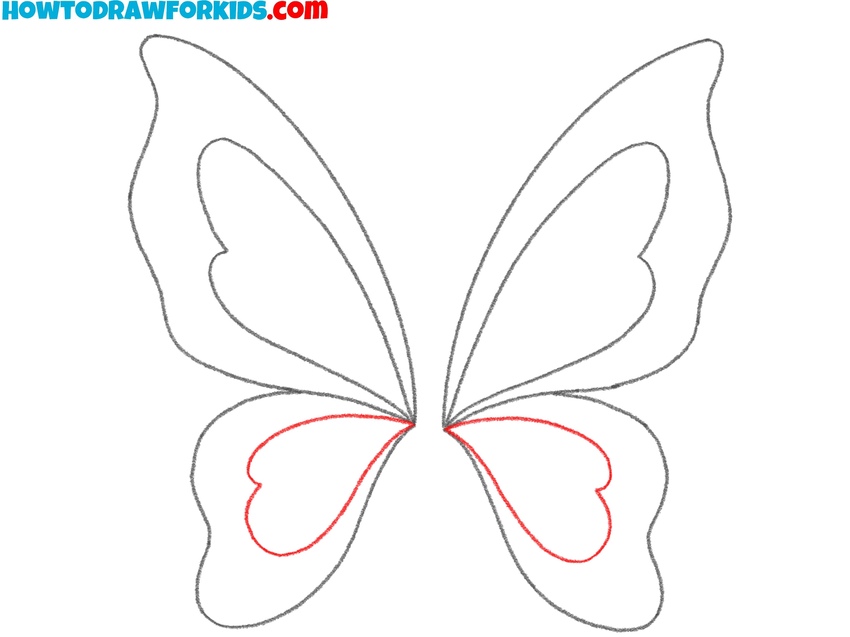
- Sketch the lower wing decorations.
Add matching decorations to the lower wings to complete the pattern. Inside each lower wing, sketch a smaller rounded shape that echoes the outer curve, forming a design similar to the upper sections. Keep both sides identical in shape and proportion.
- Apply pastel tones to the upper and lower parts.
Finish by filling the wings with soft, harmonious colors, using shades of purple, pink, or blue for a delicate fairy-like effect. Apply a lighter tone for the inner sections to create a translucent look, and keep the outer edges slightly darker. But you can use your own palette and paint the fairy wing in pink, yellow, or any other color.

Simple Fairy Wings Drawing Tutorial
To sketch fairy wings in this style, keep the drawing symmetrical and light, as precision in both halves is really important to a convincing result. Sketch the upper curved shapes first, forming the smooth outline of the top wings.
Add the lower parts to complete the overall form, trying to make the curves natural and flowing. Connect the wings along the centerline so the shape looks unified.
Next, illustrate the inner decorative lines to show the wing texture. These should follow the curvature of the main form and gradually taper toward the base.
Avoid heavy outlines; instead, use clean and even strokes. Finally, apply gentle blue and purple tones to represent transparency and delicate structure typical of many fairy wing illustrations.