How to Draw Garlic
Personally, garlic is one of my favorite cooking products, and I hope it is for you too, because here we will learn how to draw garlic.
How to Draw Garlic: Introduction
So I am glad to offer you a new tutorial on how to draw garlic. It is another food drawing lesson that will be very useful to you.
Garlic is a plant in the onion family that’s grown for its distinctive taste and health benefits. It is closely related to onions, shallots, and leeks. Garlic supplements help prevent and reduce the severity of common illnesses like the flu and common cold. I think this information is useful for you and now you know that garlic is very good for our health.
Even if you have very little drawing experience, you can still do it easily, because I have created this drawing lesson especially for beginner artists and kids. So, you can start a step-by-step drawing of garlic right now!
Garlic Drawing Tutorial
Materials
- Pencil
- Paper
- Eraser
- Coloring supplies
Time needed: 20 minutes
How to Draw Garlic
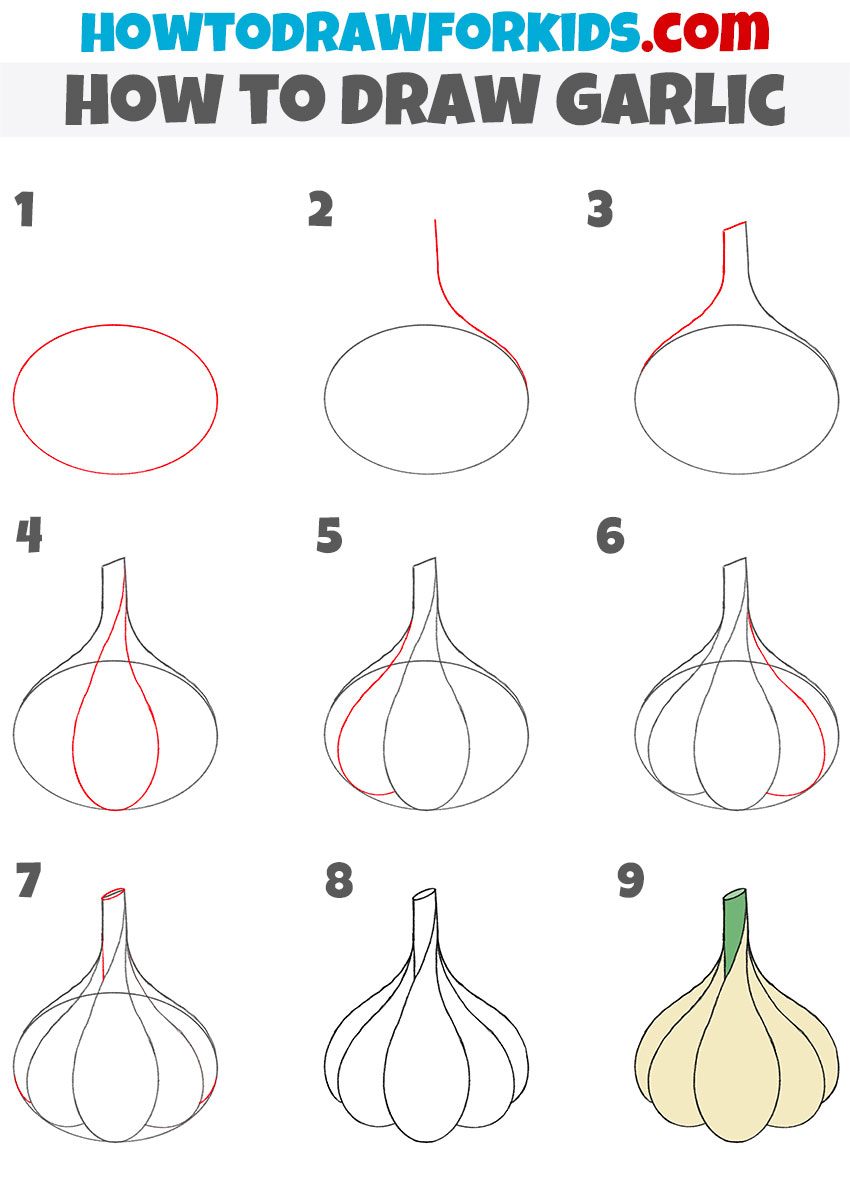
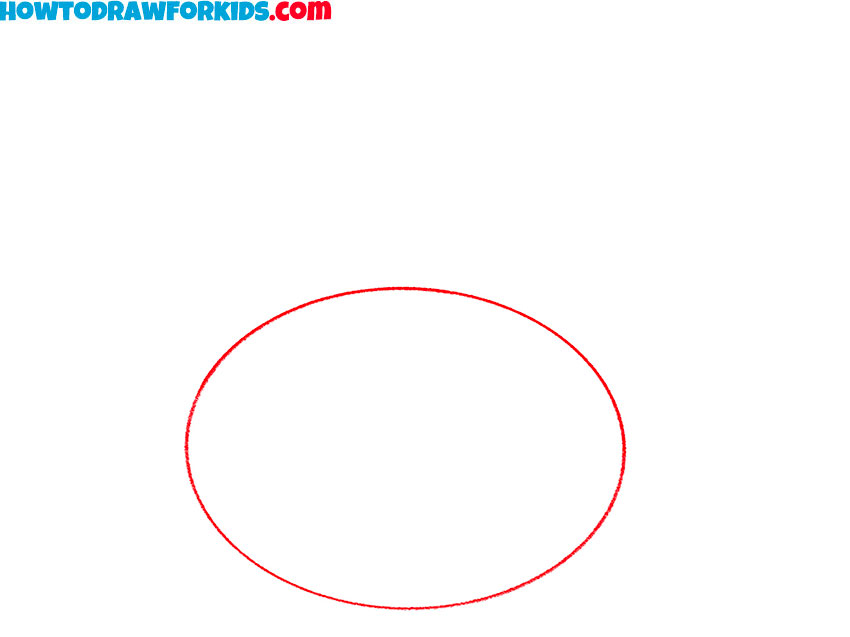
- Outline the bulb base.
To draw a believable and convincing garlic drawing, sketch a simple oval at first. This is the main part of the garlic bulb. Don’t worry about symmetry at this stage. Garlic, like many vegetables, is never perfectly shaped, so a slightly uneven oval will actually make your garlic drawing feel more natural.
- Sketch the garlic neck line.
From the top edge of the oval, extend a curved line upward. This line will become part of the stem where the garlic leaves were once attached. Sketch it in one motion if possible rather than building it up with tiny strokes, as that can make the line look rigid.

- Finish the stalk shape.
Now, add the other side of the stem by drawing a second curved line parallel to the first. Join it at the top with a short line. You can sketch lightly at first, to have an opportunity to adjust the width later. Garlic stems often dry unevenly, so adding a slight tilt or variation will make your sketch feel more authentic.

- Draw the central garlic clove.
Inside the bulb, draw a long teardrop-shaped curve that stretches from the bottom of the oval up toward the base of the stem. This represents the central garlic clove. You can think of this shape as a flame or raindrop, it starts wide and narrows upward.

- Draw another garlic clove.
Draw another teardrop-like shape on the side of the bulb, overlapping slightly with the central section. This marks the second garlic clove. Garlic bulbs are made up of many overlapping cloves, so it’s important to build them one at a time.

- Detail the right side of the bulb.
On the other side of the bulb, sketch another clove shape. Each clove follows the same basic teardrop principle, but small differences make them realistic. Don’t be afraid if your cloves aren’t symmetrical; in fact, natural garlic bulbs are usually lopsided.

- Complete the bulb form.
Now complete the bulb by adding the last visible cloves on each side. Use the same curved teardrop forms but adjust their size and angle so they look like they wrap around the bulb. Some cloves are broad and others are narrower. Don’t trace perfectly mirrored lines, organic forms are always irregular.

- Clean up the sketch and darken the outlines.
Darken the final outlines and erase unnecessary construction lines from your garlic Don’t make the lines overly heavy, garlic has a delicate surface, so softer and smoother outlines often look better. This is also a good moment to adjust any proportions.

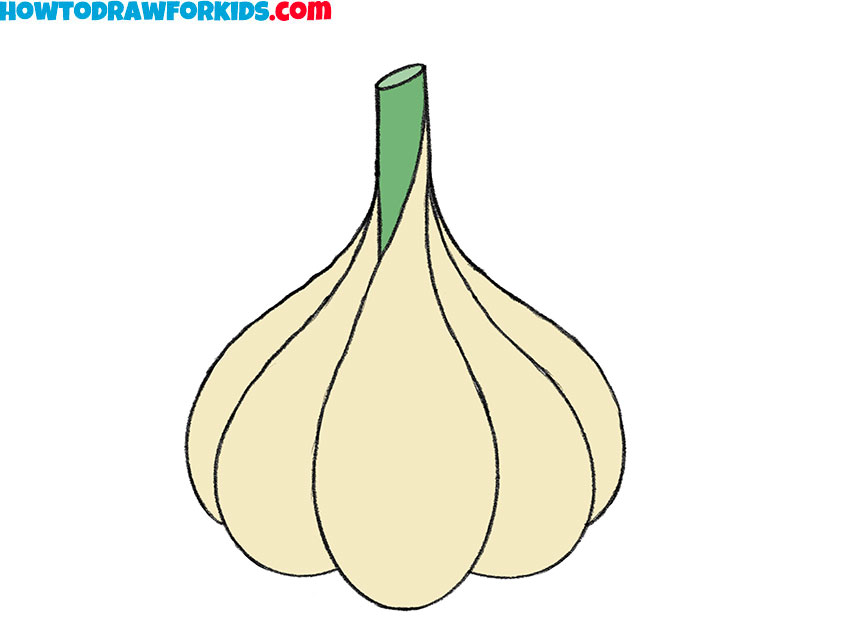
- Add muted and delicate colors.
The bulb should have soft beige or off-white areas. For the stem, keep a muted green. Garlic has a very delicate surface, so lighter tones generally look better than heavy or saturated ones. Adding faint separations between the cloves can also help convey their structure without going into too much detail.

Additional Content
I hope you enjoyed this lesson! You can download a short version of it as an PDF to view it anytime you like.