How to Draw Roadrunner
In this lesson, you will learn how to draw roadrunner step by step. This simple drawing lesson consists of nine steps.
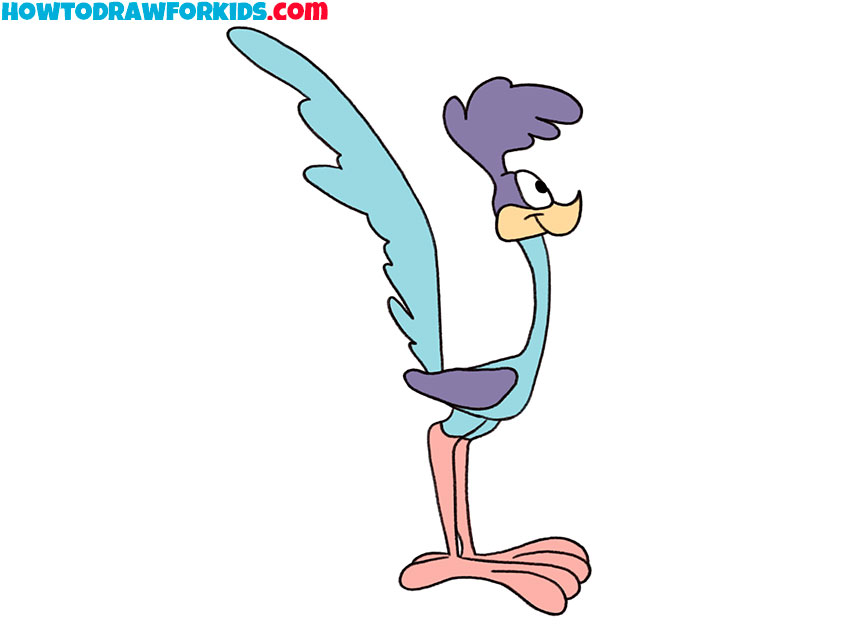
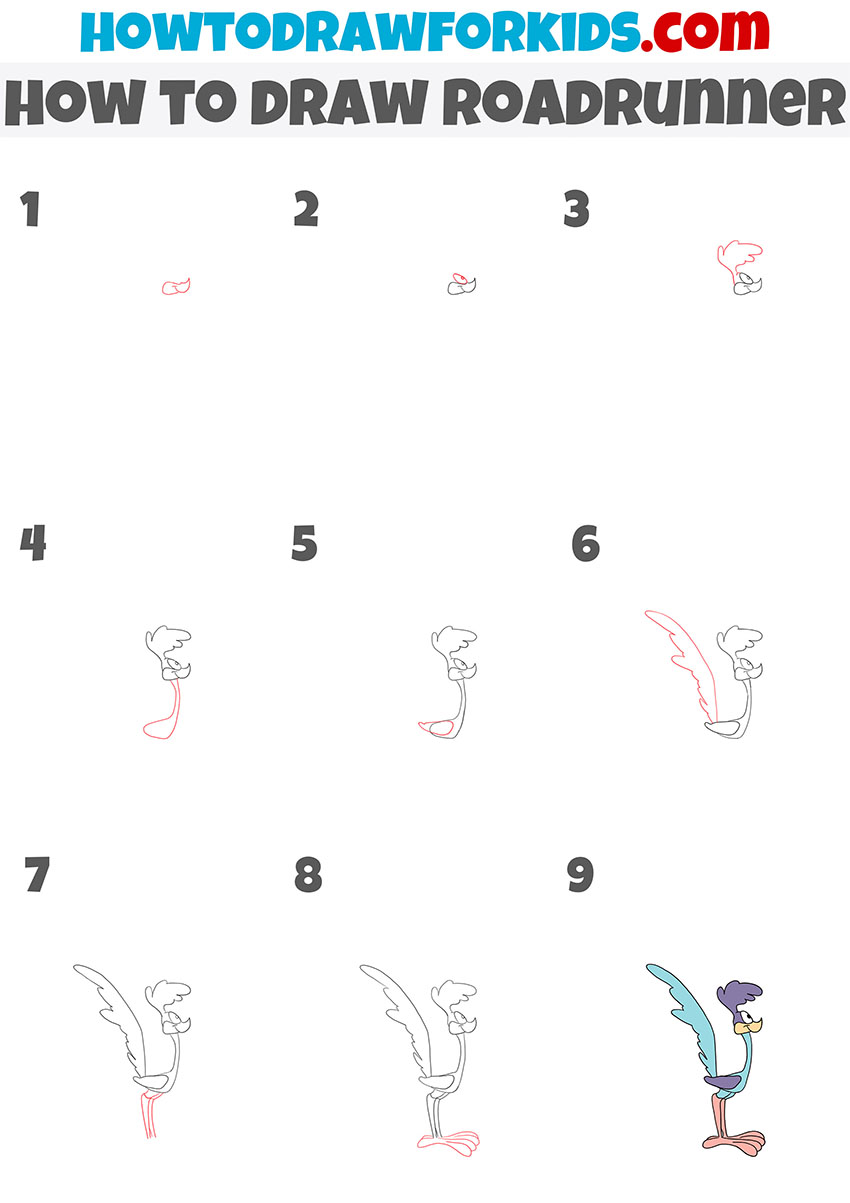
So, I am glad to bring to your attention this fascinating drawing lesson, in which I will tell you how to draw roadrunner step by step.
This lesson is about drawing a cartoon character. I think you have seen this funny character more than once, and now with the help of this instruction you will learn how to draw it yourself.
The roadrunner is one of the characters in the Looney Tunes and Merrie Melodies animated short series. The roadrunner is a zoomorphic ground cuckoo, it looks like a tall bird with a long body and a sky-blue tail, outstretched legs, a yellow beak and a blue feather.
In order to start this work, you should prepare the art supplies that you will use for this lesson. If you are ready to get started, then I wish you good luck in the process of drawing.
Roadrunner Drawing Tutorial
Materials
- Pencil
- Paper
- Eraser
- Coloring supplies
Time needed: 30 minutes
How to Draw Roadrunner
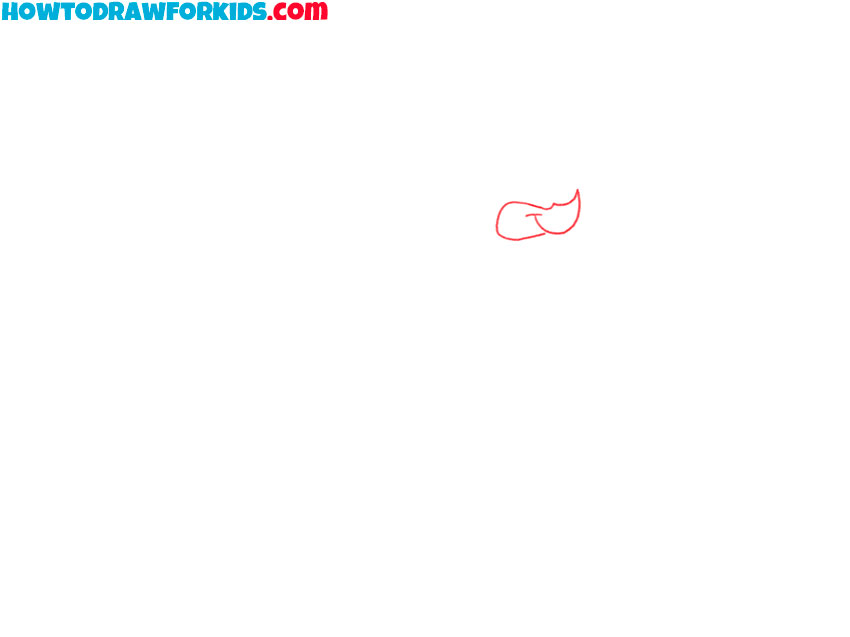
- Draw the bottom of the character’s head.
This detail will look small. Use curved lines to depict this.
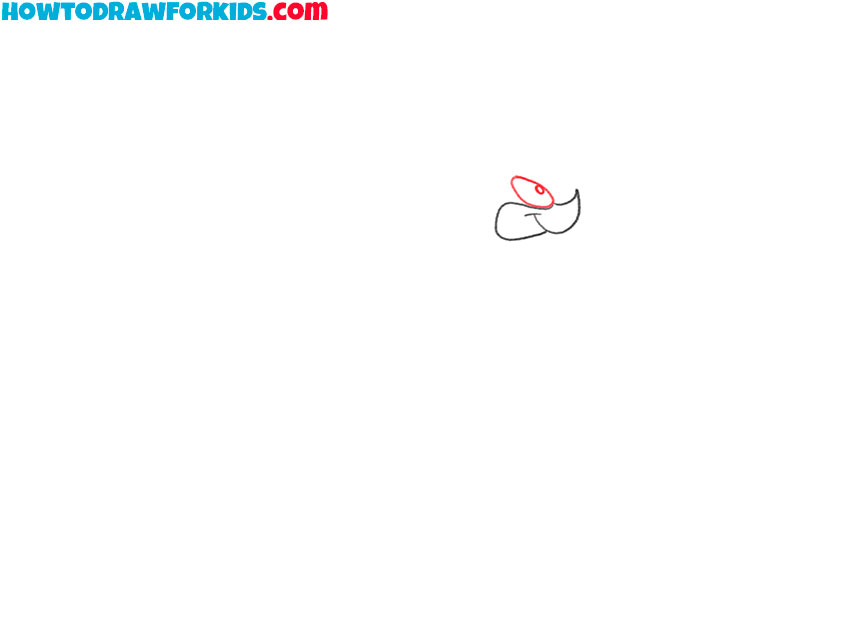
- Add the character’s eye.
Above the previously drawn elements, draw an oval, add a smaller oval inside it.
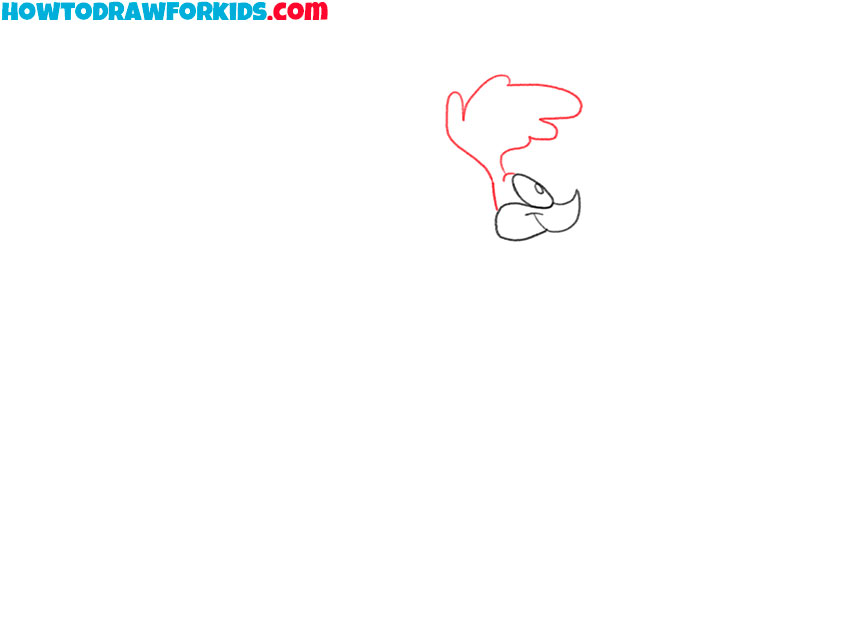
- Depict the top of the head and crest.
Use rounded and curved lines to add elements as shown.
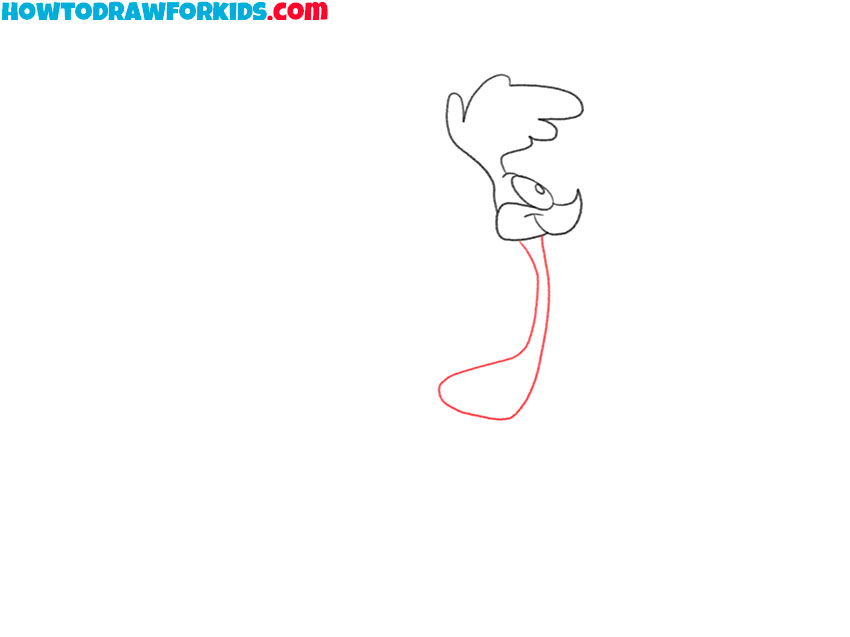
- Sketch out the neck and torso of the roadrunner.
Below the previously drawn head, draw the long narrow neck, as well as the small torso.
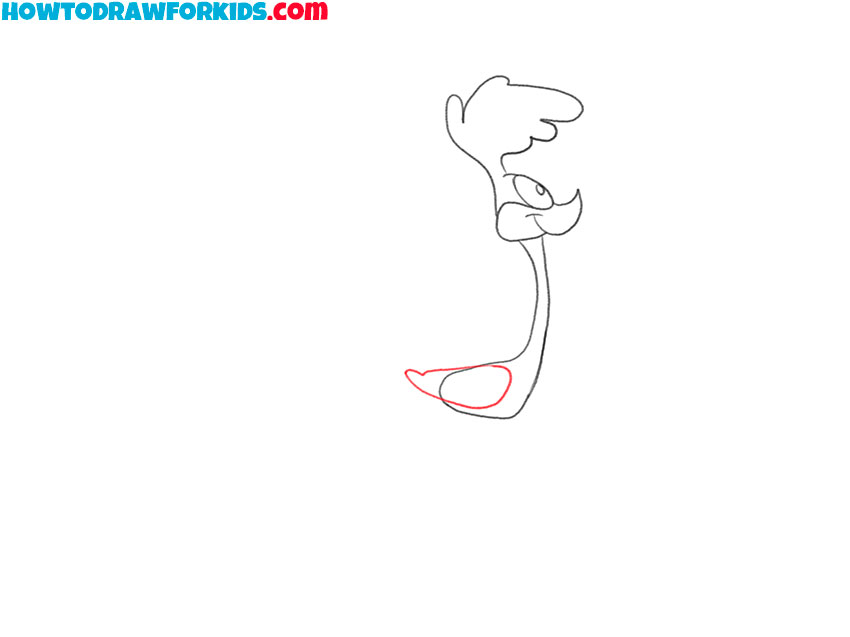
- Draw the wing.
Continue drawing the previously drawn torso by adding the wing using curved lines.
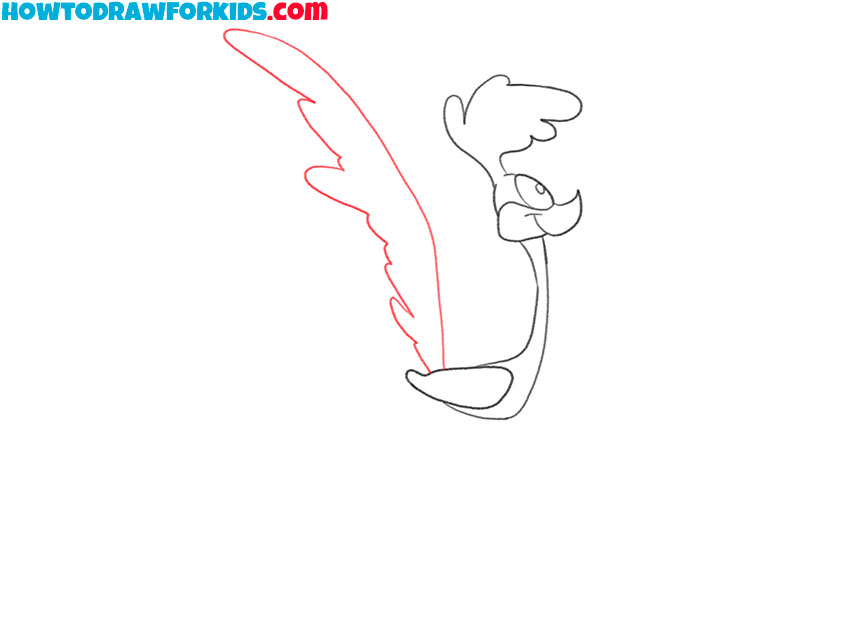
- Depict the tail of the roadrunner.
Now add the long and high tail using arcs and rounded lines of different sizes.
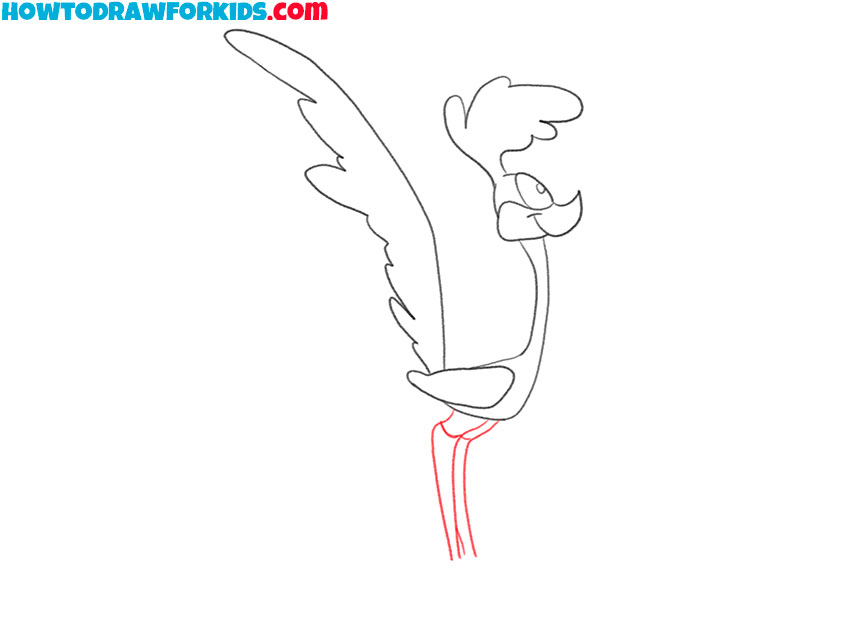
- Add the legs of the roadrunner.
Draw two legs below the previously drawn torso. The other partially covers one leg.
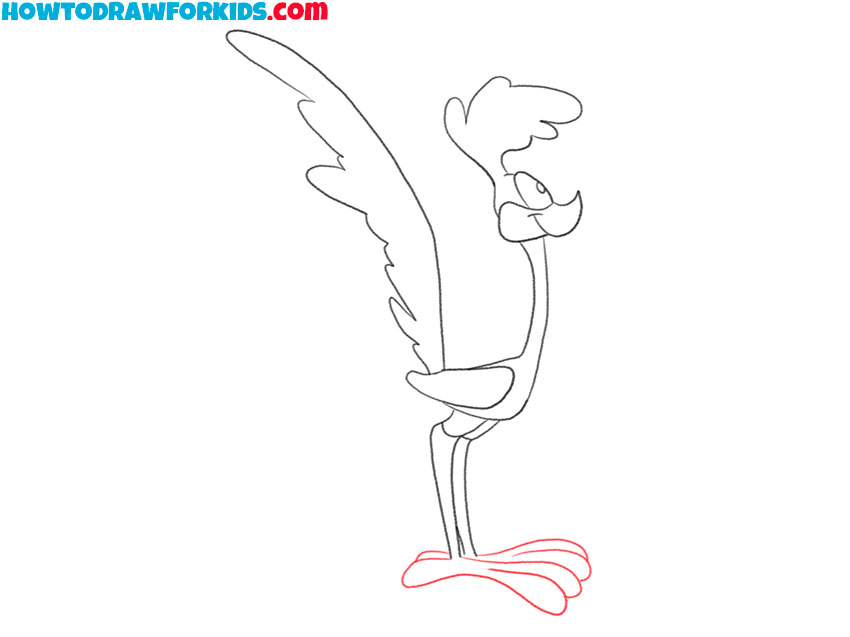
- Draw the feet.
At the bottom of the previously drawn legs, depict large feet using rounded lines.
- Color the drawing.
To color the character, use blue, purple, yellow, pink and black colors.
You can also offer your ideas for future drawing lessons. Download the PDF file, which contains a short version of this lesson, as well as additional useful materials for you.