How to Draw Rudolph Face
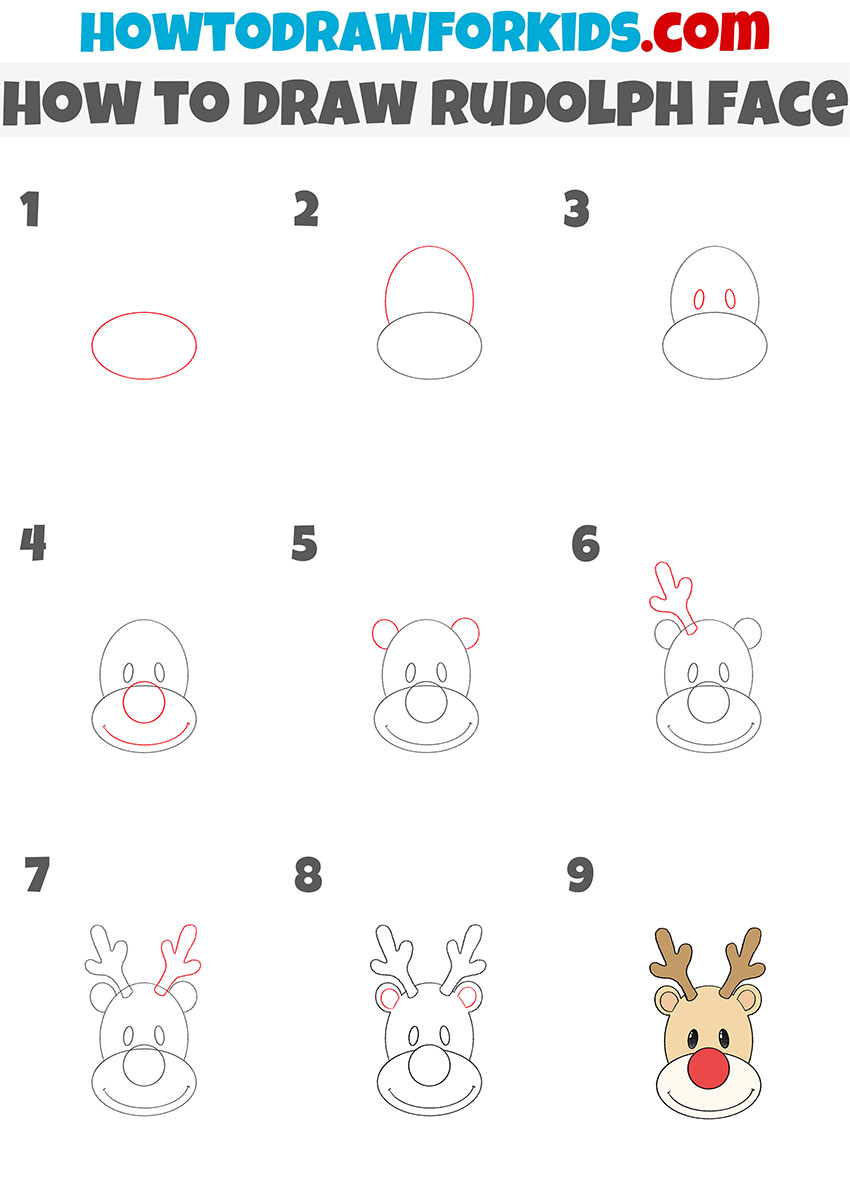
Today in this step by step tutorial you will learn how to draw Rudolph face. This instruction contains only nine simple steps.
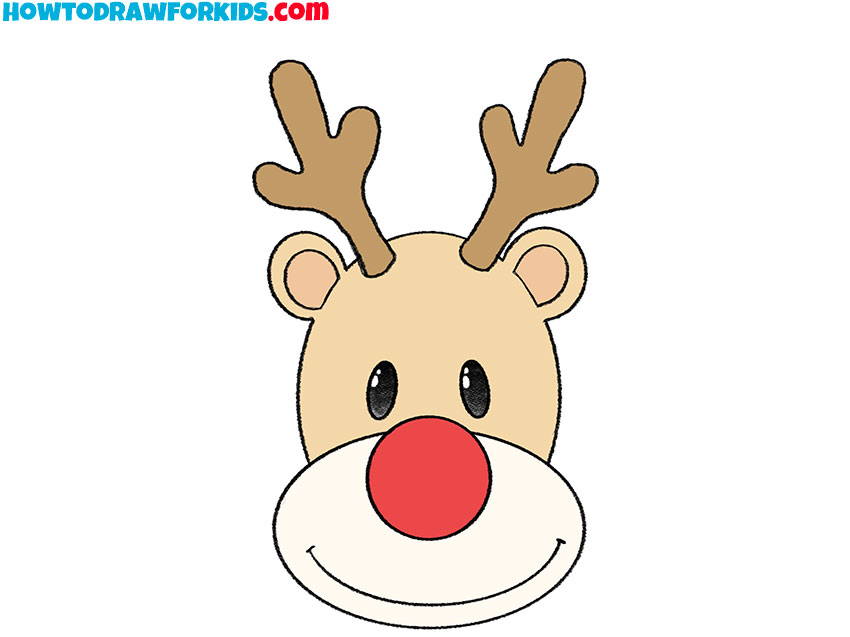
In this tutorial, I will show you how to draw Rudolph face. This tutorial is made especially for beginners and children and contains simple lines and a few elements that you can easily repeat.
Rudolph is a young reindeer. This is a very popular character that we know from literary works and cartoons. The image of Rudolph the reindeer is always associated with Christmas. I think that during the lesson you will again feel the atmosphere of the holiday.
The main difference between Rudolph and other deer is his big red nose. You can see this feature in the figure. Thanks to the step-by-step guide, you will easily draw Rudolph face and gain useful skills.
Materials
- Pencil
- Paper
- Eraser
- Coloring supplies
Time needed: 30 minutes
How to Draw Rudolph Face
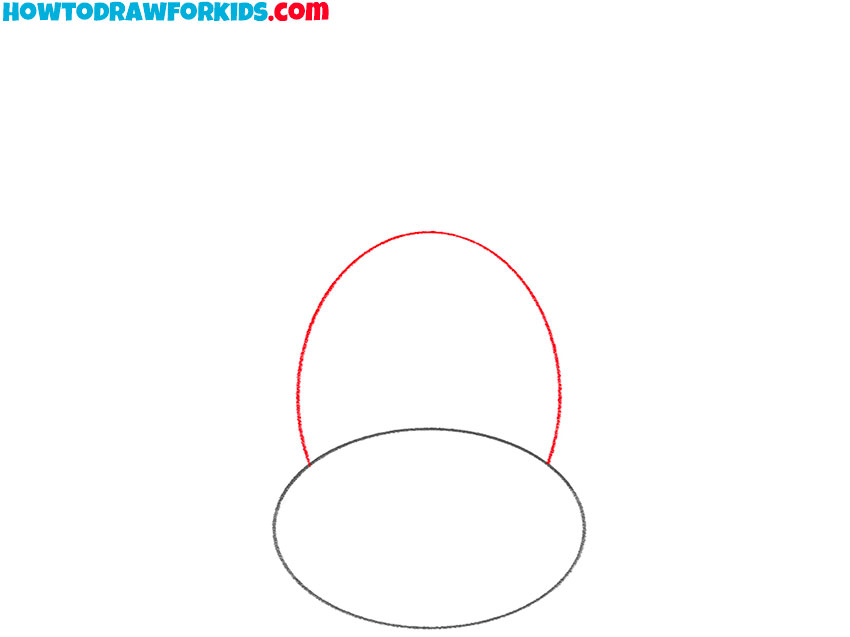
- Draw the front of the muzzle.
To do this, you need to draw an even oval.

- Add the top of the muzzle.
Above the oval, draw a smooth rounded line, as shown in the example.
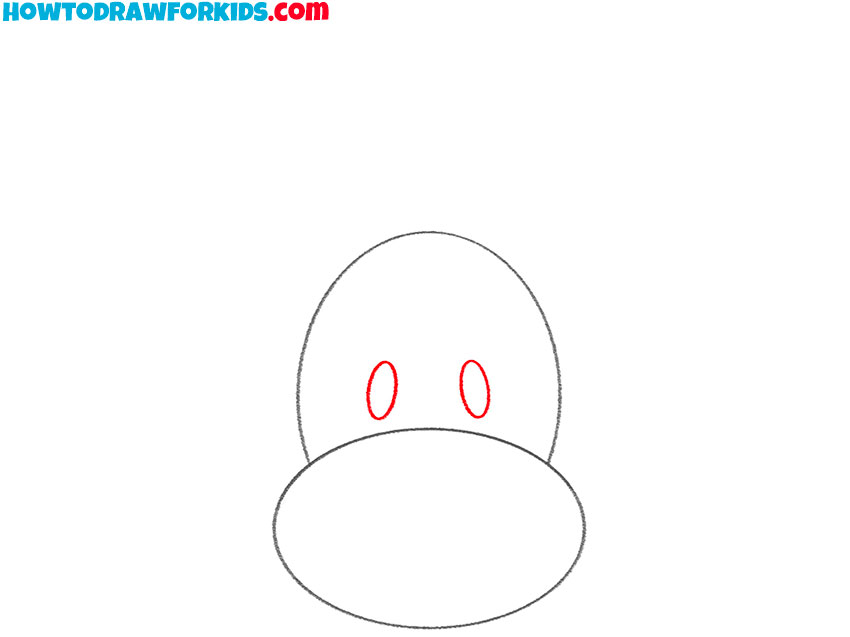
- Sketch out the eyes.
Depict two small ovals.
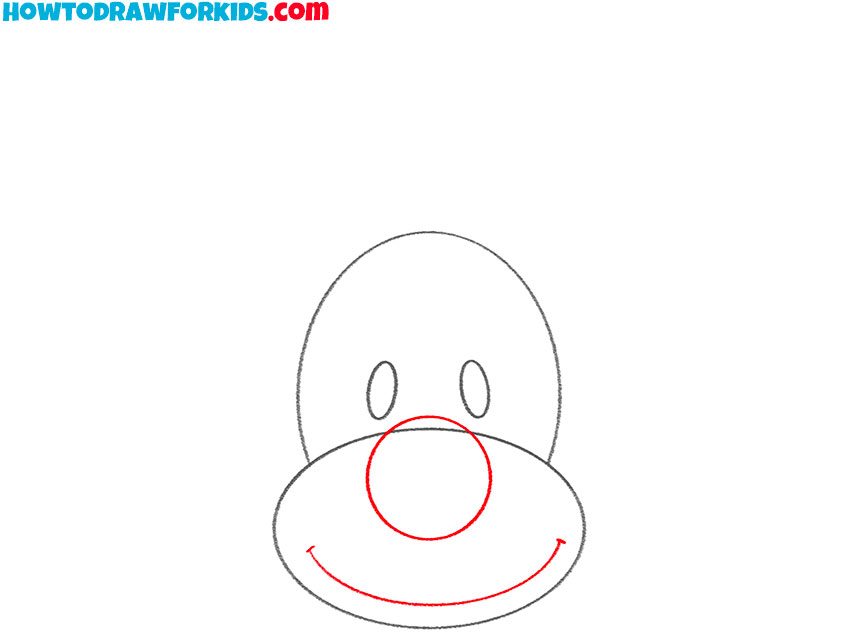
- Depict the nose and mouth.
The nose is large and round in shape. Add a smooth rounded line below – this will be the mouth.
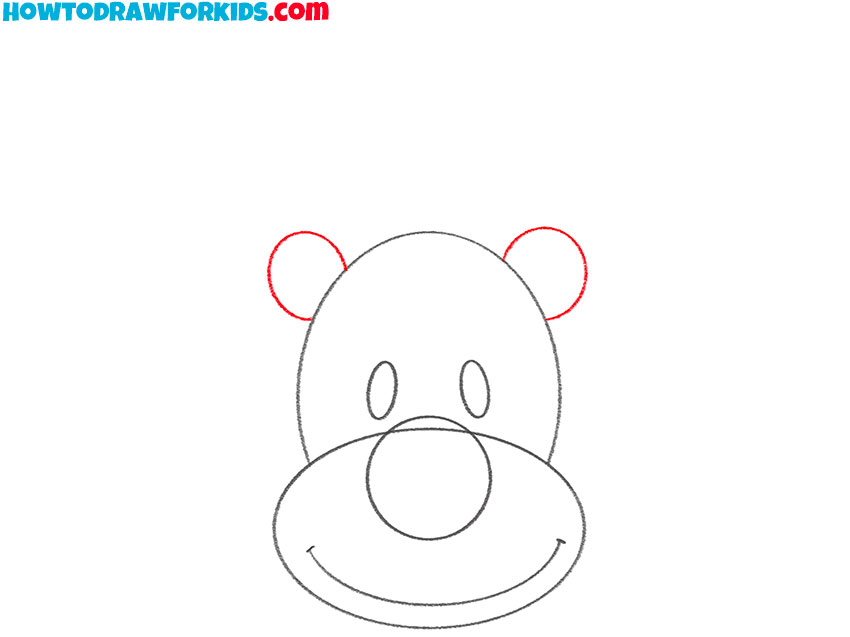
- Draw the ears.
On each side of the head, draw small semicircular lines.
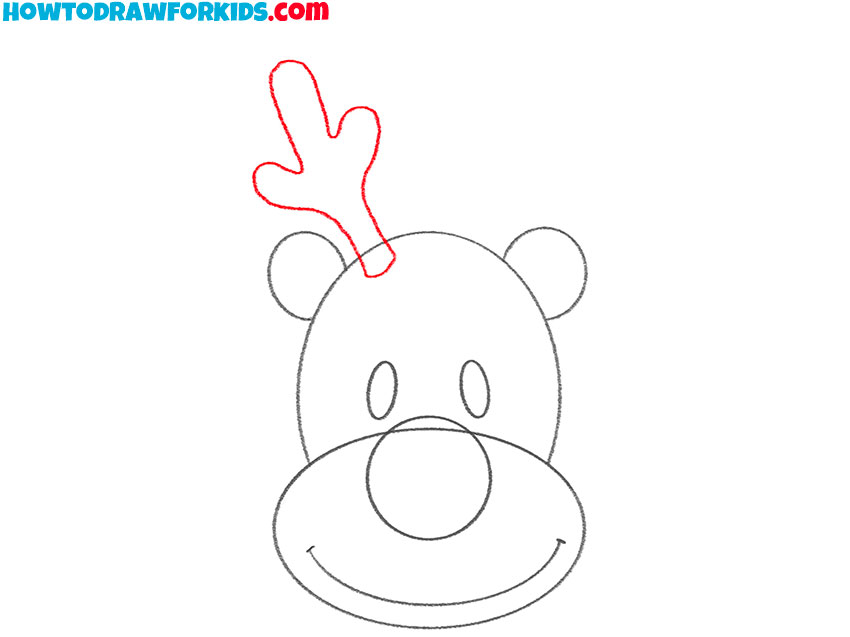
- Depict one horn.
On the head, draw one horn, which has a small base and branches into three parts.
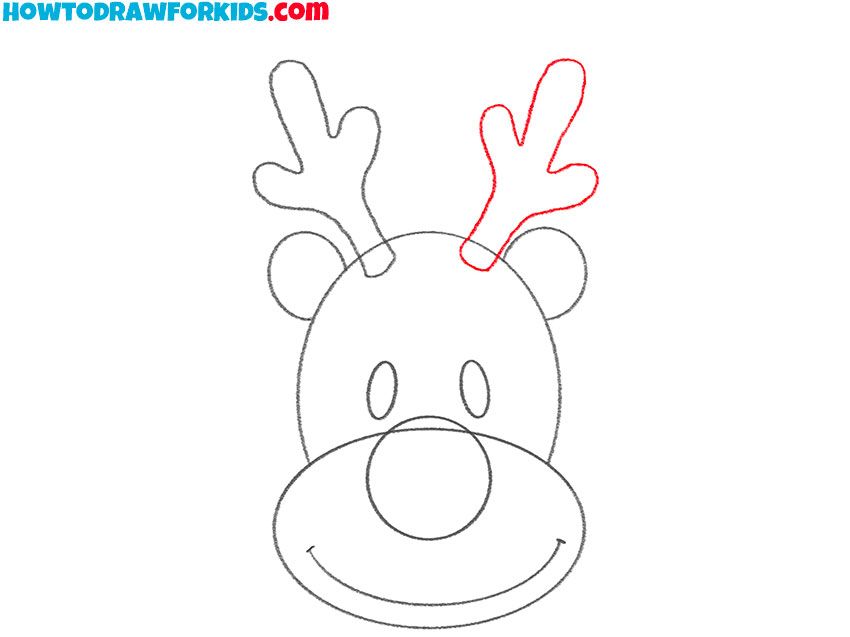
- Add the second horn.
Repeat the previous step and draw the same horn on the other side.
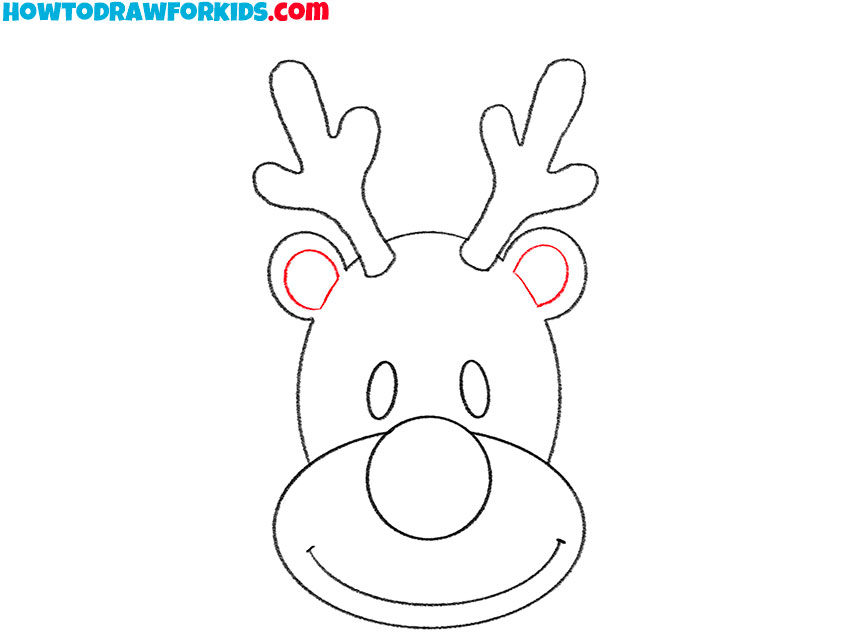
- Add details.
Sketch out the inside of the ear and correct the inaccuracies.
- Color the Rudolph face.
Choose from beige, red, brown, and black.

Especially for your convenience, I have prepared a short version of the lesson in PDF format. Save this file to always have access to the lesson.

