How to Draw Scenery
This tutorial explains how to draw scenery using two methods and shows that it can be done simply and clearly.

How to Draw Scenery: Introduction
In this tutorial, I will show how to draw scenery. I am sure that you will follow this lesson with great interest and will gain useful skills that you can apply in the future.
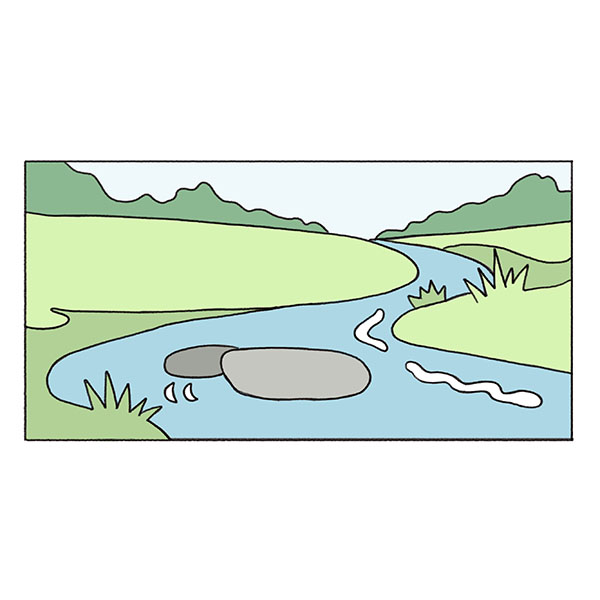
The scenery is a drawing that depicts nature. The scenery can be very different. It can be a forest, a meadow, a river or lake bank, mountains, and so on. Any beginner and experienced artist can paint scenery. This tutorial shows the easiest way to draw scenery because this tutorial is intended for children and aspiring artists. The lesson consists of several steps that you can easily repeat.
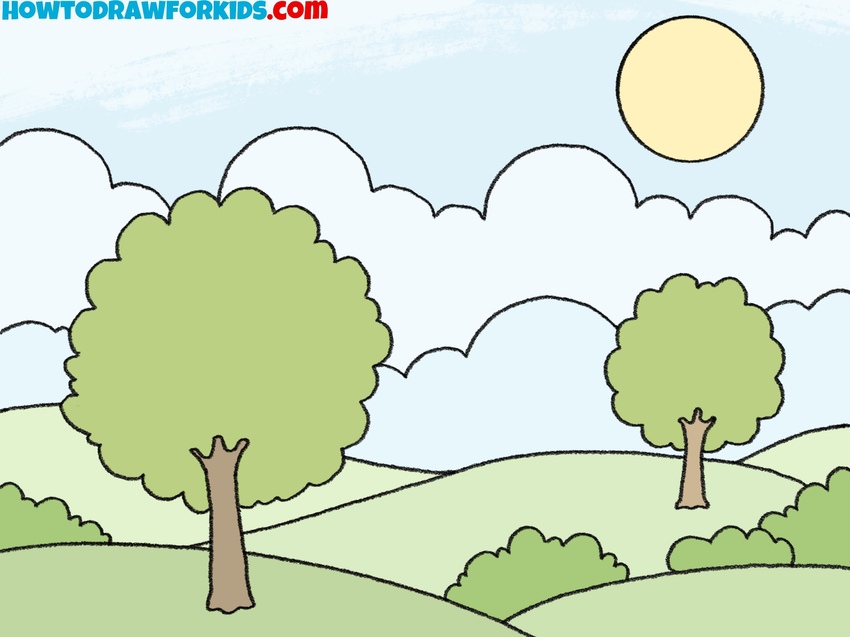
In the picture, you can see some simple objects – meadow, bushes, fruit trees, clouds, sun. Everything is very simple, at the same time very beautiful. Such a drawing may well decorate the interior of your room. Before we begin, I would like to point out that this tutorial is a follow-up to the landscape drawing tutorial I posted earlier. Here I want to cover techniques and details that didn’t fit into the landscape tutorial.
Scenery Drawing Tutorial
Materials
- Pencil
- Paper
- Eraser
- Coloring supplies
Easy Scenery Drawing Tutorial
Time needed: 30 minutes
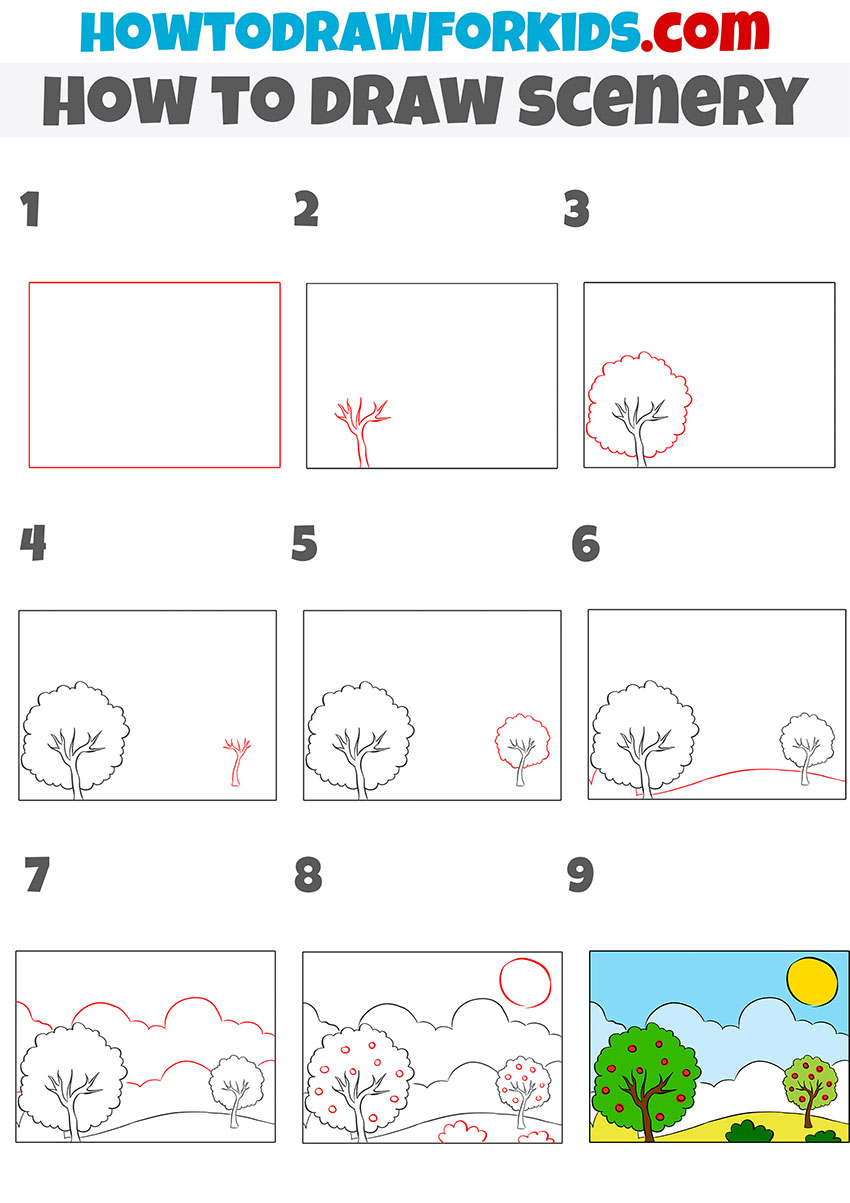
How to Draw Scenery
- Sketch the curved hill outlines.
To give some starting point to your scenery drawing, it is important to mark the main surfaces first. Draw two curved horizontal lines across the bottom of your page. These base lines will guide where you place trees and other details later.

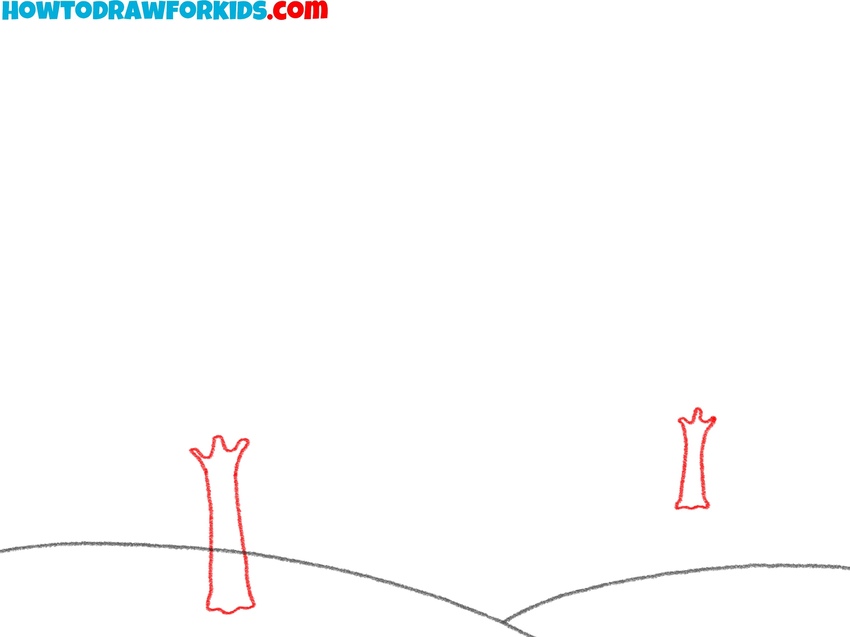
- Place the tree trunks in the scenery.
To start adding details, draw trees. Sketch two narrow trunks along the curved lines, making one larger in the foreground and a smaller one further back. The size difference creates perspective, making the scene look more realistic. Use smooth and organic lines for the trunks.
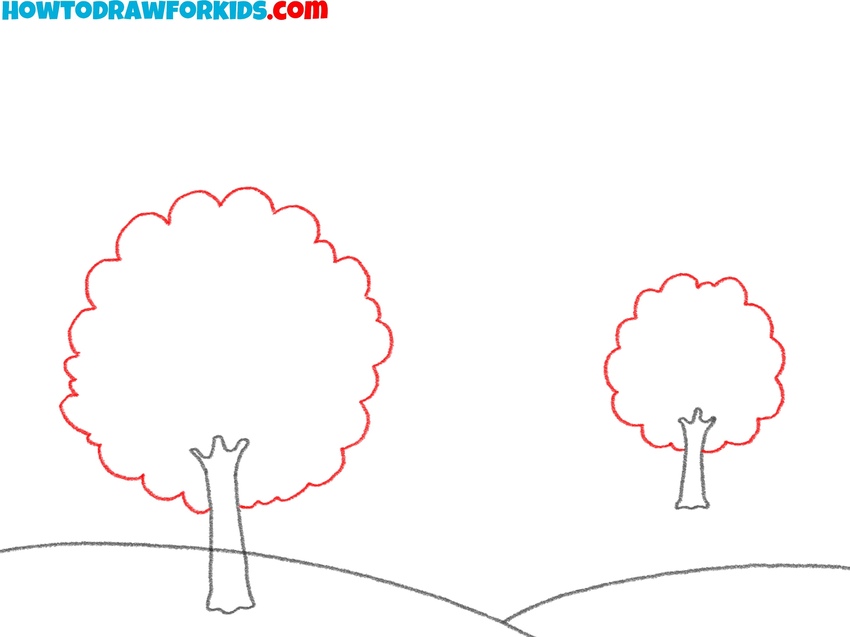
- Illustrate the leafy tree tops.
To complete the trees, sketch rounded, cloud-like outlines to show the leafy tops. Use wavy lines that form irregular but smooth curves. Larger trees should have more detail, while smaller trees in the background can be simpler and less defined.
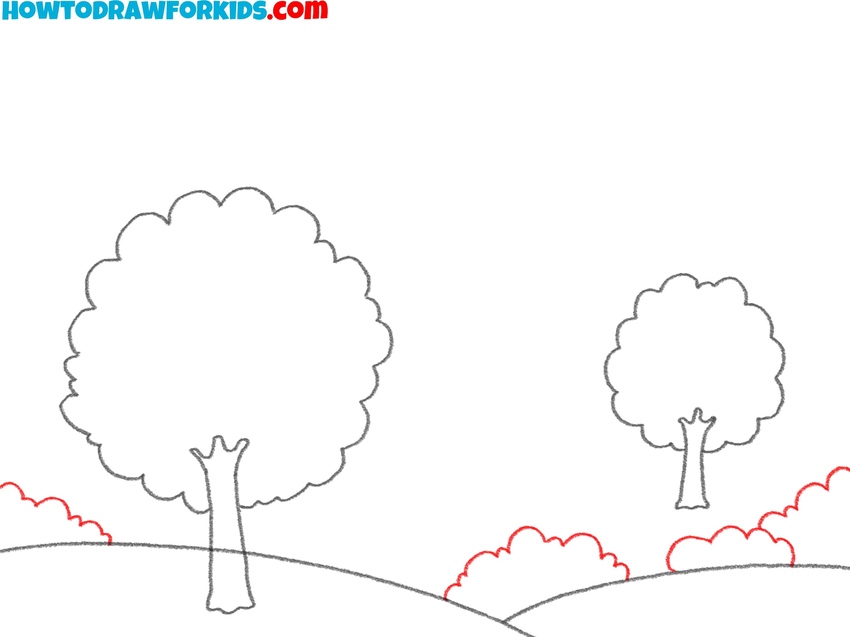
- Draw bushes along the hills.
A scenery feels more complete when it has smaller details. Draw bushes along the base of the hills by sketching smaller wavy outlines similar to the tree tops, but lower and less wide. These shapes should sit closer to the ground and overlap slightly with the hill lines.
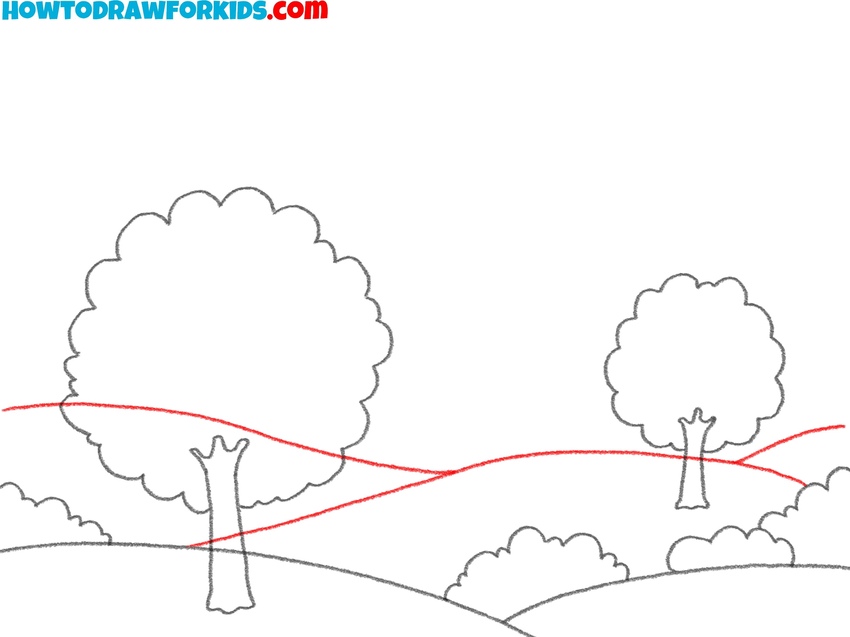
- Draw the hills in the distance.
At this point, continue the scene and create perspective by adding additional hill lines behind the ones already drawn. Use light, curved strokes that pass behind the existing trees and bushes, creating the illusion of rolling ground stretching into the distance.
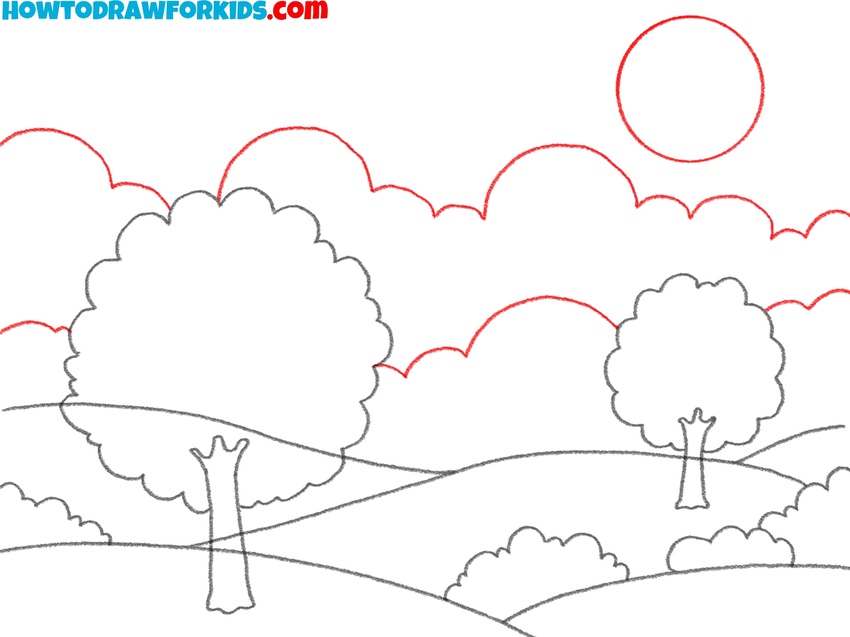
- Add the sun and sky shapes.
Finalize the main papers of the scene by drawing clouds in the background. Use soft, wavy lines similar to those of the bushes but make them larger and spread across the top area of the paper. On the very top of your composition sketch the sun as a small circle.
- Check and correct the sketch elements.
Before moving to coloring, carefully check proportions and connections. Darken the main outlines of the objects erasing any unnecessary construction lines of the hills and clouds. Look for gaps that feel too empty and consider adding some details and adjusting shapes slightly.

- Fill in the scenery with natural color.
Let’s finalize the scenery and paint the hills in soft greens, keeping the closer ones darker and the distant ones lighter to convey perspective. Color the trees and bushes in varying shades of green. The sun should be a warm yellow, while the sky is filled with light blue, fading gently toward the horizon.

Bonus: Easy Scenery Drawing Tutorial
First mark out a rectangular frame to set the boundaries of your own scenery drawing. Place a tree on the side by sketching the trunk with branches and adding a rounded crown. A second smaller tree can be added in the background.
Draw a curved line across the lower part of the rectangle to show a hill. Add clouds across the sky with a series of rounded outlines, giving them natural irregular shapes. Include a sun in the upper corner as a simple circle to complete the composition.
Small details like bushes or circular fruit on the tree can be added later for variation. Finish the scenery drawing with clean outlines and flat color fills to separate the sky, hills, and trees.