How to Draw the Sphinx
This tutorial on how to draw the Sphinx shows how to sketch the iconic Egyptian statue with a human face and lion body in simple steps.
How to Draw the Sphinx: Introduction
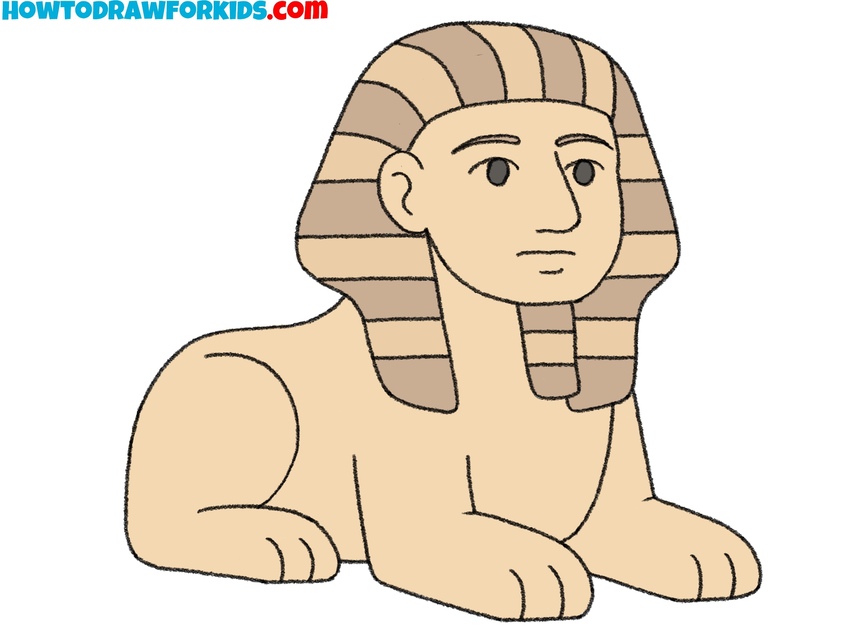
The Sphinx is one of the most iconic monuments of ancient Egypt, instantly recognizable by its lion body and human face. In this tutorial, we’ll learn how to draw the Sphinx using a simplified version of the statue that still keeps the key elements – like the human face, prominent Egyptian headdress, and iconic pose.
In the process of this tutorial on how to draw the Sphinx, don’t forget, that the body should be simple and smooth, without too many sharp angles. Make the front paws sit parallel and close together. The face should look calm and forward-facing. Keep the eyes low on the head, with a straight mouth and small nose.
The face and headgear are important details. Pay attention to the proportions of the face relative to the body, and don’t make the eyes or nose too small. The stripes of the headcloth should follow the shape of the form and taper naturally as they curve outward.
This version is easy to adapt. You can make the face more stylized, change the expression slightly, or place the Sphinx on a pedestal or desert background to match other Egypt-themed drawings. Also, you can check my lion drawing tutorial before you start drawing the Sphinx.
Sphinx Drawing Tutorial
Materials
- Pencil
- Paper
- Eraser
- Coloring supplies
Time needed: 40 minutes
How to Draw the Sphinx
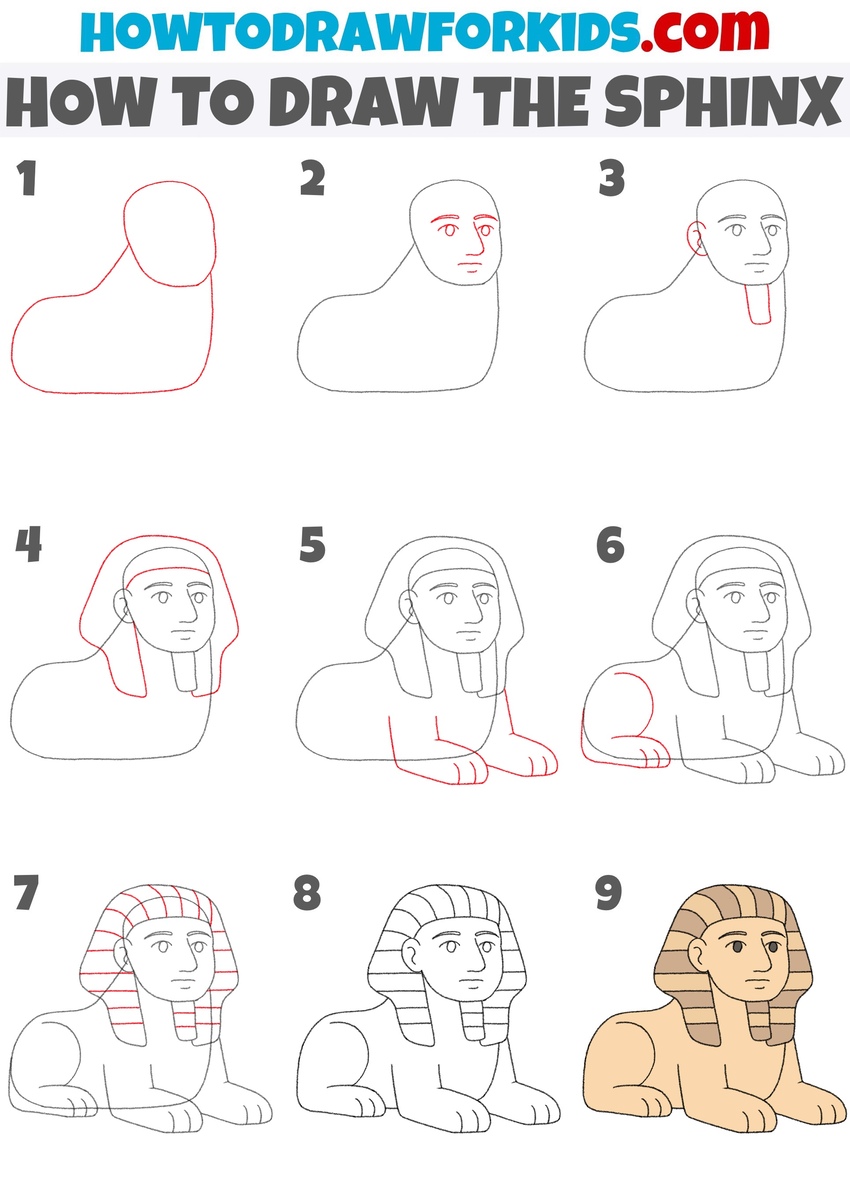
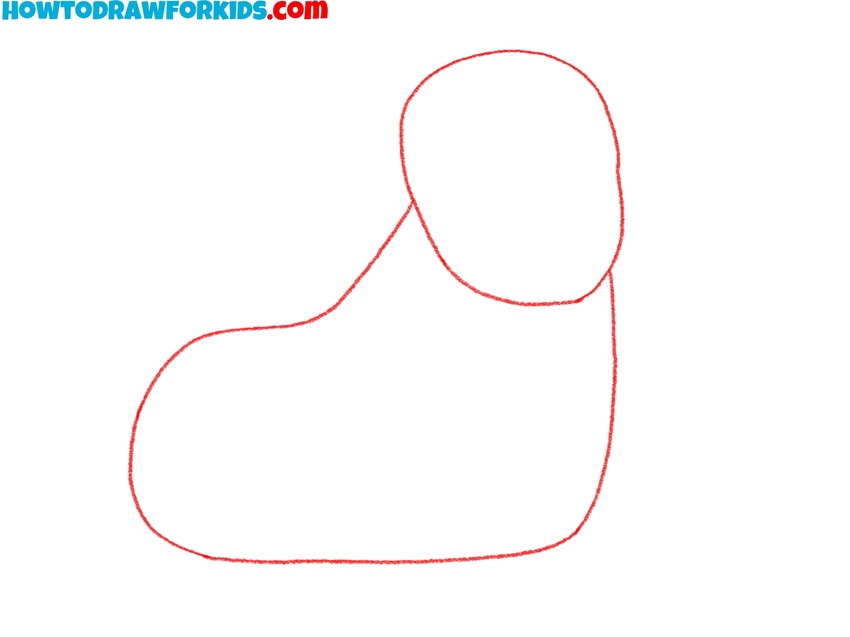
- Build the body and head shapes.
Draw the general shape of the Sphinx using two main curved forms: a large, horizontal oval for the body and a smaller vertical oval overlapping the right end to represent the head. This initial shape should be very simplified. Keep your lines smooth and light at this stage so you can easily adjust them later.
- Add the statue’s facial features.
Inside the smaller oval you drew for the head, begin sketching the facial features. First, sketch the eyes, creating two circles for the pupils and arches above for the upper eyelids. Add a simple curved brow above each eye. Below the eyes, place a small rounded nose and a horizontal line for the mouth.

- Sketch the ear and pharaoh’s beard.
Next, sketch the ear as a small oval or half-circle on the left side of the head, positioned just behind the eye line. It should sit roughly between the eye and mouth. Then, draw the beard as a vertical rectangle hanging down from the chin.

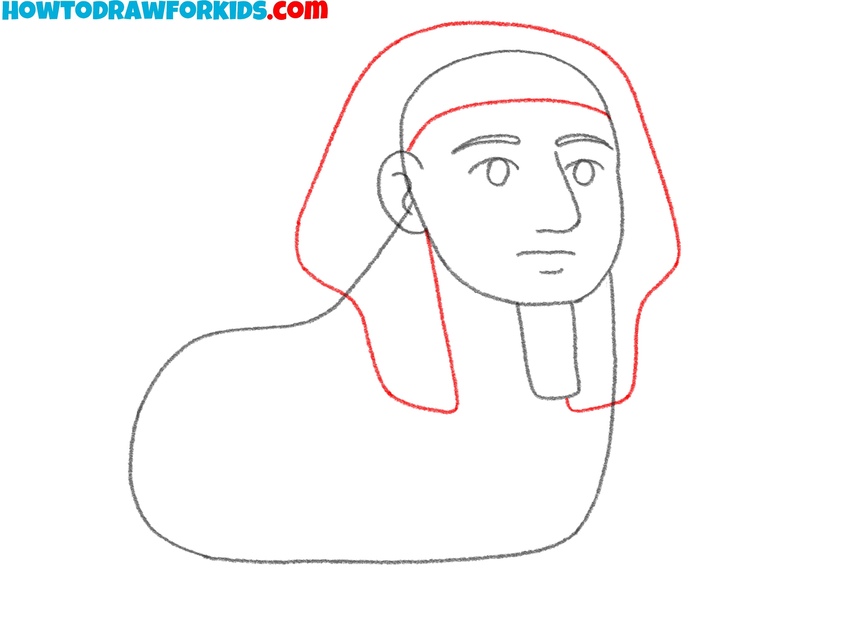
- Add the royal nemes headdress.
First, draw the outline of the top of the headdress that frames the head. Then, add the sections that hang down along the sides and over the shoulders. These flaps should stop just above the front legs. This headdress gave pharaohs a recognizable appearance and show their divine status.
- Illustrate the front legs and paws.
From the lower part of the neck, draw two thick forelegs bent at the elbows and extending forward. At the end of each leg, sketch out the paws using three rounded arcs to represent the toes. In ancient times, the Sphinx was believed to guard sacred spaces, so try to convey this protective pose.

- From the visible back leg and paw.
Move to the left side of the body of your Sphinx and draw a rounded shape for the rear leg. This part of the body consists of a curved hip and elongated foot with a couple of short lines for the toes. This leg of the statue doesn’t need much detail, use simple lines to illustrate a lion leg.

- Add stripes to the headdress and beard.
Inside the shape of the nemes headdress, draw curved horizontal lines spaced evenly from top to bottom. These stripes should follow the contour of the fabric. Continue the pattern down each side panel to complete the traditional striped appearance. Use the same pattern for the beard of the Sphinx.

- Trace and clean the Sphinx drawing.
Using a darker pencil or pen, carefully trace over the final lines of your Sphinx drawing. Erase any leftover construction lines or rough sketches beneath to give your sketch a finished and polished look. This is also the time to adjust any symmetry issues or smooth out curves in the headdress and paws.

- Color the drawing of Sphinx.
Color the Sphinx using warm, sandy tones. To color the body and face, use a soft beige, tan, or pale yellow. For the headdress, alternate darker and lighter brown or gold shades for the stripes. The eyes can be slightly darkened. The real Sphinx is monochromatic due to its weathered stone, so simplicity works well.

Conclusion
If you found this tutorial on how to draw the Sphinx useful, feel free to leave a comment and share your thoughts. Share your finished version with friends or students who are interested in history, ancient monuments, or Egyptian themes. As any other tutorial on my website, this Sphinx drawing works well both as a standalone project and as part of a larger scene, especially when combined with desert landscapes, pyramids, or other historical elements.
To continue building your ancient-themed collection, you might want to check out the pyramid drawing tutorial or try a camel drawing tutorial to add more details to your composition.
For more interesting drawing lessons like this one, follow along on Pinterest to save step-by-step guides or subscribe on YouTube for regular video walkthroughs and drawing ideas. Tutorials are updated frequently to keep your sketchbook filled with interesting and varied subjects.