How to Draw Winnie the Pooh
Welcome to my delightful tutorial on how to draw Winnie the Pooh, everyone’s beloved bear from the Hundred Acre Wood.
How to Draw Winnie the Pooh: Basic Information
In this guide, we’ll learn how to draw Winnie the Pooh, focusing on his iconic figure. We will draw this character in a classic suit and standing in a static pose.
First, I will walk you through the basic lesson on how to draw Winnie the Pooh. After that, we’ll proceed to a second technique. This exercise is optional, but it will help reinforce your skills.
Next, I will go over common mistakes to avoid when drawing Winnie the Pooh and provide brief tips on how to prevent them. This will help you master the techniques for drawing this character and build confidence in your work.
Winnie the Pooh Drawing Tutorial
Materials
- Pencil
- Paper
- Eraser
- Coloring supplies
Time needed: 1 hour and 20 minutes
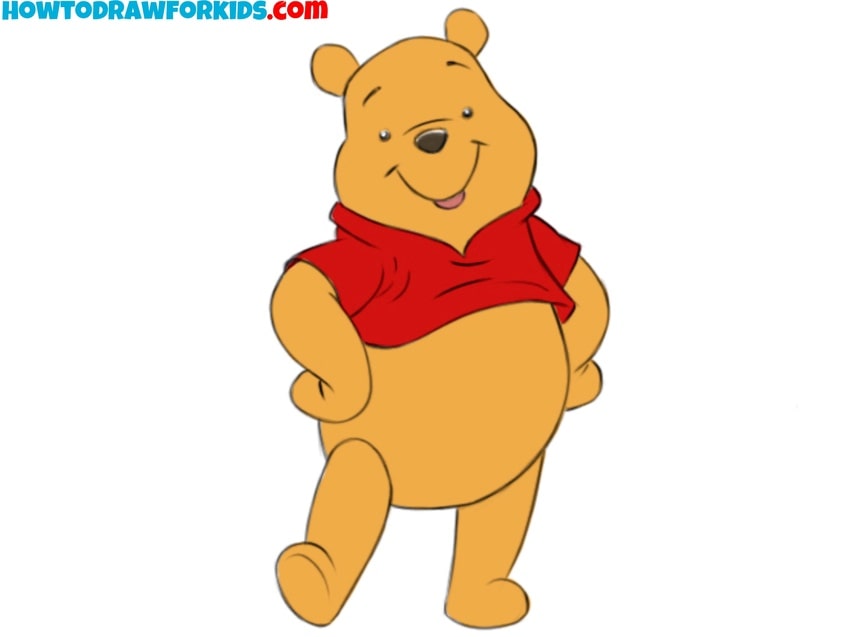
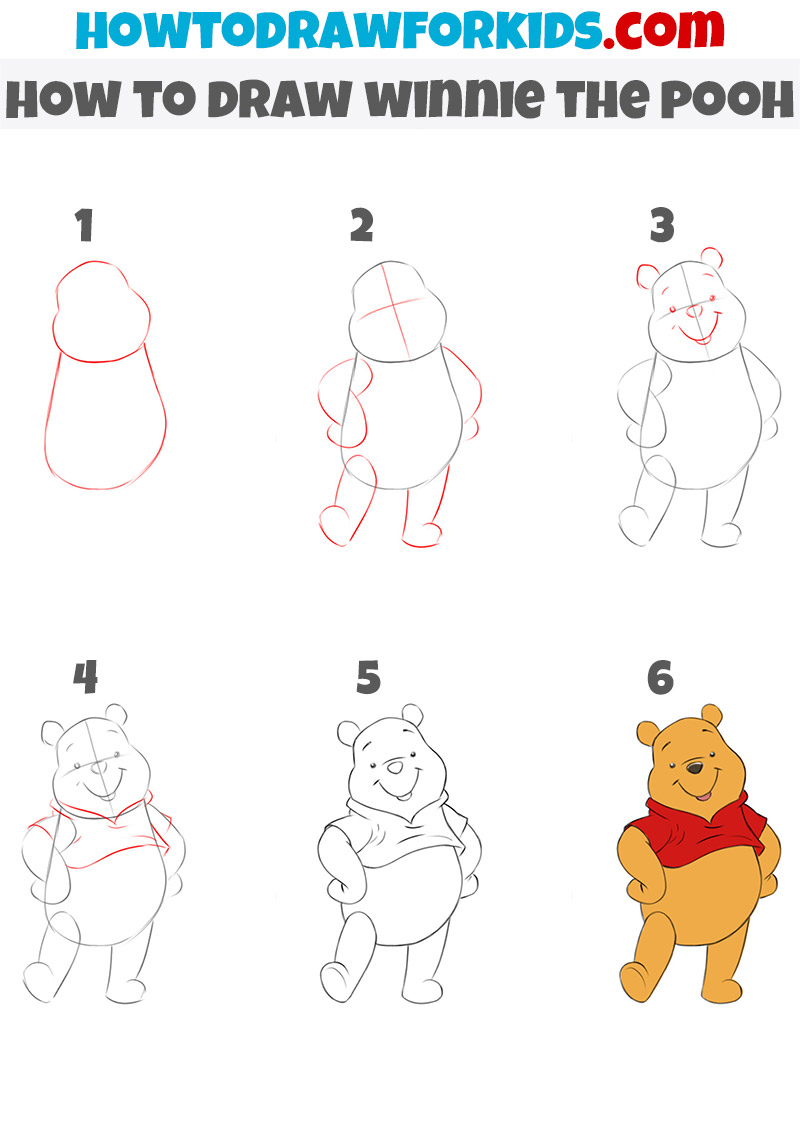
How to Draw Winnie the Pooh
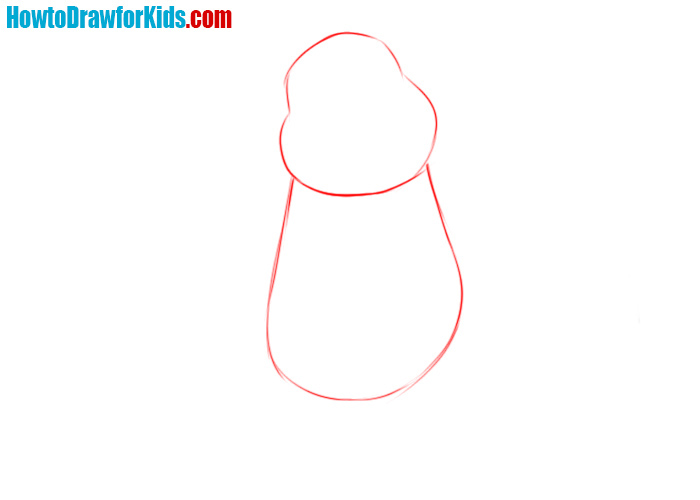
- Draw the torso and head.
In this first step, you’ll begin by sketching the basic outline of Winnie the Pooh’s body. Start with a large, rounded rectangle shape for his body, tapering slightly towards the bottom to create a pear-like form. Then, add a smaller circle on top for his head, ensuring it slightly overlaps with the body.
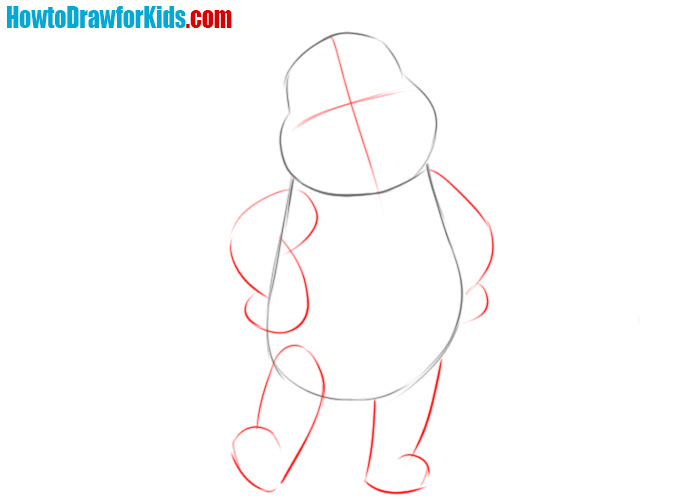
- Illustrate the limbs of Winnie the Pooh.
Now that you have the basic outline, it’s time to add guidelines and define Winnie the Pooh’s limbs. Draw a vertical and horizontal guideline across the head to help with facial symmetry. Then, sketch out his arms and legs using simple, rounded shapes attached to the body.
- Add the facial features.
Using the guidelines from Step 2, draw his facial features. Begin with his eyes, placing them symmetrically on either side of the vertical guideline. Then, add a small, rounded nose just below the horizontal line, and draw his signature smile underneath. Don’t forget to sketch his round, bear-like ears on top of his head.
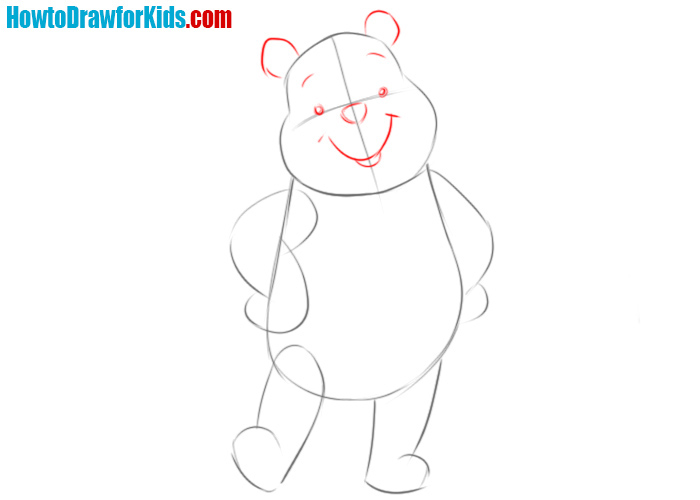
- Draw the shirt of Winnie.
Now that the face and basic body structure are in place, it’s time to add Winnie the Pooh’s shirt. Start by outlining the collar, which sits right below his chin. Then, extend the lines downward to create the short sleeves, ensuring they wrap around his round arms. The shirt should look slightly oversized.

- Remove extra guidelines.
With the shirt and basic structure in place, the next step is to refine your drawing. Go over the lines you’ve drawn, making them more clear. Pay attention to the proportions of the arms, legs, and face, ensuring everything looks finished. Add subtle details, like the curve of his belly, the folds in his shirt.

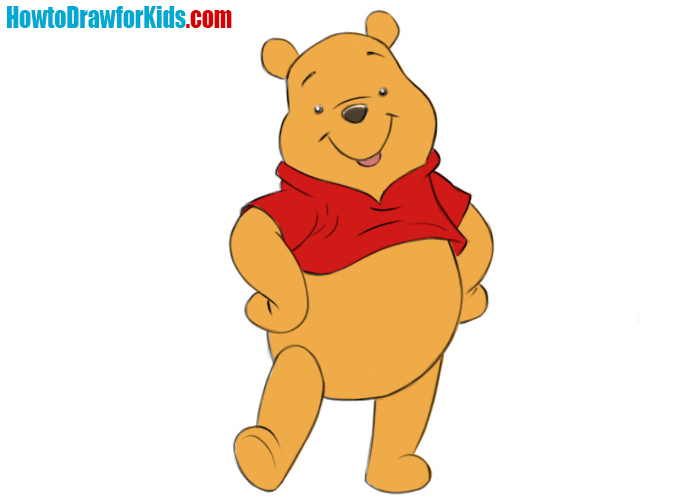
- Color your Winnie the Pooh sketch.
Certainly, you recall the comforting, dark yellow hue of Winnie the Pooh. So, create the same effect using the right shades of red and yellow. Remember to add white highlights to the eyes and nose to give your drawing of Winnie the Pooh a finished appearance.
How to Draw Winnie the Pooh: Alternative Method
To provide more practice in drawing Winnie the Pooh, an additional technique has been developed. This method supplements the main tutorial, offering a different way to approach your drawing.
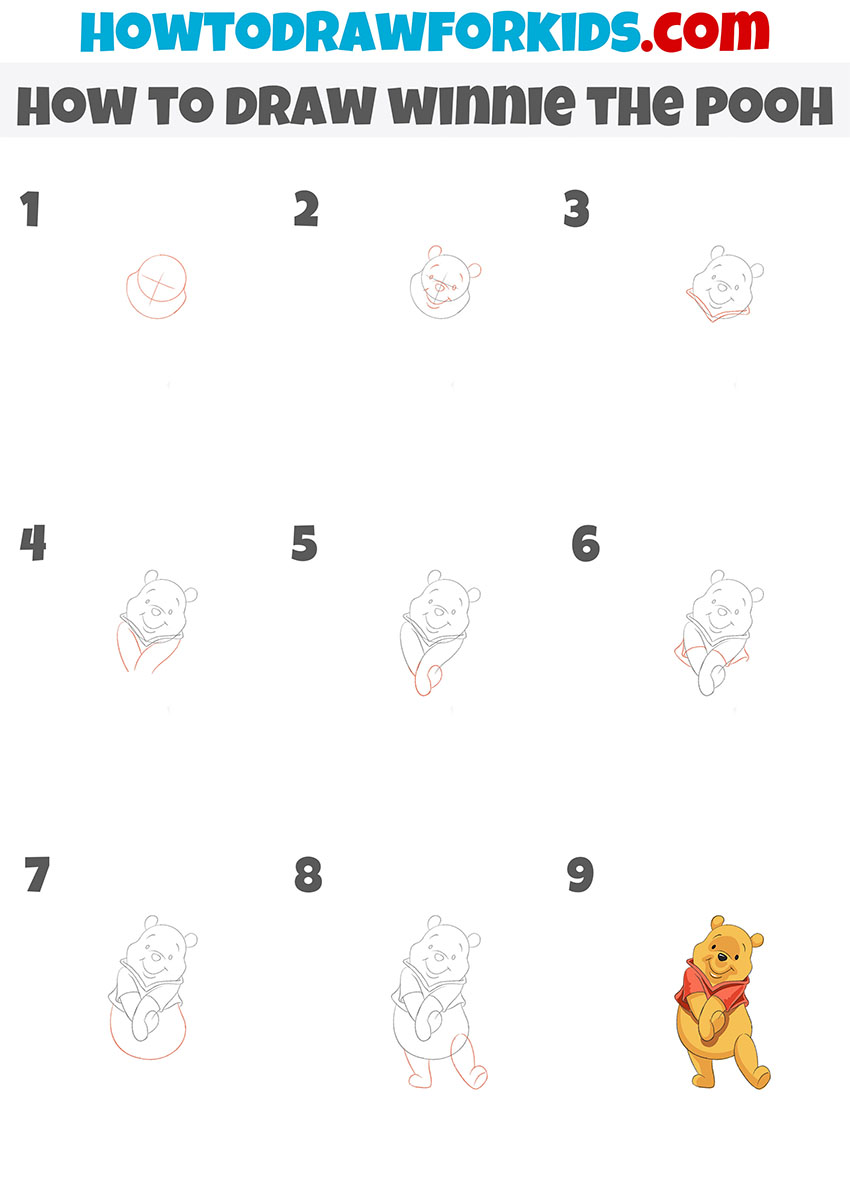
This method will show you how to draw Winnie the Pooh in a different pose. Instead of the usual front-facing image, you’ll learn how Pooh might look in different scenarios, such as pondering or smiling.
Start by drawing a circle for Winnie the Pooh’s head and add cross guidelines to help place the facial features. Next, sketch his face, including the eyes, nose, and mouth, along with his small, round ears. Continue by drawing the outline of his shirt collar around his neck, giving the appearance of it resting on his shoulders.
Add the upper part of his body, creating the loose fit of the shirt. Then, draw his arms, ensuring one is crossed over his belly, and add the lower part of his body with his rounded tummy. Extend the drawing by sketching his legs, with one foot slightly forward as if he’s walking.
Finally, outline and refine all the details, erasing unnecessary lines. Complete the drawing by adding color, using golden yellow for his body and red for his shirt.
Avoiding Winnie the Pooh Drawing Mistakes
As we finish drawing Winnie the Pooh, it’s helpful to consider common mistakes to improve future drawings:
- Proportions: Incorrect proportions can make the drawing look unbalanced. Ensure that Pooh’s torso and head are correctly sized.
- Facial Features: Pooh’s expressions are gentle. Overemphasizing them can reduce the softness of the character.
- Limbs: Pooh’s limbs are short and stout. Drawing them too long can change his iconic appearance.
- Clothing: Pooh’s shirt is a distinctive red. Incorrect shading or shape can make the drawing less authentic.
Conclusion
You’ve successfully drawn Winnie the Pooh. There are more tutorials available on my website, so consider trying to draw them. For example, you can visit the category Cartoons to draw different recognisable characters.
Stay updated by following my social media pages. If you have suggestions for future drawing tutorials, leave them in the comments below. Your idea could be featured in the next lesson.