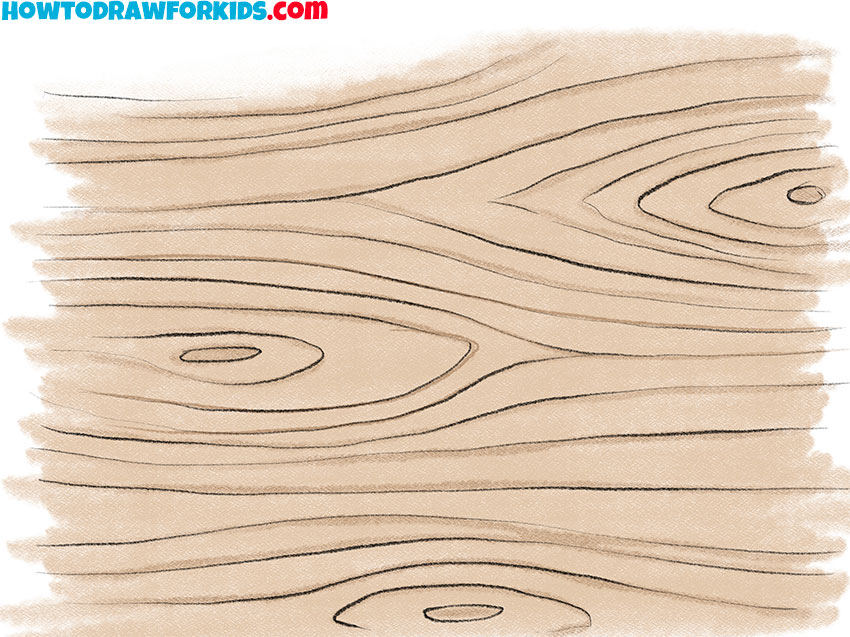
How to Draw Wood Texture
Ready to learn how to draw wood texture like a seasoned artist? With my detailed instructions, you’ll learn the secrets of realistic textures. Perfect for school projects or artistic play, this lesson will sharpen your drawing skills and creativity.
Continue your exploration of texture by learning to draw wood texture with two innovative methods. Each approach offers a unique perspective on capturing the essence of wood, enhancing your artistic repertoire. Get ready to impress with your newfound ability to create lifelike textures on paper.

How to Draw Wood Texture: Basic Information
Welcome, budding artists, to a fun-filled journey where we’ll learn to how to draw wood texture! Imagine we’re explorers, sketching the bark of ancient trees on our adventure. My simple technique will transform your paper into a canvas of wild, woody landscapes. Get ready to make your drawings come to life with the touch of nature.
Drawing wood texture is like being a magician, creating illusions with just a pencil. Each stroke you make is a whisper of the wild, a trace of the tree’s soul. With each part of this lesson, you’ll learn to see the subtle beauty in every wooden curve and line. Let’s start this magical art adventure together!
As we wrap up our draw wood texture lesson, you’ll have the tools to add a rustic charm to any piece of art. Imagine drawing a forest scene or a cozy log cabin with your newfound skills. Keep practicing, and soon you’ll be able to give a voice to every piece of wood in your artful tales. So let’s put those creative caps on and make some art!
Wood Texture Drawing Tutorial
Materials
- Pencil
- Paper
- Eraser
- Coloring supplies
Time needed: 30 minutes
How to Draw Wood Texture
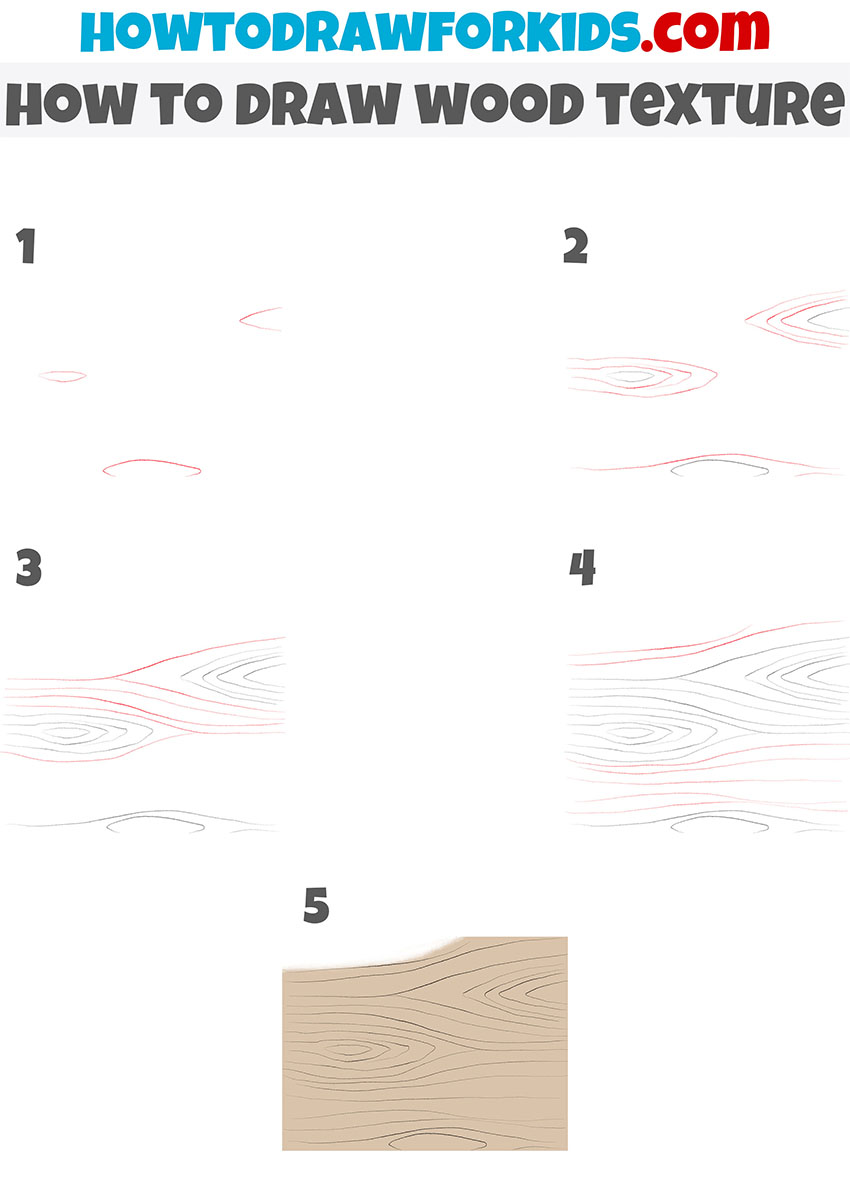
- Draw small tree rings.
To complete this step, draw three shapes that look like oblong ovals. These will become the focal points of the wood grain. It’s important to place them at varying distances from one another.

- Add the larger rings.
Around the drawn shapes, draw several curved lines of different lengths. These lines represent the wood grain flowing around the knots, which is a characteristic feature in wood textures.

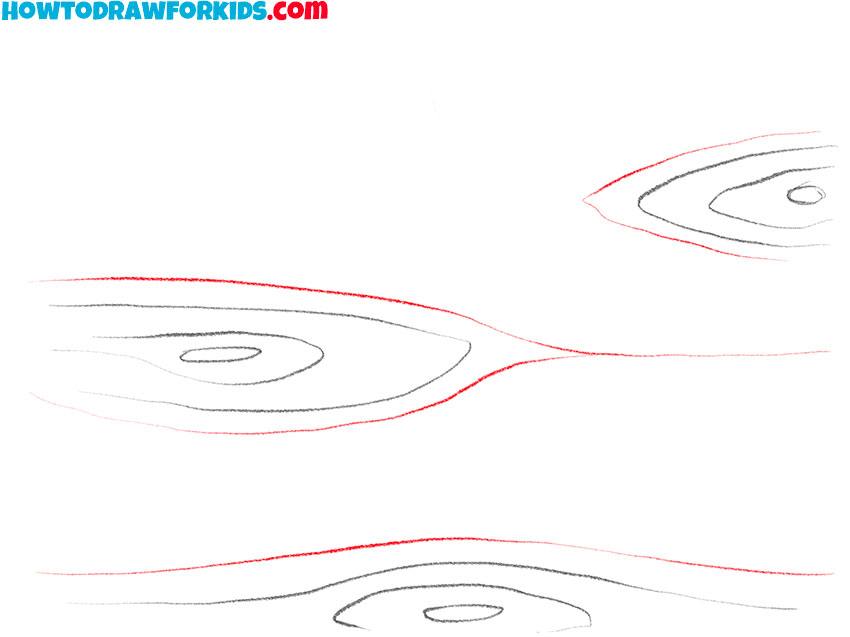
- Continue painting the wood texture.
Add another very large ring under one around the shapes from the previous steps. Below, instead of a ring, there is a straight line. There is a long, uneven line extending from the ring in the middle.
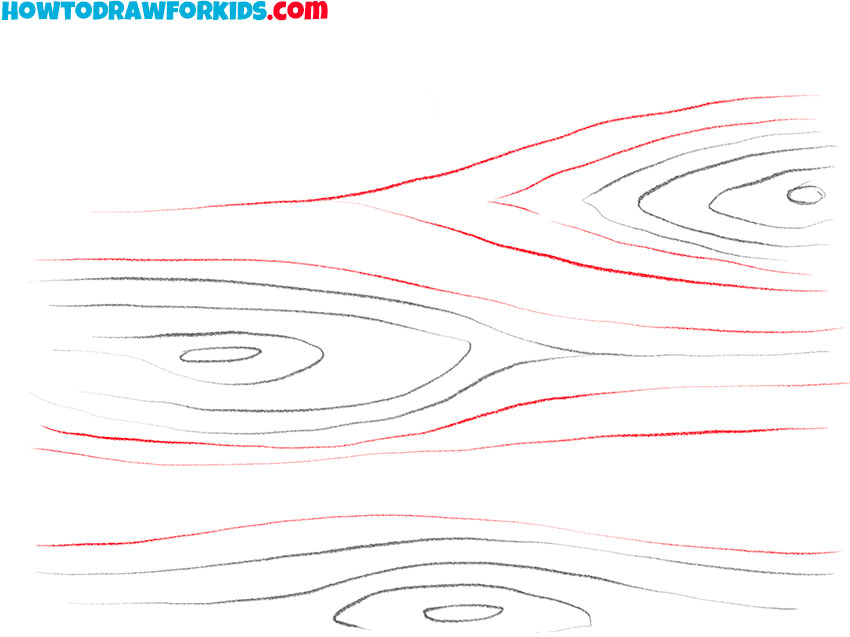
- Add some more lines.
Around the previously drawn tree rings, add a few more curved lines. he goal here is to cover the area smoothly without overcrowding it, allowing the texture to develop organically.
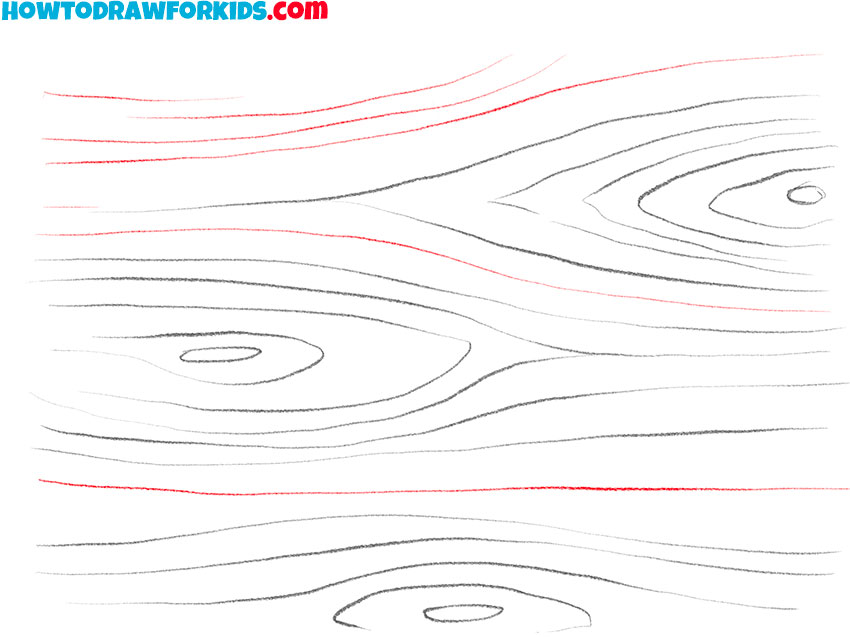
- Finish drawing the wood texture.
This step involves reinforcing the lines to add weight and shadow, particularly beneath the knots and in areas where lines converge. By varying the line weight, you create the illusion of depth and texture.
- Color the drawing.
To color the wood texture, you should use different shades of brown. Lighter tones can be used to highlight raised areas, while darker shades are applied to recesses and underlaps.
Additional Content
I’m delighted to offer a fantastic resource for our young and imaginative learners: a free PDF download of our wood texture lesson. Tailored for ease and accessibility, this version distills our drawing techniques into a portable format that’s perfect for on-the-go learning.
With this guide, you’ll have the opportunity to practice drawing detailed wood textures, enhancing your artwork with the click of a button. Ideal for moments when you’re away from Wi-Fi, it empowers you to keep honing your artistic talents. Seize this chance to make every moment an opportunity to grow artistically.
Alternative Drawing Technique
Expanding on our exploration of wood textures, I’ve introduced an additional alternative drawing method. This technique is tailored to provide you with more practice and an even deeper understanding of how to achieve lifelike wood textures.
It’s a step up in complexity, designed to push your boundaries and encourage improvement in your artistic skills. Embrace this new method and watch as your renderings of wood texture become more detailed and realistic.
Wood Texture Drawing: Additional Practice
This method of drawing is designed for additional practice to help refine your art skills. It begins with the basics—simple lines and curves that form the knots and grain of the wood. As you progress from one step to the next, these lines become more complex and interconnected, mimicking the natural patterns found in wood grain.
By the final step, you have a richly detailed piece of wood texture that looks tactile and realistic. This practice not only helps in understanding the variations in wood grain but also enhances your ability to capture texture and detail in your drawings.
From Bark to Art: Perfecting Wood Texture
Ready to take your wood texture drawings to the next level? Here’s a handy list of tips and tricks to keep in mind as you sketch and shade. So grab your pencils, and let’s get started!
- Go With the Grain: When you’re drawing wood, always remember to follow the natural direction of the grain. This will make your texture look more realistic.
- Knots are Neat: Adding knots can give your wood character. Don’t be afraid to put a few knots here and there.
- Shade for Shape: Use shading to your advantage. Lighter and darker areas can create the illusion of depth and curvature in your wood.
- Mix It Up: Try using different pencils for a variety of lines. A mix of hard and soft pencils can give you a range of textures.
Remember, practice makes perfect. Each piece of wood you draw has its own story, with unique lines and patterns. So keep practicing these tips and tricks, and soon you’ll be creating wood textures that are simply “tree-mendous”! Keep sketching, keep learning, and most importantly, have loads of fun on your artistic adventures!
Conclusion
Well done, young artists! You’ve beautifully captured the essence of wood with your pencils. Ready for the next challenge? My website is filled with exciting lessons, like scoring a goal with a football drawing or crafting a crown worthy of royalty.
Stay in the loop with new and thrilling art lessons by following my social channels. Let’s keep our artistic spirits high and our drawings even higher!

this was a non helpful website
Really good drawing tutorial
this was really cool