How to Draw a Sabre
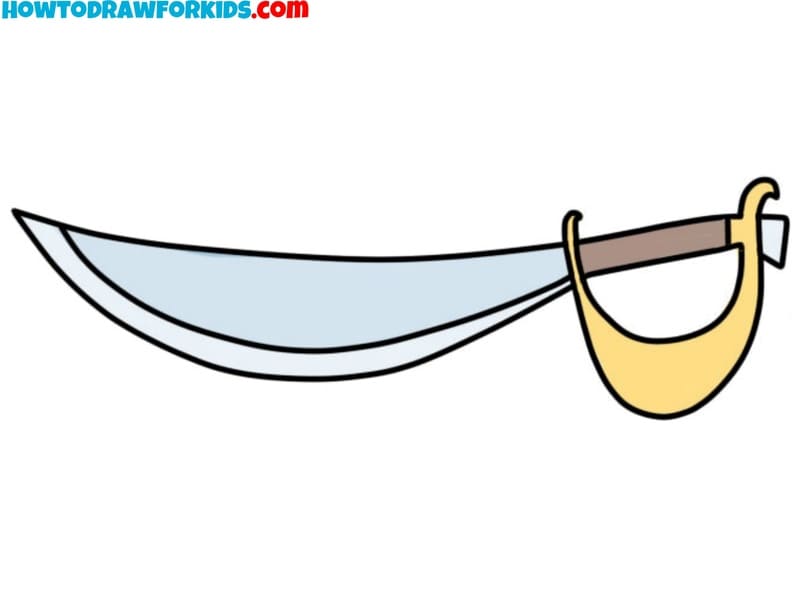
Continuing with the theme of swords and the Middle Ages, I present to you this traditionally simple lesson in which I will demonstrate to you how to draw a sabre.
The sabre’s elongated shape will challenge you to maintain proportion throughout your drawing. Learning to draw objects in correct proportion is fundamental in art and applies to everything from still life to character design.
The subtle curves of the sabre’s blade and the angles of its hilt will enhance your ability to translate different shapes onto paper. Mastery of curves and angles is very important for adding realism to your drawings.
From this guide you’ll also practice controlling your pencil to create clean lines, which is a very important skill whether you’re sketching a portrait or outlining a comic strip.
So, dear young artists, prepare your art tools, sit comfortably and start drawing a sabre.
Time needed: 30 minutes
How to Draw a Sabre
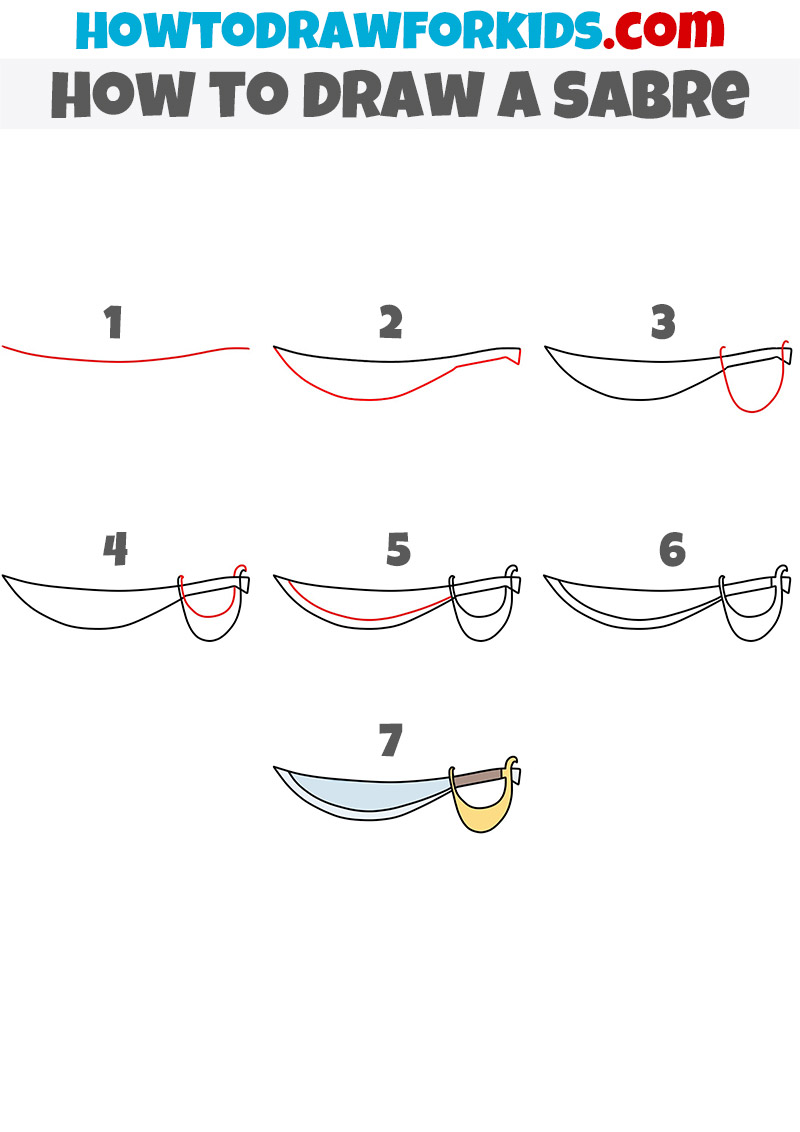
- Draw the top edge of the sabre.
Begin your sabre drawing with a gentle, slightly curved horizontal line. This represents the top edge of the sabre. The line should arch smoothly from one end to the other, creating the impression of the blade’s length and slight bend characteristic of a sabre.

- Sketch the bottom edge.
Below your initial line, sketch another one for the bottom edge of the blade. It should swoop lower than the top edge towards the left, indicating the blade’s widening before narrowing to a fine point. This line showcases the sabre’s unique profile.

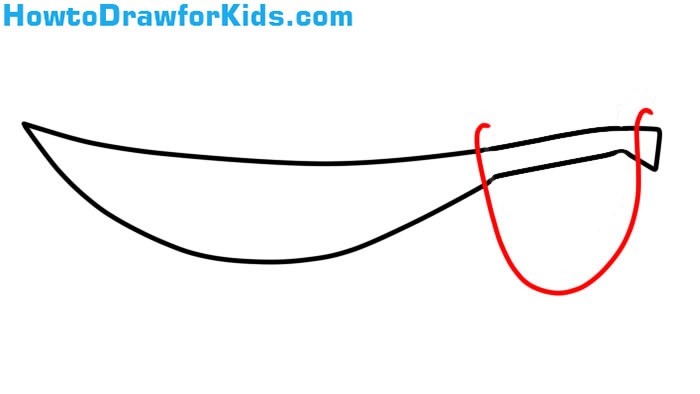
- Start illustrating the guard of the sabre.
For the handguard, add a curved line on the right end of the sabre. This line should form a partial oval shape that extends from the top and bottom edges of the blade, suggesting the protective element of the sabre which shields the hand during combat.
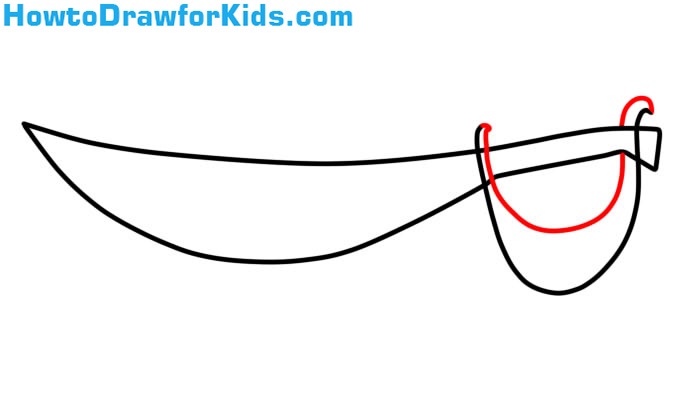
- Detail the guard.
Inside the partial oval of the guard, sketch a smaller shape, creating the inner line of the guard. This inner contour adds dimension, indicating the thickness of the metal guard. You can detail the guard by adding some patterns to the surface.
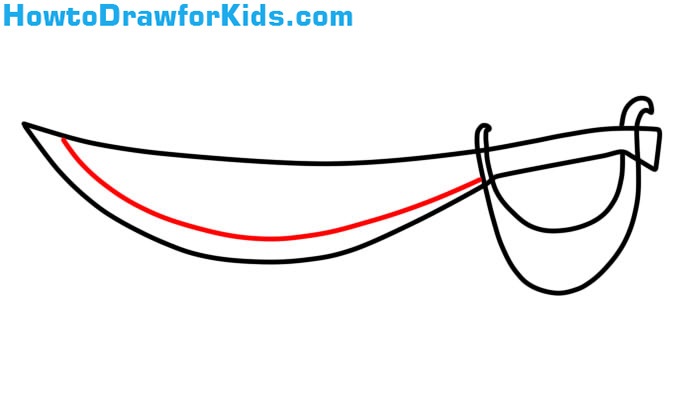
- Illustrate the line of the blade.
Detail the blade by drawing a line down the center, starting from the tip of the saber and extending towards the guard. This central ridge line gives the blade a more three-dimensional effect, suggesting a sharp edge and the flat surface of the sword.
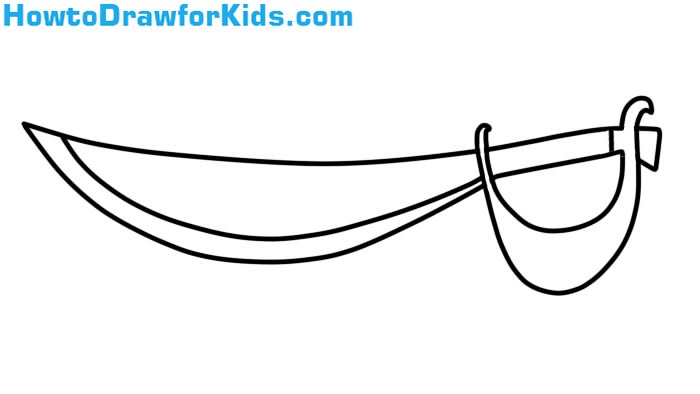
- Refine your sabre drawing.
Refine the overall artwork by smoothing out any rough edges and ensuring the lines of the blade and guard are clean and precise. Make any necessary adjustments to the curves to illustrate the elegance and sleekness of the sabre.
- Color your sabre drawing.
Choose a metallic hue like silver or gray for the blade to simulate steel. For the guard, select a gold or brass color to represent a rich, ornate metal. Additionally you can make your artwork more three-dimensional adding shadows and highlights to the elements.

Drawing tutorial on how to draw a saber for kids came to an end. Don’t forget to share this lesson with your friends and subscribe to me on social networks.


That’s just great!
hi hi hi hi hi