How to Draw a Chocolate Bar
This simple object is not only enjoyable to eat but also fun to depict, and in this lesson on how to draw a chocolate bar, you’ll see why.

In this tutorial you will learn how to draw a chocolate bar. I am sure that you will definitely like this lesson and it will be useful. If you like sweets, you will definitely appreciate this lesson!
You don’t have to worry that you won’t be able to master this tutorial because it’s very simple and made especially for beginners and kids. I’m sure most of you love chocolate.
Chocolate is a confectionery made from cocoa butter. It is one of the most popular and widespread sweets in the world. Eating chocolate in moderation is considered beneficial for the human body, but its abuse is harmful.
And of course, the ability to draw chocolate will be a very important skill in addition to drawing cakes and other sweet products.
Materials
- Pencil
- Paper
- Eraser
- Coloring supplies
Time needed: 15 minutes
How to draw a chocolate bar step by step
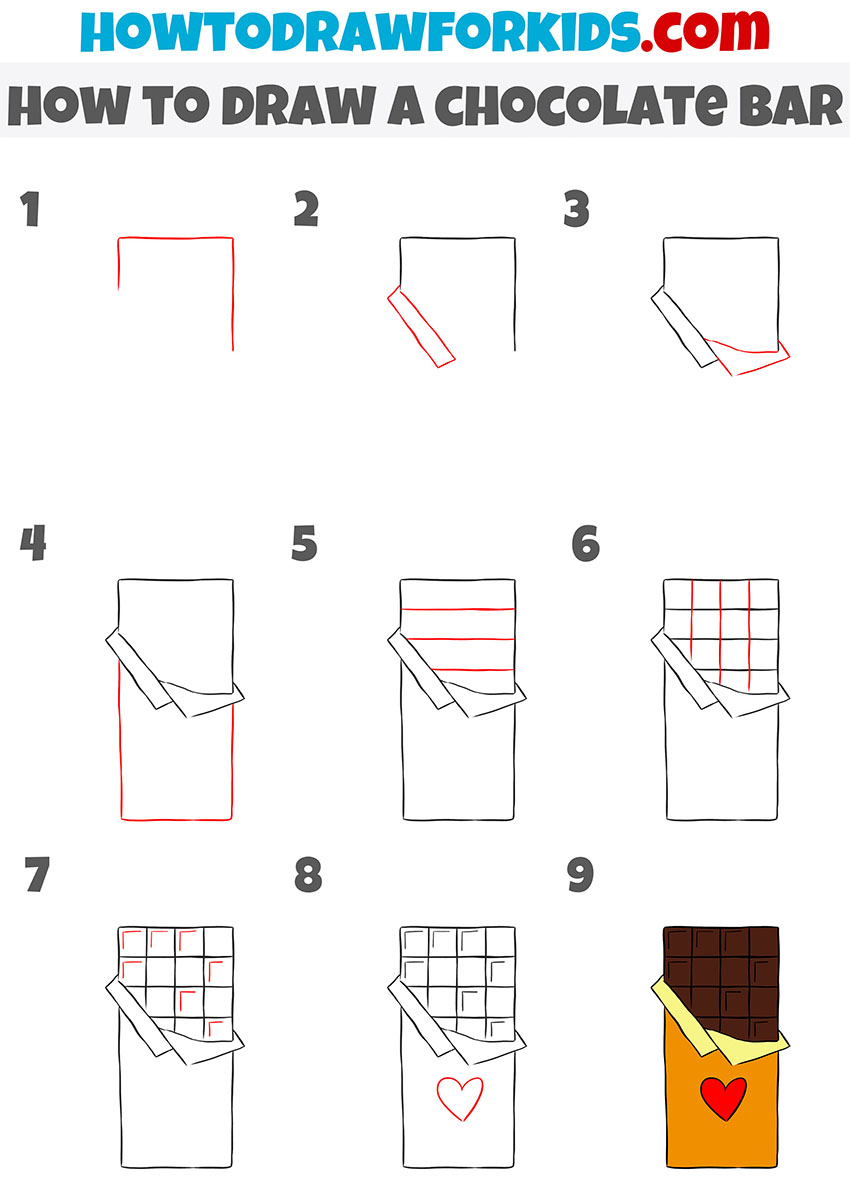
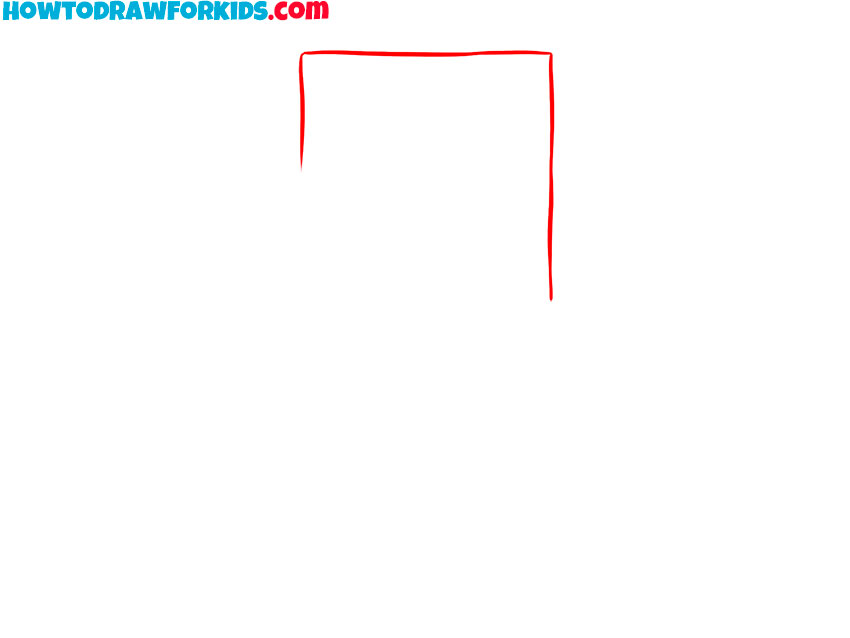
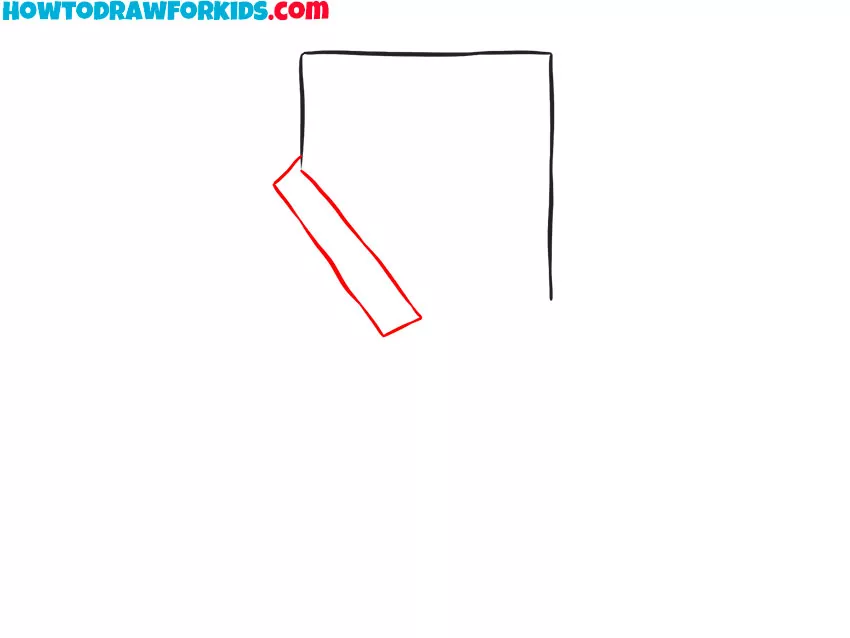
- Outline the top and sides of the bar.
Start with a clear top edge so proportions stay consistent. Draw a wide horizontal line for the chocolate bar’s top. From each end, drop a short vertical line downward, but make the right edge longer and keep the left edge short. These three strokes form the top edge.
- Add the first folded edge of the wrapper.
To create the effect of partially opened wrapping, draw a diagonal strip starting from the left side of the chocolate bar. Give it two parallel sides and small angled ends so it reads as a paper flap. Keep the strip fairly narrow.
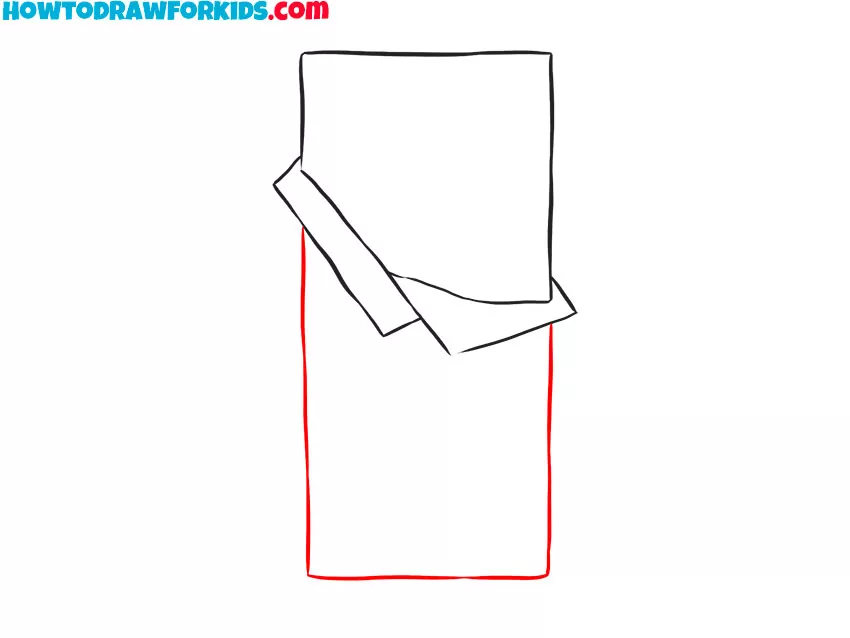
- Sketch the overlapping bottom flap.
Continue developing the packaging by sketching another fold extending from the lower right side. Draw a soft curved line that bends downward and connects under the diagonal flap drawn earlier. This lower fold should appear to sit in front of the bar, creating the sense that the paper is loosely unwrapped.

- Draw the bottom edge of the chocolate bar.
Now, outline the lower section that holds the chocolate bar. From the bottom ends of your previous lines, extend two long vertical strokes downward and close them with a straight horizontal base. This rectangle will represent the rest of the paper wrapper. Keep its width equal to the top portion so the proportions remain realistic.
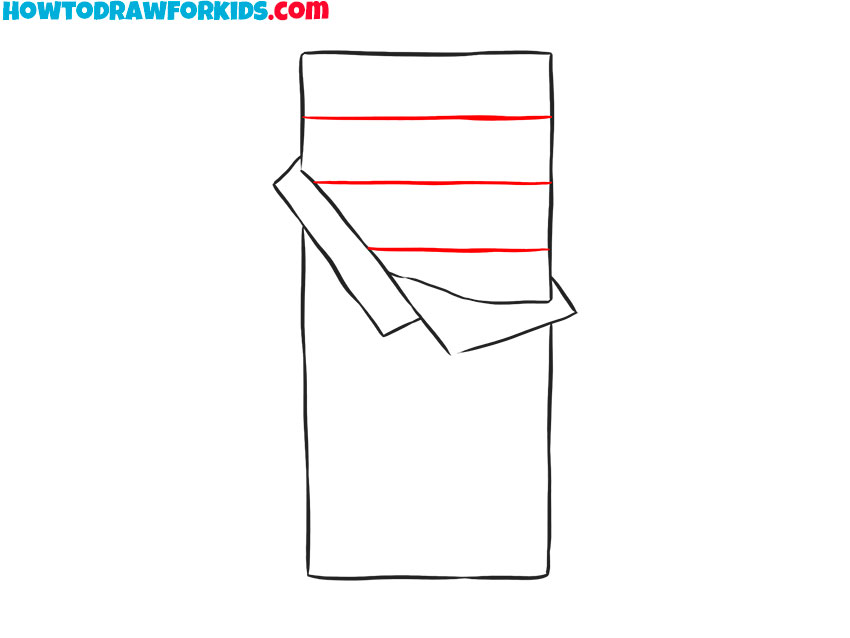
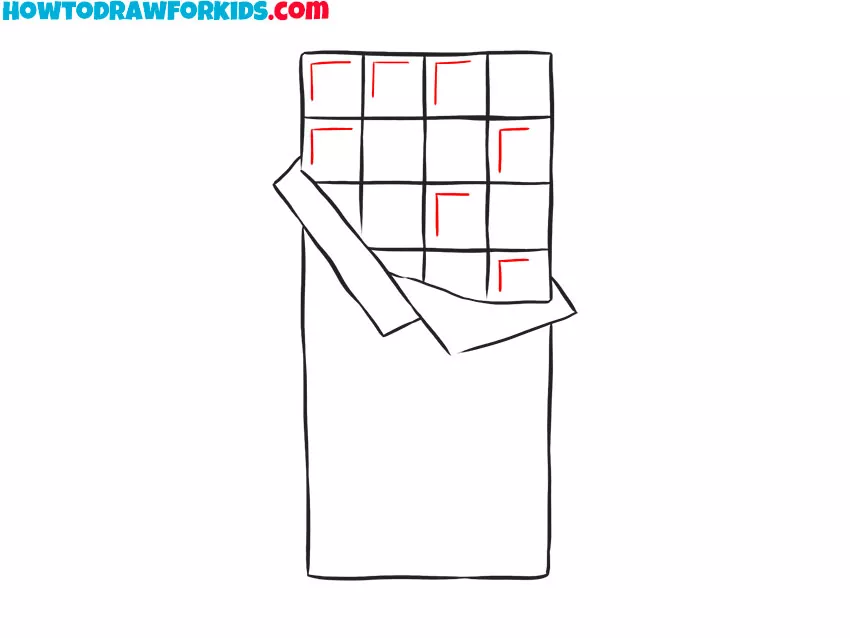
- Add horizontal divisions on the chocolate surface.
It’s time to define where each row of chocolate squares will go. Draw two or three evenly spaced horizontal lines inside the exposed part at the top of the bar. Keep these lines perfectly parallel and straight to imitate a classic chocolate bar pattern.
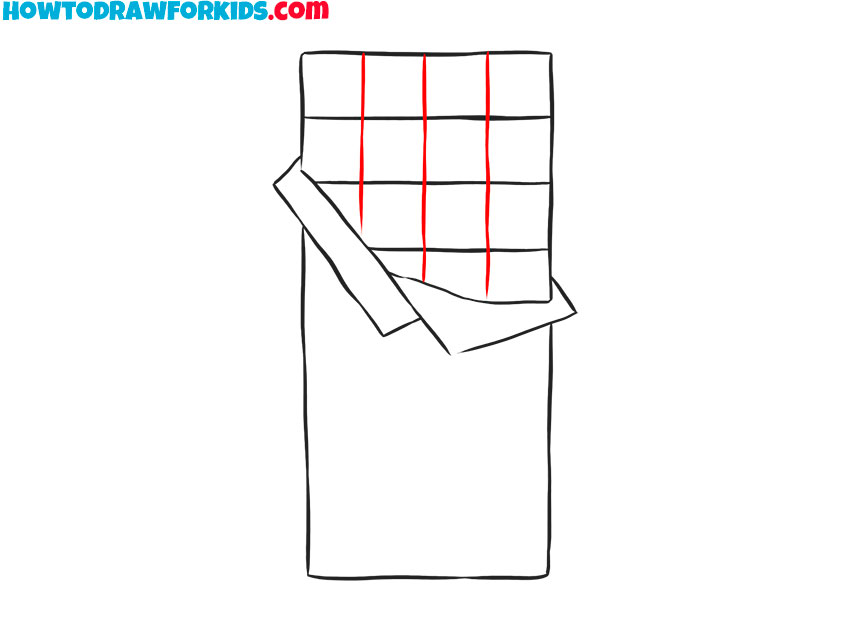
- Draw vertical lines on the chocolate bar.
Next, draw three vertical lines across the same exposed top area to complete the grid. When combined with the previous horizontal lines, they create small rectangles that form the familiar chocolate-square pattern. Adjust the spacing slightly if you want narrower or wider pieces.
- Add inner details to the squares.
To give the chocolate texture, sketch small L-shaped marks in the top corners of several squares to create beveled edges. You can draw them only in alternating pieces for variety or in all of them for a more detailed grid. These short, clean marks create the illusion of raised edges. For extra realism, lightly trace uneven folds on the wrapper flaps or small creases where the paper bends.
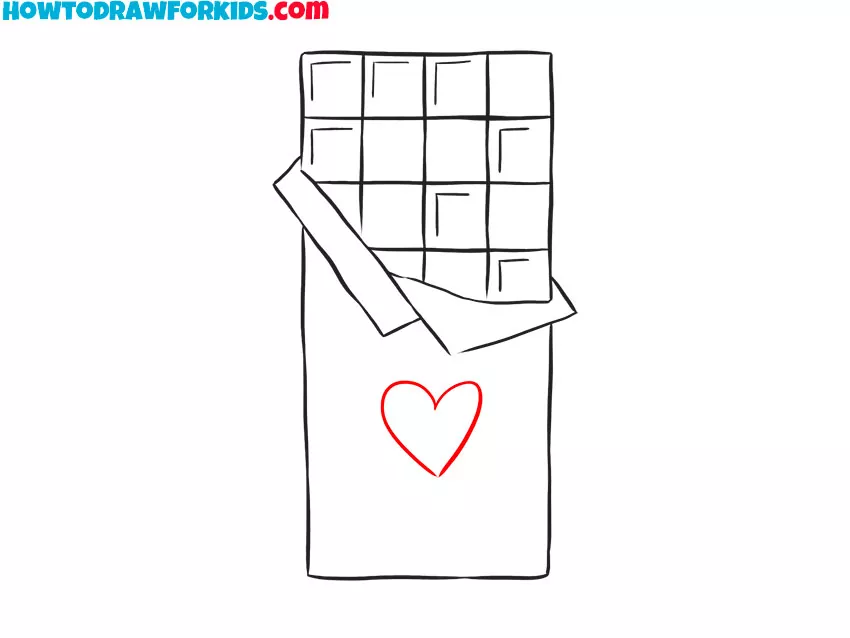
- Add a simple logo or emblem.
Add a simple logo or emblem to make the wrapper more interesting. Draw a heart or circular badge in the center of the lower section. If you want to personalize the design, you can replace the heart with a square label or a tiny brand shape.
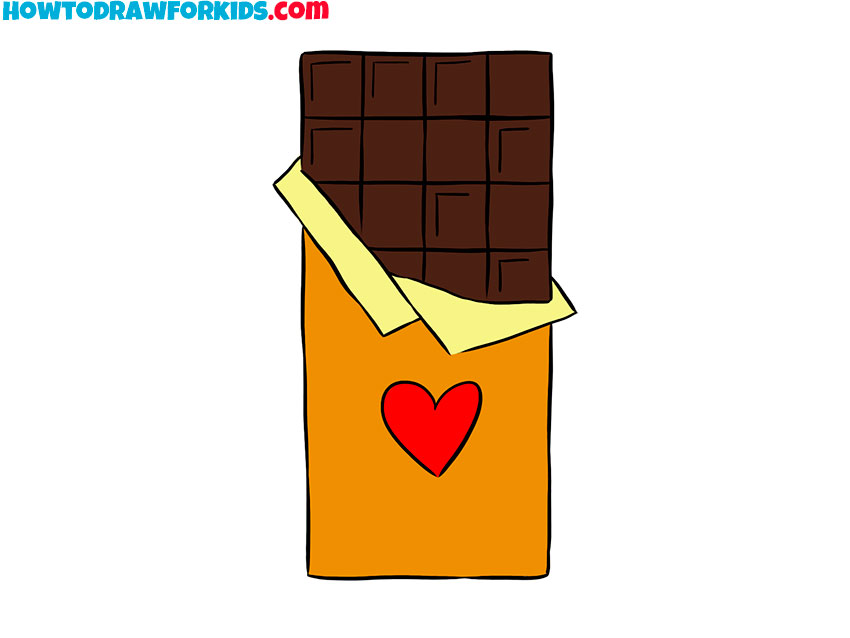
- Color the chocolate and wrapper.
Use clean, even colors to finalize the chocolate bar drawing. Fill the exposed chocolate with a dark brown tone. You can leave a slightly lighter highlight near the top for shine. Color the wrapper’s main body a warm hue such as orange, red, or gold. Paint the inner folds in a lighter yellow or beige to represent foil or thinner paper.
As usual, for your convenience, I have prepared a PDF file in which you can find a short version of this lesson and additional useful materials.