How to Draw a Tree Trunk
Here is a very simple guide on how to draw a tree trunk. Complete this task with ease, as the instruction has only six simple steps.
How to Draw a Tree Trunk: Introduction
A tree trunk, though seemingly simple, requires careful attention to the way its base widens and its branches extend. This exercise encourages artists to think critically about the relationships between different parts of their drawing, fostering a more holistic approach to art.
Texture is another important element that artists will learn in this tutorial. Trees have a distinctive bark texture that can be challenging to replicate. By practicing the techniques outlined in this tutorial, artists will learn how to use lines and shading to create a realistic representation of tree bark.
This skill is transferable to many other drawing subjects, as texture plays an important role in making drawings look lifelike.
There are no perfectly symmetrical lines in nature. This is especially true for plants, which are living beings adapted to their habitats. If you try to draw a tree using straight lines, it will be very unrealistic and incorrect.
Tree Trunk Drawing Tutorial
Materials
- Pencil
- Paper
- Eraser
- Coloring supplies
Time needed: 30 minutes
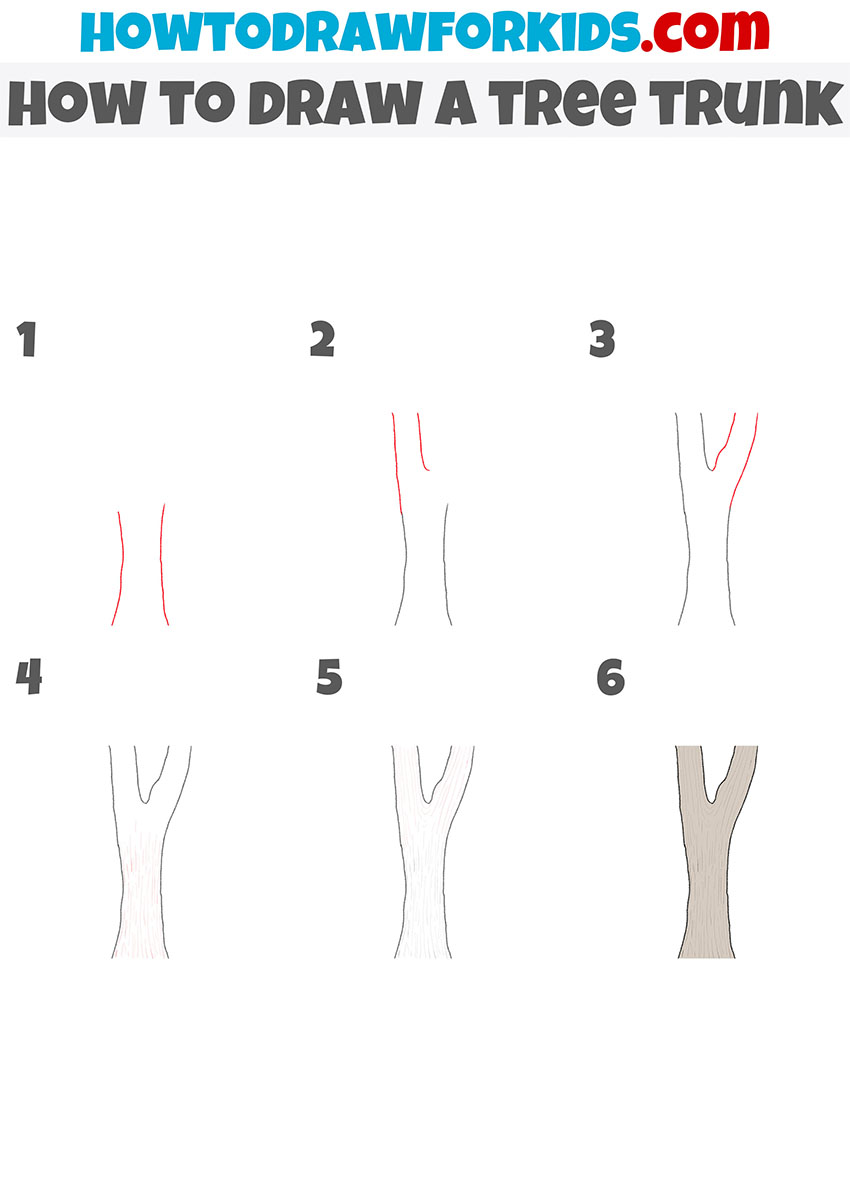
How to Draw a Tree Trunk
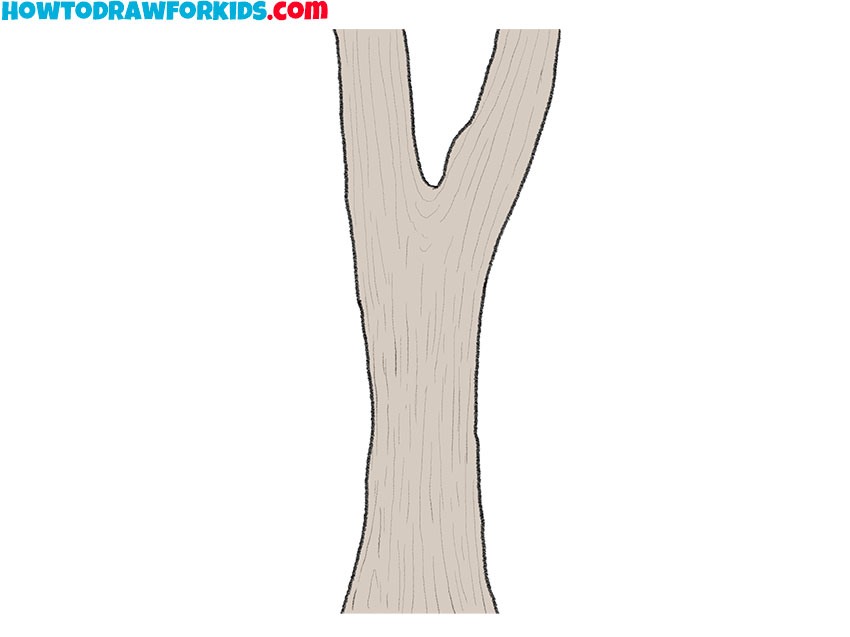
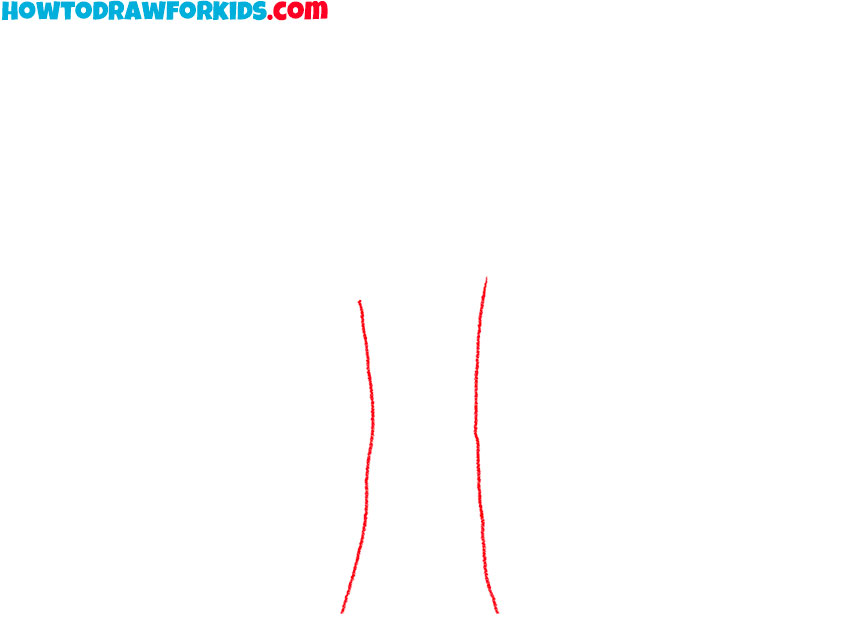
- Draw the bottom of the trunk.
Start by drawing the basic outline of the tree trunk. Using light strokes, draw two slightly curved vertical lines that will serve as the main structure of the trunk. These lines should be parallel and spaced apart, narrowing slightly as they go upwards.
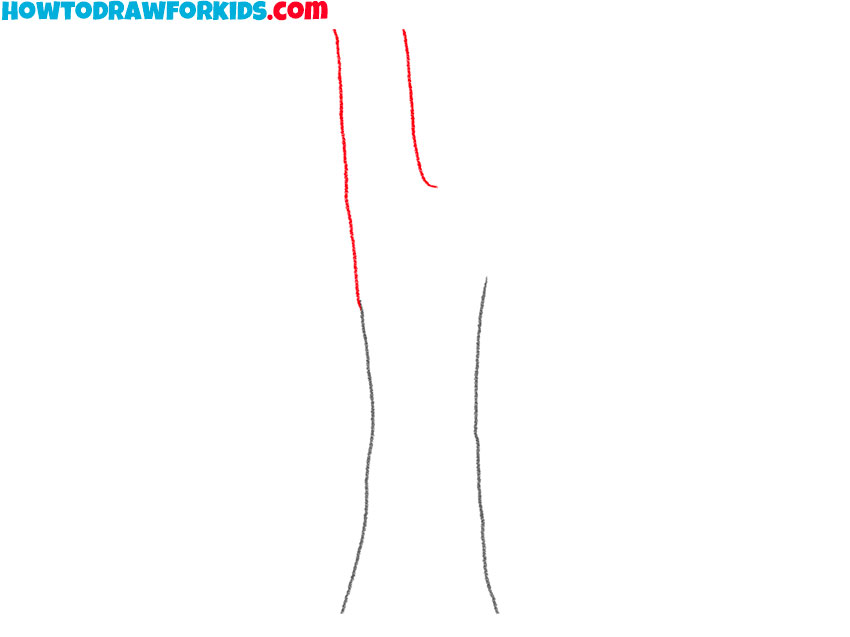
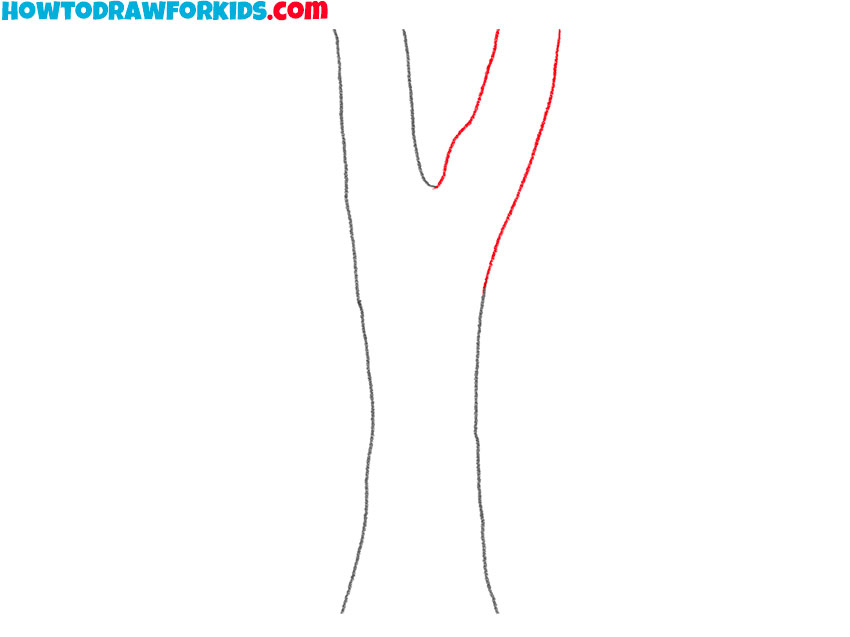
- Draw the first branch.
Next, extend the trunk lines further upwards. Draw additional lines at the top of the original outline, following the same curvature to create a first branch and give the trunk more definition. Ensure these lines remain parallel and maintain a natural, organic flow.
- Add the second branch.
Adjacent to the previous branch, draw another one that mirrors the shape of the first. Avoid making the lines perfectly straight, as nature rarely exhibits perfectly straight lines. To add the detail, consider drawing smaller branches extending from the main ones.
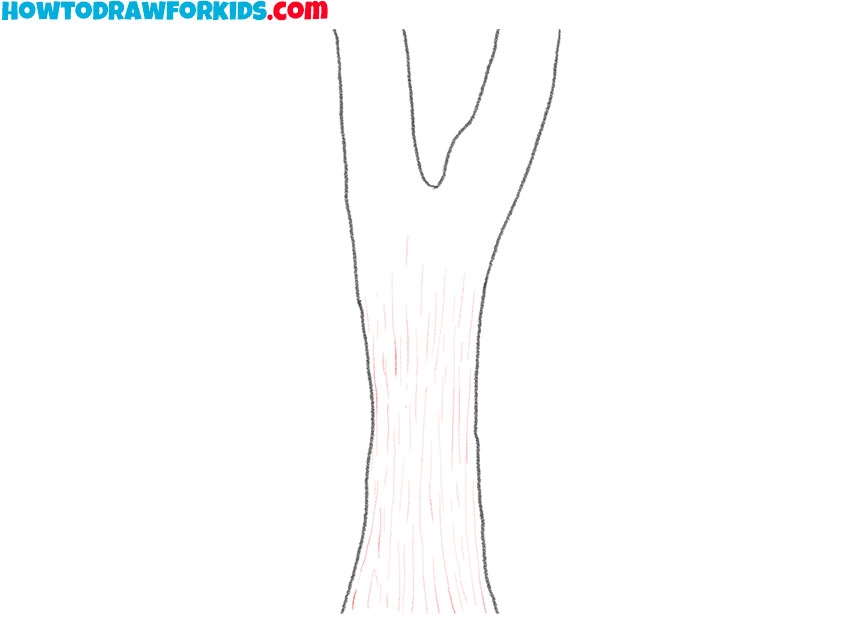
- Detail the bottom of the trunk.
Now, add texture to the bottom part of the trunk. Draw fine, vertical lines that vary in length and spacing along the lower part of the trunk. These lines should mimic the natural texture of tree bark, following the curvature and flow of the trunk.
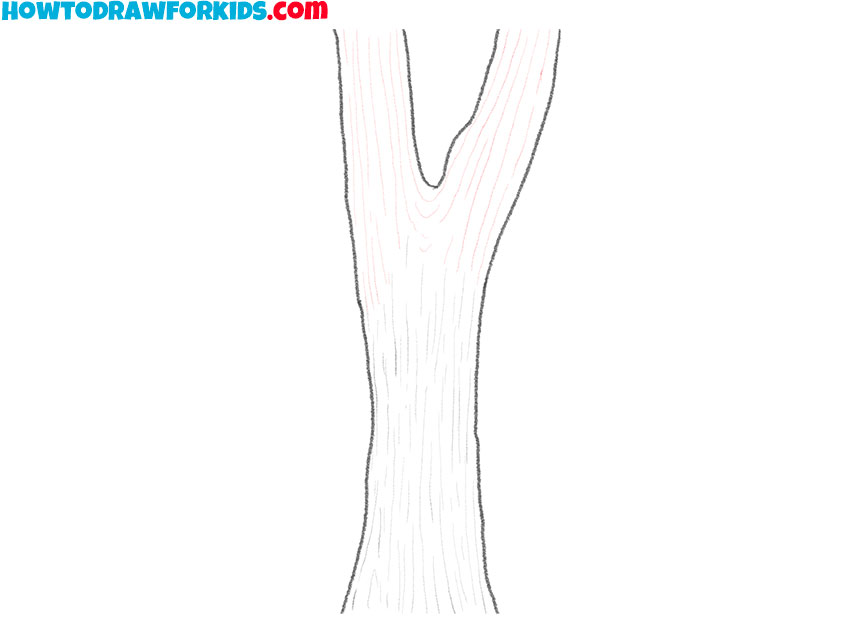
- Detail the branches.
Continue adding texture, this time to the top part of the trunk and the branches. Draw similar fine, vertical lines that follow the natural lines of the trunk and branches. Vary the length and spacing to avoid a uniform look. These lines should blend with the texture added in the previous step.
- Color the trunk drawing.
Use shades of brown to fill in the trunk and branches. You can apply darker shades in areas where shadows would naturally occur. You can gradually blend lighter and darker tones to create a smooth, realistic effect. Ensure the coloring follows the texture lines.

Additional Content
This lesson has concluded, and now you know how to draw a tree trunk. Be sure to download the PDF file, which includes brief instructions and additional training materials essential for mastering this lesson.
With this PDF, you can practice drawing a tree even without an internet connection. The key to becoming a skilled artist is frequent practice. Use the concise version of our lesson in the PDF to refine your skills whenever you have a spare moment.
How to Draw a Tree Trunk: Adding Details
Trees often have knots and irregularities in their bark. Add small, circular or oval shapes along the trunk to represent these natural imperfections. Vary their size and placement to create a more realistic appearance.
To give your tree a fuller look, add more branches stemming from different parts of the trunk. These branches can be smaller and thinner, extending outward in various directions. Remember to vary the angles and lengths to maintain a natural look.
Depending on the type of tree you’re drawing, you may want to add leaves or foliage. For a deciduous tree, sketch clusters of leaves at the ends of branches. For an evergreen, draw needle-like leaves along the branches. Use light, quick strokes to create a sense of texture and density.
Enhance the texture of the bark by adding more detailed lines and shading. Focus on areas where the bark might be rougher or cracked. This adds realism to your drawing, making the tree trunk appear more natural.
If the base of the tree trunk is visible, consider adding roots extending from the bottom. These roots can twist and turn, anchoring the tree to the ground. This detail adds realism and makes the tree look more grounded and stable.
Finally, refine your shading to create a more three-dimensional effect. Identify the light source and ensure that shadows fall on the opposite side. Add highlights where the light hits the trunk and branches, using lighter shades or erasing small areas to create contrast.
FAQ
As you continue studying, you might have additional questions or encounter new challenges. To help you further, I have compiled an FAQ section that addresses common queries and provides additional tips to boost your drawing skills. Whether you’re looking for advice on specific techniques, troubleshooting common problems, or seeking new ideas for your drawings, this FAQ section will be really useful for you.
If your branches look unnatural, consider their placement and curvature. Branches should extend from the trunk in a natural, flowing manner. Avoid making them too straight or uniformly spaced. Study real trees to understand how branches grow and intersect. Adding smaller sub-branches can also help create a more natural look.
To add seasonal elements, consider the characteristics of trees during different seasons. For a winter scene, you might add bare branches with a light dusting of snow. In spring, include budding leaves and flowers. Summer can feature full foliage and vibrant greens, while autumn may showcase falling leaves in various colors.
While this tutorial focuses on a generic tree trunk, the techniques can be adapted for different types of trees. Study the specific characteristics of the tree you want to draw, such as bark texture, branching patterns, and foliage. Adjust the steps accordingly to capture the unique features of different tree species.
To practice drawing different types of bark, observe and study various tree species. Take note of the unique patterns and textures of each bark type. Practice sketching these patterns in a sketchbook, focusing on capturing the distinctive characteristics. Use reference photos or real trees to guide your practice sessions.
Yes, adding animals or other elements can make your drawing more interesting and create a more complete scene. Consider including small animals like birds, insects, or squirrels. Position them naturally around the trunk and branches. You can also add elements like flowers, mushrooms, or vines growing on or around the trunk to add interest.
Conclusion
I hope you found this drawing lesson both useful and interesting. Trees, while not the most complex subjects, present unique challenges that can significantly boost your drawing skills. By focusing on elements like structure, texture, and shading, you build a strong foundation for all your future drawings.
Share your progress and art with me. Post your drawings on social media, and inspire others while receiving valuable feedback. Don’t forget to subscribe to my social networks for more tutorials and tips.
Please leave comments below to let me know what you found helpful or areas for improvement. Your insights help us create better content created to your needs.