How to Draw a Four-Wheeler
Initially, I will guide you through the steps of the tutorial on how draw a four-wheeler. Following that, I will explain how to enhance your drawing and effectively incorporate it into your broader art projects.
How to Draw a Four-Wheeler : Basic Information
Now, let’s imagine our paper is a big, muddy track, and we’re going to race our pencils all over it. I’ll show you how to start with simple shapes, and turn them into an awesome four-wheeler.
Drawing a four-wheeler allows us to understand the general structure and mechanical components typical in many vehicles. You’ll learn how to depict the parts such as the chassis, engine block, and wheels, each contributing to a solid understanding of vehicle anatomy.
This tutorial will also tach you to measure and apply proportion accurately within your drawings. Proportions are really important in mechanical drawings to reflect the real dimensions and relationships between different parts of the vehicle.
Drawing a four-wheeler is an excellent subject for practicing symmetry and balance in art. You’ll learn to ensure that both sides of the vehicle are symmetrical and that the placement of each component balances the overall composition.
So, grab your favorite crayons or pencils, and let’s learn how to draw a four-wheeler!
Four-Wheeler Drawing Tutorial
Materials
- Pencil
- Paper
- Eraser
- Coloring supplies
Additional Content
Time needed: 30 minutes
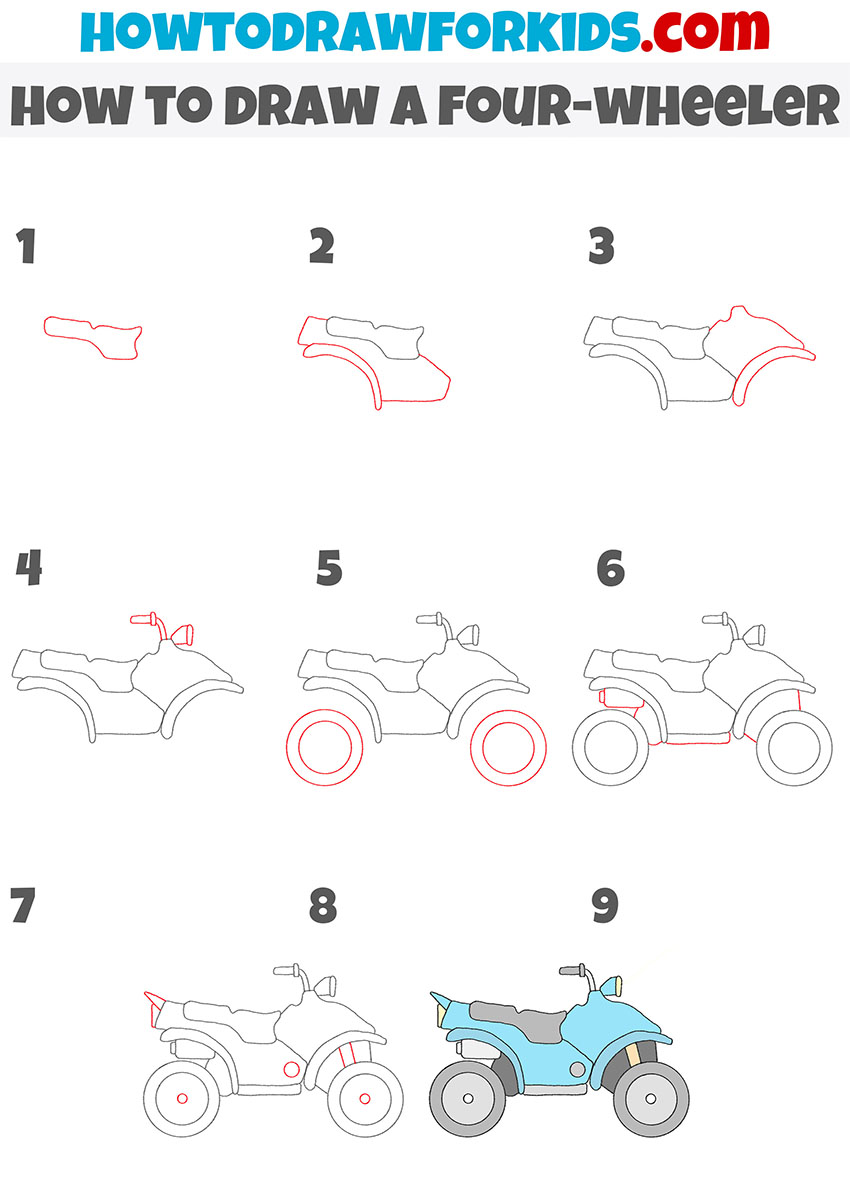
How to Draw a Four-Wheeler
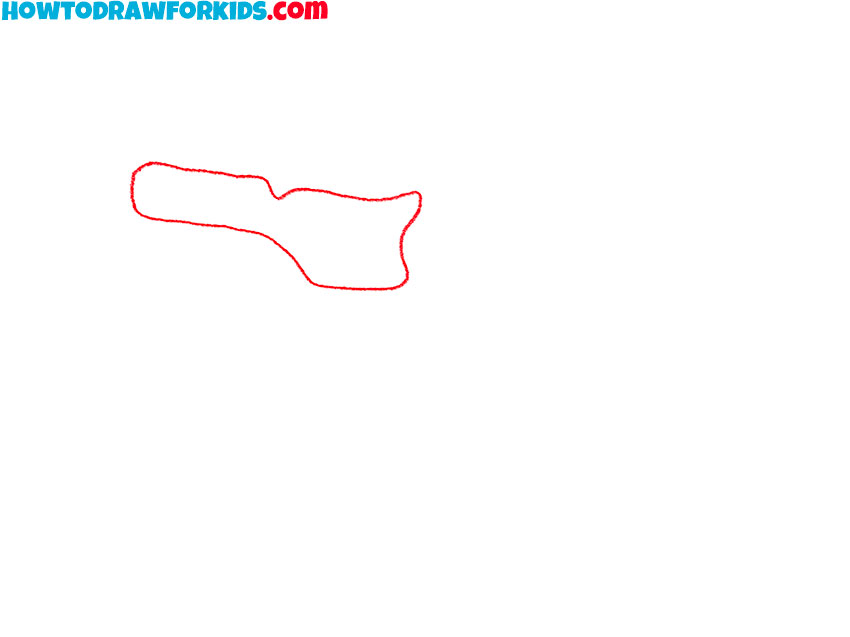
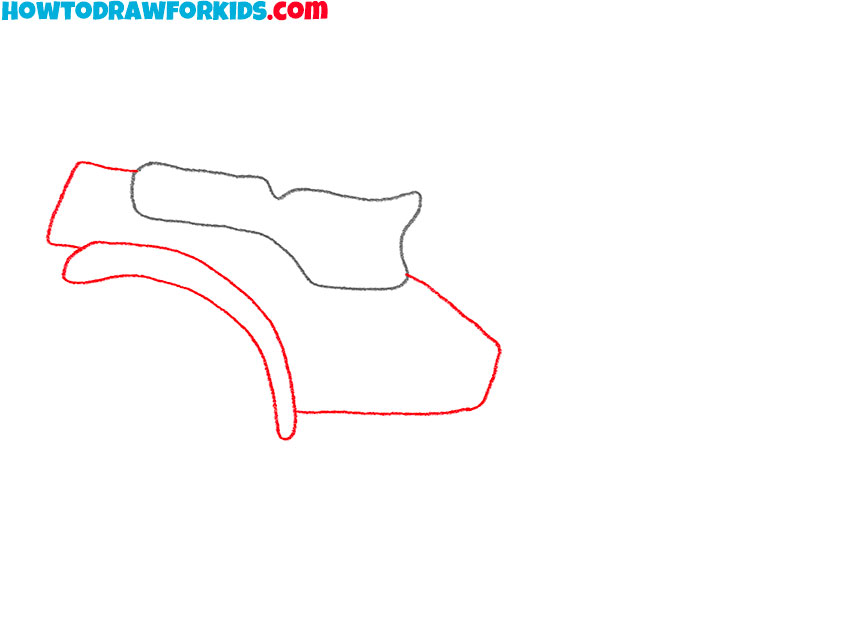
- Draw the seat of the four-wheeler.
Begin with a curved geometric shape for the seat of the vehicle. This represents the upper part of the seat, providing a base for where the rider will sit. It’s important to place this element towards the back of the vehicle’s framework.
- Sketch the rear of the body.
From the seat, extend your lines downward and outward to shape the rear part of the four-wheeler. This part contains the rear wing of the vehicle and the fuel tank. To this simple geometric shape, you can add details that will make your drawing more believable.
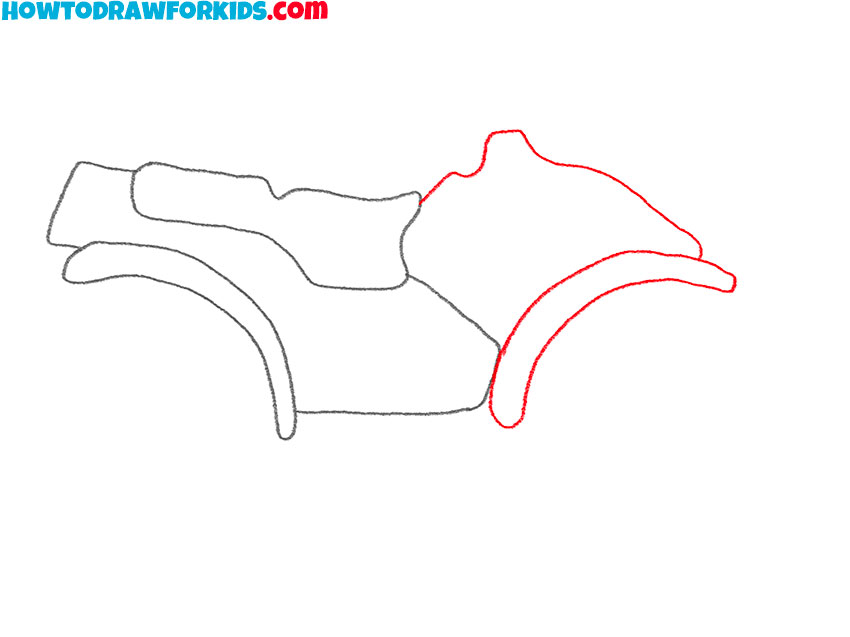
- Add the front of the body.
Draw an uneven line starting from the top of the body, curving towards the front, and then add a narrow, curved strip beneath it to outline the front part of the four-wheeler’s body. The front should taper slightly, providing aerodynamics and space for frontal components like the wheel and headlight.
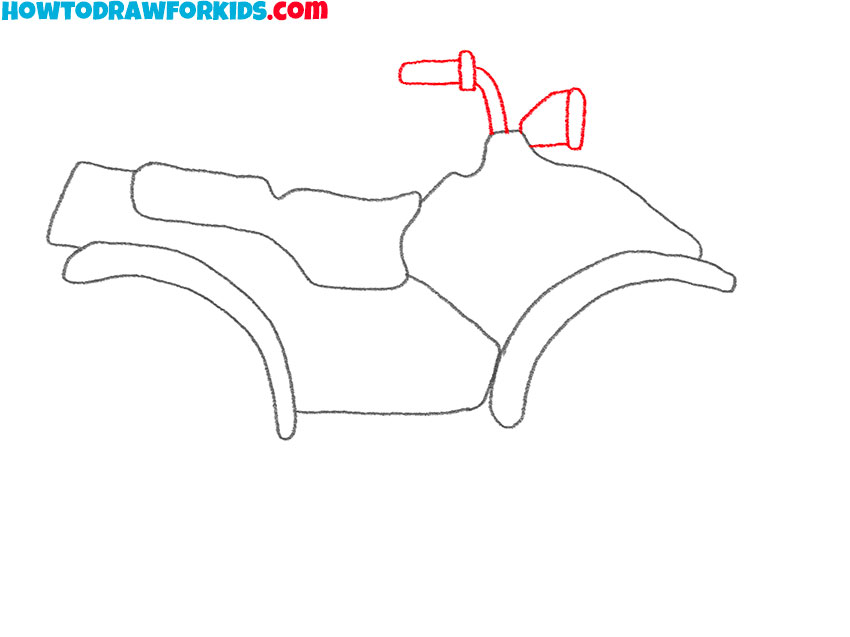
- Illustrate the handlebars and headlight.
Now it’s time to add the handlebars and the headlight to your four-wheeler. Sketch out the various shapes that make up these parts, ensuring each part connects to create the complete front assembly. In addition, you can draw a windshield, which will give your four-wheeler drawing a unique look.
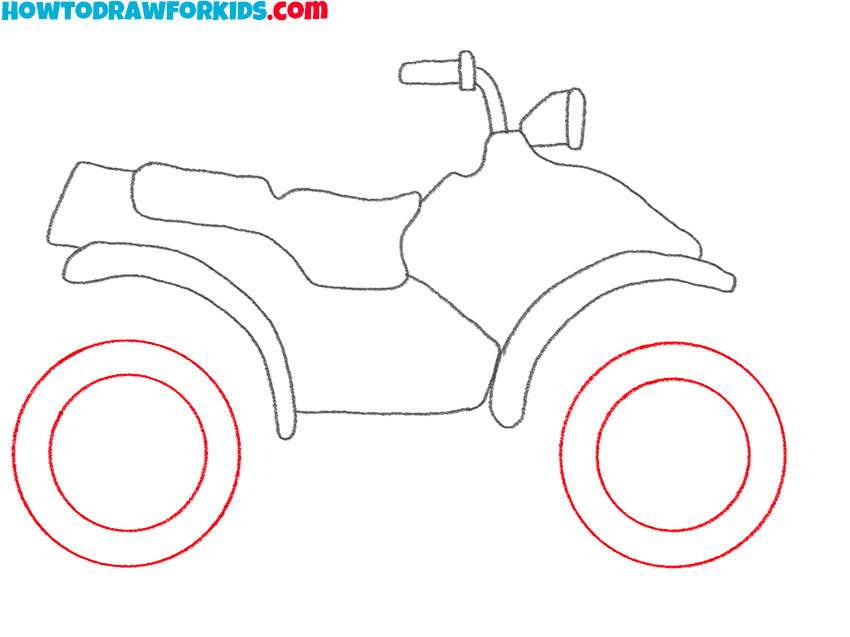
- Draw the wheels of the four-wheeler.
At the bottom of your drawing, carefully draw two smooth circles of the same sizes to create the wheels of your four-wheeler. Inside the outlines of the wheels, draw the outlines of the rims, which should also be the same size.
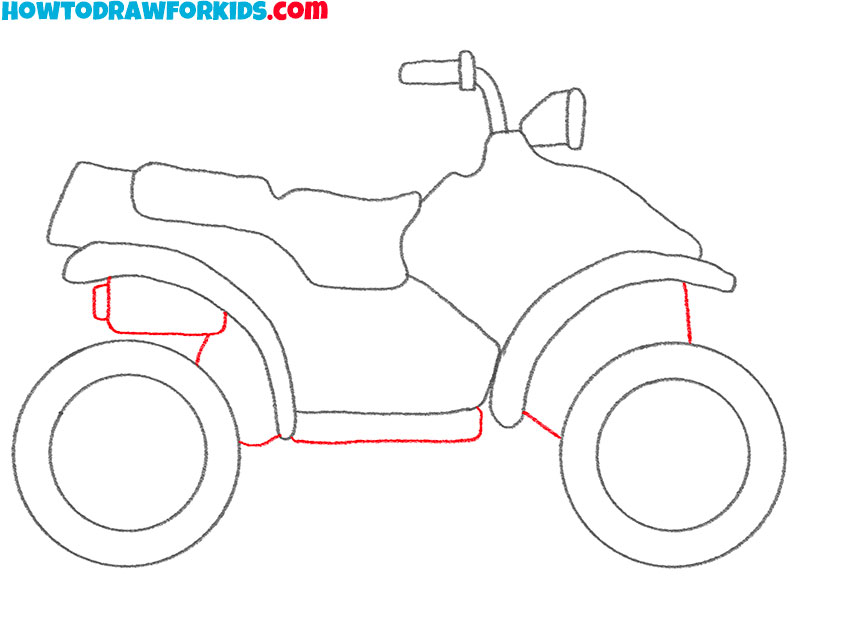
- Draw the bottom of the four wheeler.
Incorporate details of the suspension system, which absorbs impacts and provides a smooth ride. Between the body and each wheel, draw representations of springs or shock absorbers, which might look like small, compressed coils or cylindrical shapes.
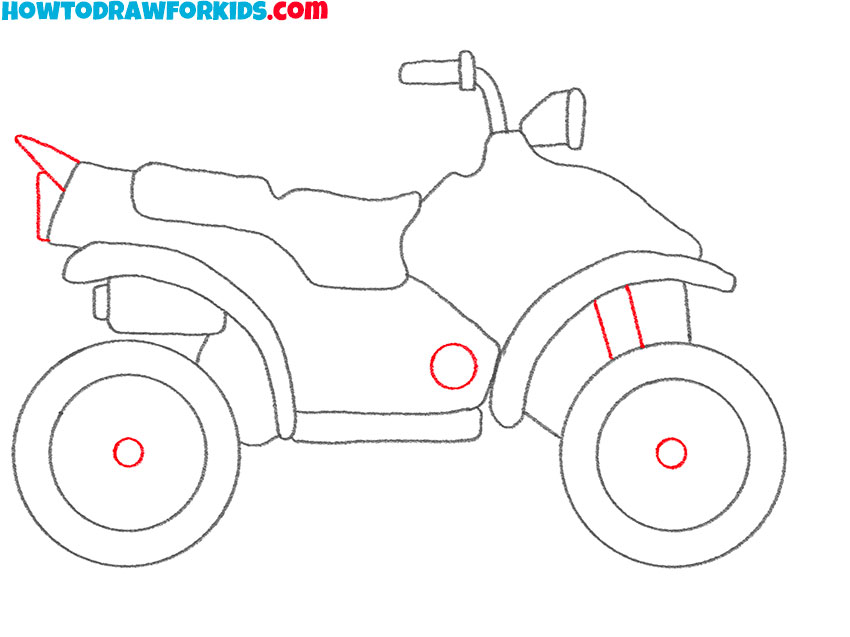
- Add the rest of the elements.
Make your drawing more realistic with additional details such as exhaust systems, control panels, and mudguards. Use simple lines and shapes to represent these features, focusing on how they integrate with the rest of the vehicle.
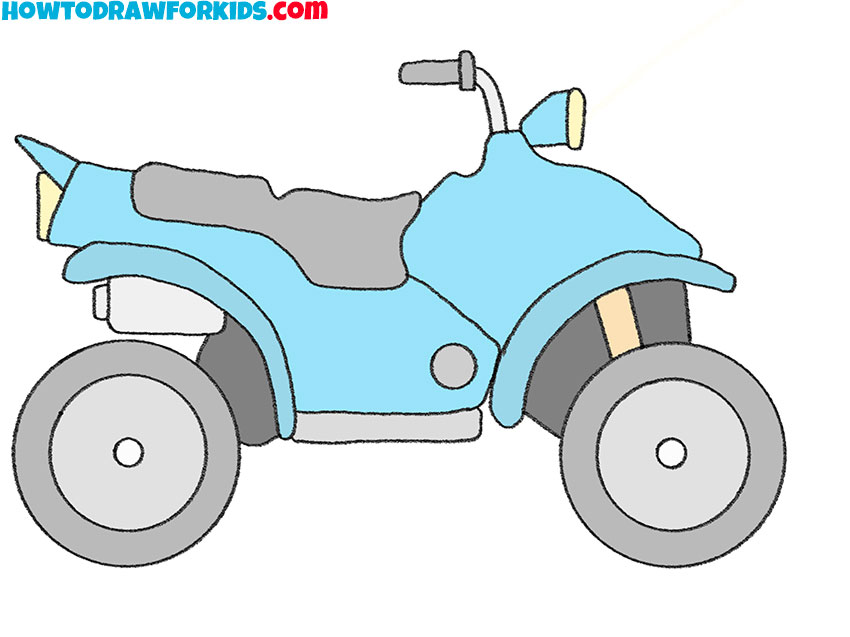
- Color the four-wheeler drawing.
Choose a primary color for the body, complemented by secondary colors for the seat, wheels, and details like the headlights. Opt for a color palette that suits a rugged, outdoor vehicle – bold and bright colors or earth tones work well.

I’ve created a detailed PDF file that thoroughly covers the four-wheeler drawing tutorial, which is available for free download. This PDF file allows you to access the tutorial offline, giving you the freedom to draw whenever and wherever inspiration hits, without the need for internet connectivity.
Art Projects With Your Four-Wheeler Drawing
Drawing a four-wheeler sharpens your skills in depicting mechanical objects and opens up a range of possibilities for creative projects. Below, you’ll find a list of really cool art project ideas that incorporate your four-wheeler drawing.
- Incorporate your four-wheeler drawing into a mixed media landscape. Use collage techniques to create a rugged, off-road scene, blending your drawing with natural elements like sand, small stones, and twigs.
- Create an art book where each page reveals a different aspect or environment for your four-wheeler. Include flaps to lift, wheels to turn, or parts to assemble, making the experience interactive.
- Create a scale model of your four-wheeler and paint it using your original drawing as a guide. This can be a detailed model-making project that could even lead into a diorama.
- Create a dynamic artwork showing the four-wheeler in motion. Use blurred lines and watercolors to depict speed and movement, illustrating the energy and power of the vehicle.
- Design a comic strip where a four-wheeler is the main vehicle. Draw several panels showing an action or a rescue mission, with the four-wheeler overcoming various obstacles.
- Draw the same four-wheeler in different environmental settings like a sunny beach, a snowy path, and a rainy mud track. This series can explore how the surroundings affect the appearance and functionality of the vehicle.
- Reimagine your four-wheeler drawing as a futuristic vehicle. Add innovative features and technology to transform it into a high-tech mode of transportation, using metallic and neon colors to highlight these upgrades.
- Create a drawing that integrates the four-wheeler into a wildlife scene. Show how the vehicle interacts with animals in the wild, focusing on the contrast between man-made machinery and natural environments.
How to Draw a Four-Wheeler: FAQ
When drawing a four-wheeler, much like any other type of vehicle, you’re likely to come across various questions and uncertainties. These can range from details about technical aspects of the vehicle to artistic considerations on how to effectively render its form. I am here to address those questions, providing detailed answers and guidance to help you navigate through the complexities of vehicle illustration.
To maintain accurate proportions, use a grid system on your reference image and your drawing paper. This method helps you map out and match the dimensions and angles correctly, which is particularly useful for complex mechanical shapes like those in a four-wheeler.
Beyond basic shading, consider using cross-hatching and stippling techniques to create texture and depth, especially on the tire treads and seating area. Experiment with different grades of pencils to achieve a range of tonal values, which can enhance the three-dimensional look of your drawing.
To convey speed, use dynamic lines and motion blur around the edges of the four-wheeler. Positioning the vehicle at a slight angle and emphasizing the rear with dust or debris can also suggest rapid movement.
Choose backgrounds that illustrate the theme of your drawing. For a rugged, outdoor feel, incorporate rocky or muddy terrains. For a sleek, modern look, a smooth track or urban setting can complement the design of the four-wheeler.
Adding a driver or bystanders can provide scale and add a human element that makes the scene more relatable. Consider the interaction between the characters and the vehicle to make the drawing more interesting.
Conclusion
Congratulations on completing this four-wheeler drawing tutorial.
But don’t forget that’s there are many more vehicles to draw. From speeding cars and soaring planes to rumbling trains, my other tutorials offer a variety of subjects to train your drawing skills.
Also, follow my social media, share your artwork, and interact with fellow artists.