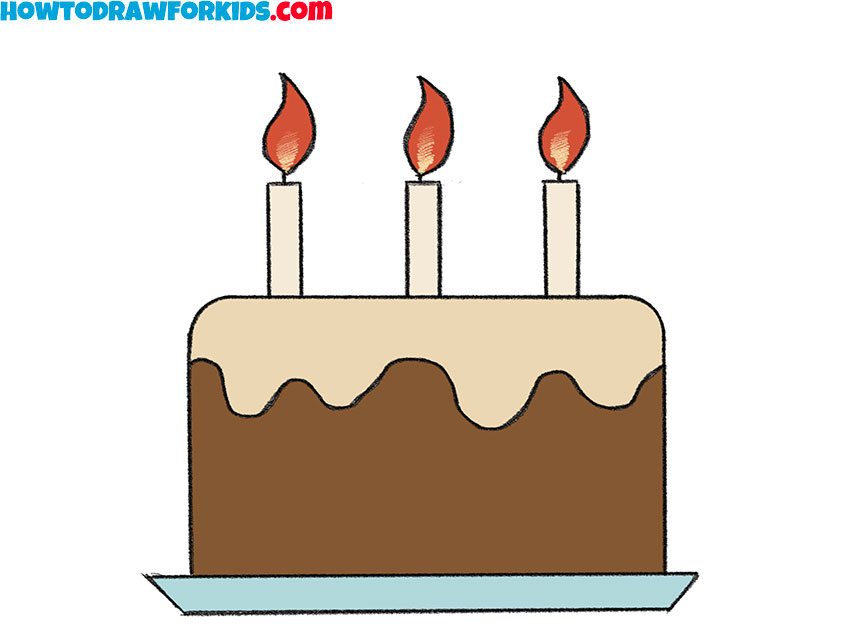
How to Draw a Birthday Cake
Everyone loves birthdays, and many of us love to draw. So let’s combine these two pleasures and learn how to draw a birthday cake.
How to Draw a Birthday Cake: Introduction
Any artist knows that to draw complex compositions, it is essential to be able to draw their individual components. For example, learning how to draw a birthday cake can help in creating more detailed still-life drawings.
In this drawing lesson, I will provide detailed instructions on how to draw a birthday cake, starting with the plate and progressing to the upper part, including candles, and finishing with adding the appropriate colors to the entire composition.
This simple birthday cake drawing tutorial will be especially useful for anyone who enjoys drawing various still-life subjects, as well as for those looking to improve their overall drawing skills.
The lesson involves many straight and symmetrical lines, which can significantly aid young artists in mastering symmetry in their drawings.
Birthday Cake Drawing Tutorial
Materials:
- Pencil
- Paper
- Eraser
- Coloring supplies
Time needed: 20 minutes
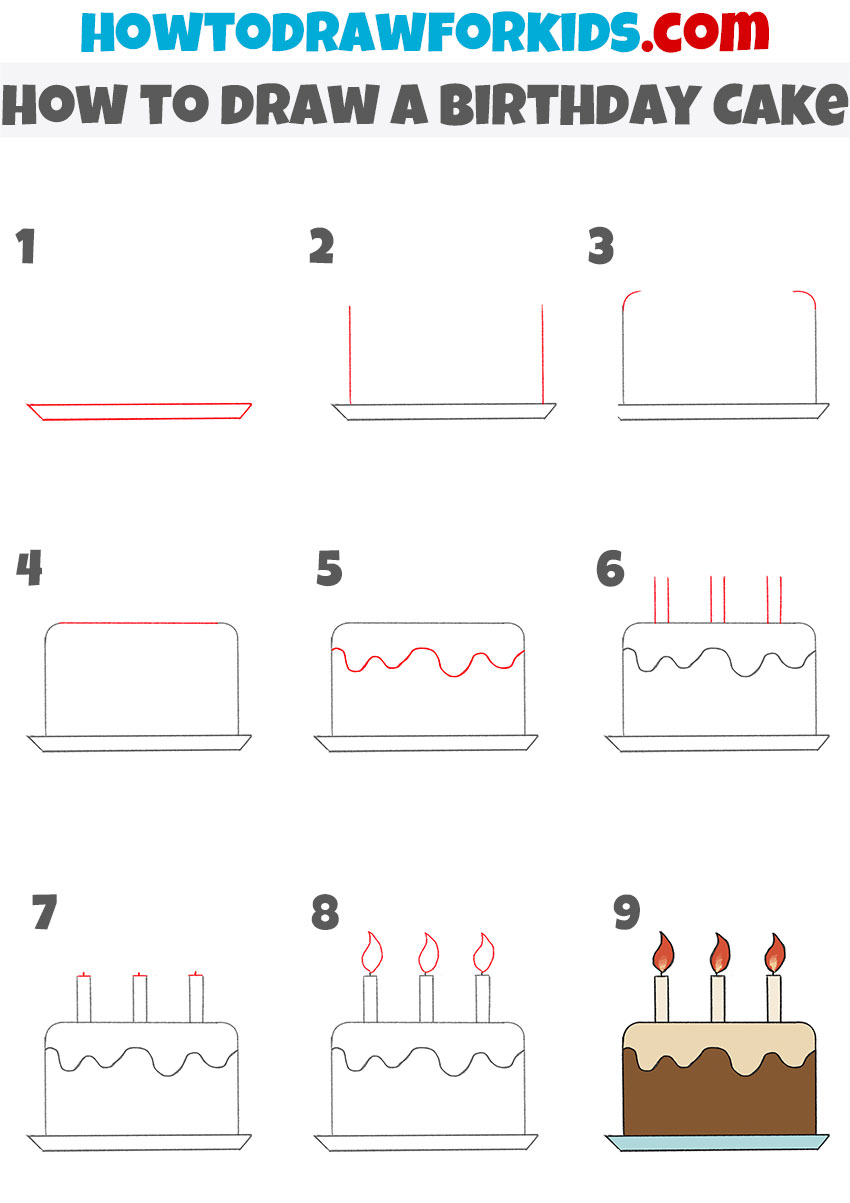
How to Draw a Birthday Cake
- Draw the plate.
Begin your birthday cake drawing by sketching a thin, elongated rectangle at the bottom of your canvas. This represents the plate on which your birthday cake will rest. Draw the plate symmetrical and flat, as it serves as the foundation for your cake drawing.

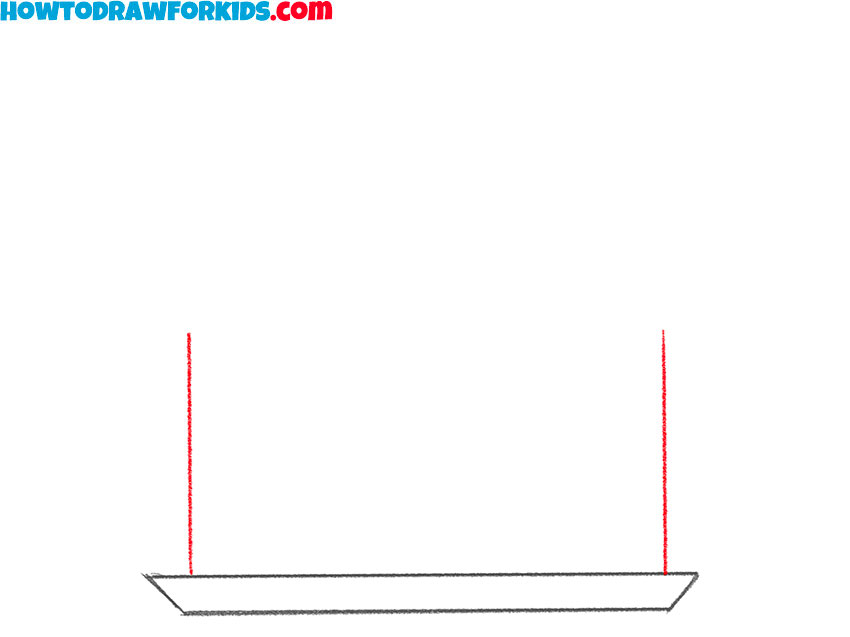
- Draw the sides of the birthday cake.
From the edges of the plate, draw two vertical lines upward to establish the sides of your birthday cake. These lines should be parallel to give the cake lifelike shape. Regularly check the symmetry of the drawing and correct errors at the early stages, if there are any.
- Create the top corners.
At the top of the vertical lines, sketch slight curves angling inwards towards the center. These curves form the top corners of the cake, leading into the top edge. The angle and curve should be gentle, mimicking the soft edge of a real cake.

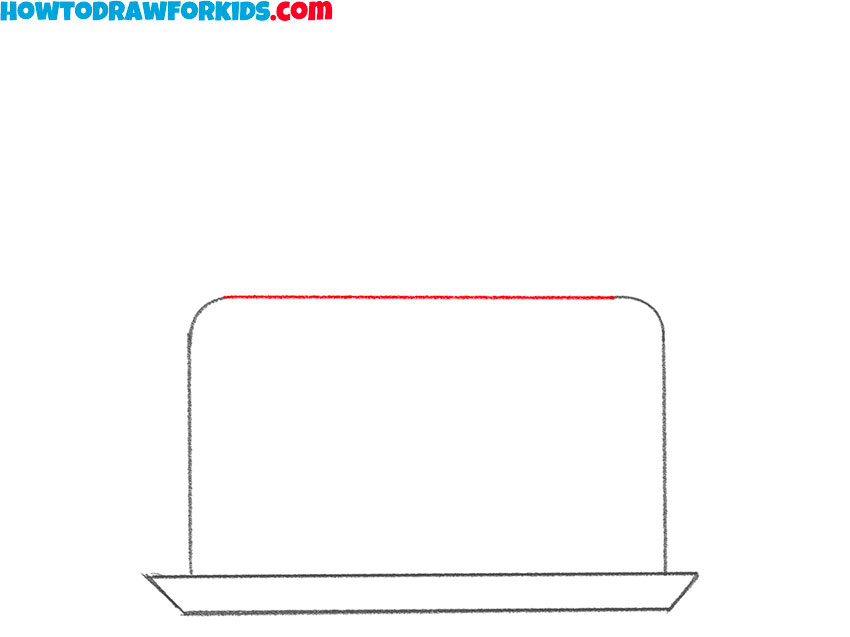
- Draw the top edge of the cake.
Connect the top curved angles with a horizontal line, creating the top edge of the cake. This line should be parallel to the base plate but shorter, giving the cake a solid and realistic appearance. This top edge will be the base for any additional decorations such as icing or candles.
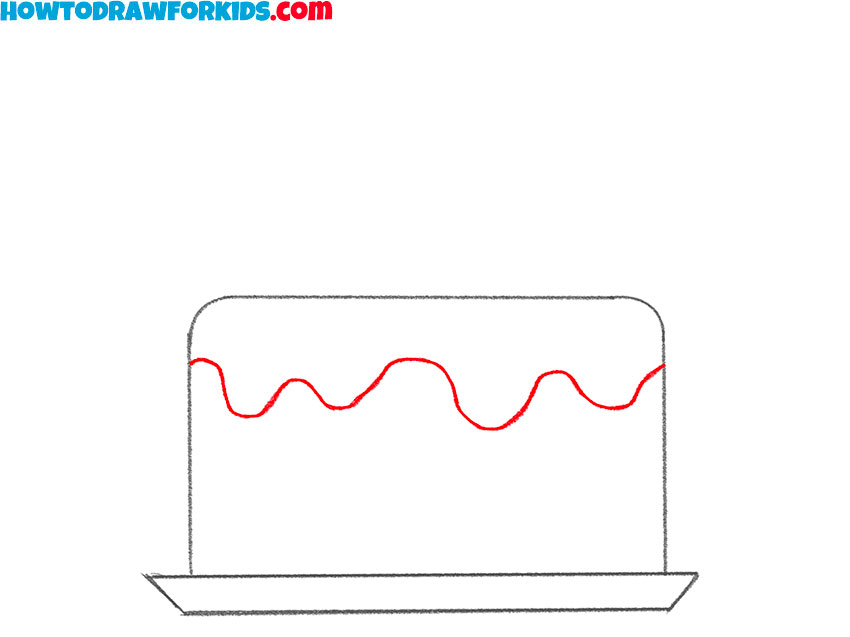
- Illustrate the icing on the cake.
Add a wavy line across the middle of the cake’s body to depict dripping glaze or icing. Vary the amplitude and frequency of the waves to make the icing look naturally drippy. This simple detail will make your birthday cake drawing look more realistic.
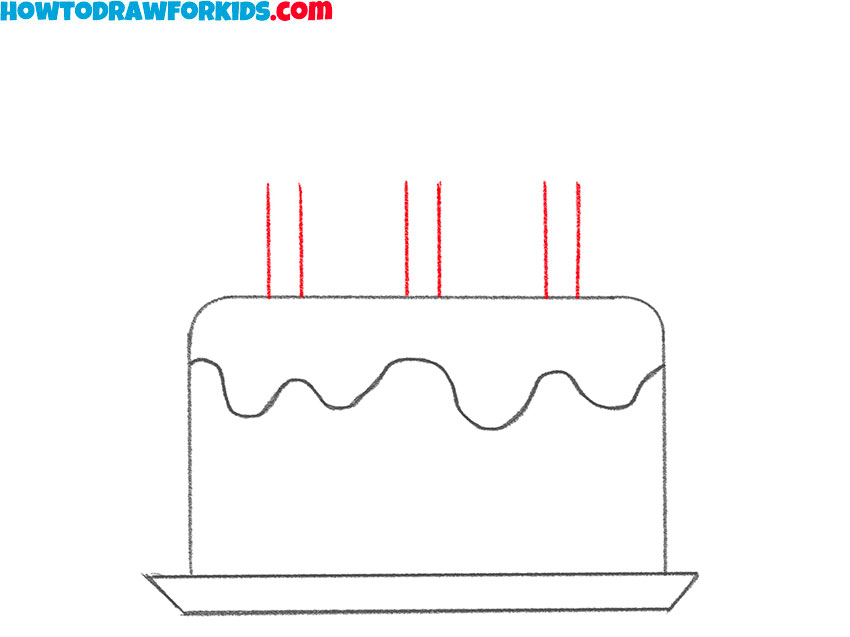
- Draw the candles on the cake.
Place straight, vertical lines on top of the cake to draw the candles. The lines should be drawn starting from the top edge of the cake and extending upwards. The number of candles can be adjusted based on the intended age or celebration.
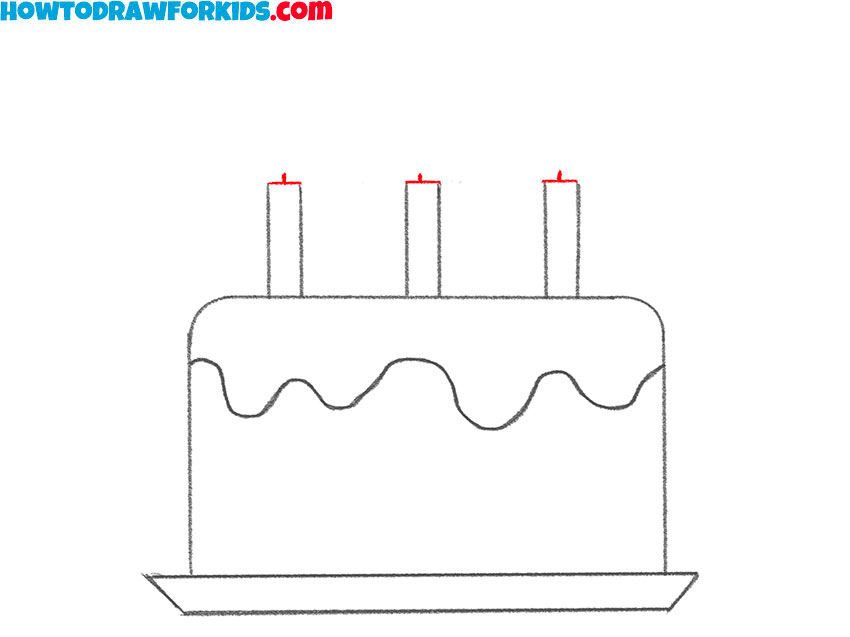
- Detail the candles.
At the top of each candle, sketch a small horizontal line to signify the top edge of the candle. Just above this line, add a tiny vertical stroke to represent the wick. The wick should be just the right size to be noticeable but not overpower the candle itself.
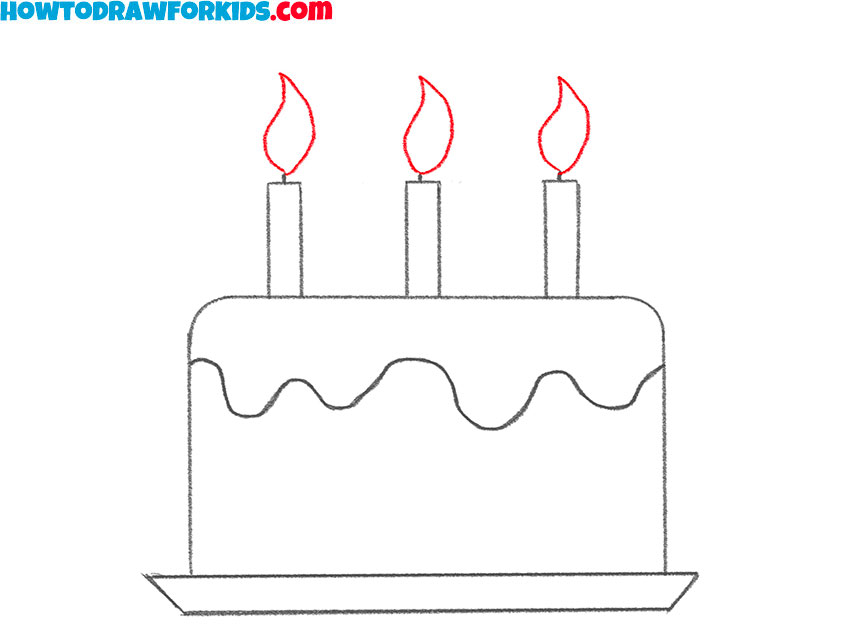
- Illustrate the candle flames.
On top of each wick, draw a small flame. This can be achieved by sketching a teardrop shape. Make the flames slightly asymmetrical to give the effect of a gentle breeze. Flames should look dynamic and almost in motion, which adds an element of realism to your birthday cake drawing.
- Color the birthday cake.
Finalize your birthday drawing by adding color. Color the cake with your choice of hues for the icing and cake layers. The plate can be a subtle shade that complements the cake. Use vibrant colors for the candles and a bright, warm yellow or orange for the flames.

Additional Content
I have prepared a short version of this tutorial in PDF format, which you can download and use at any time convenient for you. In addition to the steps of this birthday cake drawing tutorial, in the file you will find a coloring page, a tracing worksheet, and a grid drawing worksheet.
Conclusion
This was a birthday cake drawing lesson where we started with the basic outline of the plate, then drew all the components of the cake, and finished by adding the distinctive feature of this dessert – lit candles.
I hope this lesson was simple for you and helped you learn how to create a simple yet realistic-looking birthday cake. Now is the perfect time to try drawing the cake again but with some changes to make your drawing more unique. For example, you could draw a different number of candles, create a multi-tiered cake, or modify the topping.
Don’t forget to check out other lessons in the food category to learn how to draw a cupcake or challenge yourself with drawing cakes of more complex shape.
Additionally, staying updated on my website might be helpful for you. To ensure you don’t miss any updates, follow me on social media. You can find me on most modern platforms, from YouTube to Pinterest.
this helps very much and its easy to draw
Nice, Zac. I always try to make the tutorials as simple as possible.