How to Draw a Boston Terrier
If you find drawing a Boston Terrier to be challenging, you’ve come to the right place. With my favorite minimalist style, even this unusual breed can be easily captured. Let me guide you through the process right now and show you how to draw a Boston terrier.

How to Draw a Boston Terrier: Basic Information
What are the main features of this lesson on how to draw a Boston Terrier?
The primary feature of this lesson is learning to draw a purebred dog in a minimalist style. Typically, when people think of a simplified drawing of a dog, they envision a very ordinary dog without any distinctive features.
However, there’s no need to worry. If you plan to draw a dog, the first step, as always, is to carefully examine your subject before drawing. Observe the ratio between the dog’s body and limbs. Assess the pose – whether it’s dynamic or static. Since dogs are naturally active animals, a dynamic pose can often appear more natural.
Pay close attention to the dog’s facial features. Is the face elongated or flattened? What is the exact shape of the ears? Finally, evaluate the dog’s facial expression. This could range from an angry snarl with bared teeth, a friendly smile, to a calm look with a closed mouth.
Boston Terrier Drawing Tutorial
Materials
- Pencil
- Paper
- Eraser
- Coloring supplies
Time needed: 45 minutes
How to Draw a Boston Terrier
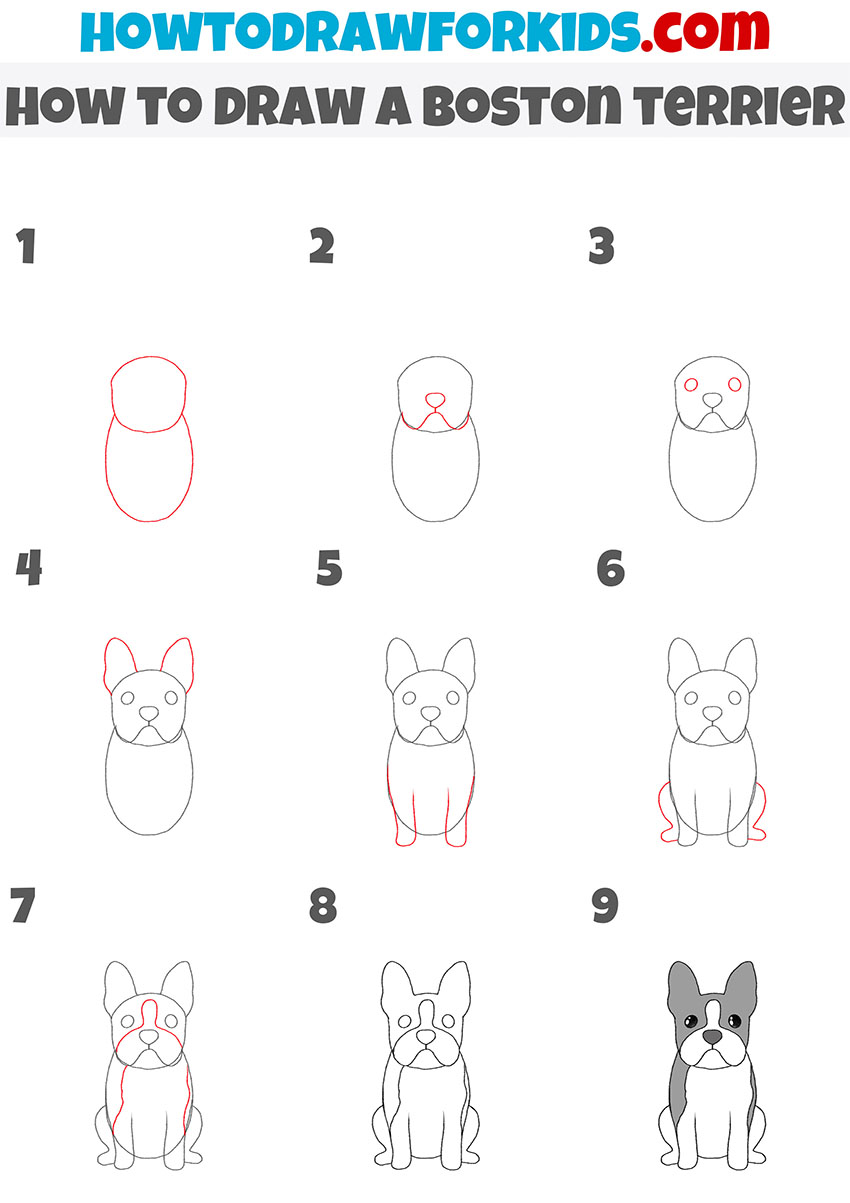
- Draw the head and torso of the dog.
Begin by drawing two simple shapes to form the foundation of the Boston Terrier’s body. Draw a slightly flattened oval for the head, positioned above a larger, more elongated oval for the body. Despite the minimalist style, ensuring that the head and body shapes are accurate will make the breed recognizable.

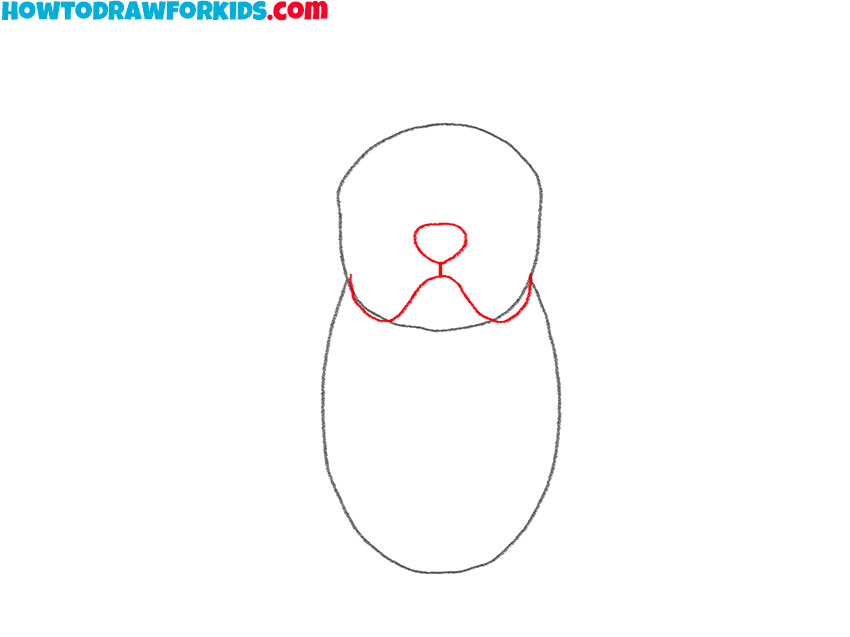
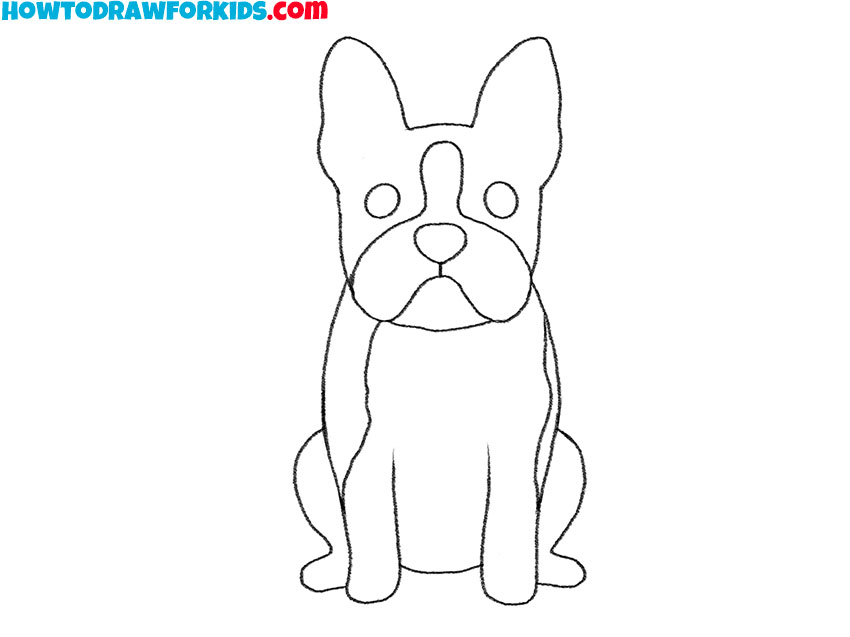
- Draw the bottom of the muzzle.
Below the center of the face, draw two curved lines extending outwards and downwards to illustrate the sagging cheeks. These cheeks are a characteristic feature of the Boston Terrier, giving the dog its look. Don’t forget about the nose in the form of a large flat triangle.
- Add the eyes of the Boston terrier.
Draw large, rounded outlines for the eyes of this beautiful dog. Look at the distance from the eyes to the top edge of the forehead, as well as to the nose. These are very important parameters for the correct appearance of this dog breed.

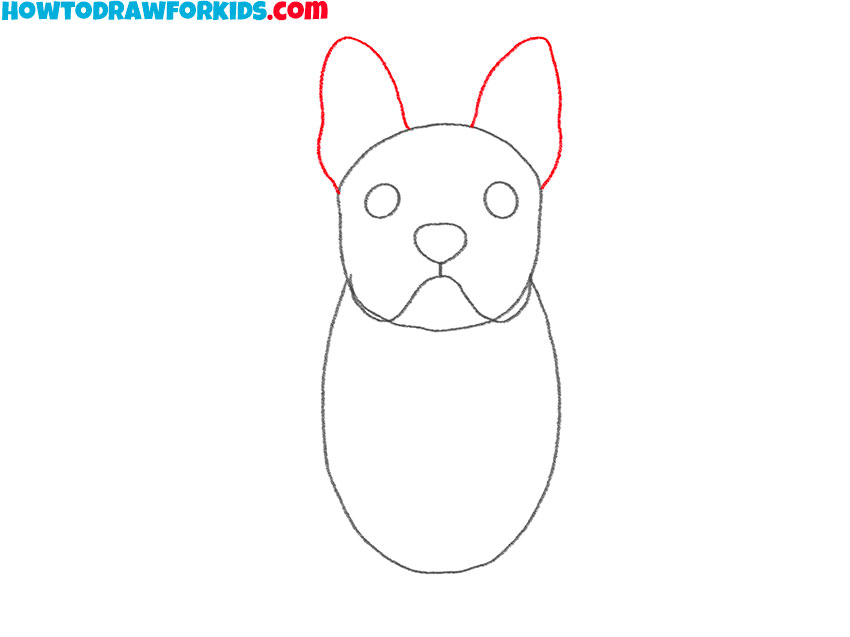
- Sketch the ears of the dog.
Add the ears next, by drawing two large, upright triangles on top of the head. These should be placed symmetrically and slightly angled outwards. The ears of a Boston Terrier are one of their most noticeable traits, often standing erect and giving the dog an attentive appearance.
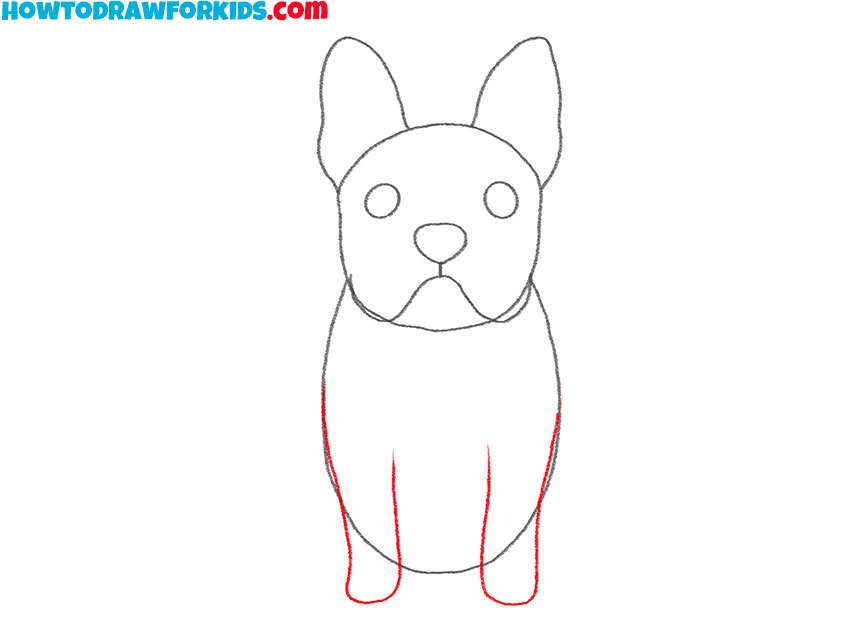
- Draw the front legs.
Proceed by sketching the front legs of the Boston terrier. Draw two straight lines down from the bottom of the body oval, slightly tapering towards the bottom to form the legs. Add small, rounded shapes at the ends to represent the paws.
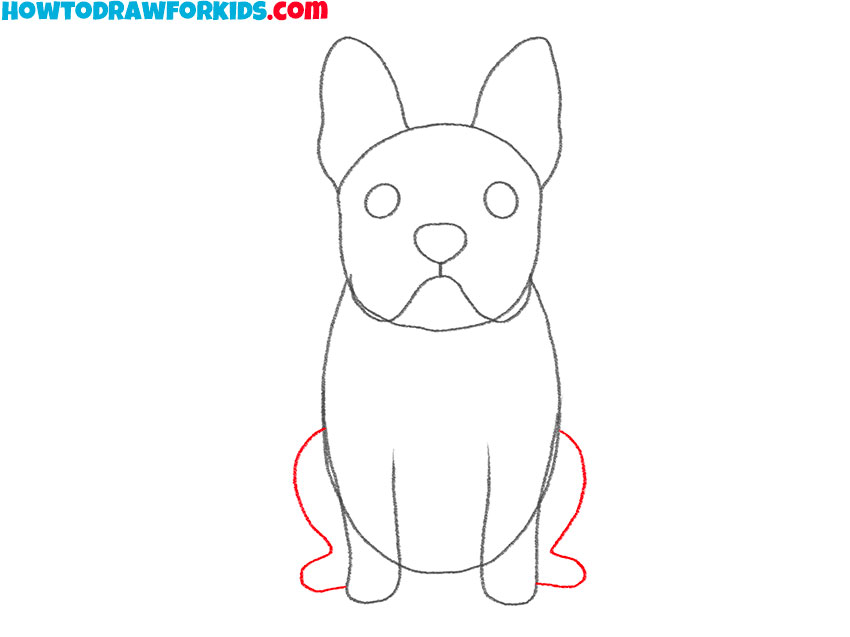
- Illustrate the hind legs.
Next, draw the hind legs of your dog. These should start from the bottom sides of the body oval, curving out and then back in to meet the ground, forming a bent shape. Add rounded shapes at the ends for the paws, similar to the front legs.
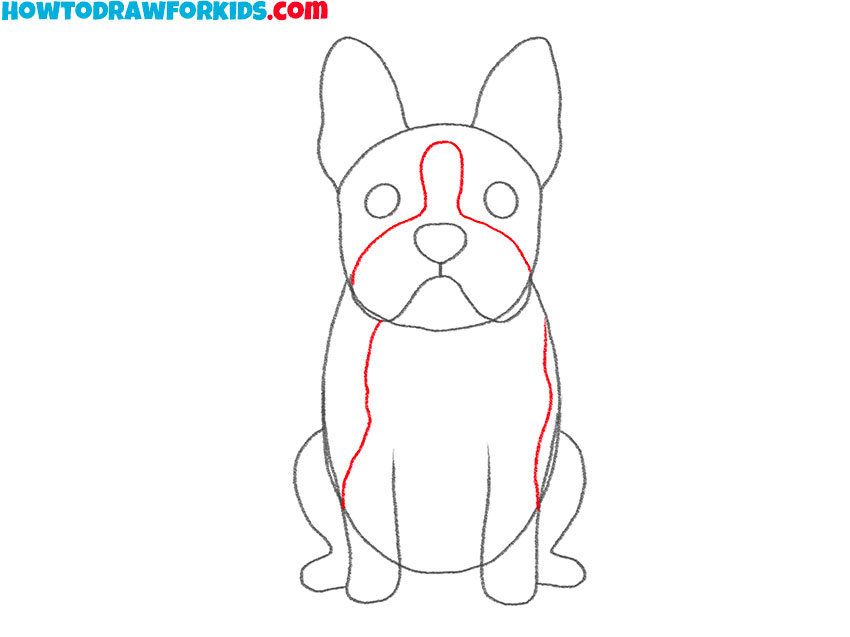
- Detail the patterns on the body.
In this step, do a little preparation for coloring. Select the areas that will be painted dark. In fact, these could be any areas on our bulldog’s body, but I create this design. To make the pattern look realistic, do not try to make it symmetrical. It is the asymmetry of the pattern that will give realism to the drawing.
- Review the sketch and correct the inaccuracies.
Adjust any lines on the body and legs to ensure smoothness and accuracy. This step is about cleaning up the dog sketch and making sure all proportions and features are correctly placed. So, If the drawing is accurate, move on to coloring the Boston Terrier.
- Color the Boston terrier drawing.
Boston Terriers typically have a black and white coat, so use these colors to fill in the dog’s body and facial markings. Ensure the black patches are placed around the eyes and ears, and a white streak runs down the center of the face and chest.

Additional Content
I’ve got some exciting news for you. I’ve created a PDF file that’s a compact version of this drawing tutorial. It’s a handy guide that you can download and use anytime, anywhere, even when the internet is playing hide and seek.
Perfecting Your Boston Terrier Sketch
Can you make your Boston terrier even better? Yes. Of course. Let’s see how you can do it.
At first, pay close attention to the anatomical structure of the Boston Terrier. Study reference images and focus on accurately depicting the proportions and muscle structure, especially around the face and legs.
Use various pencil strokes or digital brushes to create realistic fur texture. Consider the direction of fur growth and add layers to give a three-dimensional look.
The eyes are the windows to the soul. Spend extra time adding expression to the dog’s eyes. Use highlights and reflections to make them look lively and more realistic.
Advanced shading techniques can make your Boston terrier drawing more lifelike. Use cross-hatching, stippling, or smooth gradient shading to create shadows and highlights that add volume to your Boston Terrier.
Add a background that complements your Boston Terrier. Whether it’s a simple park scene or a more complex urban backdrop, the setting can add make the composition more interesting.
Experiment with various poses such as sitting, lying down, playing, or jumping to capture the full range of the Boston Terrier’s movements and behaviors.
And of course, you can draw a person near this cute dog. When drawing a human alongside the Boston Terrier, pay attention to the interaction between the two.
Conclusion
If you’ve had fun with this tutorial, there are a lot really simple drawing sessions waiting for you at my website. Why not to try your hand at sketching a cat or a illustrating a bunny next?
Naturally, I encourage you to follow me on social media platforms like YouTube and Pinterest. On YouTube, you’ll find a vast collection of video lessons that offer a fresh perspective on drawing. On Pinterest, you can share your drawings by adding them to comments or sending them in personal messages.